End users can connect to a server and use remote desktops and published applications. For troubleshooting purposes, end users can reset remote desktops and published applications.
Connect to a Remote Desktop or Published Application for End Users
To connect to a remote desktop or published application, you must provide the name of a server and supply credentials for your user account. The connection procedure is slightly different for administrators and end users, so refer to the section that applies to your role.
Note: The following considerations apply to Horizon Cloud on Azure desktops.
-
If an administrator has enabled the Omnissa Horizon Cloud Entitlement On-Ramp feature in the Horizon Cloud Control Plane and entitled users and groups to use the feature, you can access both Omnissa Horizon 8 and Horizon Cloud on Azure desktops after connecting to Omnissa Horizon Connection Server.
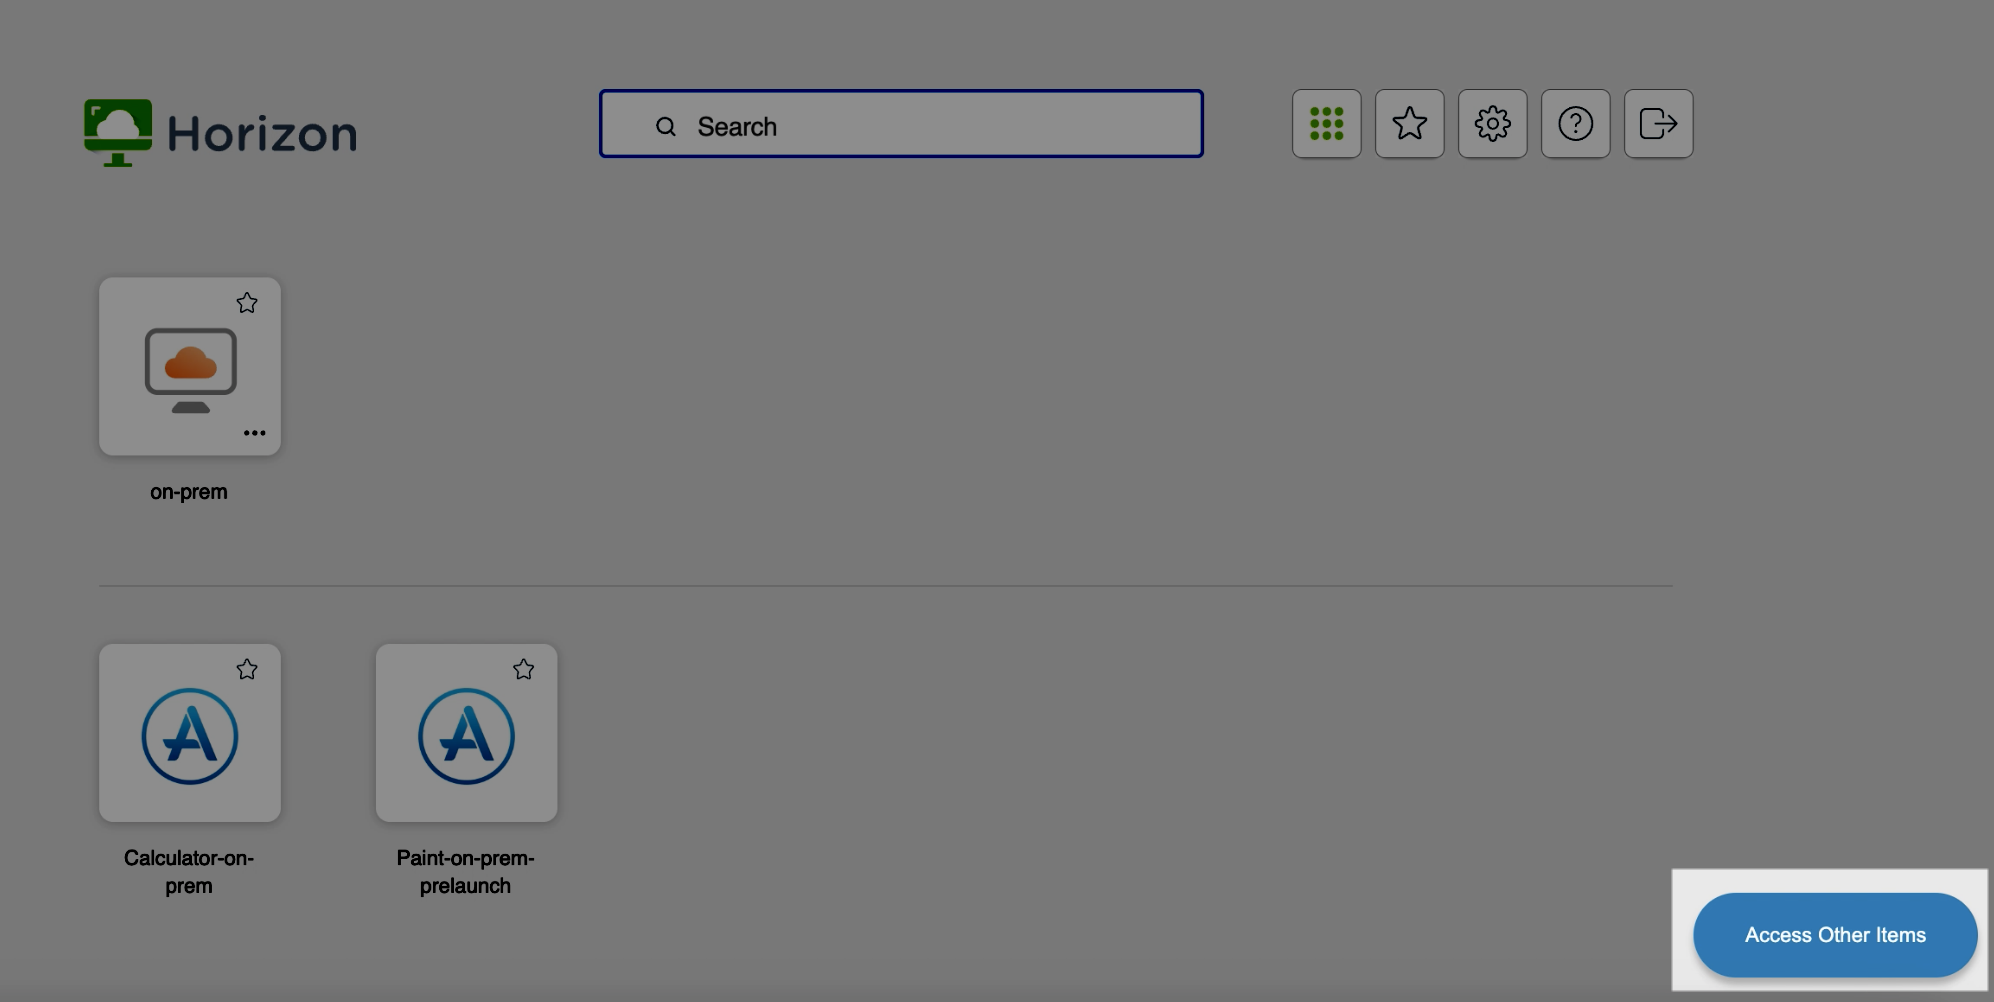
To access Horizon Cloud on Azure desktops, click the Access Other Items button at the bottom of the desktop and application selector window.
-
If the Horizon Cloud Entitlement On-Ramp feature has not been enabled, you must connect to the Omnissa Horizon Cloud Service - next-gen portal instead of Horizon Connection Server to access Horizon Cloud on Azure desktops. See Launch a Desktop with Omnissa Horizon Client and Launch an Application with Horizon Client in the Horizon Cloud Service - next-gen documentation.
Procedure for End Users
Before you begin, get the following information from your administrator:
- Instructions about whether to turn on a VPN (virtual private network) connection.
- Fully qualified domain name (FQDN) to use for connecting to the server.
- If the port is not 443, the port number to use for connecting to the server.
- Credentials to log in, such as an Active Directory user name and password, RSA SecurID user name and passcode, or RADIUS authentication credentials.
- Domain name for logging in.
The following procedure describes the steps to connect to a remote desktop or published application for end users.
-
If your organization requires a VPN connection, turn on the VPN.
-
Open a browser and type the server name in the navigation bar, as instructed by an administrator.
Type
httpsand use the FQDN of the server or connection broker, for example,https://view.company.com.Horizon Connection Server connections always use TLS. The default port for TLS connections is 443. If the server is not configured to use the default port, use the format
view.company.com:1443. -
When the Horizon web portal page appears, select one of the following options.
The following table lists all the possible options. The options that are available to you depend on the server that you connect to and how your environment is configured.
Option Description Launch Native Client Starts Horizon Client. Note: This option is available only if an administrator has configured the system environment with Omnissa Unified Access Gateway. Browser Access Starts HTML Access. Note: This option is available only if an administrator has configured the system environment with Unified Access Gateway. Horizon HTML Access Starts HTML Access. Install Horizon Client Opens the Horizon Clients download page, where you can download the Horizon Client installer for your client system. Note: This option might appear as a link instead of an option. Optionally, you can select a check box to save your selection and skip the Horizon web portal page the next time you enter the server name in the same browser type on the same client system. If you change your mind later, you can use the Restore default landing page setting on the HTML Access Settings page to display the Horizon web portal page.
-
If you are prompted for RSA SecurID credentials or RADIUS authentication credentials, enter the credentials and click Login.
The passcode might include both a PIN and the generated number on the token.
-
If you are prompted a second time for RSA SecurID credentials or RADIUS authentication credentials, enter the next generated number on the token.
Do not enter your PIN, and do not enter the same generated number that you entered previously. If necessary, wait until a new number is generated. This step is required only when you mistype the first passcode or when configuration settings in the RSA server change.
-
If you are prompted for a user name and password, supply your Active Directory credentials.
a. Enter your user name and password as instructed by an administrator. You must be entitled by an administrator to use at least one desktop or application pool.
b. (Optional) Select a domain as instructed by an administrator.
If you cannot select a domain, you must enter the user name in the format domain\username or username@domain.c. Log in.
-
To connect to a remote desktop or published application, do one of the following in the desktop and application selector window.
Option Action Connect from the desktop/application icon Click the desktop or application icon. 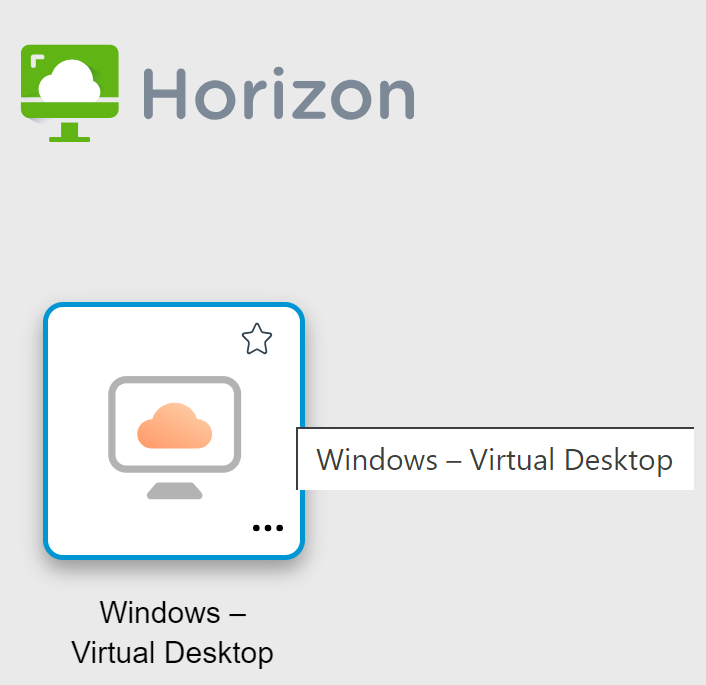
Connect from the desktop/application context menu Click the […] button next to the desktop or application icon, and select Connect. 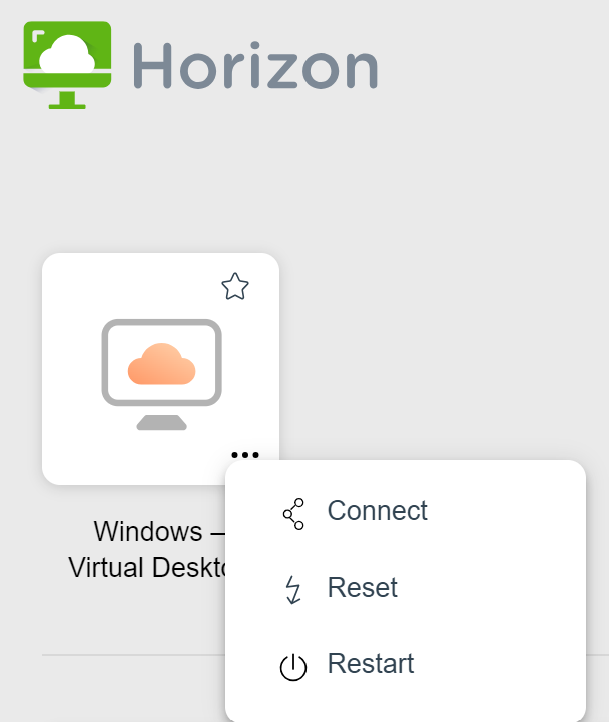
The remote desktop or published application opens in the browser window. To open the sidebar, click the tab on the left side of the browser window. From the sidebar, you can open other remote desktops or published applications, configure settings, copy and paste text, and perform other tasks.
-
(Optional) To mark a remote desktop or published application as a favorite, in the desktop and application selector window, click the gray star inside the icon for the remote desktop or published application.
The star icon turns from gray to yellow. The next time you log in, you can click the star icon in the upper-right part of the browser window to show only your favorite items.
Note: If you are disconnected after connecting to a remote desktop or published application, and a prompt appears asking you to click a link to accept the security certificate, select whether to trust the certificate. See Trust a Self-Signed Root Certificate section.
If the time zone in the remote desktop or published application does not use the time zone set in the client device, you can set the time zone manually. See Setting the Time Zone section.
By default, HTML Access displays a notification message in the session window if your network connection becomes unstable. For more information, see Detect Unstable Network Connections section.
Procedure for Administrators
Verify that you have completed the following tasks:
- Gather login credentials, such as an Active Directory user name and password, RSA SecurID user name and passcode, or RADIUS authentication credentials.
- Get the NETBIOS domain name for logging in. For example, you might use
mycompanyrather thanmycompany.com. - If you are outside the corporate network and require a VPN connection to access remote desktops and published applications, verify that the client device is set up to use a VPN connection and turn on that connection.
- Verify that you have the fully qualified domain name (FQDN) of the server that provides access to the remote desktop or published application. Underscores (_) are not supported in server names. If the port is not 443, you also need the port number.
-
If your organization requires a VPN connection, turn on the VPN.
-
Open a browser and type the server or connection broker name in the navigation bar.
Type
httpsand use the fully qualified domain name (FQDN) of the server, for example,https://view.company.com.Server connections always use TLS. The default port for TLS connections is 443. If the server is not configured to use the default port, use the format
view.company.com:1443. -
When the Horizon web portal page appears, select one of the following options.
The following table lists all the possible options. The options that are available to you depend on the server that you connect to and your environment configuration.
Option Description Launch Native Client Starts Horizon Client. Note: This option is available only if an administrator has configured the system environment with Unified Access Gateway. Browser Access Starts HTML Access. Note: This option is available only if an administrator has configured the system environment with Unified Access Gateway. Horizon HTML Access Starts HTML Access. Install Horizon Client Opens the Horizon Clients download page, where you can download the Horizon Client installer for your client system. Note: This option might appear as a link instead of an option. Optionally, you can select a check box to save your selection and skip the Horizon web portal page the next time you enter the server name in the same browser type on the same client system. If you change your mind later, you can use the Restore default landing page setting on the HTML Access Settings page to display the Horizon web portal page.
-
If you are prompted for RSA SecurID credentials or RADIUS authentication credentials, enter the credentials and click Login.
The passcode might include both a PIN and the generated number on the token.
-
If you are prompted a second time for RSA SecurID credentials or RADIUS authentication credentials, enter the next generated number on the token.
Do not enter your PIN, and do not enter the same generated number that you entered previously. If necessary, wait until a new number is generated. This step is required only when you mistype the first passcode or when configuration settings in the RSA server change.
-
If you are prompted
a. Enter the user name and password. The user must be entitled by an administrator to use at least one desktop or application pool.
b. (Optional) Select a domain.
If you cannot select a domain, you must enter the user name in the format domain\username or username@domain.
c. Log in.
-
To connect to a remote desktop or published application, do one of the following in the desktop and application selector window.
Option Action Connect from the desktop/application icon Click the desktop or application icon. Connect from the desktop/application context menu Click the […] button next to the desktop or application icon, and select Connect. The remote desktop or published application opens in the browser window. To open the sidebar, click the tab on the left side of the browser window. From the sidebar, you can open other remote desktops or published applications, configure settings, copy and paste text, and perform other tasks.
-
(Optional) To mark a remote desktop or published application as a favorite, in the desktop and application selector window, click the gray star inside the icon for the remote desktop or published application.
The star icon turns from gray to yellow. The next time you log in, you can click the star icon in the upper-right part of the browser window to show only your favorite items.
Note: If you are disconnected after connecting to a remote desktop or published application, and a prompt appears asking you to click a link to accept the security certificate, select whether to trust the certificate. See See Trust a Self-Signed Root Certificate section.
If the time zone in the remote desktop or published application does not use the time zone set in the client device, you can set the time zone manually. See Setting the Time Zone section.
By default, HTML Access displays a notification message in the session window if your network connection becomes unstable. For more information, see Detect Unstable Network Connections section.
Trust a Self-Signed Root Certificate
Sometimes, when connecting to a remote desktop or published application for the first time, the browser might prompt you to accept the self-signed certificate that the remote machine uses. You must trust the certificate before you can connect to the remote desktop or published application.
Most browsers give you the option to trust the self-signed certificate permanently. If you do trust the certificate permanently, you must verify the certificate every time you restart your browser. If you are using a Safari browser, you must trust the security certificate permanently to establish the connection.
Procedure
-
If the browser presents an untrusted certificate warning, or a warning appears stating that your connection is not private, examine the certificate to verify that it matches the certificate that your company uses.You might need to contact your system administrator for assistance. For example, in Chrome, you might use the following procedure.
- Click the lock icon in the address bar.
- Click the Certificate information link.
- Verify that the certificate matches the certificate that your company uses.You might need to contact your system administrator for assistance.
-
Accept the security certificate.Each browser has its own browser-specific prompts for accepting or always trusting a certificate. For example, in Chrome, you can click the Advanced link on the browser page and click Proceed to server-name (unsafe).
In Safari, use the following procedure to trust the certificate permanently.
- Click the Show Certificate button when the untrusted certificate dialog box appears.
- Select the Always Trust check box and click Continue.
- When prompted, provide your password and click Update Settings.
Results
The remote desktop or published application starts.
Use Unauthenticated Access to Connect to Published Applications
If you have an unauthenticated access user account, you can log in to a server anonymously and connect to your published applications. The connection procedure is slightly different for administrators and end users, so refer to the section that applies to your role.
Procedure for End Users
Before you begin, get the following information from your administrator:
- Server name to use for connecting to the server.
- An Unauthenticated Access user account to use for logging in anonymously.
Note: HTML Access displays a notification message in the session window if your network connection become unstable. To turn on and off these message displays, click the Settings toolbar button in the upper-right corner of the desktop and application selector window and toggle the Disable network display option.
-
To connect to the server on which you have unauthenticated access, open a browser and enter a Uniform Resource Identifier (URI).
For example, you can use one of the following URI syntaxes.
- https://authority-part?unauthenticatedAccessEnabled=true
- https://authority-part?unauthenticatedAccessEnabled=true&unauthenticatedAccessAccount=anonymous_account authority-part is the server address and, optionally, a non-default port number. If you need to specify a port number, enter server-address:port-number.
anonymous_account is the Unauthenticated Access user account.
Connections always use TLS. The default port for TLS connections is 443. If the server is not configured to use the default port, use the format shown in this example:
horizon.company.com:1443. -
(Optional) If you did not specify an Unauthenticated Access user account in the URI, select an Unauthenticated Access user account from the User account drop-down menu, if necessary, and click Submit.
If only one Unauthenticated Access user account is available, that user account is selected by default.
The application selection window appears after you click Submit.
-
Click the icon for the published application that you want to access.
The published application appears in your browser. A navigation sidebar is also available. You can click the tab on the left side of the browser window to show the sidebar. You can use the sidebar to access other published applications, show the Settings window, copy and paste text, and more.
Note: You cannot reconnect to unauthenticated application sessions. When you disconnect from the client, you are logged off the local user session automatically.
By default, HTML Access displays a notification message in the session window if your network connection becomes unstable. For more information, see Detect Unstable Network Connections.
Procedure for Administrators
Verify that you have completed the following prerequisites:
- Perform the administrative tasks described in #.
- Set up Unauthenticated Access users on the Horizon Connection Server instance. For information, see "Providing Unauthenticated Access for Published Applications" in the Horizon 8 Administration document.
-
To connect to the server on which you have unauthenticated access, open a browser and enter a Uniform Resource Identifier (URI).
For example, you can use one of the following URI syntaxes.
- https://authority-part?unauthenticatedAccessEnabled=true
- https://authority-part?unauthenticatedAccessEnabled=true&unauthenticatedAccessAccount=anonymous_account authority-part is the server address and, optionally, a non-default port number. If you need to specify a port number, enter server-address:port-number.
anonymous_account is the Unauthenticated Access user account.
Connections always use TLS. The default port for TLS connections is 443. If the server is not configured to use the default port, use the format shown in this example:
horizon.company.com:1443. -
(Optional) If you did not specify an Unauthenticated Access user account in the URI, select an Unauthenticated Access user account from the User account drop-down menu, if necessary, and click Submit.
If only one Unauthenticated Access user account is available, that user account is selected by default.
The application selection window appears after you click Submit.
-
Click the icon for the published application that you want to access.
The published application appears in your browser. A navigation sidebar is also available. You can click the tab on the left side of the browser window to show the sidebar. You can use the sidebar to access other published applications, show the Settings window, copy and paste text, and more.
Note: You cannot reconnect to unauthenticated application sessions. When you disconnect from the client, you are logged off the local user session automatically.
By default, HTML Access displays a notification message in the session window if your network connection becomes unstable. For more information, see Detect Unstable Network Connections.
Detect Unstable Network Connections
HTML Access can monitor the network quality during remote sessions and display a notification message if it detects network instability due to high latency. The network latency is measured in terms of the round-trip time (RTT) metric.
You can use an agent GPO setting and HTML Access settings to control the display of these notification messages. You can also configure the threshold parameters used by HTML Access to identify unstable networks.
Configure the Display of Network Notification Messages
Several settings control whether or not to display network notifications, depending on the version of Horizon Agent in use.
Horizon Agent 2406 and Later
For remote desktops running Horizon Agent for Windows 2406 or later, an administrator can use the Enable Displaying Network State agent GPO setting to configure the display of notifications. Whether or not this agent GPO setting takes effect depends on the state of the client network display setting.
-
If the client setting has never been modified, the agent GPO setting takes precedence over the client setting and the agent setting takes effect.
-
If the client setting has been modified at least once, the client setting takes precedence over the agent GPO setting and the client setting takes effect.
Horizon Agent 2312 and Earlier
Remote desktops running Horizon Agent for Windows 2312 or earlier do not have a GPO setting for network notifications. In this case, network notifications are controlled solely by the client network display setting.
Configure the Client Network Display Setting
To turn on and off notification messages from HTML Access, click the Settings toolbar button in the upper-right corner of the desktop and application selector window and toggle the Disable network state display option.
Customize How HTML Access Determines the Network Quality
To determine the quality of the network connection, HTML Access compares the detected RTT value during a specified time interval to a pair of low and high threshold values and calculates a quality score from 0 through 100 percent. If the score falls below a certain percentage, the network is deemed to be high-latency and unstable.
HTML Access uses the following rules to calculate the network quality score:
Definitions:
rtt = detected RTT value
lowBound = low threshold value
highBound = high threshold value
score = network quality score

If rtt >= highBound, then score = 0

If rtt <= lowBound, then score = 100

If lowBound < rtt < highBound, then score = 100 * ((rtt - lowBound) / (highBound - lowBound))
HTML Access then uses the following rules to determine the network stability:
Definitions:
score = network quality score
thresholdGood = minimum score required to indicate good network stability
thresholdPoor = high limit of score range indicating poor network stability

If score >= thresholdGood, the network is considered good and no notification is displayed.

If thresholdPoor <= score < thresholdGood, the network is considered OK and no notification is displayed.

If score < thresholdPoor, the network is considered poor and a notification is displayed.
You can use the following steps to customize the threshold values used by HTML Access to calculate the network quality score and determine network stability.
-
Log in to the Horizon Connection Server host machine with administrator privileges.
-
Open the
portal-version.propertiesfile in a text editor. -
Specify the following properties in the configuration file.
Property Valid Values Description enableNetworkIndicatortrueorfalseSpecifies whether to activate the network notification feature ( true) or deactivate the feature (false). Whether or not this client setting takes effect depends on several factors, as described in Configure the Display of Network Notification Messages. Setting the value tofalseremoves the Disable network state display option from the Settings window. The default value istrue.networkState.TcpRttMSLowA positive integer The low RTT threshold value used to calculate the network quality score. This value must be less than the networkState.TcpRttMSHigh value. This value corresponds to the "lowBound" variable in the rules described earlier. The default value is 2.networkState.TcpRttMSHighA positive integer The high RTT threshold value used to calculate the network quality score. This value must be greater than the networkState.TcpRttMSLow value. This value corresponds to the "highBound" variable in the rules described earlier. The default value is 400.networkState.TcpThresholdGoodA percentage from 0 through 100 The minimum score required to indicate good network stability. This value must be greater than the networkState.TcpThresholdPoor value. This value corresponds to the "thresholdGood" variable in the rules described earlier. Scores falling in the range between networkState.TcpThresholdPoor and networkState.TcpThresholdGood indicate OK network quality. The default value is 85.networkState.TcpThresholdPoorA percentage from 0 to 100 The high limit of the score range indicating poor network stability. This value must be less than the networkState.TcpThresholdGood value. This value corresponds to the "thresholdPoor" variable in the rules described earlier. Scores falling in the range between networkState.TcpThresholdPoor and networkState.TcpThresholdGood indicate OK network quality. The default value is 40.networkState.RttCheckPeriodMsAn integer greater than 2000 The time interval, in milliseconds, during which network RTT statistics are monitored. The default value is 15000.
Connect to a Server in Omnissa Workspace ONE Mode
An administrator can enable Workspace ONE mode on a Horizon Connection Server instance.
When Workspace ONE mode is enabled, you can connect to the server only through the Workspace ONE Web Portal. You are redirected to the Workspace ONE Web Portal when you try to connect to the server through HTML Access. After you connect to the server through the Workspace ONE Web Portal, you can start remote desktops and published applications only through the Workspace ONE Web Portal.
When Workspace ONE mode is enabled, the sidebar does not show all the remote desktops and published applications that you are entitled to use. Instead, it shows only the currently running remote desktops and published applications.
You might encounter the following problems when Workspace ONE mode is enabled.
- You cannot connect to the server through HTML Access. You might not reach the server, or you might see a message that states that the server expects to receive your login credentials from another application or server.
- After you start a remote desktop or published application through the Workspace ONE Web Portal, you cannot see or start the remote desktop or published application in HTML Access.
Setting the Time Zone
The time zone that a remote desktop or published application uses is set to the time zone in your local system automatically.
When you use HTML Access, if the time zone cannot be correctly determined due to certain daylight saving policies, you might need to set the time zone manually.
To set the correct time zone manually before you are connected to a remote desktop or published application, click the Settings toolbar button in the upper-right corner of the desktop and application selector window. Turn off the Set Time Zone Automatically option in the Settings window and select one of the time zones from the drop-down menu. The value you select is saved as your preferred time zone to use when connecting to a remote desktop or published application.
To set the correct time zone manually after you are connected to a remote desktop or published application, return to the desktop and application selector window and change the current time zone setting.
The Set Time Zone Automatically option is not available from the Settings window that is accessible from the sidebar.
Note: When you use the Chrome browser on an Android device, if the Set Time Zone Automatically option is set to true and you change the Android system time zone, the new time zone is not synchronized with the remote desktop automatically. This problem is a Chrome limitation on the Android system. You must restart the Android device and the Chrome browser to synchronize the selected time zone.
Allowing H.264 Decoding
When you use a Chrome browser, you can allow H.264 decoding in the client for remote desktop and published application sessions.
H.264 is an industry standard for video compression, which is the process of converting digital video into a format that takes up less capacity when it is stored or transmitted.
When you allow H.264 decoding, HTML Access uses H.264 decoding if the agent supports H.264 encoding. If the agent does not support H.264 encoding, HTML Access uses JPEG/PNG decoding.
If you are connected to a remote desktop or published application, you can allow H.264 decoding by turning on the Allow H.264 decoding option in the Settings window, which is available from the sidebar. You must disconnect and reconnect to the remote desktop or published application for the new setting to take effect.
If you are not connected to a remote desktop or published application, you can click the Settings toolbar button in the upper-right corner of the desktop and application selector window and turn on the Allow H.264 decoding option in the Settings window. The new setting takes effect for any sessions that are connected after you change the setting.
Log Out or Disconnect
If you disconnect from a remote desktop without logging out, applications in the remote desktop might remain open. You can also disconnect from a server and leave published applications running.
Procedure
Log out of the server and disconnect from (but do not log out from) the remote desktop, or quit the published application.
| Option | Action |
|---|---|
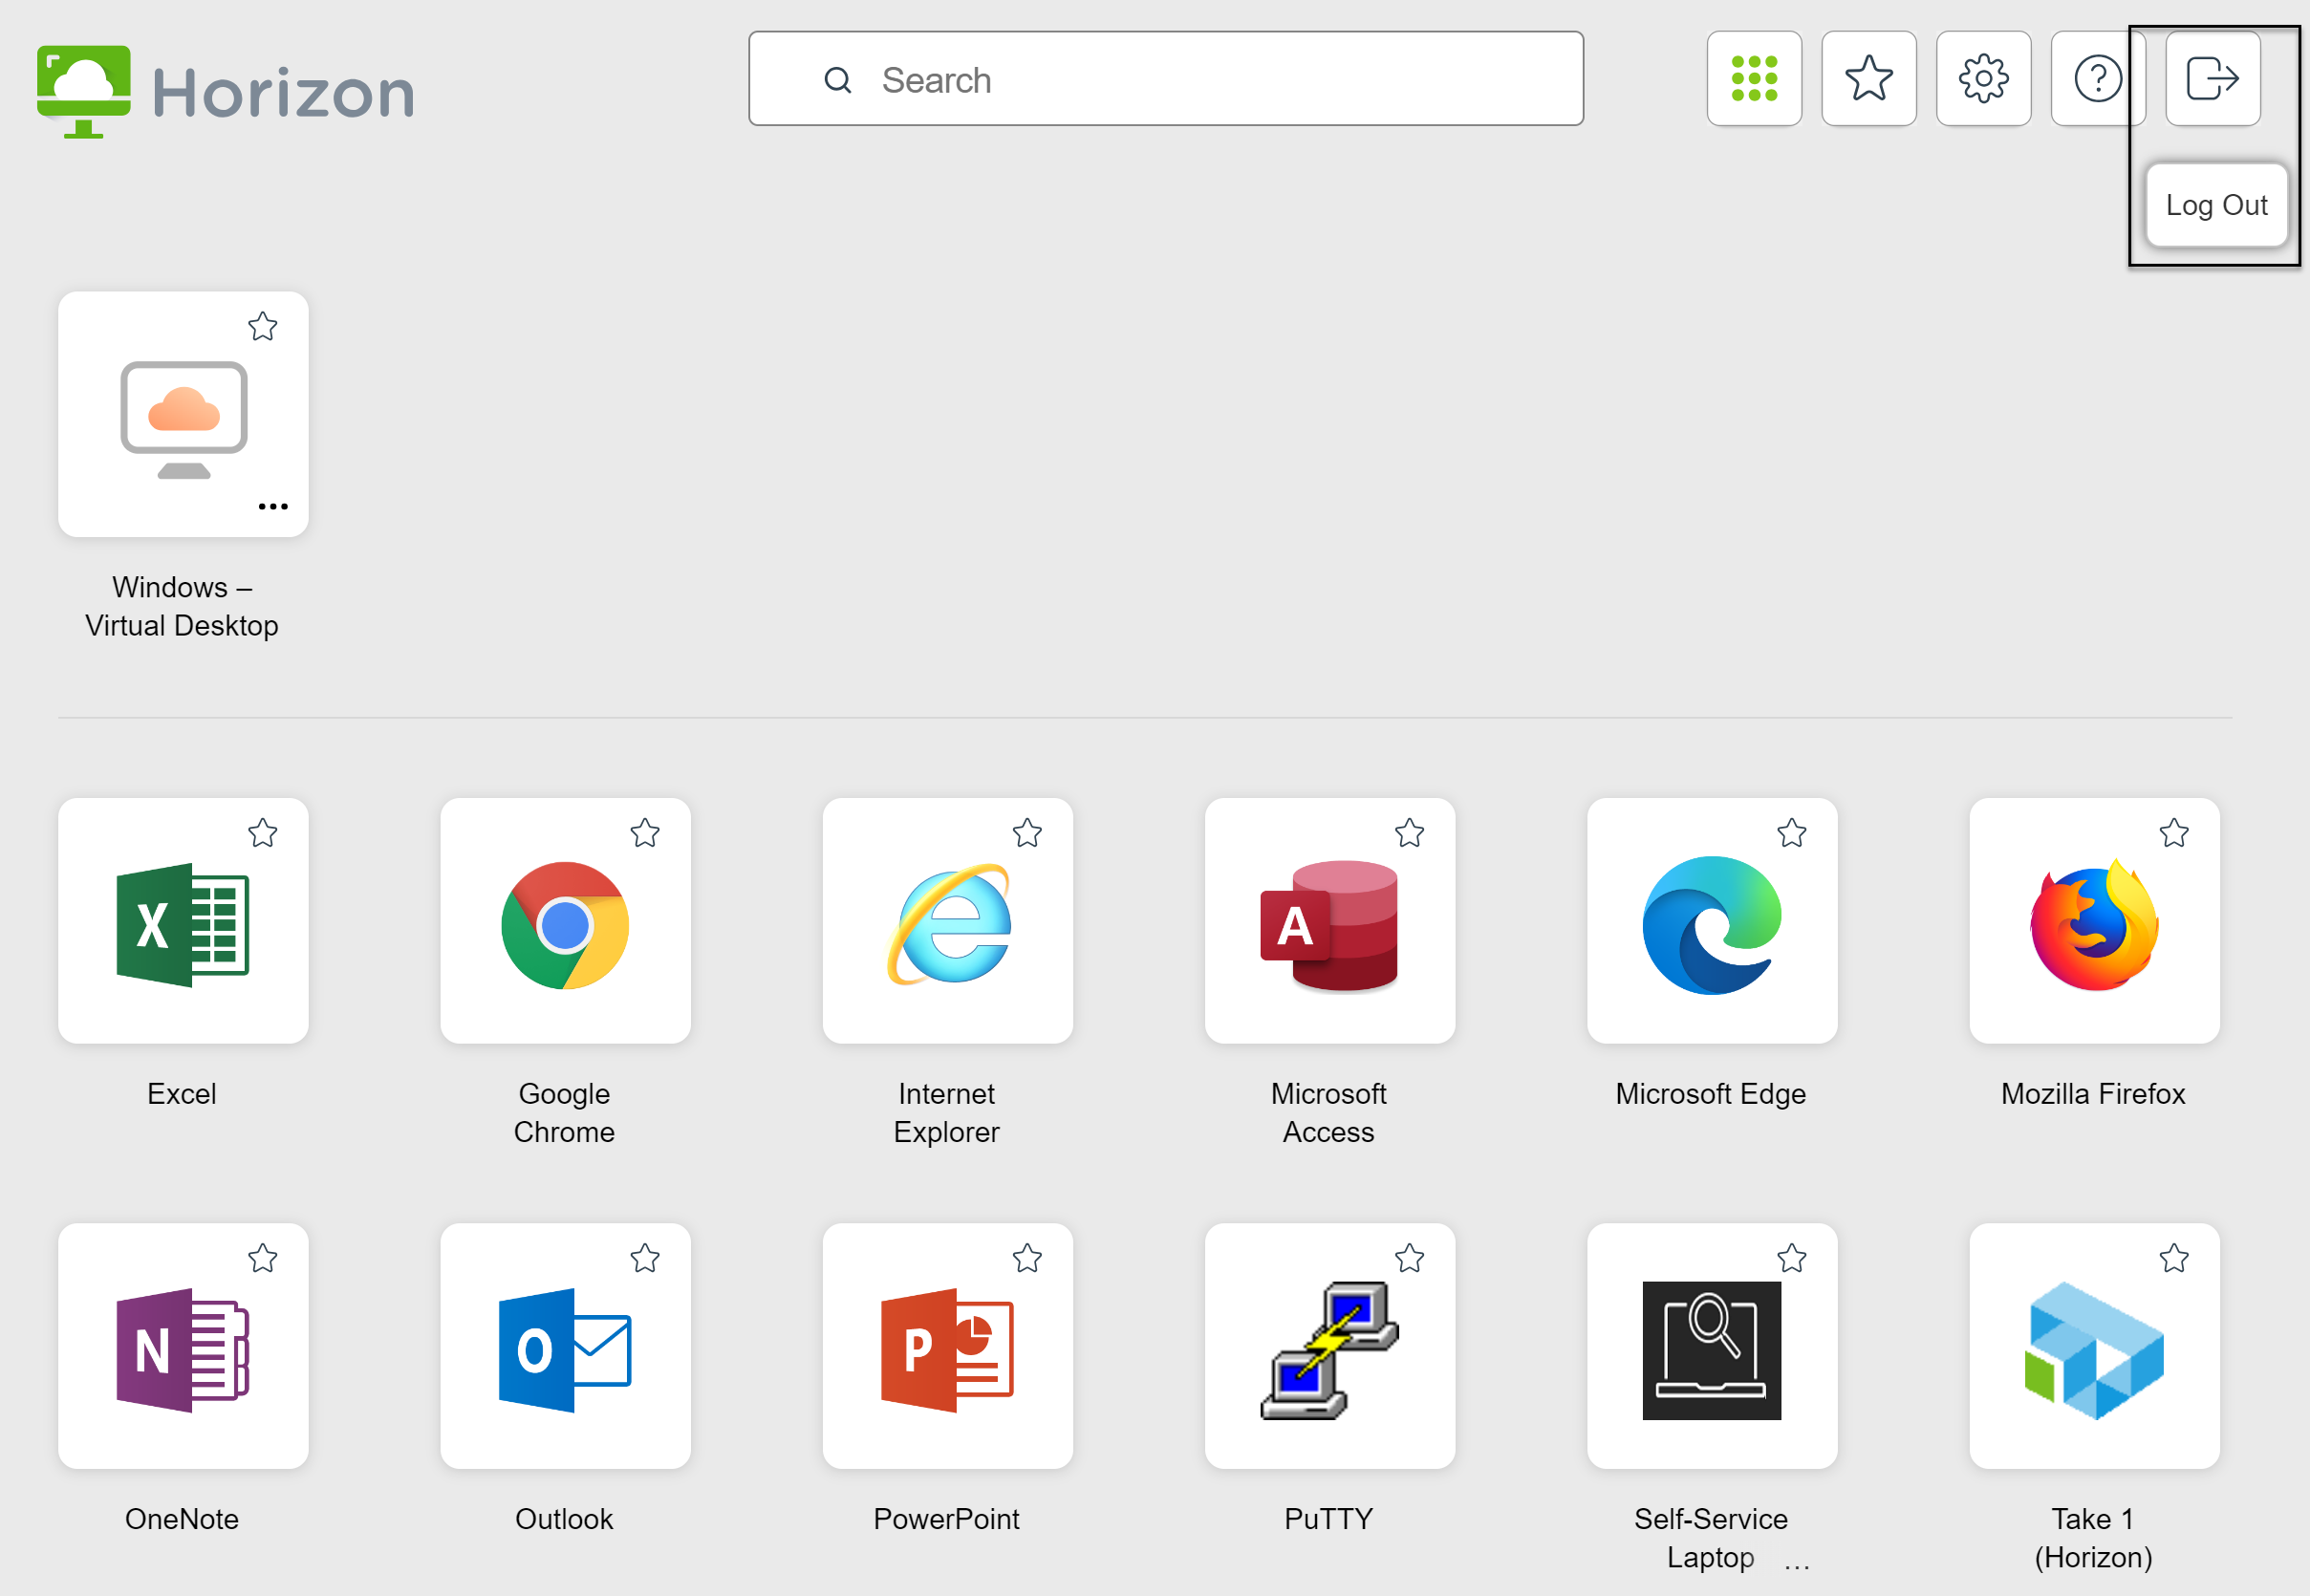
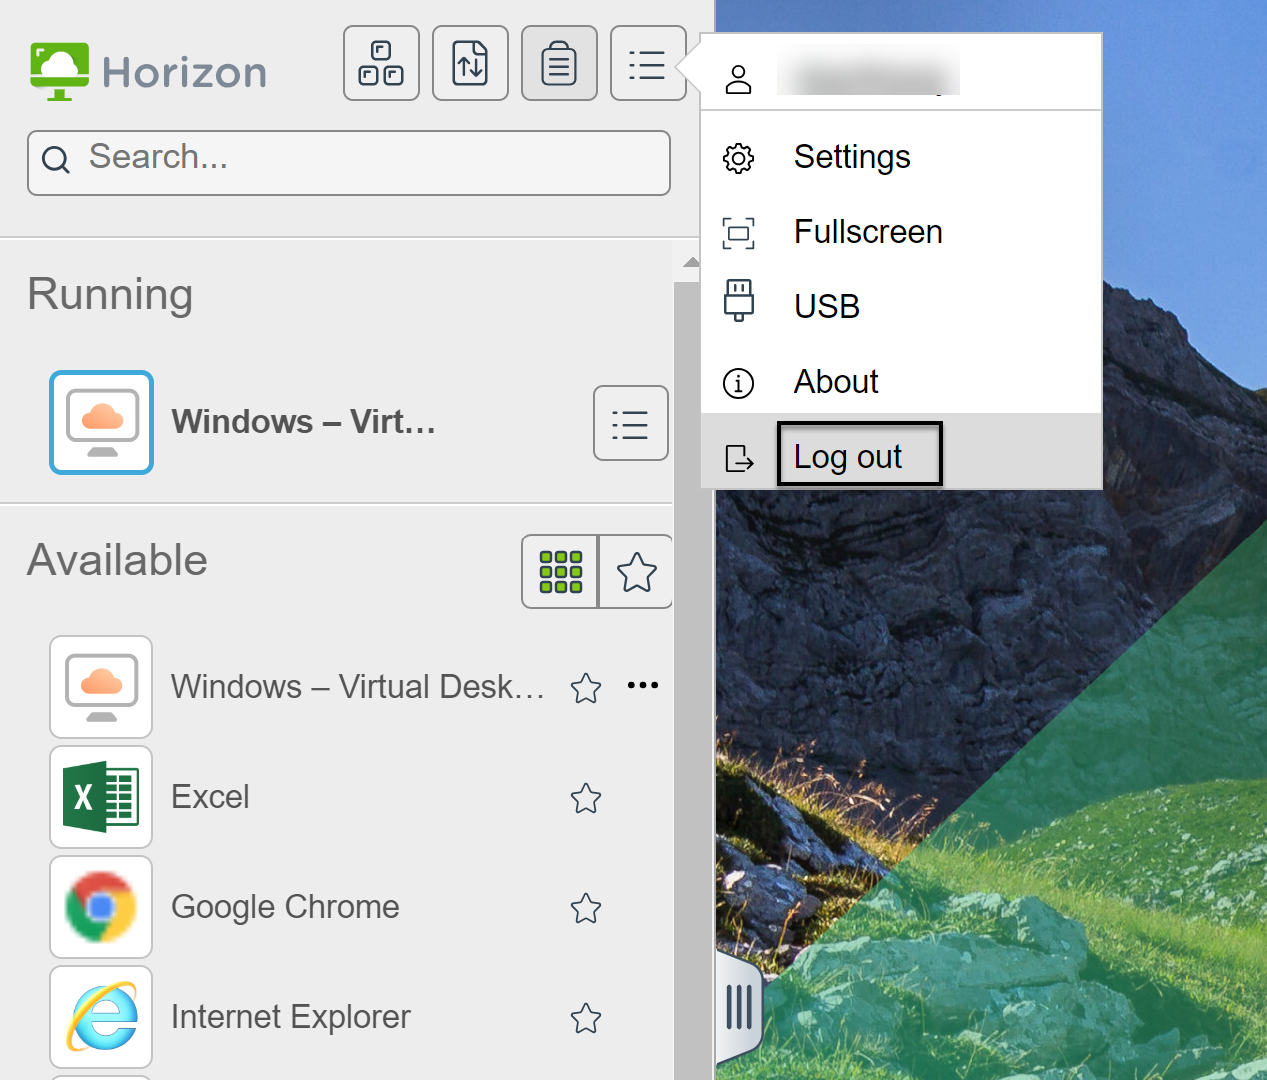
| From the desktop and application selector window, before connecting to a remote desktop or published application | Click the Log Out toolbar button in the upper-right corner of the window.
 |
| From the sidebar when connected to a remote desktop or published application | Click the Log out toolbar button at the top of the sidebar.
 |
Close a published application.
| Option | Action |
|---|---|
| From within the published application | Quit the published application in the usual manner, for example, click the X (Close) button in the corner of the published application window. |
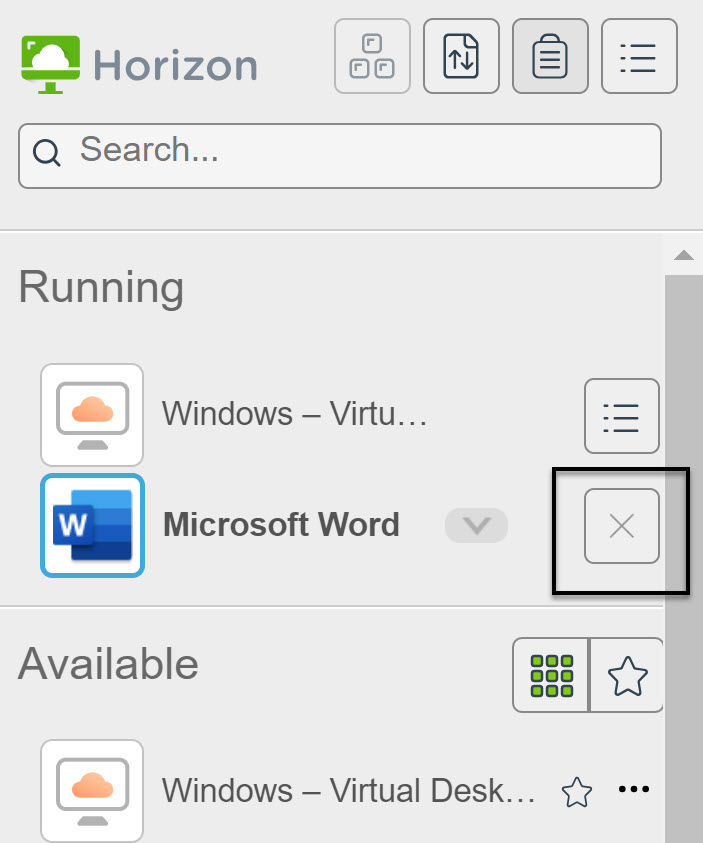
| From the sidebar | Click the X next to the published application name in the Running list in the sidebar.
 |
Log out or disconnect from a remote desktop.
| Option | Action |
|---|---|
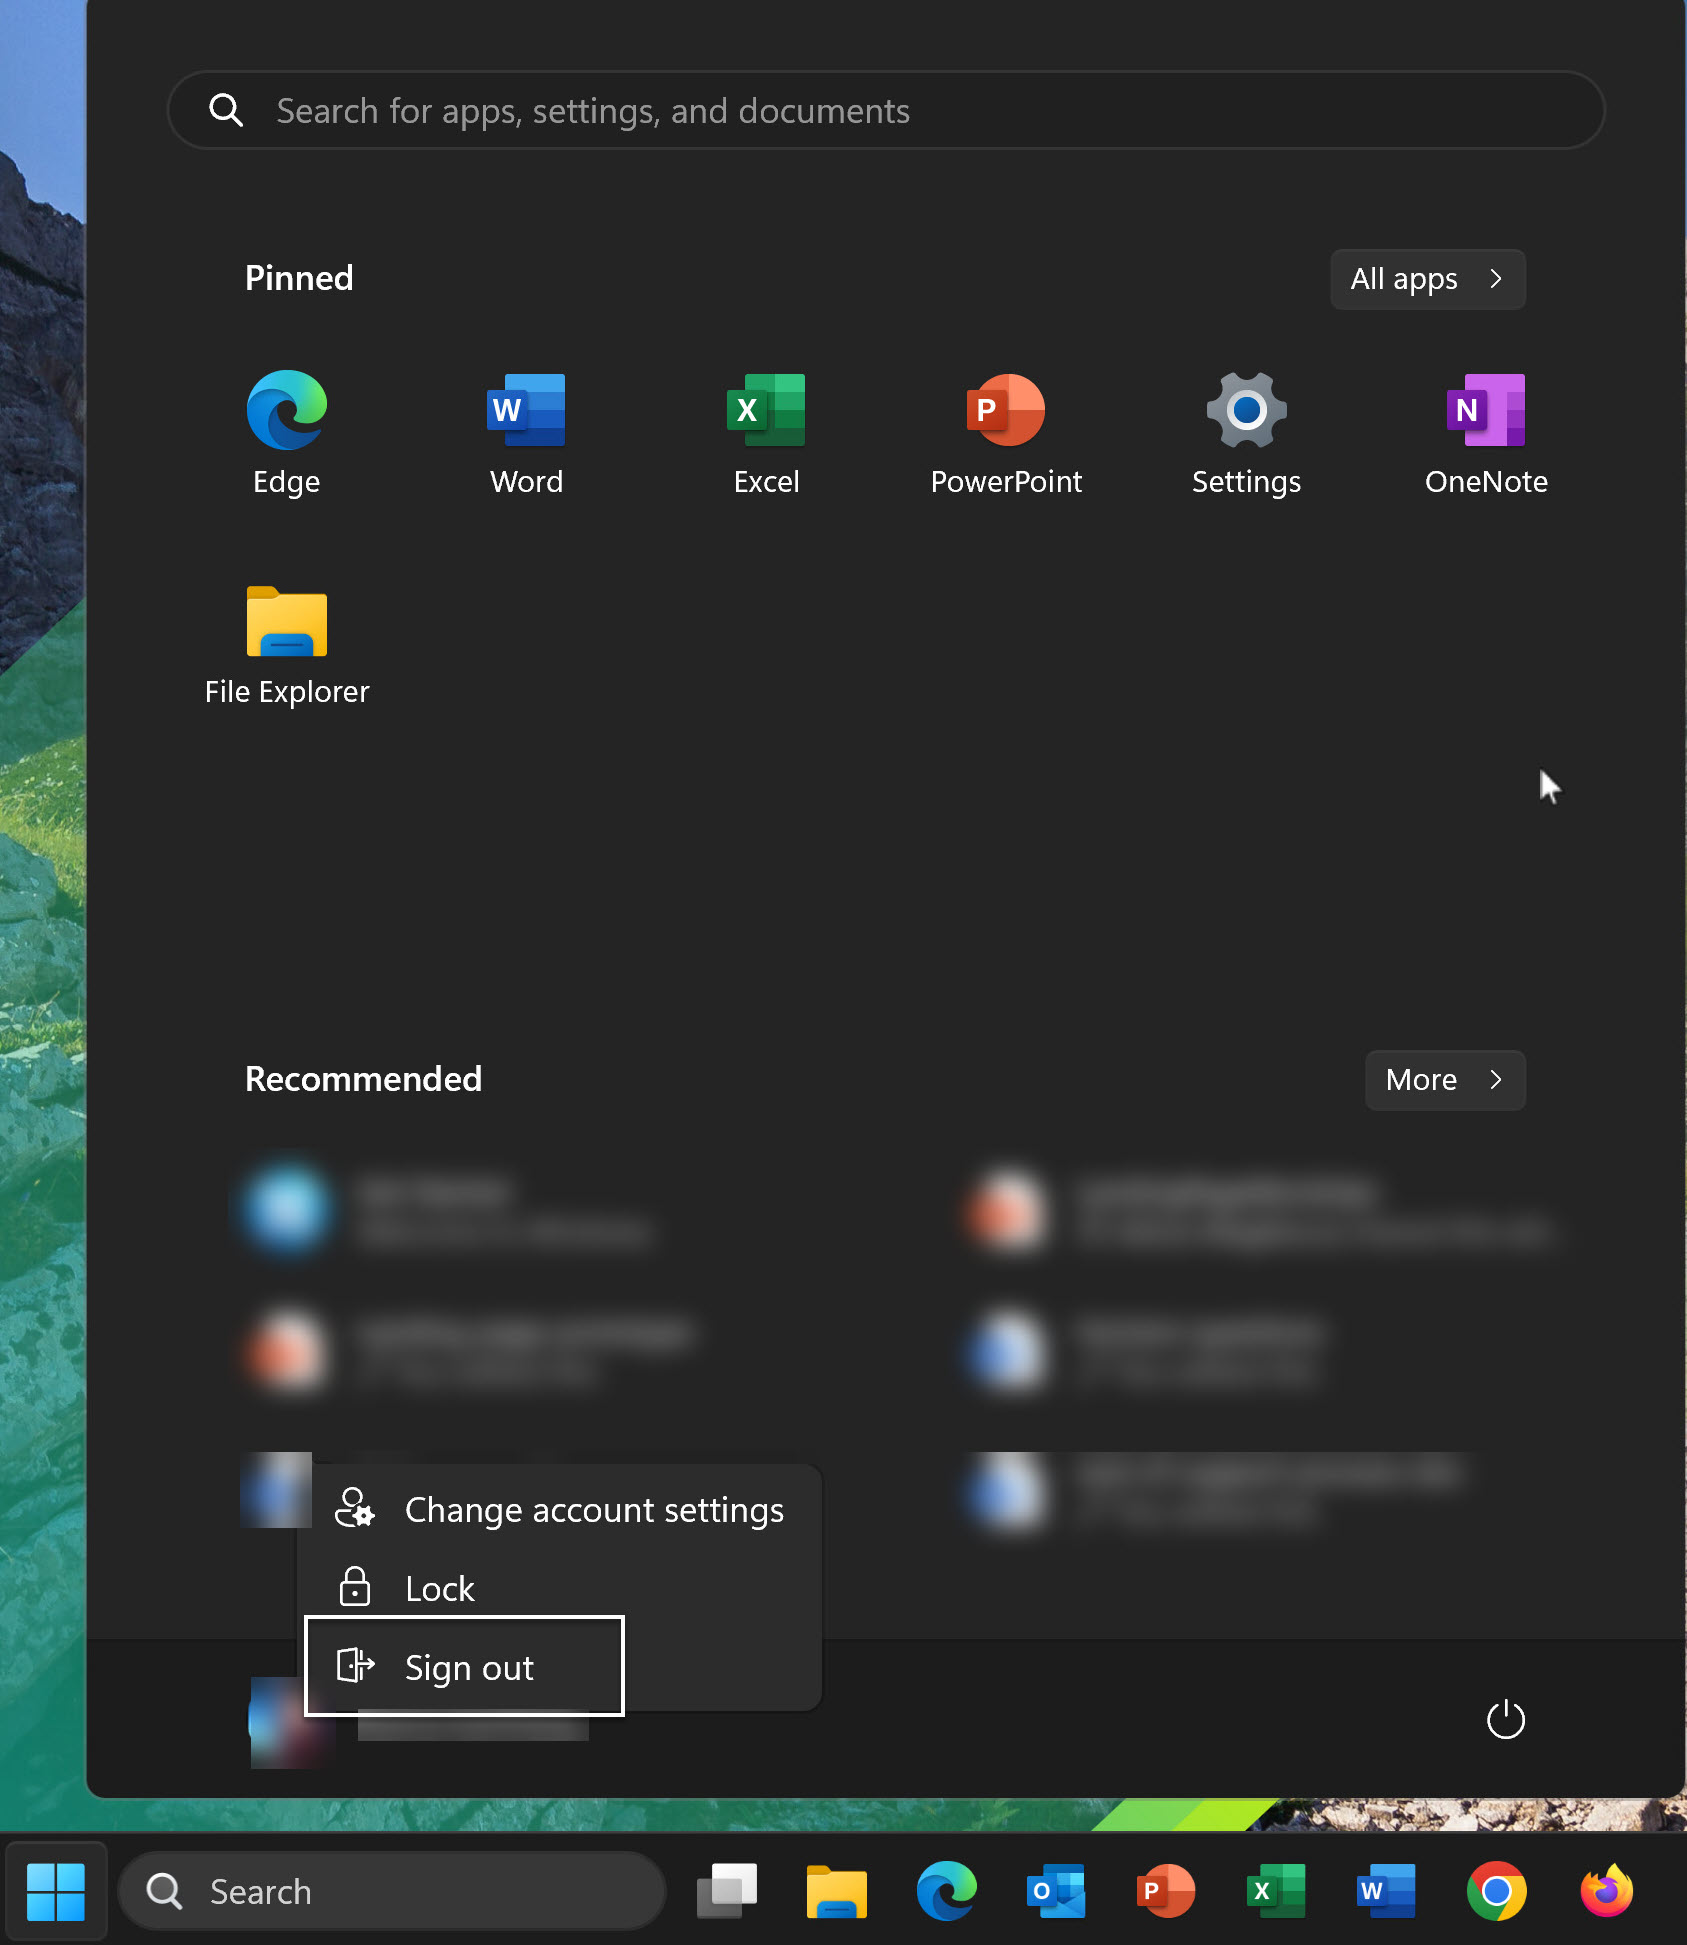
| From within the remote desktop | To log out, use the Windows Start menu to log out.
 |
| From the sidebar |
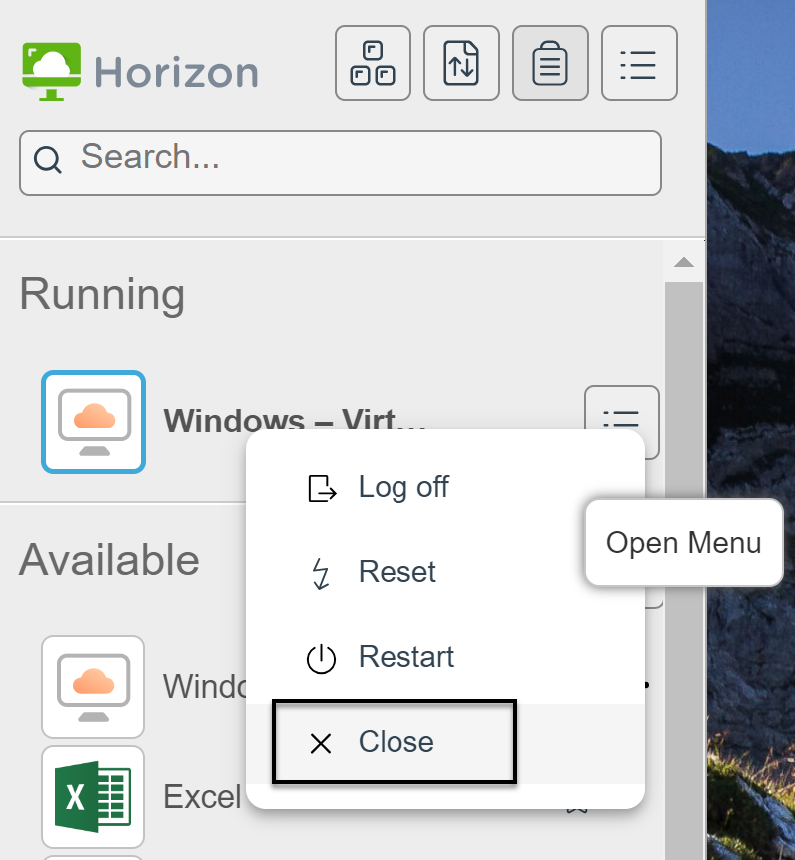
To log out and disconnect, click the Open Menu toolbar button next to the remote desktop name in the Running list in the sidebar and select Log Off. Files that are open on the remote desktop are closed without being saved first.
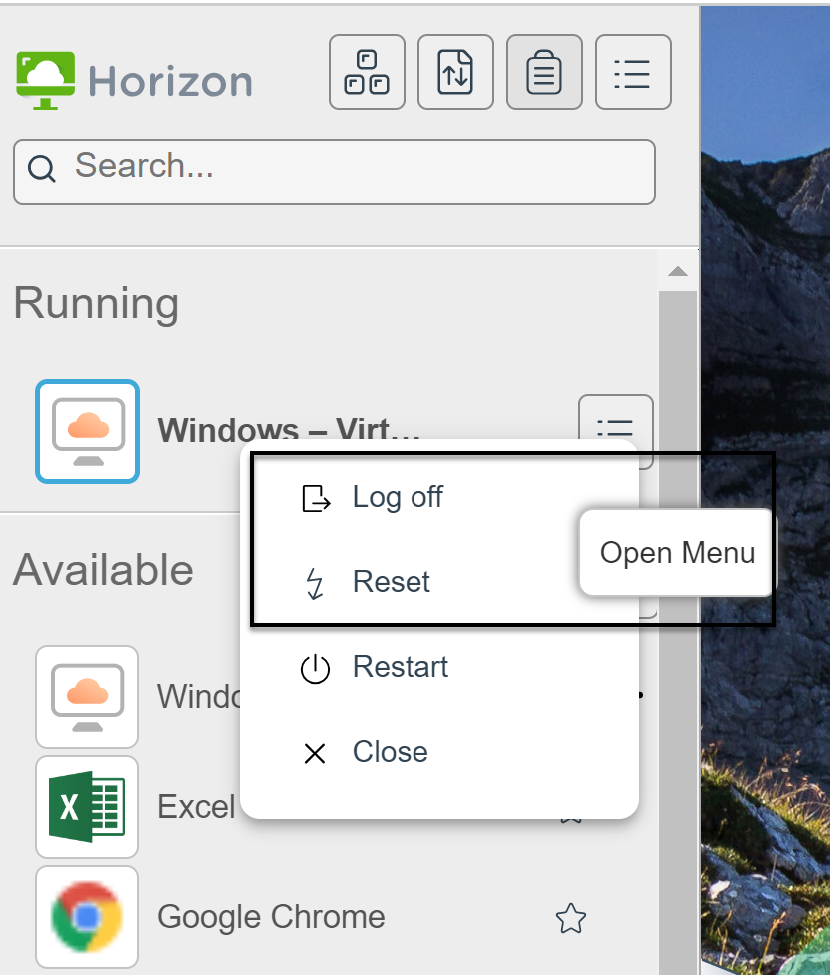 To disconnect without logging off, click the Open Menu toolbar button next to the remote desktop name in the Running list and select Close.
 Note: A Horizon administrator can configure the remote desktop to log out automatically when disconnected. In that case, any open applications in the remote desktop are closed.
 |
Was this page helpful?