To configure Okta as an external source for the Security Events Service, you create an API services application in the Okta Admin console and create an external source in the Security Events Service console.
Note: To integrate another third-party product, see Configuring Third-Party Products as External Sources in the Security Events Service.
Prerequisites
- Omnissa Risk Analytics add-on license
- An administrator role in the Okta Admin Console
- An administrator role in Omnissa Connect
Step 1: Create an API services application in Okta
Before you can add Okta as an external source in the Security Events Service, you must create and configure an API services application in Okta.
-
Log in to the Okta Admin console as an administrator.
-
Select Applications > Applications.
-
Click Create App Integration.
-
Select API Services and click Next.
-
Enter a name for the application and click Save.
-
On the application's General tab, generate a public/private key pair:
- In the Client Credentials section, click Edit, then select the Public key/Private key option for Client authentication.

- In the Public keys section, click Edit, verify that the Save keys in Okta option is selected, then click Add key.

- In the Add a public key popup window, click Generate new key, then click Copy to clipboard to copy the private key.
IMPORTANT: Copy the key and save it in a secure location before proceeding. The key will not be displayed after you close the popup window. You will need it later to configure the source in the Security Events Service console. - Click Done in the popup window.
- Click Save in the Public keys section.
- Click Save in the Client Credentials section.
- Copy the Client ID from the Client Credentials section and save it. You will need it later to configure the source in the Security Events Service.

- In the Client Credentials section, click Edit, then select the Public key/Private key option for Client authentication.
-
In the General Settings - APPLICATION section, click Edit, uncheck the Proof of possession: Require Demonstrating Proof of Possession (DPoP) header in token requests option, and click Save.

-
Select the Okta API Scopes tab and grant the following scopes:
ssf.readssf.manageokta.users.read
Then select the Granted tab in the left pane and verify that the scopes are granted.

-
Assign the Super Administrator role to the application.
- Select the Admin roles tab.
- Click Edit assignments.
- In the Complete the assignment section, select the Super Administrator role.
- Click Save Changes.
- If you are prompted to enter the Okta Verify code, enter it to log back in to the admin console.
- Navigate to the application, select the Admin roles tab, and verify that the Super Administrator role appears.

Step 2: Add Okta as an external source in the Security Events Service
After you create the API services application in the Okta admin console, configure Okta as an external source in the Security Events Service console.
Before you begin, make sure that you have the following information:
- Client ID of the Okta API services application
- Private key of the Okta API services application
- Okta tenant URL
-
Log in to Omnissa Connect.
-
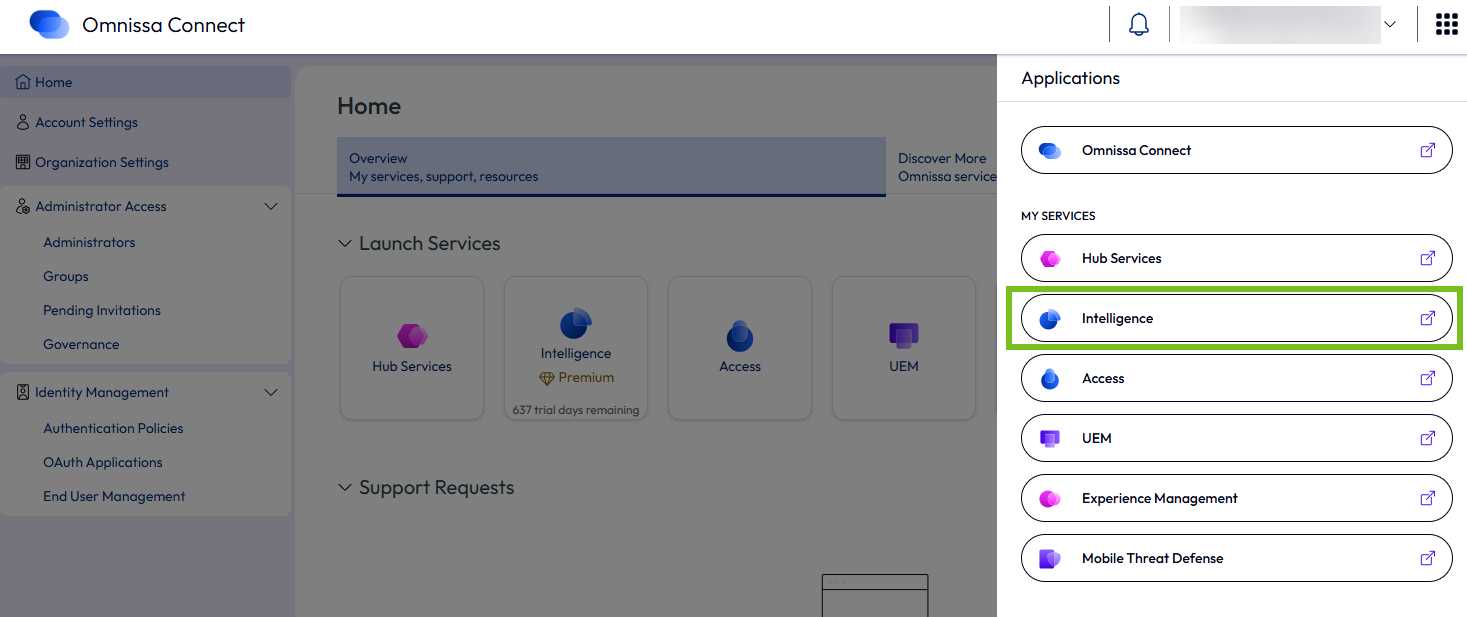
From the menu at the top-right corner, select Intelligence to go to the Intelligence console.
-
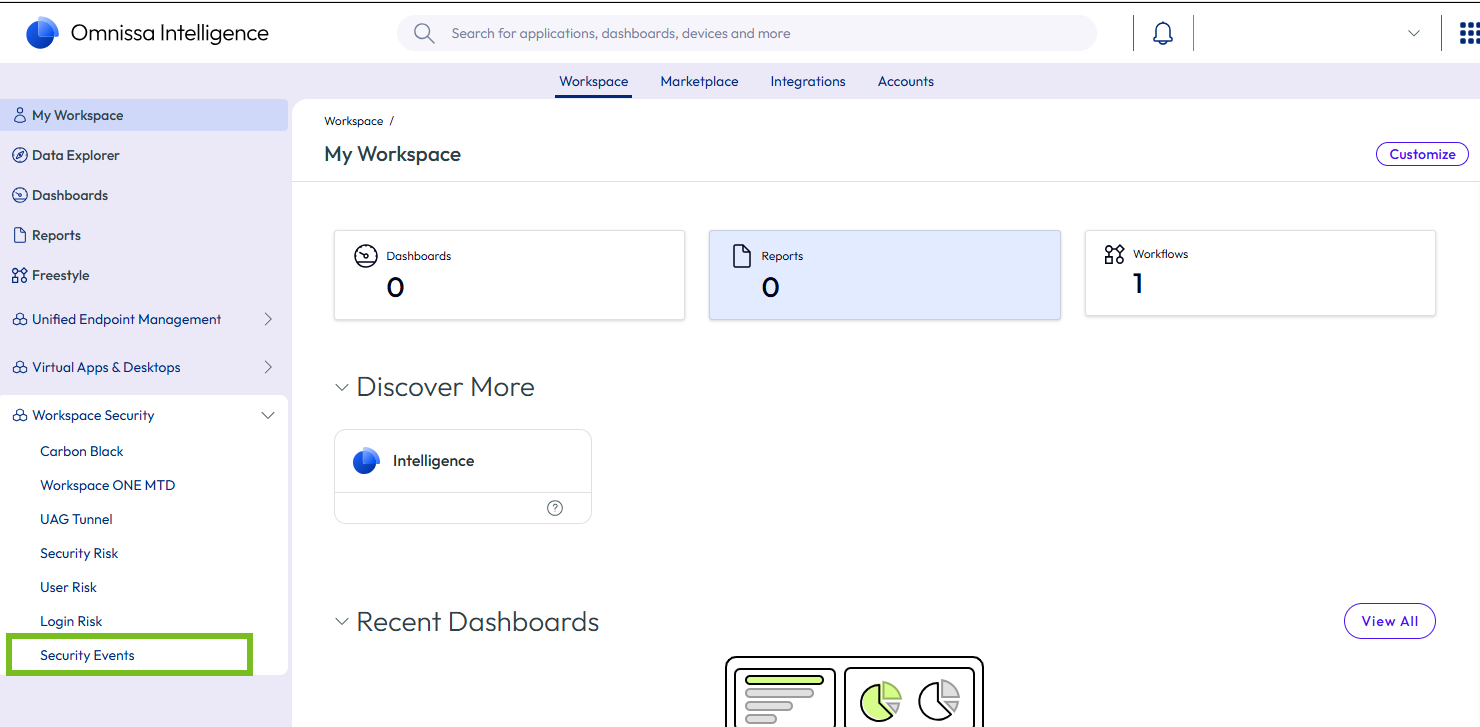
In the Intelligence console, select Workspace Security > Security Events from the left pane.
-
Click Launch Security Events.

The Security Events Service console appears in a new tab.
-
Do one of the following, based on your scenario.
If no sources or subscribers are configured yet in the Security Events Service, an overview page appears.
-
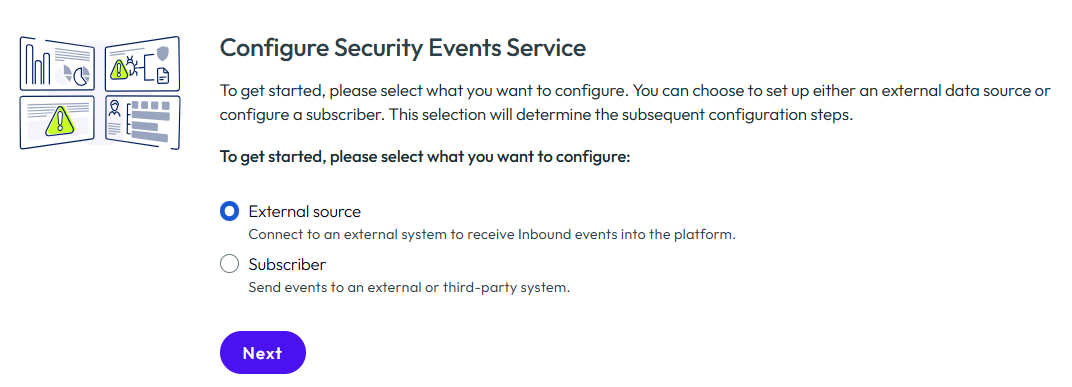
Review the information and click Get Started.
-
Select External Source and click Next.
If you have already configured a source or subscriber, the overview page and wizard do not appear.
- Select the Sources tab.
- Click Add External Source.
-
-
Configure Okta as an external source.
Name: Enter a name for the external source.
External source type: Select Okta.
SSF Well-Known URL: Enter your Okta tenant's SSF Well-Known URL, which is in the following format:https://<yourOktaTenant>/.well-known/ssf-configuration
Client ID: Copy and paste the Client ID that you saved in Step 1: Create an API services application in Okta.
Token URL: Enter your Okta tenant's Token URL, which is in the following format:https://<yourOktaTenant>/oauth2/v1/token
Private Key: Copy and paste the private key that you saved in Step 1: Create an API services application in Okta.For example:

-
Click Save.
The external source is created and appears in the Sources tab. The Security Events Service registers the subscription with Okta and sends an initial verification request.
Step 3: Verify the integration
-
Verify the integration in the Security Events Service console:
- In the Sources tab, select the source.
- Click Refresh at the top of the page to refresh the view.
- In the right pane, scroll to the Events section and verify that the initial verification request sent by the Security Events Service was successful. For example:

-
Verify the integration in the Okta Admin console:
- In the Okta Admin Console, select Security > Device Integrations.
- Select the Transmit shared signals tab.
- Verify that the integration is listed with a Stream status of Enabled. For example:

- Verify the stream by selecting Actions > Verify Stream.

- Go to the Security Events Service console, and verify that a new event is received.
Was this page helpful?