Client Certificate-Based Authentication (CBA) is a security mechanism that uses digital certificates to authenticate a user's identity or a device. It is a secure way of authentication compared to Basic authentication since it is not prone to MITM attack. Kerberos authentication requires Certificate Authority and Authentication Agency along with Certificate signing provider.
Step 1: Setup the AD Server
- Configure Certificate Authority on the AD Server.
- In the Certificate Authority add-in (certsrv), create the certificate template with the required rules the certificate templates.
- Create a service user (master user) in the AD users which authenticates on behalf of the user accessing the resource.
- Set the Service Principal Name (SPN) to the user using the
setspncommand. The service user acts as an admin user. - Register the repository server using the
setspncommand.
Step 2: Setup on the Workspace ONE UEM Console
1. Configure the Directory Services
For more information, see Directory Service Settings.
2. Configure Certificate Authorities
For more information, see Certificate Authorities Settings.
3. Enable CBA profile
There are two ways to enable CBA for Content app.
Using CBA with PIV-D
-
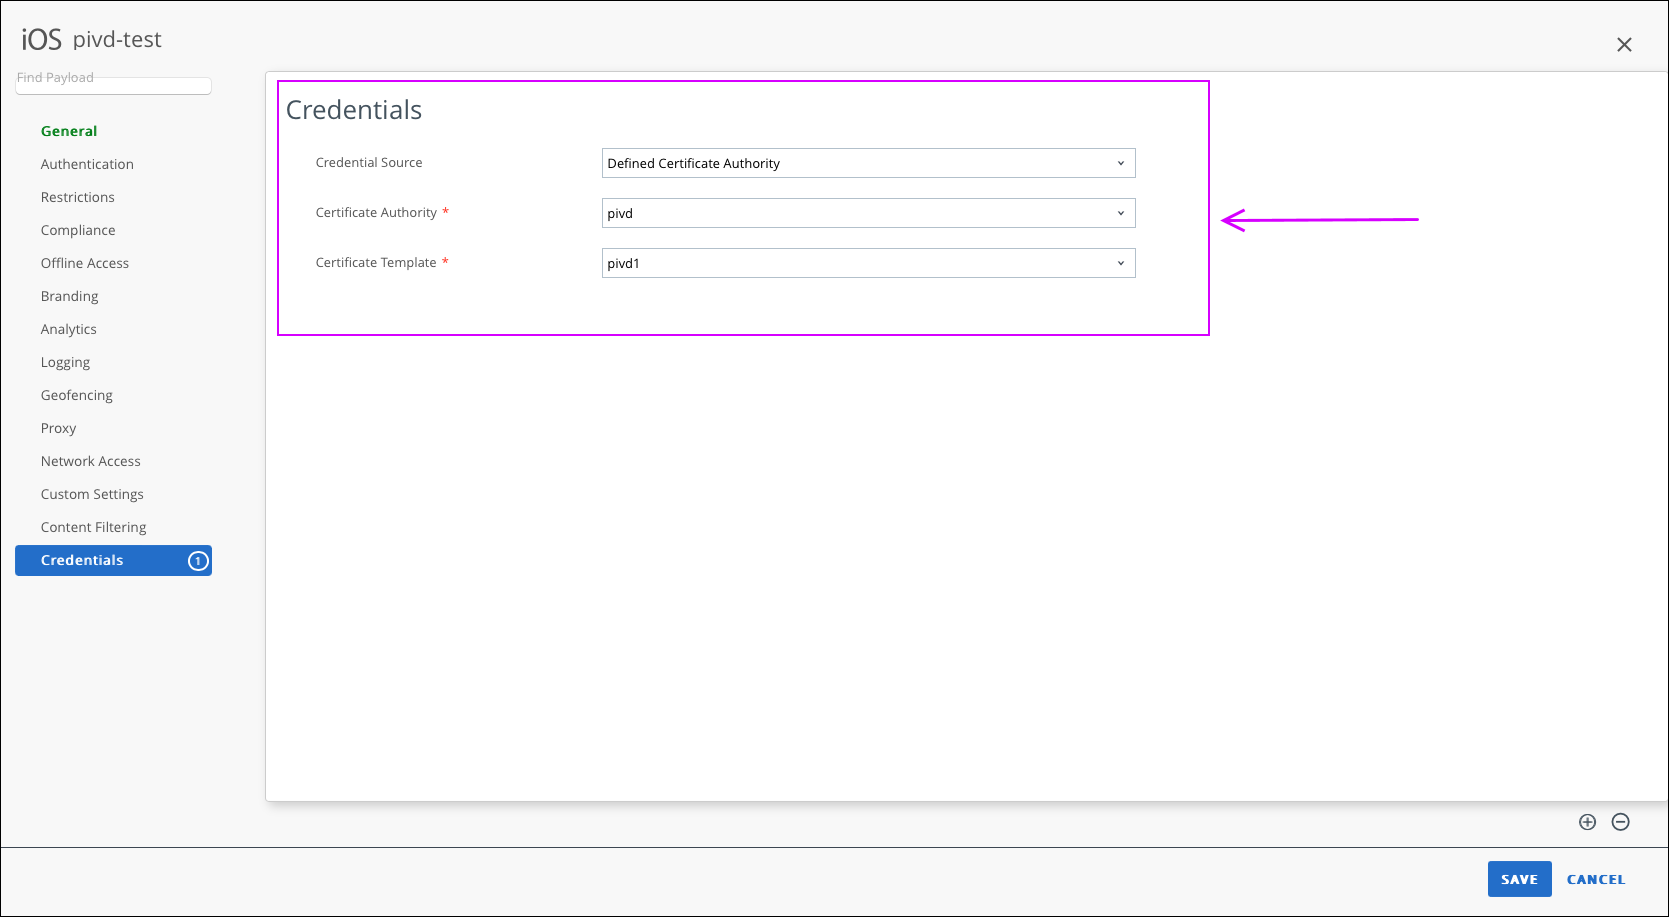
Create Credentials SDK profile with Credential Source as Defined Certificate Authority.
-
Enter the Certificate Authority and Certificate Template.
-
Save the changes.
-
Assign this profile to PIV-D public app.
Using CBA with Integrated Authentication (IA)
-
Go to Apps > Settings and Policies > Settings > Custom Settings.
-
Set the KVP
NotUsePIVDForCBAtotrue. -
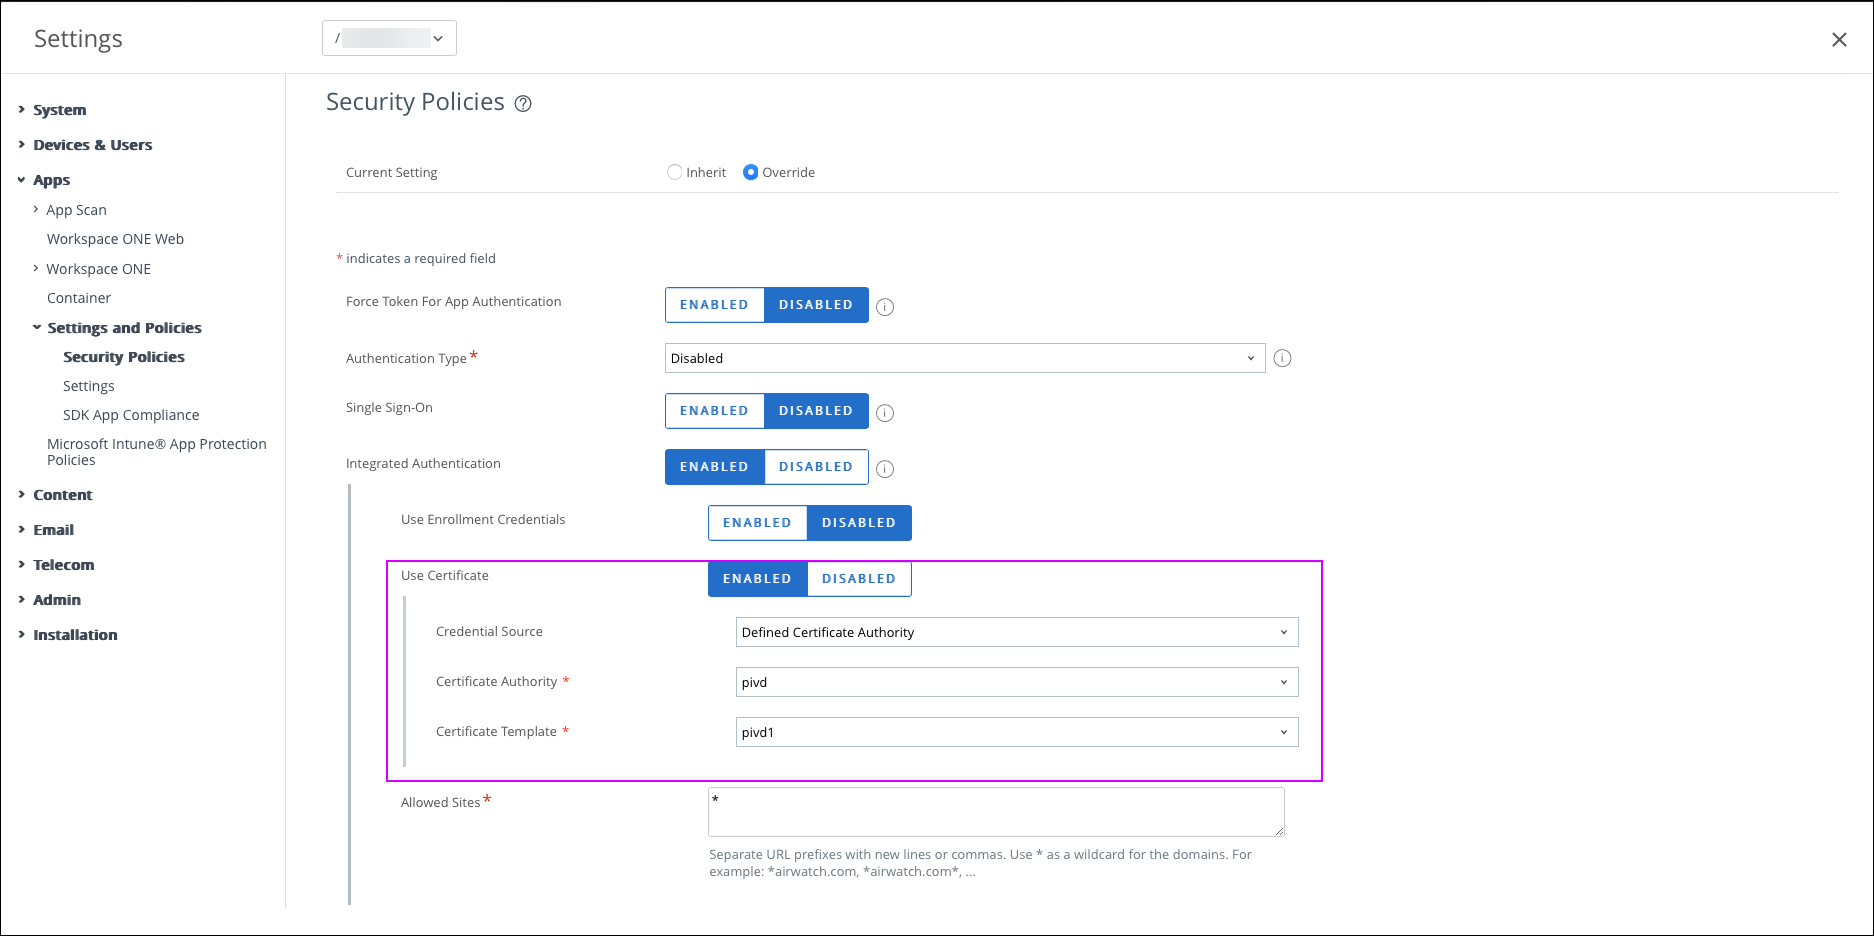
On Security Policies > SDK Settings, enable Integrated Authentication.
-
Add the Credential Source as Defined Certificate Authority and enter the Certificate Authority and Certificate Template.
-
Save the changes.
4. Configure Content Gateway
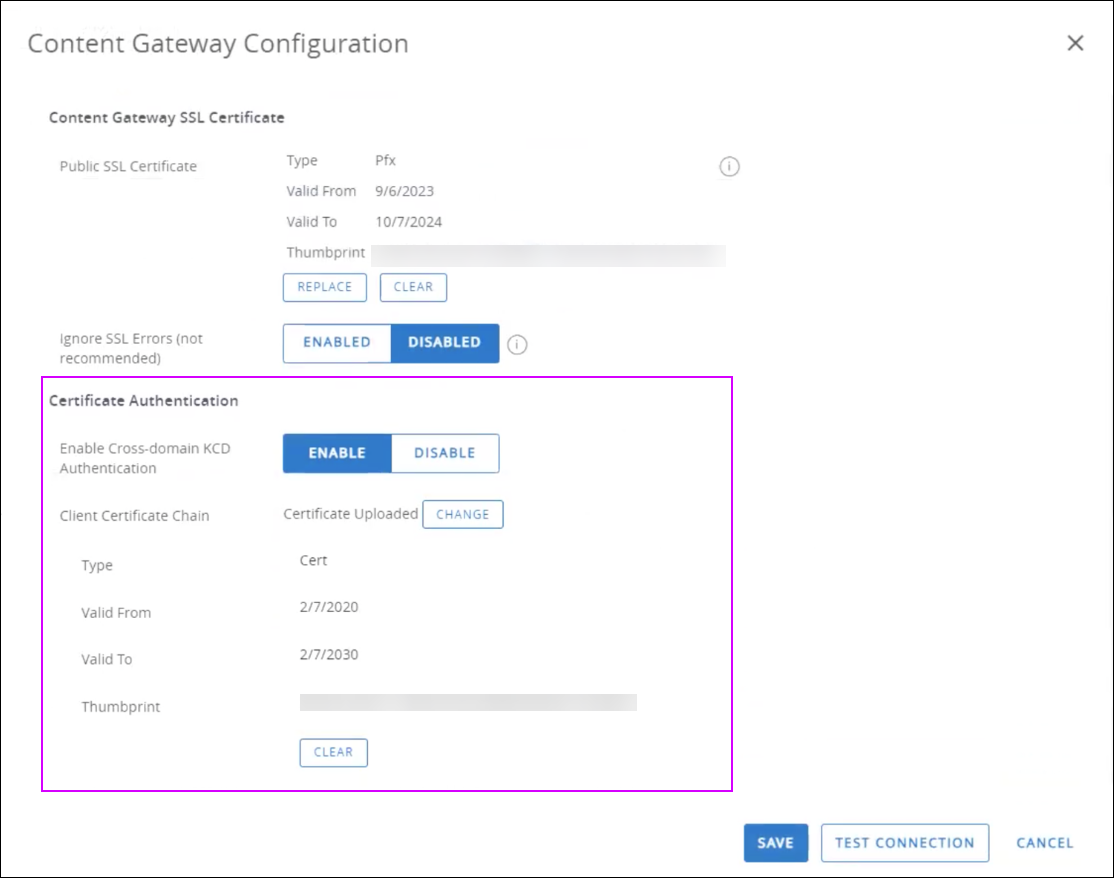
Enable the cross-domain KCD authentication and upload the certificate. For more information, see the description for Certificate Authentication on Content Gateway Settings.
5. Configure the Repository
- Add the repo with the URL. Ensure that the service user has access to the repository.
- Enable the Content Gateway that has the CBA settings enabled.
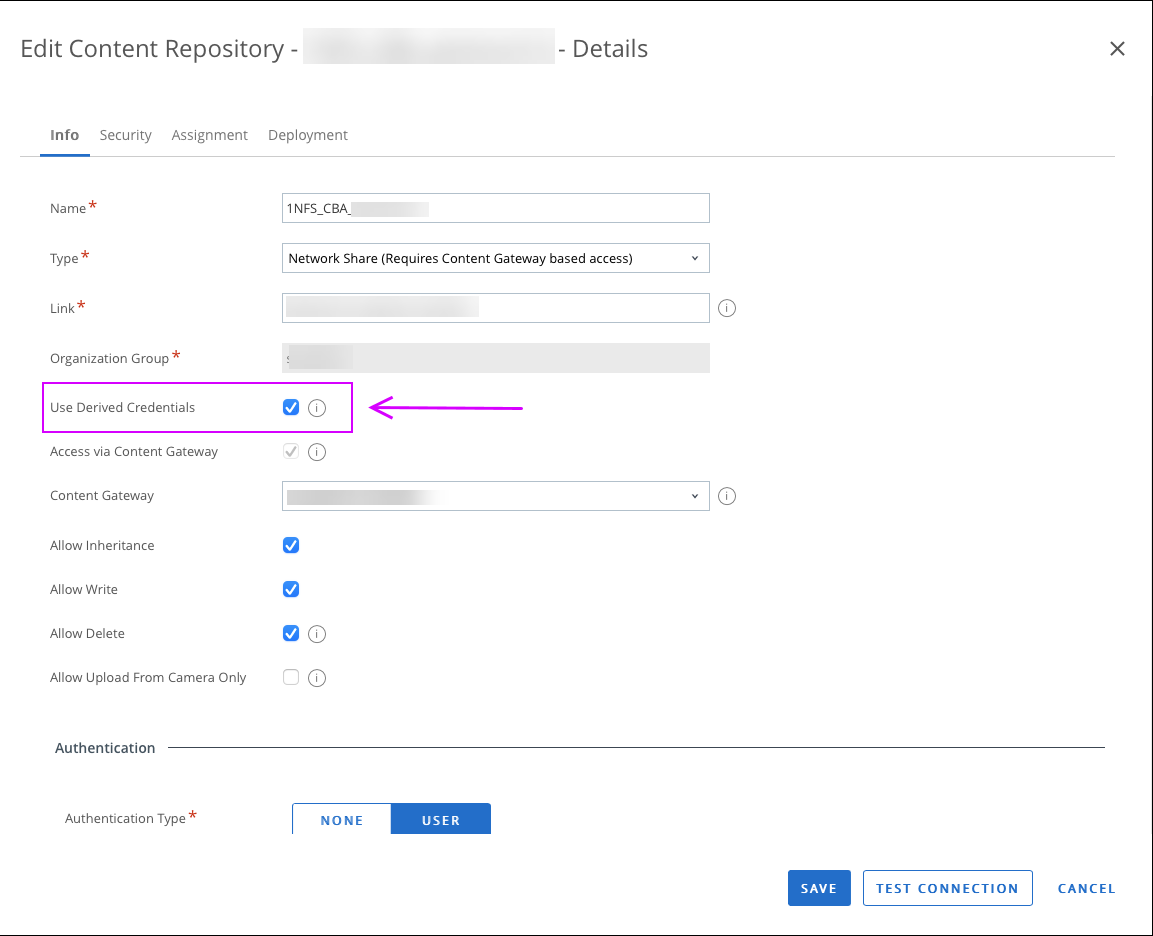
- Enable Use Derived Credentials option.
For example, consider configuring repository for NFS.
- Save the repository.
Step 3: Configure the Device
Option 1: CBA with PIV-D
- Login to PIV-D using Hub or Standalone mode.
- Select the provider and create a PIN.
- Login to the Content app.
- For iOS only: While accessing the repo on Content, you are prompted to enter the PIN created in PIV-D.
- Access the repository.
You can now view/download/upload the files from Content using the repository.
Option 2: CBA with Integrated Authentication (IA)
- Login to the Content app using Hub or Standalone mode.
- Access the repository.
You can now view/download/upload the files from Content using the repository.
Was this page helpful?