Configure VPN Profile for Windows platform (UWP) app to allow devices to connect to internal sites you define through the Omnissa Workspace ONE Tunnel. Using this functionality requires you to configure and install the Per-App Tunnel component as part of your Tunnel installation.
-
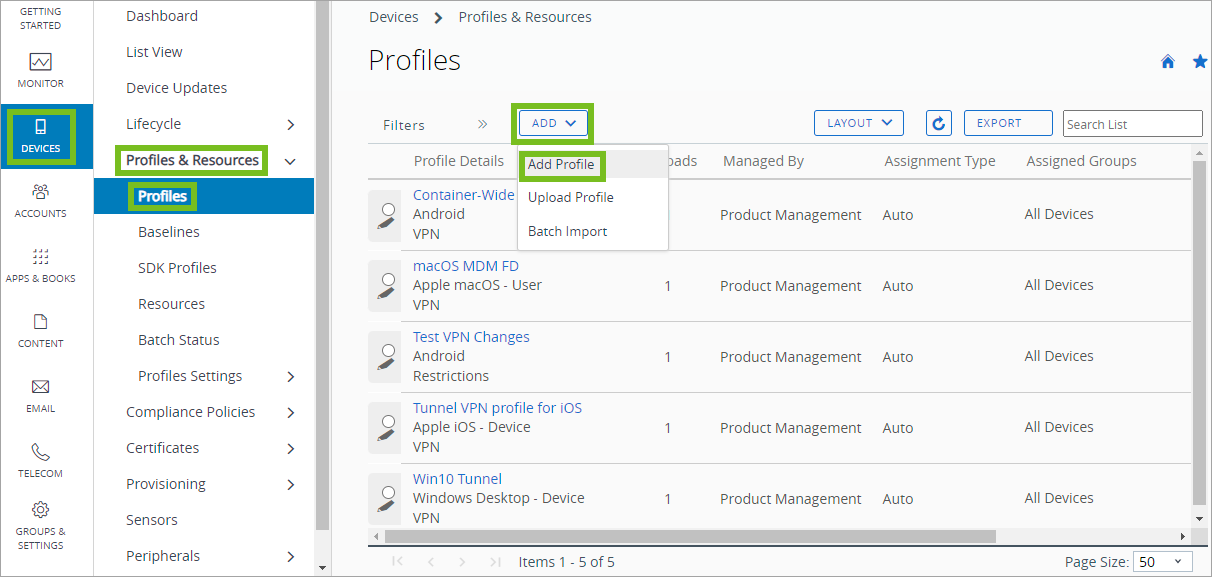
Go to: Devices > Profiles & Resources > Profiles > ADD > ADD Profile > Windows > Windows Desktop > Device Profile.
-
Configure the profile's General settings.
-
Select the VPN payload from the list.
-
Enter a Connection Name and select Workspace ONE Tunnel as the Connection type.
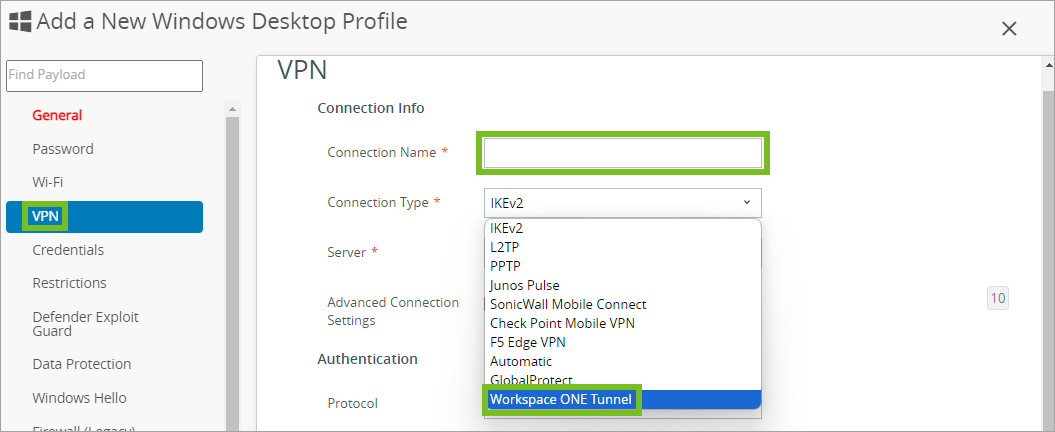
The Server text box populates automatically with your Tunnel component server URL. If this component is not configured, you see a message and hyperlink to the system settings page where you can configure it.
-
Configure the Per App VPN rules.
-
Configure the relevant Policies settings.
Settings Description Always On Enable to force the VPN connection to be always on. VPN Lockdown Enable to force the VPN to always be on, never disconnect, deactivate any network access if the VPN is not connected, and prevent other VPN profiles from connecting on the device. A VPN profile with VPN Lockdown enabled must be deleted before you push a new VPN profile to the device. This feature only displays if the profile is set to Device context. Trusted Network Detection Enter comma separated trusted networks (For example,acme.com, abc.net and so on). Tunnel fails to connect when the device is on a trusted network. DNS Resolution via Tunnel Gateway In the DNS Resolution via Tunnel Gateway section, select Add New Domain to add domains to resolve through the Tunnel server. Any domains added resolve though the Workspace ONE Tunnel server regardless of the app originating the traffic. For example, omnissa.com will resolve through the Tunnel server if you use the allowlisted Chrome or the non-allowlisted Edge apps. -
Select Save & Publish.
Was this page helpful?