本节介绍了在创建任何 Unified Access Gateway 实例之前准备 Azure 环境所需执行的步骤,以及用于将 Unified Access Gateway 3.9 或更高版本部署到 Microsoft Azure 的 PowerShell 命令。
建议的操作系统
| 操作系统 | 建议的操作系统版本 |
|---|---|
| Windows | 10 和 11 |
| Ubuntu | 20.04、22.04、24.04 |
步骤
- 为 PowerShell 部署准备 Windows 或 Ubuntu 客户端
- 准备 Microsoft Azure 环境
- 将 Unified Access Gateway 映像上载到 Microsoft Azure 并创建受管映像
- 为 Microsoft Azure 部署准备 INI 文件
- 使用 uagdeployaz.ps1 PowerShell 命令将 Unified Access Gateway 部署到 Azure
步骤 1:为 PowerShell 部署准备 Windows 或 Ubuntu 客户端
-
使用管理权限打开 PowerShell 命令窗口。
-
运行命令
Install-Module -Name Az -Force。 -
要登录 Azure 环境,请运行命令
connect-AzAccount。
步骤 2:准备 Microsoft Azure 环境
- 在订阅中注册 UseStandardSecurityType 功能。
目前,Unified Access Gateway 支持标准启动方法。Microsoft 建议在订阅中明确注册UseStandardSecurityType功能,以启用标准启动。有关更多信息,请参阅 Microsoft 常见问题解答是否可以为新 VM 部署禁用受信任启动?中提到的备注。
- 检查是否已注册
UseStandardSecurityType功能。
Get-AzProviderFeature -FeatureName UseStandardSecurityType -ProviderNamespace Microsoft.Compute - 如果该功能处于
Unregistered状态,请运行以下命令。
Register-AzProviderFeature -FeatureName UseStandardSecurityType -ProviderNamespace Microsoft.Compute - 等待注册完成。运行以下命令以检查状态。
Get-AzProviderFeature -FeatureName UseStandardSecurityType -ProviderNamespace Microsoft.Compute
状态应显示Registered。 - 注册完成后,刷新资源提供程序。
Register-AzResourceProvider -ProviderNamespace Microsoft.Compute
-
添加一个名为 Azure 资源组的组以在其中部署 Unified Access Gateway 设备。您可以使用 Azure 门户 Web 界面或通过运行以下示例中的 PowerShell 命令来添加:
$resourceGroup="uagrg" $location="uk south" New-AzResourceGroup -Name $resourceGroup -Location $location -
添加一个存储帐户,并在该存储帐户中添加一个名为
virtual-disk的 blob 容器。此容器用于存储 Unified Access Gateway 映像。您可以使用 Azure 门户 Web 界面或通过运行以下示例中的 PowerShell 命令来添加:New-AzStorageAccount -ResourceGroupName $resourceGroup -AccountName uagstore ` -Location $location -SkuName Standard_LRS New-AzRmStorageContainer -Name virtual-disk -ResourceGroupName $resourceGroup ` -StorageAccountName uagstore
4. 创建具有默认子网的虚拟网络。
```
New-AzVirtualNetwork -Name VirtualNetwork -ResourceGroupName $resourceGroup `
-Location $location -AddressPrefix "10.0.0.0/16"
```
5. 或者,虚拟网络可以具有指定的子网,以便可以按以下方式指定这些子网。
```
$frontendSubnet = New-AzVirtualNetworkSubnetConfig -Name frontendSubnet `
-AddressPrefix "10.0.1.0/24"
$backendSubnet = New-AzVirtualNetworkSubnetConfig -Name backendSubnet `
-AddressPrefix "10.0.2.0/24"
New-AzVirtualNetwork -Name VirtualNetwork -ResourceGroupName $resourceGroup `
-Location $location -AddressPrefix "10.0.0.0/16" -Subnet $frontendSubnet,$backendSubnet
```
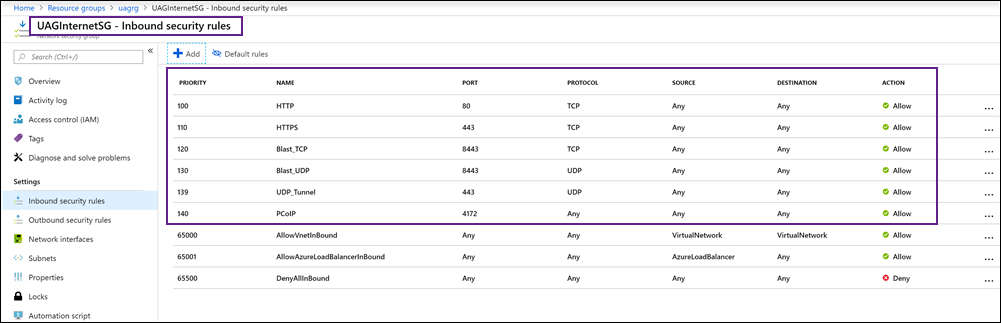
6. 如果要直接从 Internet 访问 Unified Access Gateway 设备,请添加一个名为 UAGInternetSG 的安全组,以控制从 Internet 到每个 Unified Access Gateway 的入站端口访问。您可以使用门户或通过 PowerShell 添加安全组。此安全组可由多个 Unified Access Gateway 设备共享。例如,对于 Horizon 访问,允许以下端口:
-   HTTPS - TCP 443
-   HTTP - TCP 80
-   Blast - TCP 8443
-   Blast/BEAT - UDP 8443
-   UDP 隧道 - UDP 443
-   PCoIP - TCP 和 UDP 4172
-
(可选)运行以下命令之一以添加公共 IP 地址对象。
方案 1:
New-AzRmPublicIpAddress -Name UAG1PublicIP -ResourceGroupName $resourceGroup -AllocationMethod Static -Location $location方案 2:在特定区域上创建 IP
$ipName="UAG1PublicIP"
$alloc="Static"
$sku="Standard"
$zone="3"

New-AzPublicIpAddress -ResourceGroupName $resourceGroup -Name $ipName -Location
$location -AllocationMethod $alloc -Sku $sku -Zone $zone
有关 PowerShell 命令的更多信息,请参阅 Microsoft Azure PowerShell 文档。
结果
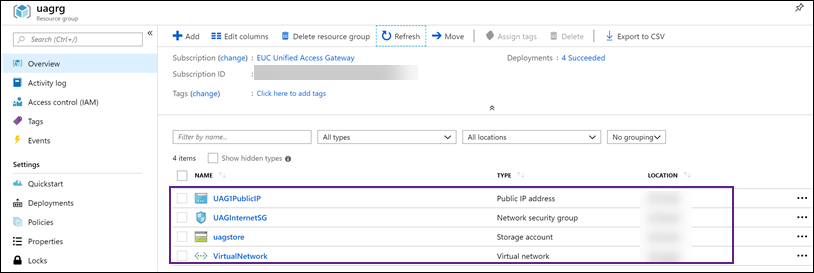
对象将显示在 Azure 门户中。
步骤 3:将 Unified Access Gateway 映像上载到 Microsoft Azure 并创建受管映像
-
从 Omnissa 获取特定 Unified Access Gateway 版本的 Unified Access Gateway
.vhd映像文件。 -
使用以下示例 PowerShell 命令将
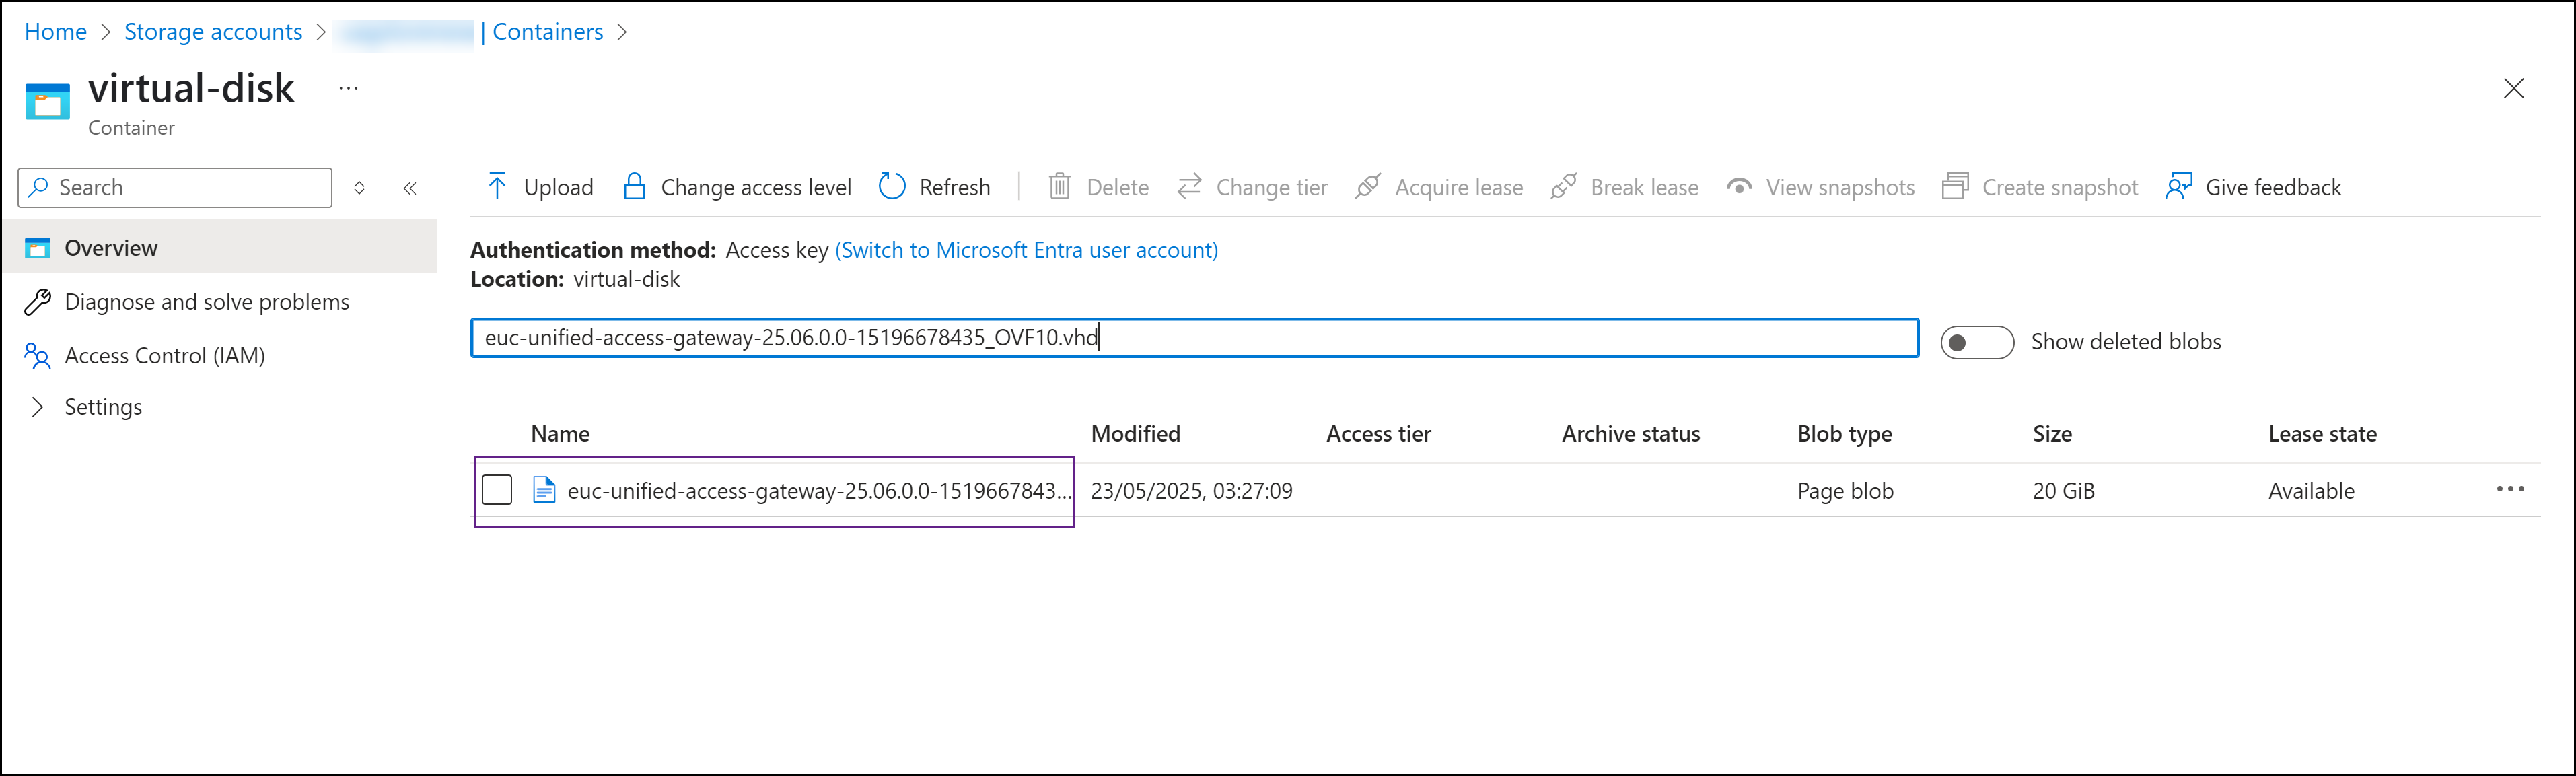
.vhd映像上载到之前创建的virtual-disk容器并创建受管映像。$imageURI = "https://<storage_account_name>.blob.core.windows.net/virtual-disk/euc-unified-access-gateway-25.06.0.0-15196678435_OVF10.vhd"$imagePath = "E:\UAGImages\euc-unified-access-gateway-25.06.0.0-15196678435_OVF10.vhd"$location="<Azure region name>"$imageName= "euc-unified-access-gateway-25.06.0.0-15196678435_OVF10.vhd"Add-AzVhd -ResourceGroupName $resourceGroup -LocalFilePath $imagePath ` -Destination $imageURI -NumberOfUploaderThreads 32$imageConfig = New-AzImageConfig -Location $location $imageConfig = Set-AzImageOsDisk -Image $imageConfig -OsType Linux -OsState Generalized -BlobUri $imageURI $image = New-AzImage -ImageName $imageName -ResourceGroupName $resourceGroup -Image $imageConfig上载的 .vhd 映像将在 virtual-disk 容器中列出。
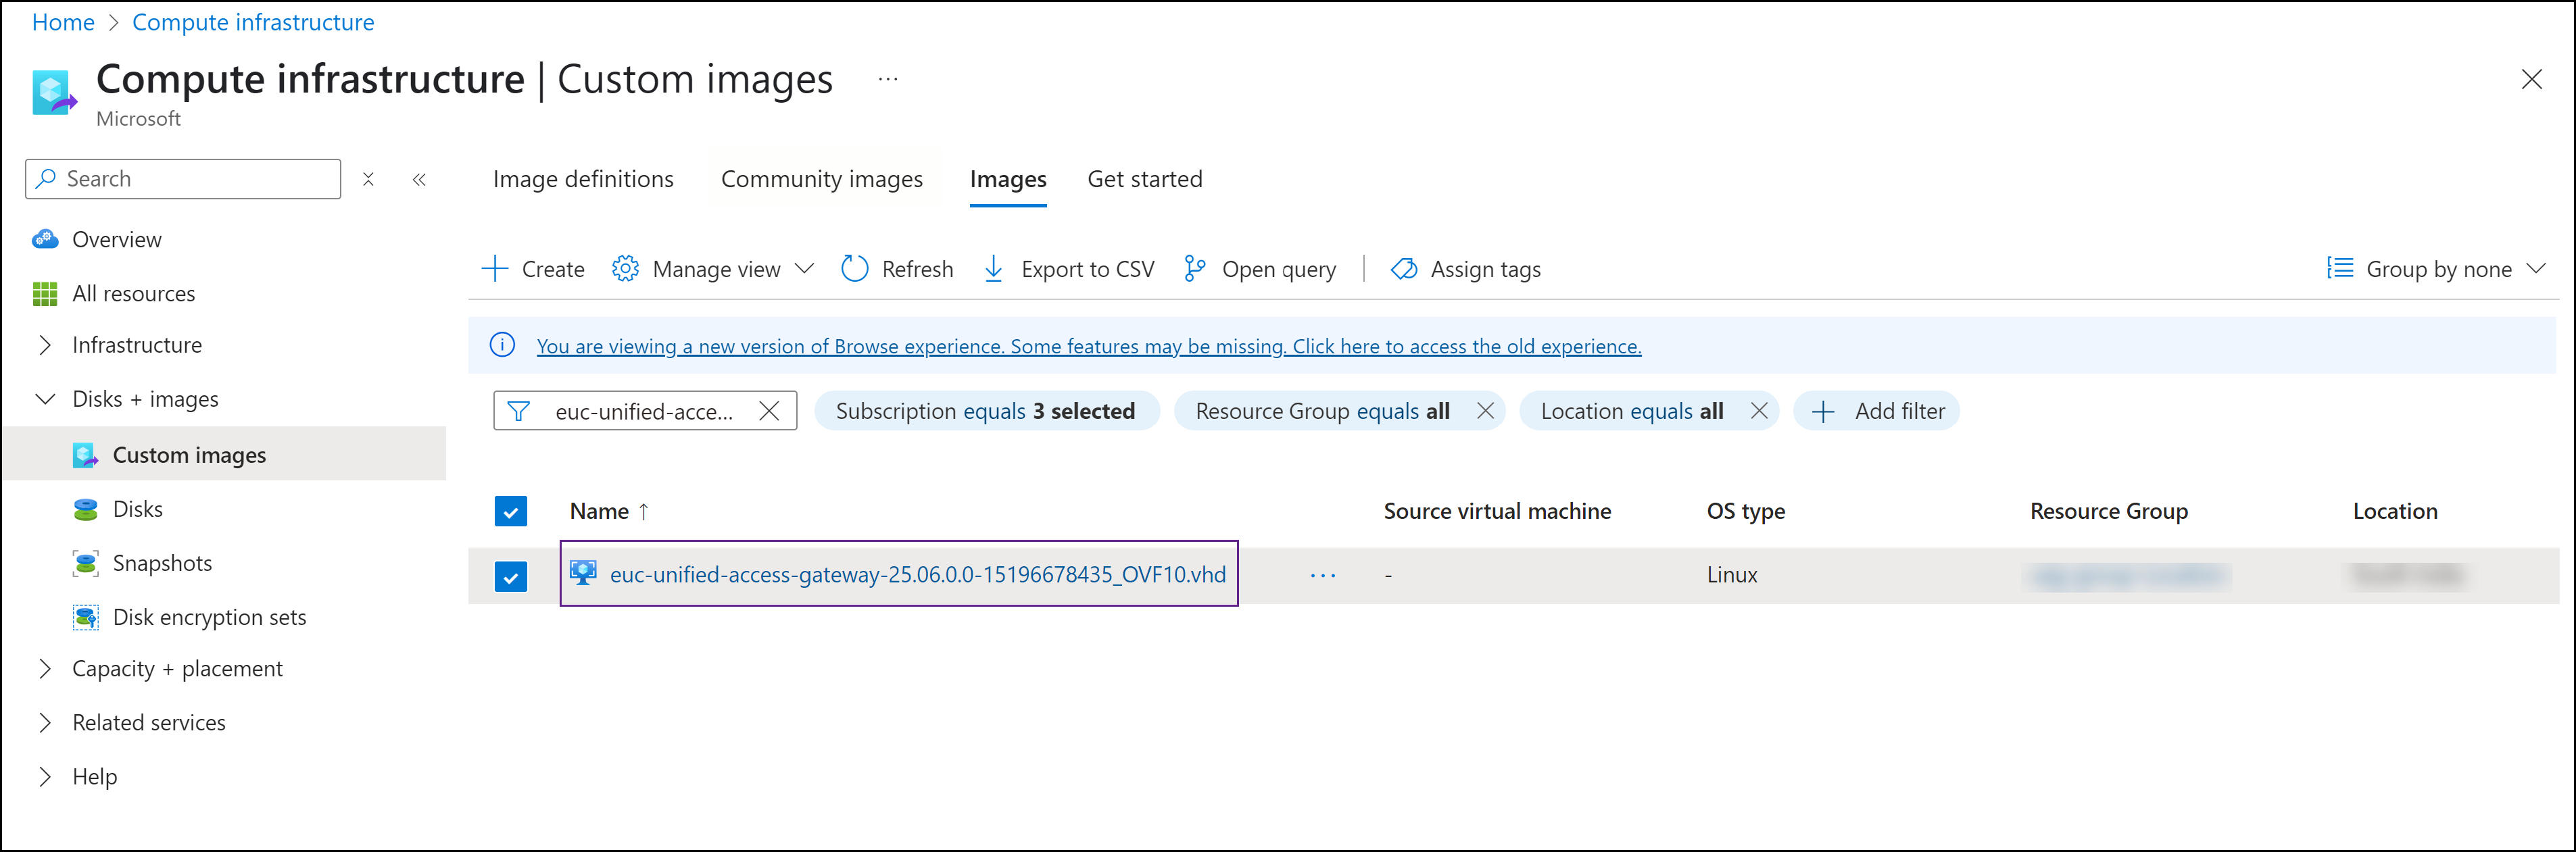
创建的新映像将列出在自定义映像部分中。
步骤 4:为 Microsoft Azure 部署准备 INI 文件
INI 文件的大部分内容与 vSphere、Hyper-V 和 Azure 部署支持的 Unified Access Gateway 标准 INI 设置相同。
对于 Microsoft Azure 部署,不使用“General”节中的以下设置。有关“常规”部分中其他设置的更多信息,请参阅 PowerShell 部署参数。
diskModedsfoldernetInternetnetManagementNetworknetmask0、netmask1、netmask2netBackendNetworksourcetargetip0、defaultGateway、netmask0、ipmode0v6ip0、v6ipprefix0、v6DefaultGateway
对于 Microsoft Azure,有一个名为 [Azure] 的新组,其中包含特定于 Microsoft Azure 部署的所有设置。
Azure 部署特定的设置
| 值 | 示例 | 描述 |
|---|---|---|
location | location=uksouth | Unified Access Gateway 部署的 Azure 位置。 |
networkSecurityGroupName0 | networkSecurityGroupName0=UAGInternetSG | (可选)eth0 网卡的 Azure 网络安全组名称。 |
networkSecurityGroupName1 | networkSecurityGroupName1=UAGManagementSG | (可选)eth1 网卡的 Azure 网络安全组名称。 |
networkSecurityGroupName2 | networkSecurityGroupName2=UAGBackendSG | (可选)eth2 网卡的 Azure 网络安全组名称。 |
publicIPAddressName0 | publicIPAddressName0=UAG1PublicIP0 | (可选)eth0 网卡的 Azure 公共 IP 地址对象名称。 |
publicIPAddressName1 | publicIPAddressName1=UAG1PublicIP1 | (可选)eth1 网卡的 Azure 公共 IP 地址对象名称。 |
publicIPAddressName2 | publicIPAddressName2=UAG1PublicIP2 | (可选)eth2 网卡的 Azure 公共 IP 地址对象名称。 |
resourceGroupName | resourceGroupName=uagrg | Unified Access Gateway 部署的资源组名称。 |
subnetName0 | subnetName0=subneta | (可选)指定的虚拟网络中 eth0 网卡子网的子网名称。如果未设置,它将使用虚拟网络的默认子网。 |
subnetName1 | subnetName1=subnetb | (可选)指定的虚拟网络中 eth1 网卡子网的子网名称。如果未设置,它将使用虚拟网络的默认子网。 |
subnetName2 | subnetName2=subnetc | (可选)指定的虚拟网络中 eth2 网卡子网的子网名称。如果未设置,它将使用虚拟网络的默认子网。 |
subscriptionID | subscriptionID=12345678-1234-1234-1234-123456788901 | Azure 帐户订阅 ID。 |
virtualNetworkName | virtualNetworkName=VirtualNetwork | Azure 虚拟网络名称。 |
vmSize | vmSize=Standard_A2_v2 | Azure 虚拟机映像大小。 |
zone | zone=2 | 位置的区域编号。 |
managedImageName | managedImageName=imageName | Azure 管理的映像名称。 |
vNetResourceGroupName | vNetResourceGroupName=resourceGroupName | (可选)网络资源组名称。如果未提供密钥,则考虑使用 resourceGroupName。 |
nsgResourceGroupName | nsgResourceGroupName=resourceGroupName | (可选)网络安全组的资源组。如果未提供密钥,则考虑使用 resourceGroupName。 |
publicIpAddrResourceGroupName | publicIpAddrResourceGroupName=UAG1PublicIP11 | (可选)资源组的 Azure 网络安全组名称。如果未提供密钥,则考虑使用 resourceGroupName。 |
INI 文件示例
[General]
#name indicates the name of the Azure virtual machine
name=UAG11

#uagName indicates the UAG OS hostname and must be the same as the Azure virtual machine name
uagName=UAG11

deploymentOption=twonic

[Azure]
subscriptionID=12345678-1234-1234-1234-123456788901
resourceGroupName=uagrg
location=uk south
managedImageName=imageName
vmSize=Standard_A2_v2
virtualNetworkName=VirtualNetwork

# eth0 settings
subnetName0=subneta
publicIPAddressName0=UAGPublicIP0
networkSecurityGroupName0=UAGInternetSG

# eth1 settings
subnetName1=subnetb
步骤 5:使用 uagdeployaz.ps1 PowerShell 命令将 Unified Access Gateway 部署到 Azure
-
从 Omnissa Customer Connect 中,转到 Unified Access Gateway (UAG) PowerShell 脚本文件,然后单击立即下载。
zip 文件uagdeploy-xx.xx.x.x-xxxxxxxx将下载到您的本地计算机上。 -
从该 zip 文件中提取文件。确保以下 PowerShell 脚本在您的计算机上可用。
uagdeployaz.ps1和uagdeploy.psm1 -
打开 PowerShell 窗口并运行以下命令。
uagdeployaz.ps1 uag1.ini
此页面对您有帮助吗?