You can use Omnissa Workspace ONE UEM to manage the deployment and maintenance of publicly available mobile applications from various app stores. These apps are available on respective app stores of the platforms such as App Store, Play Store, Windows Store, and so on. Deploying public apps from the different app stores differs slightly between platforms.
Add Public Applications from an App Store
Deploy public applications from the Workspace ONE UEM console to devices with Workspace ONE UEM or the UEM Legacy Catalog (known as the AirWatch Catalog).
-
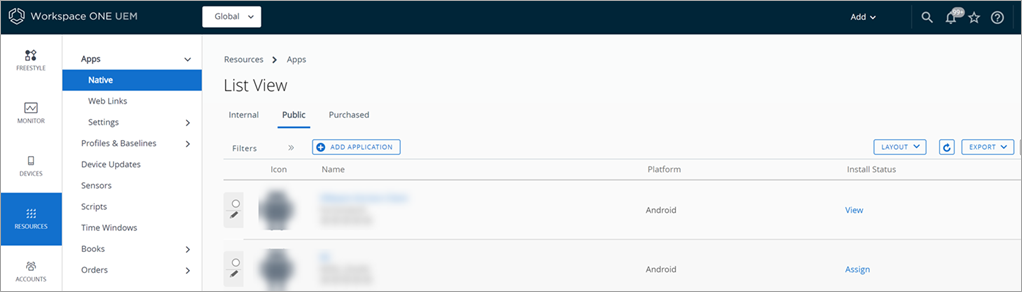
Navigate to Resources > Apps > Native > Public and select Add Application.
-
View the organization group from which the application uploads in Managed By.
-
Select the Platform.
-
Find the application in an app store by entering a search keyword in the Name text box.
-
Select from where the system gets the application, either Search App Store or Enter URL.
Setting Description Search App Store iOS – Searches for the application in the app store.
Windows Desktop and Phone – Searches for the application. If you acquire applications this way and not with the Microsoft Store for Business, the system does not manage them.
Note: Workspace ONE UEM previously managed free, public applications on Windows 10+ devices by integrating with the Microsoft Store for Business. The Microsoft Store for Business reached its End of Life on March 31, 2023. For information about the new method of deploying the Windows app, see the knowledge base article at https://kb.omnissa.com/s/article/90945.
Android: Uses the Google Play Store iFrame search experience and looks for the application in the Play Store. The iFrame allows Google Play to be embedded directly into the Workspace ONE UEM console for a unified mobility management experience
Note: Workspace ONE UEM announced the End of General Support for the Play Store Integration Service on December 15th, 2018. Existing customers who utilize the Play Store Integration Service to search and add public Android apps to the Workspace ONE UEM console are encouraged to set up Android to use the official Play Store search experience. For more information, see End of General Support for the Play Store Integration Service in the https://my.workspaceone.com/ portal.Enter URL Add the application using a URL for the application. If you add applications with this method, the system does not manage them. -
Select Next and Select the desired application from the app store result page.
-
Configure options on the Details tab.
-
Assign a Required Terms of Use for the application on the Terms of Use tab. This setting is optional. Terms of use state specifically how to use the application. They make expectations clear to end users. When the application is pushed to devices, users view the terms of use page that they must accept to use the application. If users do not accept the terms of use, they cannot access the application.
Setting Description Name View the name of the application. View in App Store View the store record for the application where you can download it and get information about it. Categories Use categories to identify the use of the application.
You can configure custom application categories or keep the application's pre-coded category.Supported Models Select all the device models that you want to run this application. Is App Restricted to Silent Install - Android Assign this application to those Android devices that support the Android silent uninstallation feature.
Workspace ONE UEM cannot silently install or uninstall public applications. However, you can control what applications you push to your Android standard devices or your Android enterprise devices. Android enterprise devices support silent activity.Size- iOS View the size of the application for storage. Managed By View the organization group (OG) that the application belongs to in your Workspace ONE UEM OG hierarchy. Rating View the number of stars that represent the popularity of the application in the Workspace ONE UEM console and the UEM Legacy Catalog (known as the AirWatch Catalog). Comments Enter comments that explain the purpose and use of the application for the organization. Default Scheme
iOS
Windows Desktop
Windows PhoneIndicates the URL scheme for supported applications. The application is packaged with the scheme, so the system parses the scheme and displays the value in this text box.
A default scheme offers many integration features for your applications.
Use the scheme to integrate with other platforms and Web applications.
Use the scheme to receive messages from other applications and to initiate specific requests.
Use the scheme to run the Apple iOS applications in the AirWatch Container. -
Select the SDK tab and assign the default or custom SDK Profile and an Application Profile to the application. SDK profiles apply advanced application management features to applications.
-
Select Save & Assign to configure flexible deployment options for the application.
Migrate Your User Group Exceptions to the Flexible Deployment Feature
Public applications now use the flexible deployment feature to assign applications to devices. The flexible deployment system does not include exceptions. In the past, you used exceptions to deploy public applications to special user groups with a specified device ownership type. Flexible deployments replace exceptions and the system gives you additional control of deployments. The feature enables you to assign deployments to smart groups, to assign multiple deployments for an application, and to prioritize those deployments.
Use the migration process to move your user groups configured with assignment exceptions for public applications to the flexible deployment feature.
- Navigate to Resources > Apps > Native > Public.
- Edit an application that you know had exceptions.
- Select Assign.The system displays a warning message prompting you to migrate your exceptions.
- Select Migrate and complete the wizard.
Was this page helpful?