A golden image for a Horizon environment's consumption starts with a base VM. You optimize the base VM's Windows operating system so that settings that are unnecessary or detrimental in a virtual environment are eliminated. This optimized VM makes for a golden image that provides for optimized performance within a Horizon environment.
At a high level, building the optimized Windows image consists of the following steps:

The Windows OS Optimization Tool for Horizon helps with three key steps in this process:
- Optimize
- Generalize
- Finalize
You run the OS Optimization Tool on a VM after you install the required apps and Horizon Agent on the VM.
- The OS Optimization Tool analyzes the base image and displays current values for properties based on the selected template.
- You select the properties that you want applied to the image during the optimization process.
- You then generalize the image by running the Sysprep tool with an answer file (file named
unattend). - In the last step, you finalize the image by cleaning it up.
For a step-by-step walkthrough of the complete process starting from creation of the base Windows VM, see the Manually Creating Optimized Windows Images for Horizon VMs guide.
Note: With Windows 11 24H2 and later, once Windows has been installed, a restart is required to complete the installation of the OS and leave it in a suitable state for optimizing. Failure to perform a restart may result in an error during the Generalize step.
Audit mode
During the initial VM creation step, you install Windows. As part of the Windows installation, you should enter audit mode.
The screen at which you enter audit mode depends on which Windows operating system you are using. For example, some operating systems automatically log in to Windows after a restart operation, while others prompt for user credentials. If prompted, use Administrator for the username and leave the password field blank.
The steps to switch into audit mode will vary for the different Windows operating systems, because different Windows operating systems provide different prompts after the initial installation.
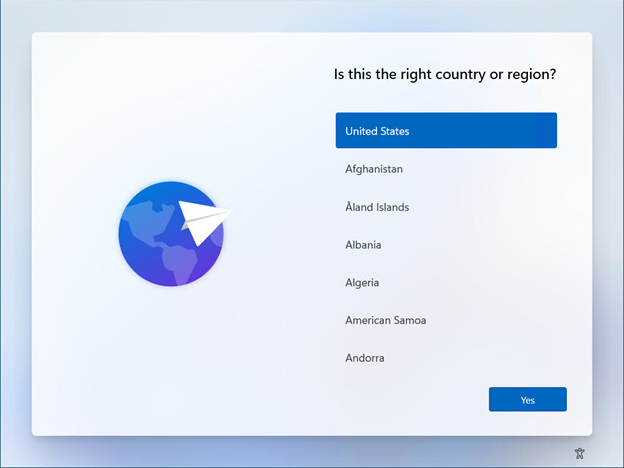
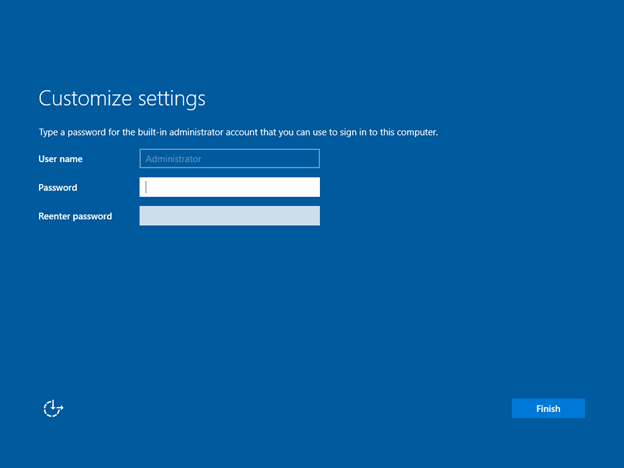
Depending on the Windows operating system, when you are prompted with Is this the right country or region, Get going fast, Personalize, Customize Settings, or Setup Windows, press CTRL+SHIFT+F3 to switch to audit mode.
Example: Windows 11 23H2 switch to audit mode
This example describes the prompts in Windows 11 23H2. After you install Windows 11 23H2, the Is this the right country or region prompt is displayed. When you see this prompt, press CTRL+SHIFT+F3 to switch to audit mode in Windows 11.
Example: Windows Server 2019 switch to audit mode
After you install Windows Server 2019, the Customize Settings prompt is displayed. When you see this prompt, press CTRL+SHIFT+F3 to switch to audit mode in Windows Server.
System preparation tool prompt
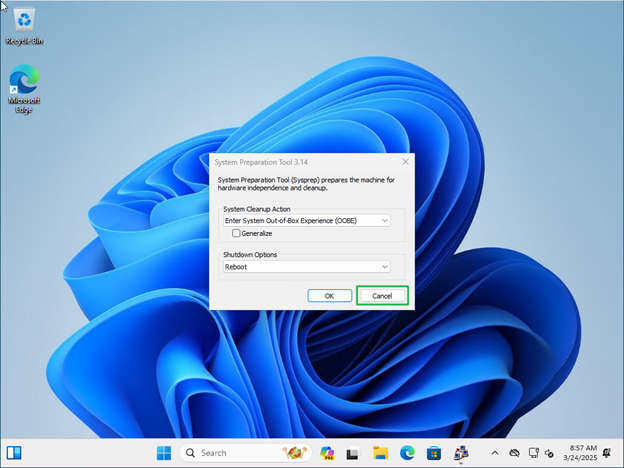
After Windows is in audit mode, it displays a prompt to run the System Preparation Tool (Sysprep) each time Windows is rebooted, and you log on. The OS Optimization Tool for Horizon runs Sysprep as part of the Generalize step.
You should cancel the Sysprep prompt each time it displays, to keep Windows in audit mode. The following screenshot depicts an example of the Sysprep prompt's Cancel button.
Was this page helpful?