This section describes the required steps to prepare your platform for deploying Omnissa Unified Access Gateway to Nutanix AHV.
Pre-requisites to deploy Unified Access Gateway on Nutanix AHV
Ensure that the subnets and clusters are already created on Prism Central. For more information, see Creating a Subnet and Create a cluster.
Recommended Operating Systems for running the PowerShell deployment script
The following table lists the operating systems from which PowerShell based Unified Access Gateway deployment to Nutanix AHV can be executed. This does not refer to the operating system of the Unified Access Gateway appliance itself.
| Operating System | Recommended OS Version |
|---|---|
| Windows | 10 and 11 |
| Ubuntu | 20.04, 22.04, 24.04 |
Minimum Supported Nutanix Software Versions
- Prism Central (PC): 2024.3
- AOS: 7.0
- AHV: 10.0
Step 1. Download and upload the .qcow2 image file
-
Download the Unified Access Gateway (UAG) for vSphere, AWS, Google Cloud and Nutanix file from Omnissa Customer Connect portal.
-
Login to Prism Central and upload the
.qcow2image file. For more information, see Add an image.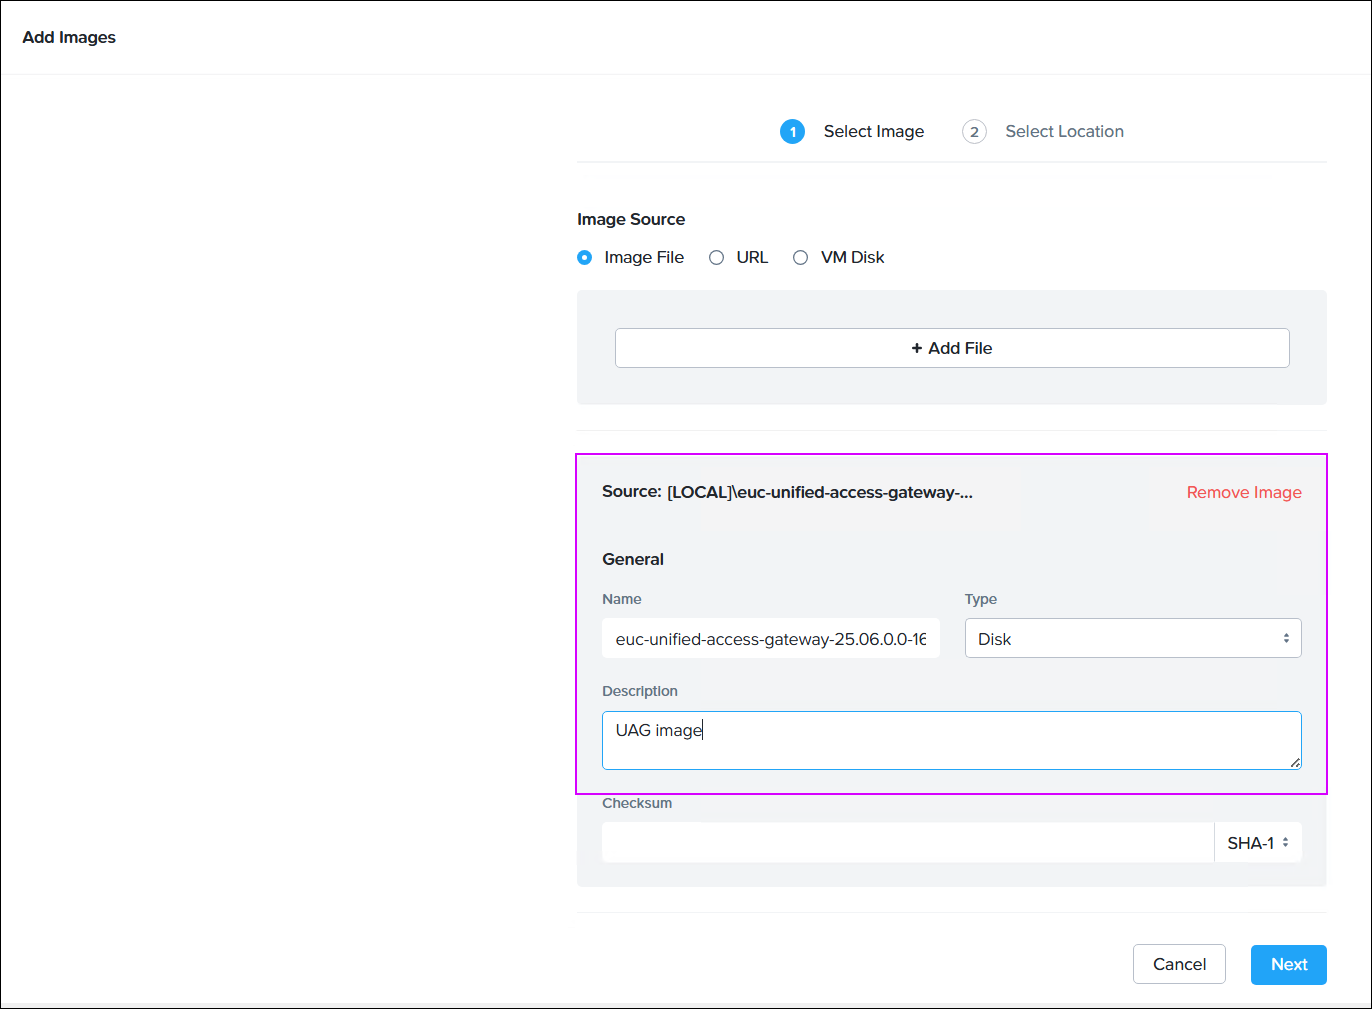
Step 2. Prepare the .ini file
To prepare the .ini file, configure the General settings and create a new section for [Nutanix] and include the parameters mentioned in the following table.
For more information about configuring [General] section parameters, see PowerShell deployment parameters.
Nutanix AHV specific settings
| Value | Example | Description |
|---|---|---|
prismCentralUserName | user1.test1.com | Enter the prism central username. |
prismCentralAddress | prism3.prov1.test1.com | Enter the prism central address. |
cluster | cluster1 | Enter the name of the customer where the virtual machine has to be deployed. |
image | uag-vm | Enter the name of the image. |
subnet0, subnet1, subnet2 | subnet0=subneta, subnet1=subnetb, subnet2=subnetc | Enter the name of the Subnet for eth0 interface. subnet1 and subnet2 are required only during multi NIC deployments. Note: To get the network details on Prism Cental, go to Network & Security > Subnets. |
Example of .ini file
[General]
name=uag-vm
defaultGateway=10.xx.xx.xxx
deploymentOption=twonic
requestTimeoutMsec=10000
snmpEnabled=false
sshEnabled=true
sshKeyAccessEnabled=true
sshPasswordAccessEnabled=true
DNS=10.12.120.xxx


[Nutanix]
prismCentralUserName=user1.test1.com
prismCentralAddress=prism3.prov1.test1.com
cluster=cluster1
image=euc-unified-access-gateway-26.06.0.0-14396117935-system.qcow2
subnet0=subneta
subnet1=subnetb
Step 3. Deploy Unified Access Gateway to Nutanix AHV
You can deploy Unified Access Gateway to Nutanix AHV by using the uagdeployntnx.ps1 PowerShell command.
-
Download Unified Access Gateway (UAG) PowerShell Scripts file from the Omnissa Customer Connect portal.
A zip fileuagdeploy-xx.xx.x.x-xxxxxxxxis downloaded on your local machine. -
Extract the files from the zip file. Ensure that the following PowerShell script is available on your machine.
uagdeployntnx.ps1 -
Open PowerShell window and run the following command:
.\uagdeployntnx.ps1 Nutanix.ini
4. Enter the root user password, admin password, and Prism Central password when prompted. For more information about the root user and admin password requirements, see Password requirements.
Alternatively, you can use non-interactive mode to deploy. See Non-Interactive mode deployment parameters.
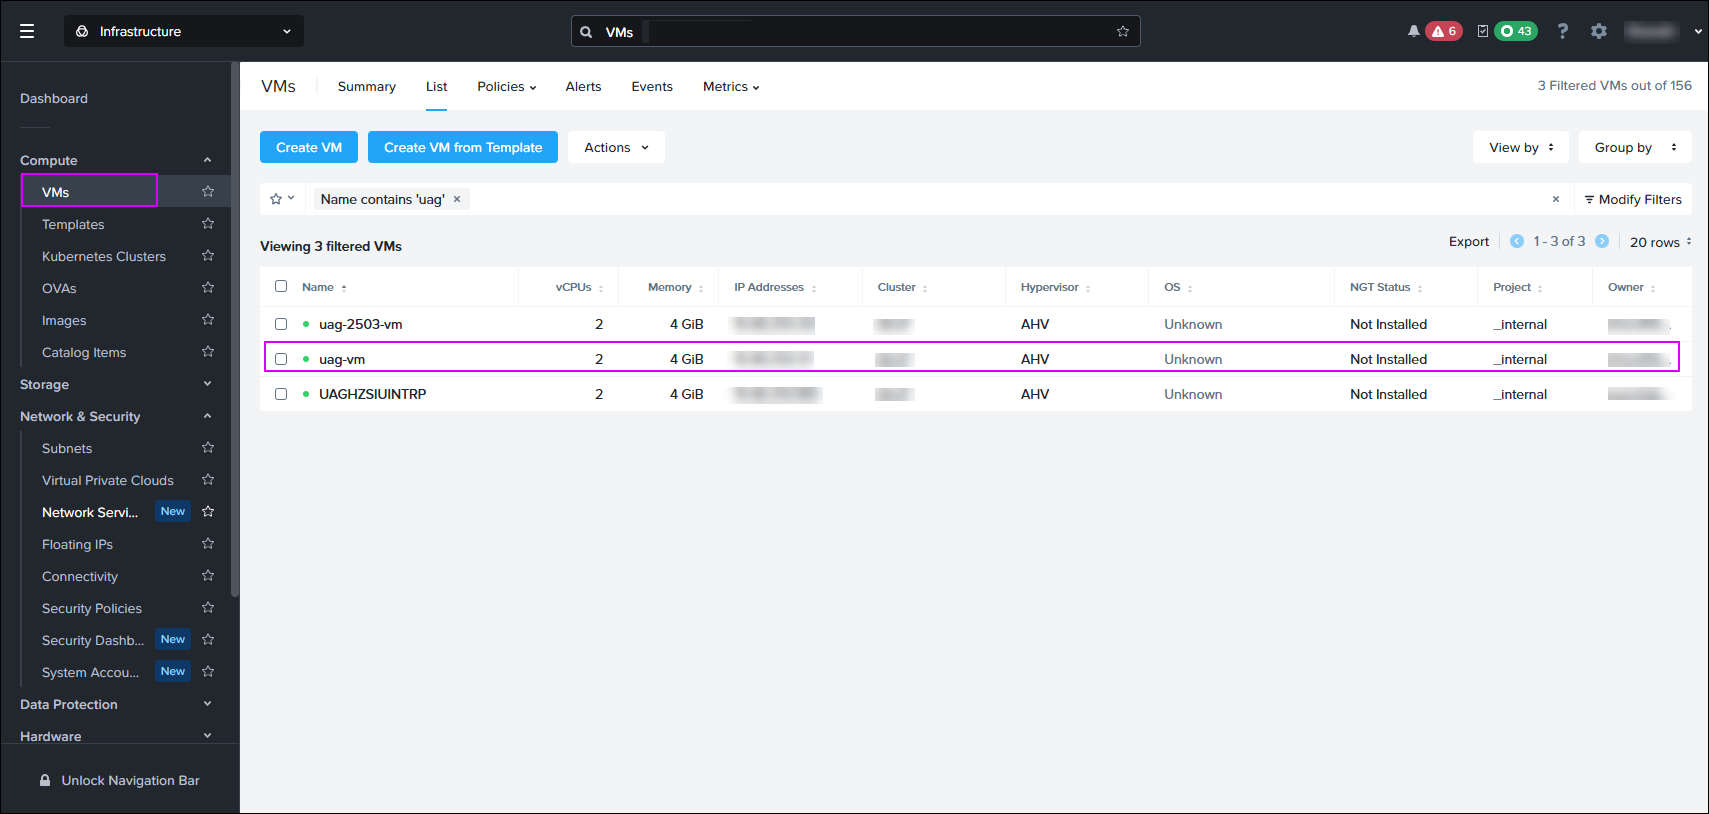
After successful deployment, virtual machine is created on Prism Central.
What to do next
- Using the IP information, login to the virtual machine to ensure all services are working as expected.
- Login to the admin UI with
https://uag-ip:9443and configure the settings based on your requirement. See Configure Horizon Settings.
Was this page helpful?