Use the Cloud Admin Hub, a part of Omnissa Connect, to customize the fully qualified domain name (FQDN) for your Omnissa Access tenant so that it is recognizable and represents your organization.
Your Access service URL represents your organization's FQDN. Users enter this FQDN in the browser to access apps in the Omnissa Workspace ONE Intelligent Hub app catalog. Many companies want the service URL to also represent their branding. When Access is provisioned, information received during the order is used to configure the service URL. Cloud Admin Hub provides an opportunity to customize the tenant name portion of the service URL.
Updating during onboarding
Updating the tenant name of the Access service URL during the onboarding process is preferable because this tenant is not yet configured. It is easier for the Cloud Admin Hub to create a new tenant with the customized URL without risking possible loss of data.
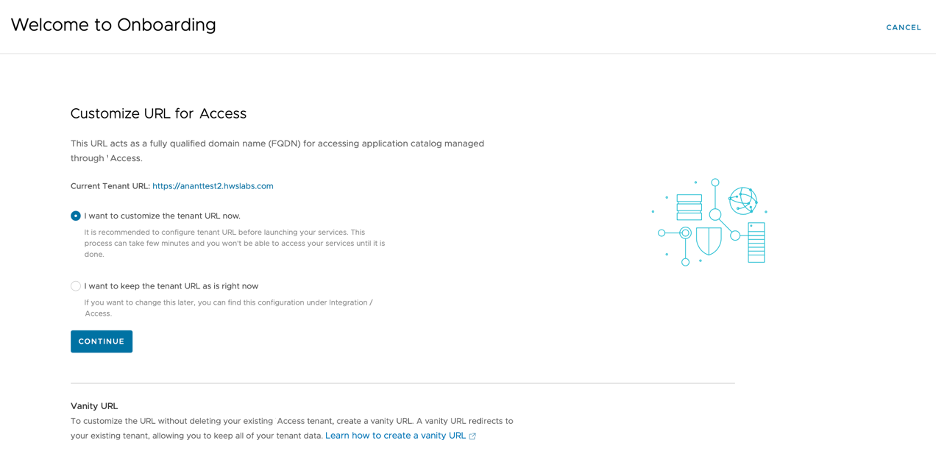
During the onboarding process in the Cloud Admin Hub, the Cloud Admin Hub presents the option to change the tenant name for your Access service URL.
Update procedure
- Select I want to customize the tenant URL now.
- You can select to do this operation later, but the Cloud Admin Hub prompts you to confirm your decision to customize the tenant URL later.
- If you do decide to customize the name later, make this change before you start using your Access tenant.
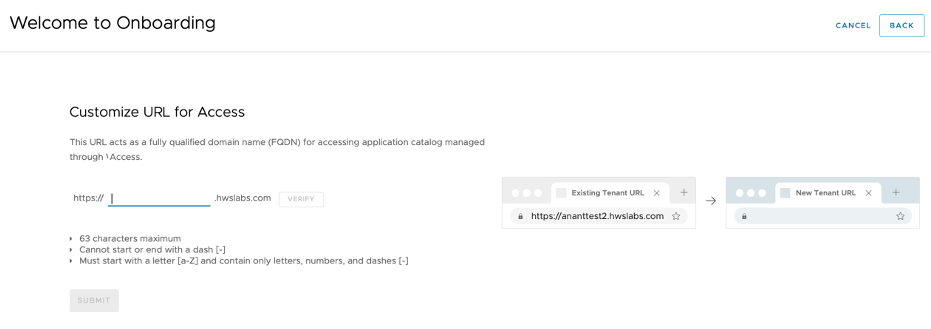
- Enter your preferred tenant name in the text field. Follow the rules provided to ensure your chosen name is valid.
- Select Verify.
- The system verifies the name to make sure it meets all the conditions. The system also verifies that the name is not already in use.
- Tenant names must be unique.
- If verification fails, you can reenter a different name.
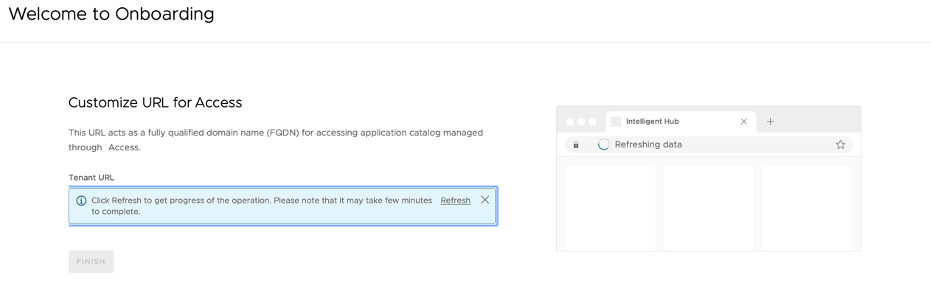
- After successful verification, submit your preferred name.
- The operation takes a minute or two to complete. You can refresh the page to see the status of the operation.
- To complete the process, the Cloud Admin Hub displays a message that the submission was successful and you can now access your services.
Updating after onboarding
Customize your Access service URL during onboarding. However, if you cannot customize the URL during onboarding, it is possible to update it after onboarding.
Important: If you customize your tenant name after onboarding, customize it before you start configuring your Access tenant. If the Cloud Admin Hub detects users on a Access tenant URL, it deactivates the changing process until you delete the active users.
Update alternative - vanity URL
If you previously configured your Access tenant and are using it actively, use a vanity URL. Create a 301 permanent record to redirect traffic to your Access tenant instead of going through a tenant update process.
Update procedure
Follow the steps to customize your Access tenant name after onboarding but before configuring the Access tenant.
- In the Cloud Admin Hub, go to Integrations > Data Sources > Access.
- Select to View on the Access card.
- Select the URL Configuration tab.
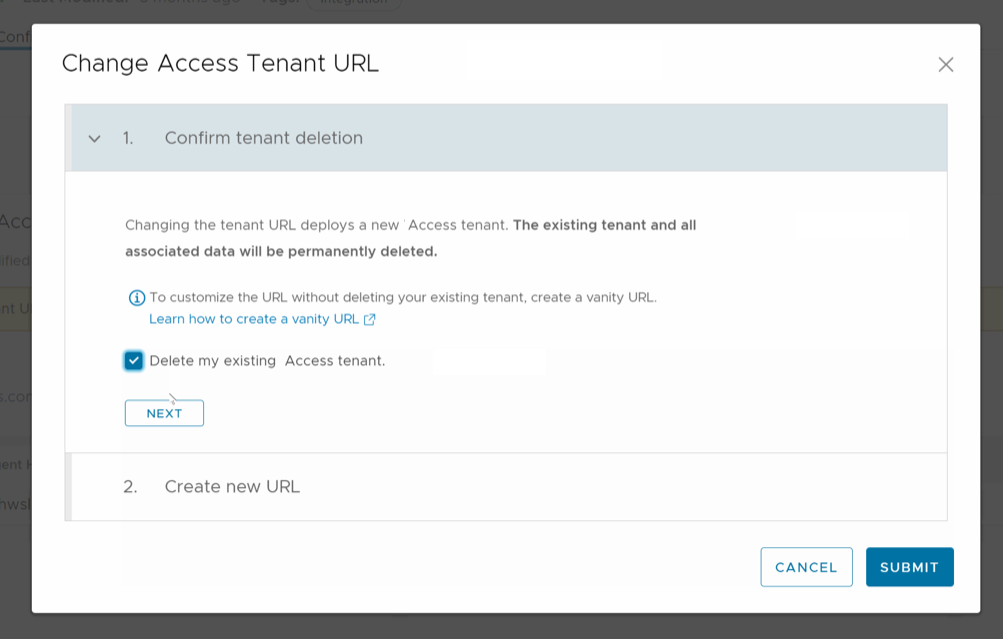
- Changing the Access URL is a destructive process. It requires deleting the existing tenant and deploying a new one.
- If the Cloud Admin Hub identifies activity on the tenant, the Change menu item is inaccessible. Follow the instructions in the message if you want to continue to rename your tenant.
- Select Delete All Users in the informational message. This option opens another browser tab and takes you to the users area where you can delete users.
- Go back to the URL Configuration tab and select Refresh in the informational message. The console now activates the Change menu item.
- Select the Change menu item.
- Acknowledge that you understand that the Cloud Admin Hub deletes the existing tenant so it can deploy the new one.
- Enter your preferred tenant name in the text field. Follow the rules provided on this page to ensure your chosen name is valid.
- Select Verify.
- The system verifies the name to make sure it meets all the conditions. The system also verifies that the name is not already in use.
- Tenant names must be unique.
- If verification fails, you can reenter a different name.
- After successful verification, submit your preferred name.
- The operation takes a minute or two to complete. Refresh the page to see the status of the operation.
- To complete the process, the Cloud Admin Hub displays a message that submission was successful.
- If you see an error message, contact Global Services for help.
Was this page helpful?