Roles Based Access Control (RBAC) for Workspace ONE is a feature you configure through the Cloud Admin Hub, a component of Omnissa Connect. Use this feature to invite admins to work in Workspace ONE, to assign roles to admins and admin groups, and to manage admins and their roles across your Omnissa services from a single dashboard.
Limitations
- Presently, the feature supports Omnissa Workspace ONE UEM and Omnissa Intelligence role assignments. We are working to add Omnissa Access and Horizon services roles soon.
- If you edit an admin’s roles in Workspace ONE UEM, the role changes do not transfer to Cloud Admin Hub. The admin’s role assignments in Cloud Admin Hub override any role changes in the UEM service when the admin logs in to UEM.
Core capabilities
Find the RBAC feature in the Cloud Admin Hub at Accounts > Administrators where you can manage your Workspace ONE admin’s role assignments from a single console.
- Add and manage Workspace ONE admins by searching for users, if they are federated.
- If admins are not federated, you can add them using their email addresses.
- Admin groups can be searched or created in Cloud Services before assigning roles.
- Assign predefined (default) and custom roles created and managed in Omnissa services.
- Currently, Intelligence and Workspace ONE UEM services are supported.
- Alternately, you can assign admins the Basic or Admin roles. With this assignment, admins are given privileges equivalent to read-only or super admin access to all Omnissa services.
- You can edit or revoke admins and admin group role assignments.
Note: The service roles displayed in the Cloud Admin Hub are created, owned, and managed by the Omnissa services like Intelligence or UEM. So, all roles, whether pre defined or custom, are displayed in the service role list.
Requirements
You must meet these requirements to configure and manage RBAC in Cloud Admin Hub.
- You must be a Cloud Services organization owner to add, edit, and deactivate admins and groups and their roles.
- You can only assign admin roles that are native to the supported, integrated system. For example, if your Workspace ONE UEM service is integrated with Cloud Services, you can only assign admin roles that are available in Workspace ONE UEM.
- If you want to use admin groups, you must create these groups (custom groups) or federate these groups (enterprise groups) in Cloud Services.
Supported integrations for RBAC
You can assign and manage RBAC roles for the listed Omnissa products. More product integrations are in development.
- Intelligence: Find explanations of Intelligence admin roles in RBAC role descriptions.
- Workspace ONE UEM: Find Workspace ONE UEM admin roles explained in the topic Roles-based Access. Find available admin roles in the Workspace ONE UEM console at Accounts > Administrators > Admins Roles.
Quick actions
Cloud Admin Hub offers two quick actions called Platform Roles. There are two platform roles, the Basic Role and the Admin Role.
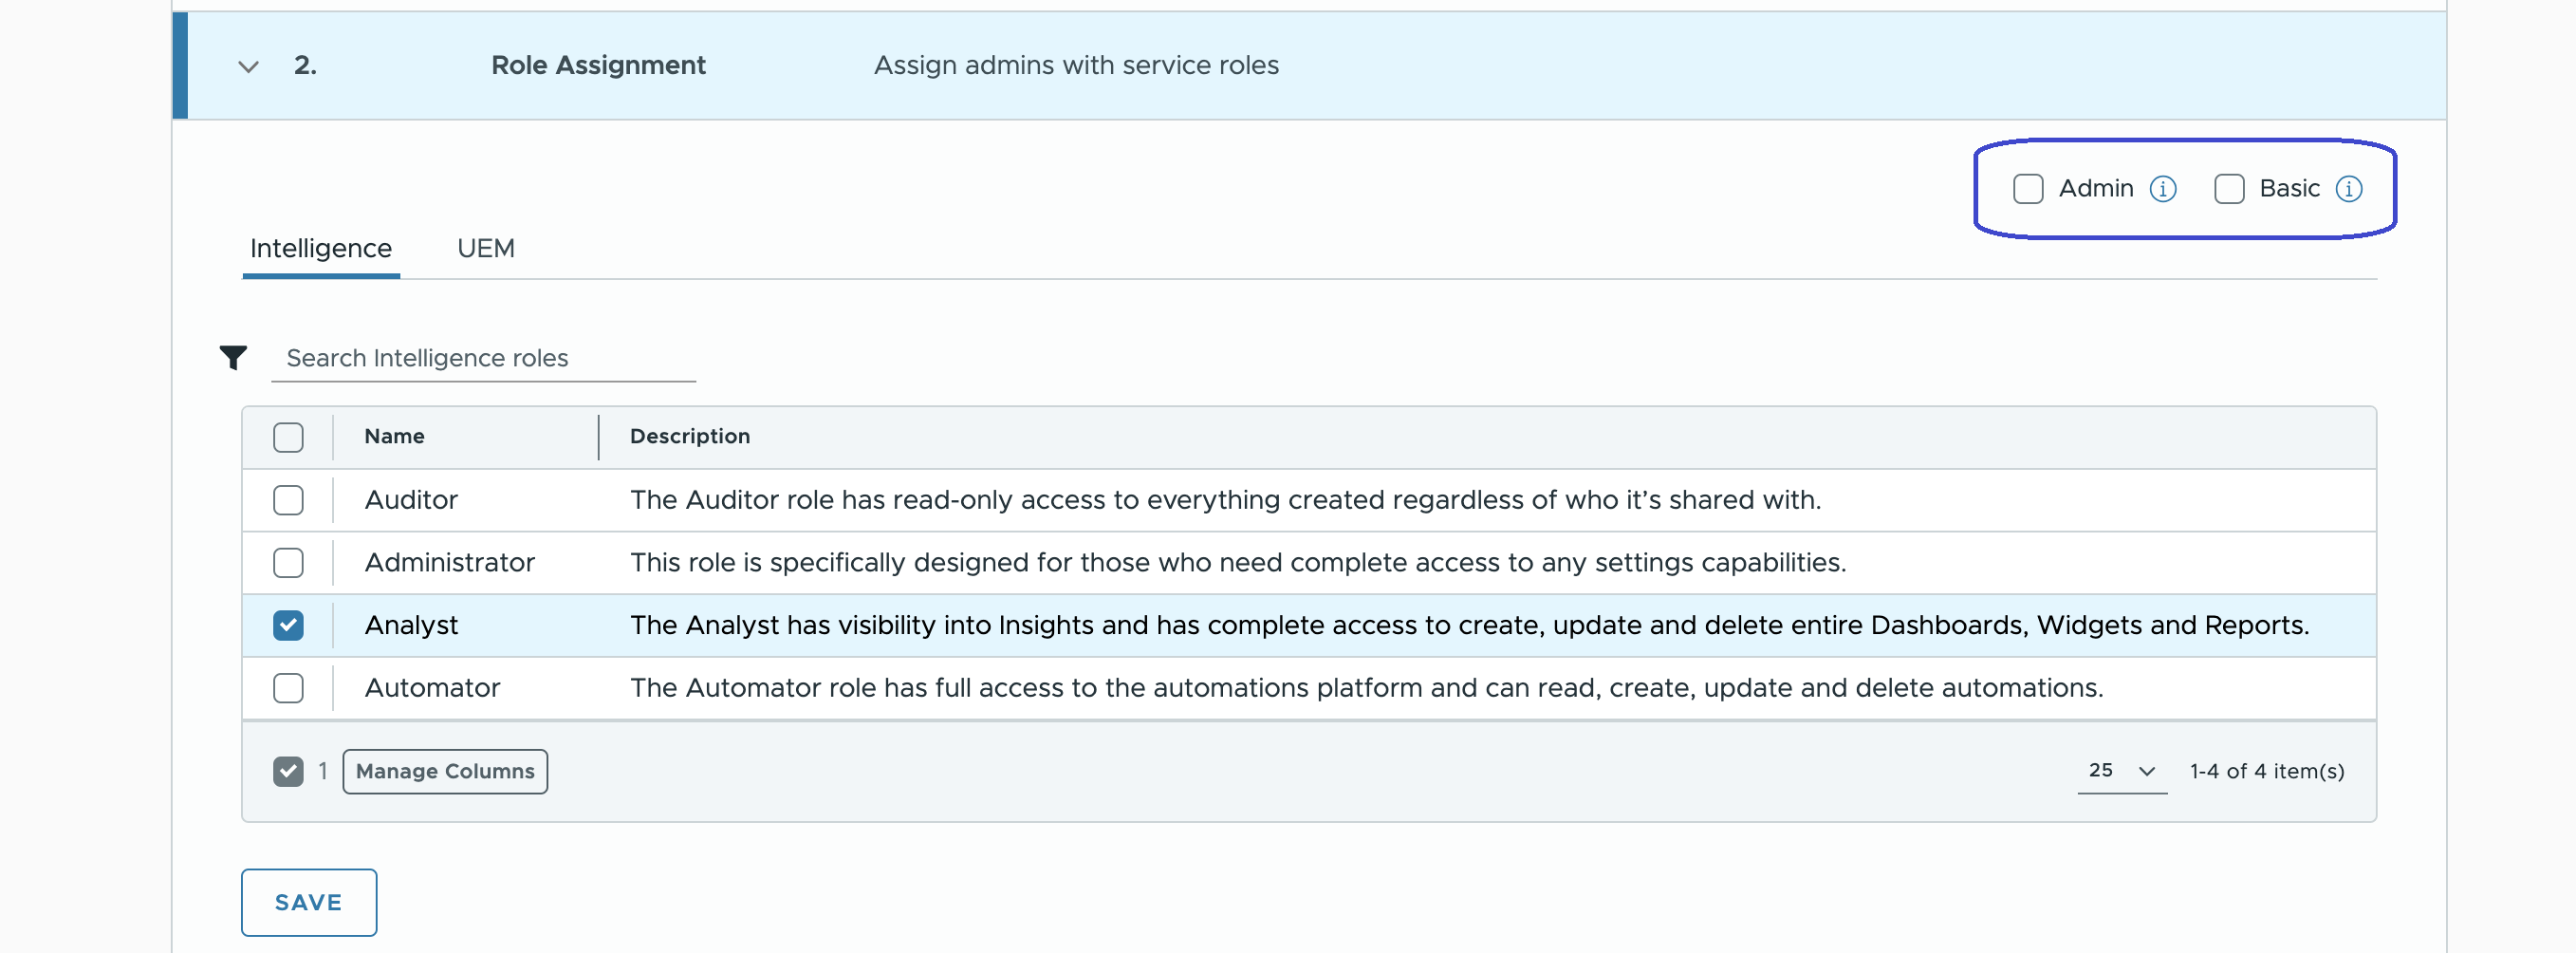
- Selecting Admin gives privileges equivalent to a super admin access across your subscribed Omnissa services.
- Selecting Basic gives privileges equivalent to read-only access across your subscribed Omnissa services.
Note: Both Basic and Admin roles provide access across all Omnissa services. For specific assignments, select one or more roles from a single service or multiple services. If the Basic or Admin role is selected, you cannot make specific role assignments.
Selecting organization groups for admin roles
When you add admins or admin groups, the wizard sometimes prompts you to select an organization group. This behavior depends on the product from which the system pulls the admin role. Some products use organizations to group users and resources. You can select single or multiple organization groups.
The Cloud Admin Hub pulls admin roles from the selected organization groups and displays them in the UI for assignment.
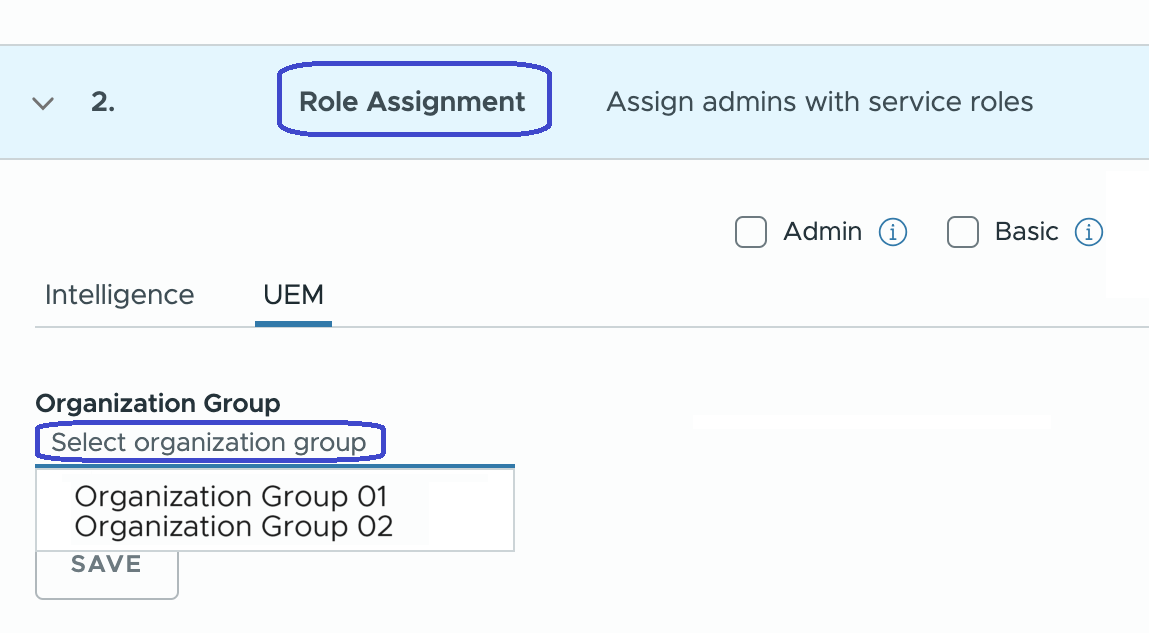
For example, if you are adding an admin that is managed in your Workspace ONE UEM service, the wizard asks you to select one or more organization groups. The system pulls all admin roles, custom or default, configured in that organization group so that you can select them for assignment.
How do you add an admin and assign them admin roles?
Use the Administrators page in Cloud Admin Hub to add admins and assign them roles.
- Launch your Workspace ONE Cloud service to access your Cloud Admin Hub.
- Go to Accounts > Administrators > Admins (tab) and select Add.
- In the Add New Administrators wizard, configure the Find Admins section.
- Search for users by their first name, last name, or email address.
The results include users already added to your Cloud Services.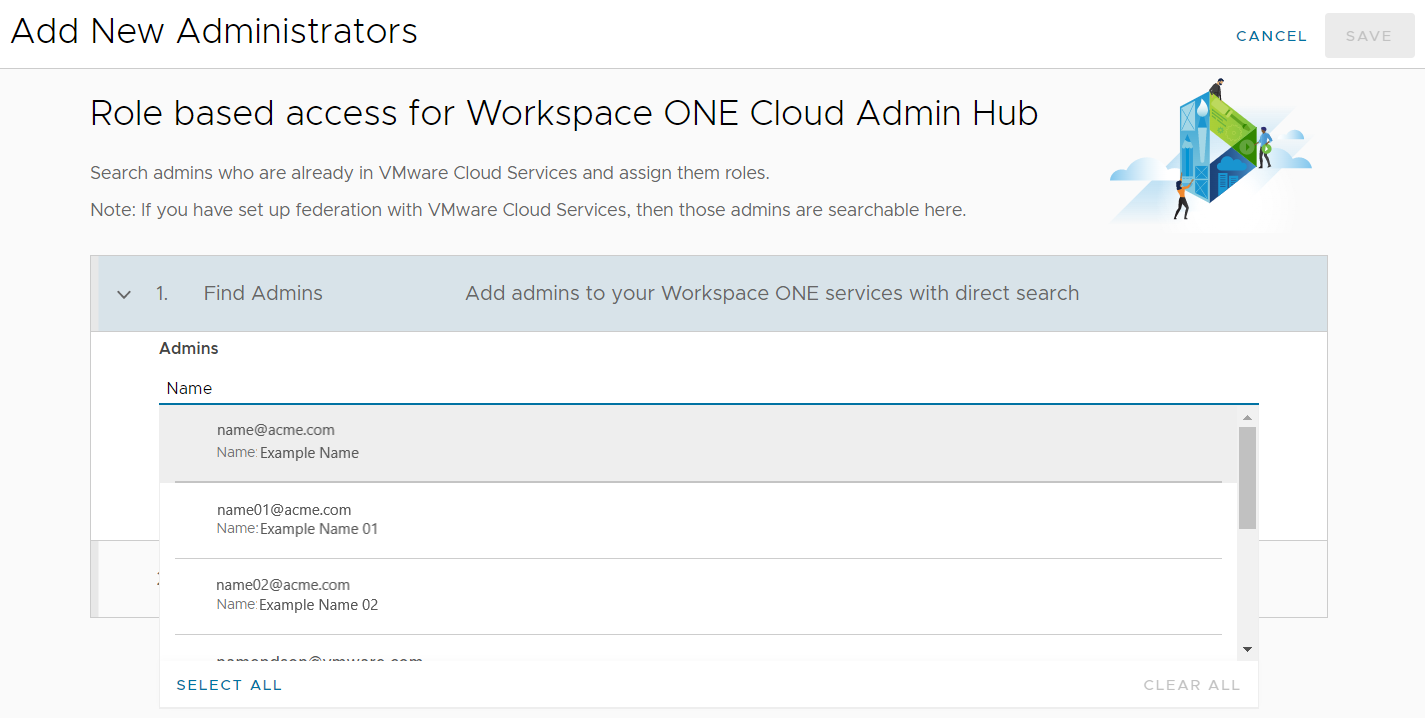
- Select one or several users and continue through the wizard.
- Search for users by their first name, last name, or email address.
- In the Role Assignment section, assign one or several roles to the admin.
- Cloud Admin Hub displays roles that it has pulled from supported services.
- Some roles require you to select at least one organization group. The wizard prompts for this selection if the supported service uses organization groups to manage users and other resources.
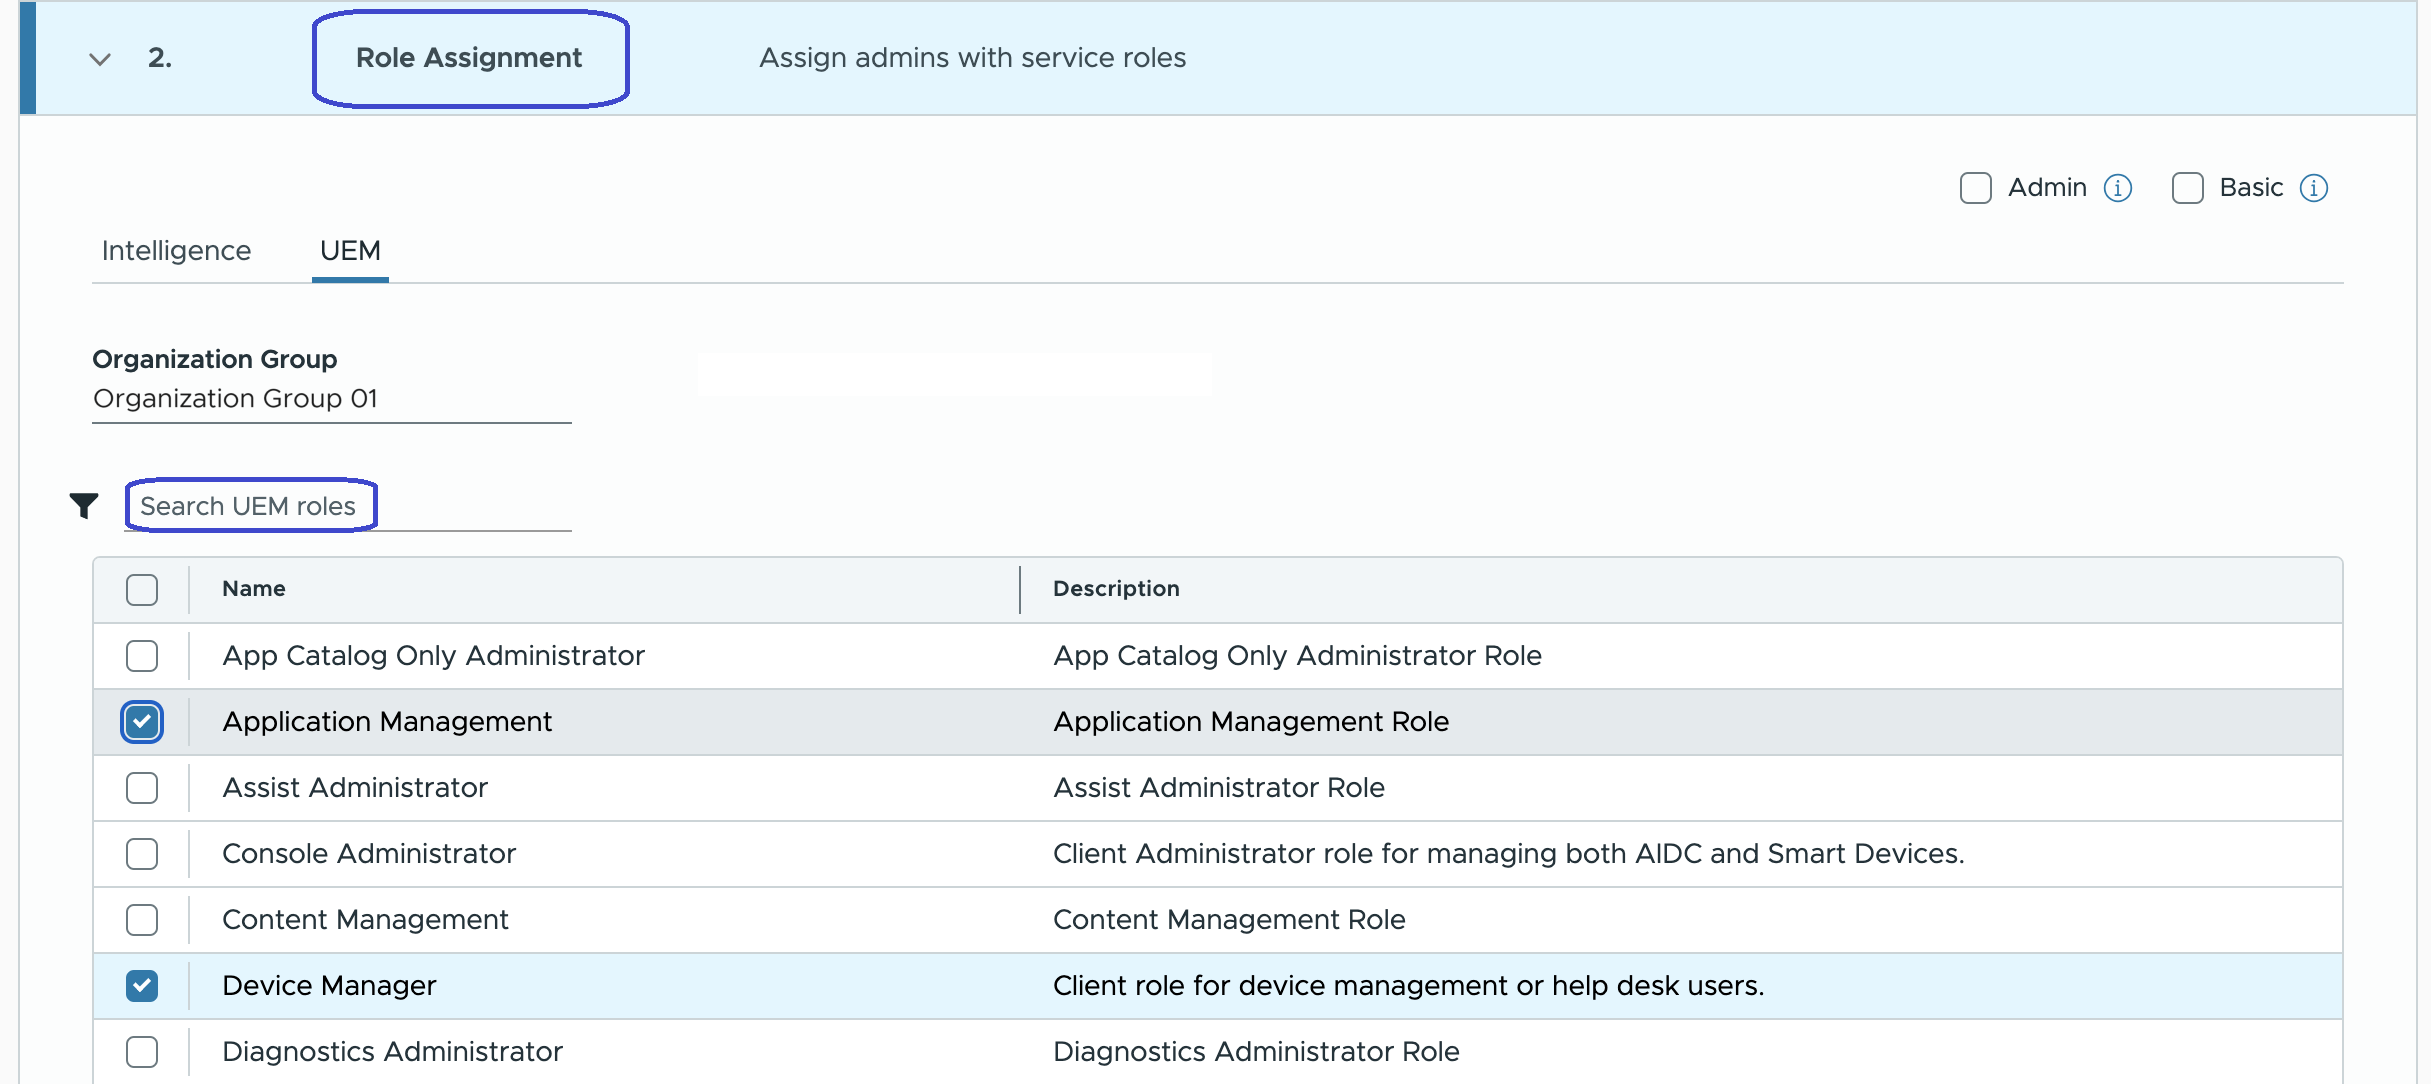
- If you know the name of the role you want to assign, you can enter the name to display a results list. Select the roles you want to assign.
- Optionally, you can use the Quick Action feature to assign platform roles, either the Basic role or the Admin role.
- Save your configurations to see a display of admins and their respective role assignments. Confirm your selections to finalize the process.
The system sends the admins a notification about their role assignments and the Cloud Admin Hub UI displays a message that X new admin(s) added. Setup emails have been sent to the new admins.
How do you edit role assignments?
Use the Administrators page in Cloud Admin Hub to edit role assignments.
Note: You cannot edit admin roles assigned through Admin Groups.
- Launch your Workspace ONE Cloud service to access your Cloud Admin Hub.
- Go to Accounts > Administrators > Admins (tab), select the admin from the list, and select Edit.
- In the Edit Administrators wizard, select the Role Assignment section and make changes.
- Optionally, you can use the Quick Action feature to change the roles of the admin to the Admin role.
- Save your changes to finalize the process.
How do you deactivate admins and their role assignments?
Use the Administrators page in Cloud Admin Hub to remove role assignments from admins. You can only deactivate one admin at a time. You cannot deactivate multiple admins simultaneously.
- Launch your Workspace ONE Cloud service to access your Cloud Admin Hub.
- Go to Accounts > Administrators > Admins (tab), select the admin from the list, and select Deactivate.
- Confirm the deactivation by selecting Delete.
The system removes the role assignments and sends admins notifications to confirm the deactivation of assignments within the Cloud Services organization. Consider that these admins can no longer access Omnissa products because you have deactivated them in the system. After you deactivate an admin, the Cloud Admin Hub UI displays a message that reads Successfully removed roles for user "Admin X".
How do you invite an admin that is not in Cloud Services?
Use the Administrators page in Cloud Admin Hub to invite admins that are not members of your Cloud Services.
To invite an external admin, you need the admin's email address. The system sends the admin an invitation that includes an activation link that is good for seven (7) days. If the invitation link expires, you can use the Pending Invitation tab to resend an invitation.
- Launch your Workspace ONE Cloud service to access your Cloud Admin Hub.
- Go to Accounts > Administrators > Admins (tab) and select Invite.
- In the Invite External Administrators > Invite Admins wizard, enter one or several email addresses of the admins you want to invite to work in your Workspace ONE service.
- In the Role Assignment section, assign external admins their roles.
- Review and confirm your selections to save your configurations.
- The system sends an invitation to the entered email addresses and this invitation includes an activation link. This link is good for seven (7) days. After seven days, the link expires.
- The external admin uses the activation link to register and create a Cloud Services account.
- Check the status of the invitation in the Cloud Admin Hub on the Pending Invitation tab.
- Log in to your Cloud Admin Hub instance and go to the Administrators > Pending Invitation tab.
- After the admin creates an account with Cloud Services, the system removes the admin's name from the Pending Invitation tab.
What can you do on the Pending Invitation tab?
The Pending Invitation tab lists those external admins (admins that are not members of Cloud Services) that you invited to join your Workspace ONE service. If they are listed on this tab, they have not yet created an account with Cloud Services.
On this tab you can use the Notify and Revoke actions to manage external admins.
- Notify: The initial invitation link expires after seven (7) days.
- Use Notify to resend invitations to external admins who did not respond to the original invitation within the seven days.
- The system sends a reminder email invitation with a new link.
- External admins can use the link to register and create an account with Cloud Services.
- Revoke: This action voids the invitation from the system so that the external admin cannot use the link to register with Cloud Services.
How do you add an admin group?
Use Admin Groups to manage role assignments for groups of admins.
Note: You cannot create admin groups in Cloud Admin Hub. You must create them or use federated groups in Cloud Services, and then the admin groups display for selection in the Cloud Admin Hub.
- Launch your Workspace ONE Cloud service to access your Cloud Admin Hub.
- Go to Accounts > Administrators > Admin Groups (tab) and select Add.
- In the Add New Admin Group > Admin Groups wizard, search and select groups.
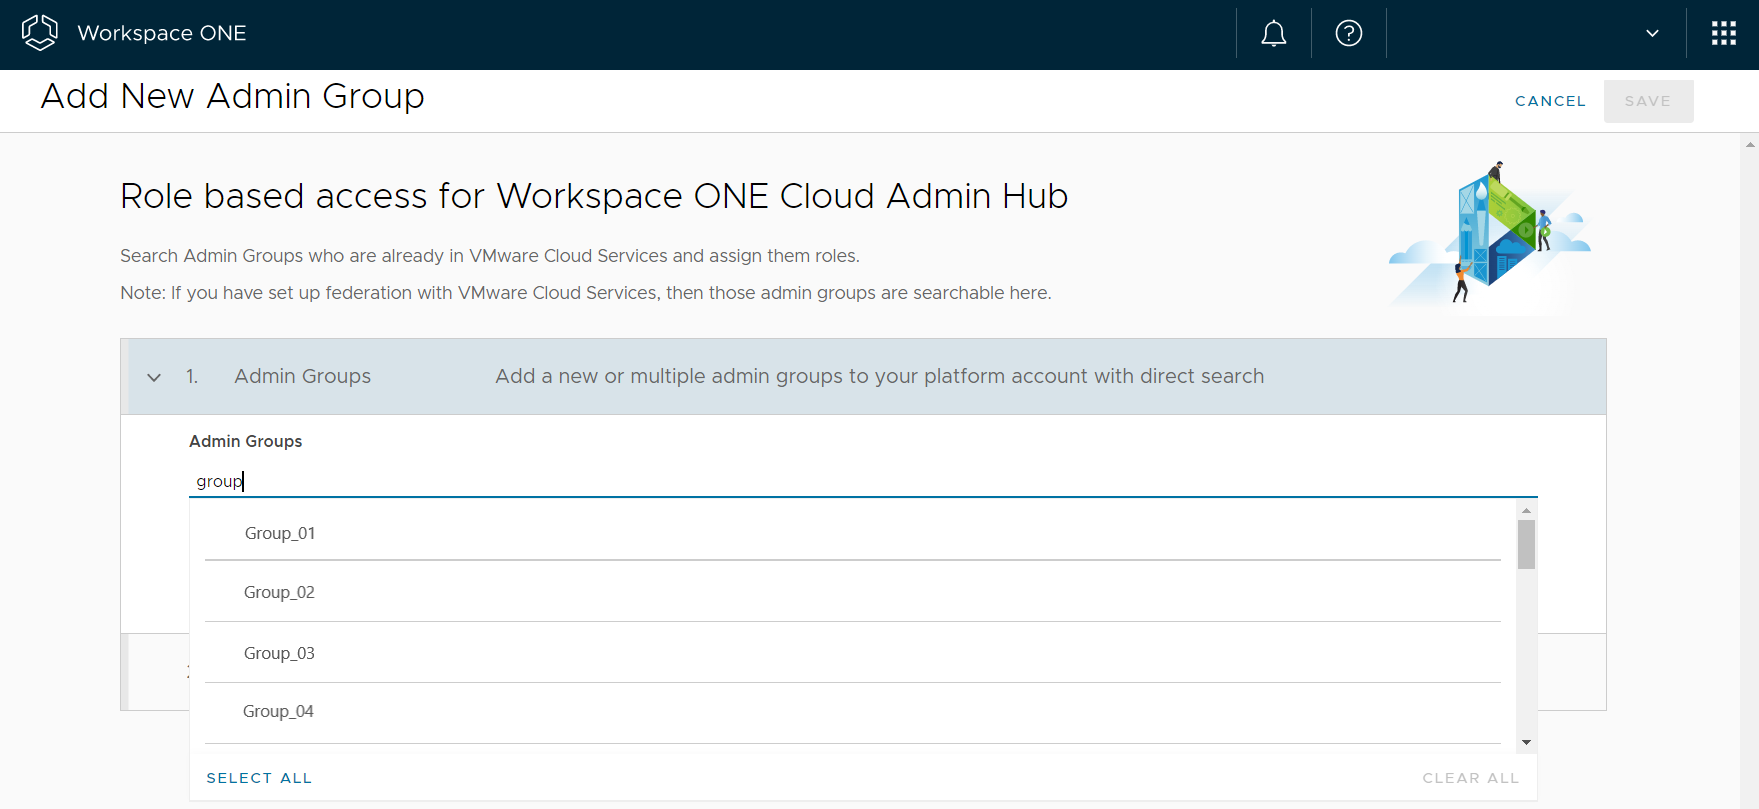
- In the Role Assignment section, select an organization if the integration uses them and select roles. You can also use the Quick Action feature to assign platform roles to groups, either the Basic role or the Admin role.
- Save your configurations to see a display of admin groups and their respective role assignments. Confirm your selections to finalize the process.
- You can review admin groups on the Administrators > Admin Groups (tab) by selecting the group and viewing its summary in the right panel of the UI.
How do you edit admin roles in admin groups?
You can edit admin roles assigned to admins in admin groups in the Cloud Admin Hub.
- Launch your Workspace ONE Cloud service to access your Cloud Admin Hub.
- Go to Accounts > Administrators > Admin Groups (tab), and select Edit.
- Add or remove role assignments and save your changes.
- You can review admin group edits on the Administrators > Admin Groups (tab) by selecting the group and viewing its summary in the right panel of the UI.
How do you deactivate admin groups and their role assignments?
You can deactivate all admins and their assignments in an admin group in the Cloud Admin Hub.
- Log in to your Cloud Admin Hub instance.
- Go to Accounts > Administrators > Admin Groups (tab) and select the admin group you want to remove.
- Select Deactivate.
- Confirm the deactivation by selecting Delete.
The system removes admin roles and access from all the admins in the admin group. However, this action is not permanent and you can reactivate an admin group with its assignments when needed.
Was this page helpful?