After you complete the preparation tasks in Prepare Virtual Machines for Omnissa Access Installation, deploy the virtual machines for your Control Plane cluster: the Bootstrap node, the Infrastructure/Platform nodes, and the Omnissa Access nodes.
Deployment Order
Deploy the virtual machines in the following order:
- Deploy the Bootstrap node.
- Deploy the first Infrastructure/Platform node, then clone it to create any additional Infrastructure/Platform nodes required for your deployment size.
- Deploy the first Omnissa Access node, then clone it to create any additional Omnissa Access nodes required for your deployment size.
- Power on all the nodes together only after every node has been deployed.
Deployment Method
The preferred method is to upload the Omnissa Access OVA and deploy each virtual machine from it individually, using the Deploy OVF Template procedure.
If you choose to clone a virtual machine instead of deploying it directly from the OVA, the following restrictions apply:
- Do not clone the Bootstrap node. The Bootstrap node cannot be cloned as an Omnissa Access node or an Infrastructure/Platform node.
- Cloning is supported only between nodes of the same type: Omnissa Access node-to-Omnissa Access node, and Infrastructure/Platform node-to-Infrastructure/Platform node.
- During cloning, edit the cloned node's networking and password properties so that they are unique to that node. See Hardware Sizing Requirements in Prepare Virtual Machines for Omnissa Access Installation to confirm how many Infrastructure/Platform and Omnissa Access nodes your deployment size requires.
Deploy the Bootstrap Node
Deploy one Bootstrap node from the Omnissa Access OVA using the Deploy OVF Template wizard:
-
In your vSphere Client, right-click the destination compute resource and select Deploy OVF Template.
-
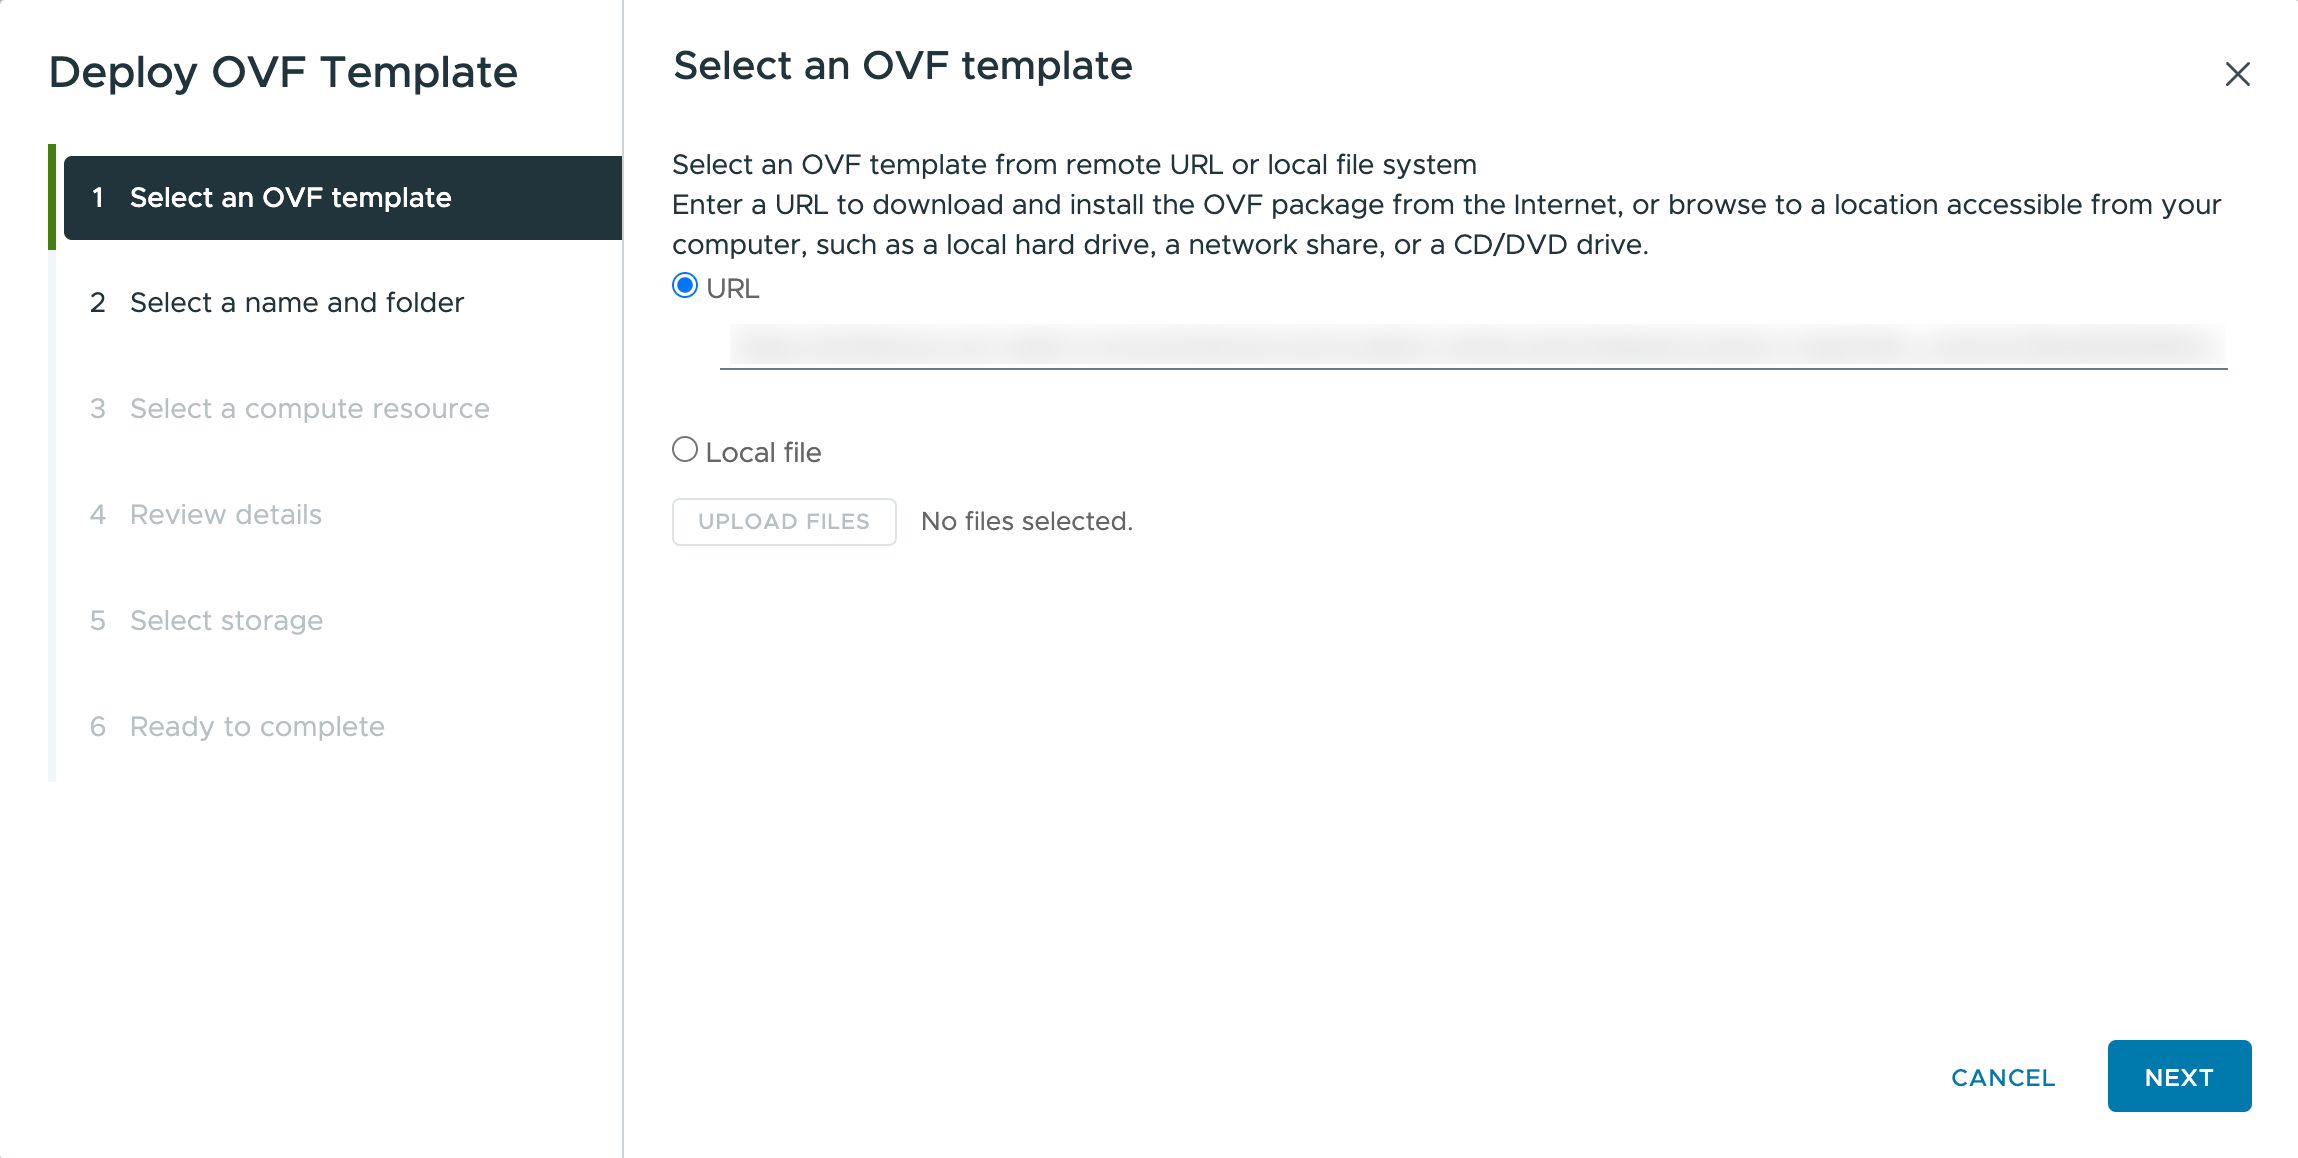
On the Select an OVF template page, select URL and enter the download URL for the Omnissa Access OVA, or select Local file and upload the OVA file, then click Next.
-
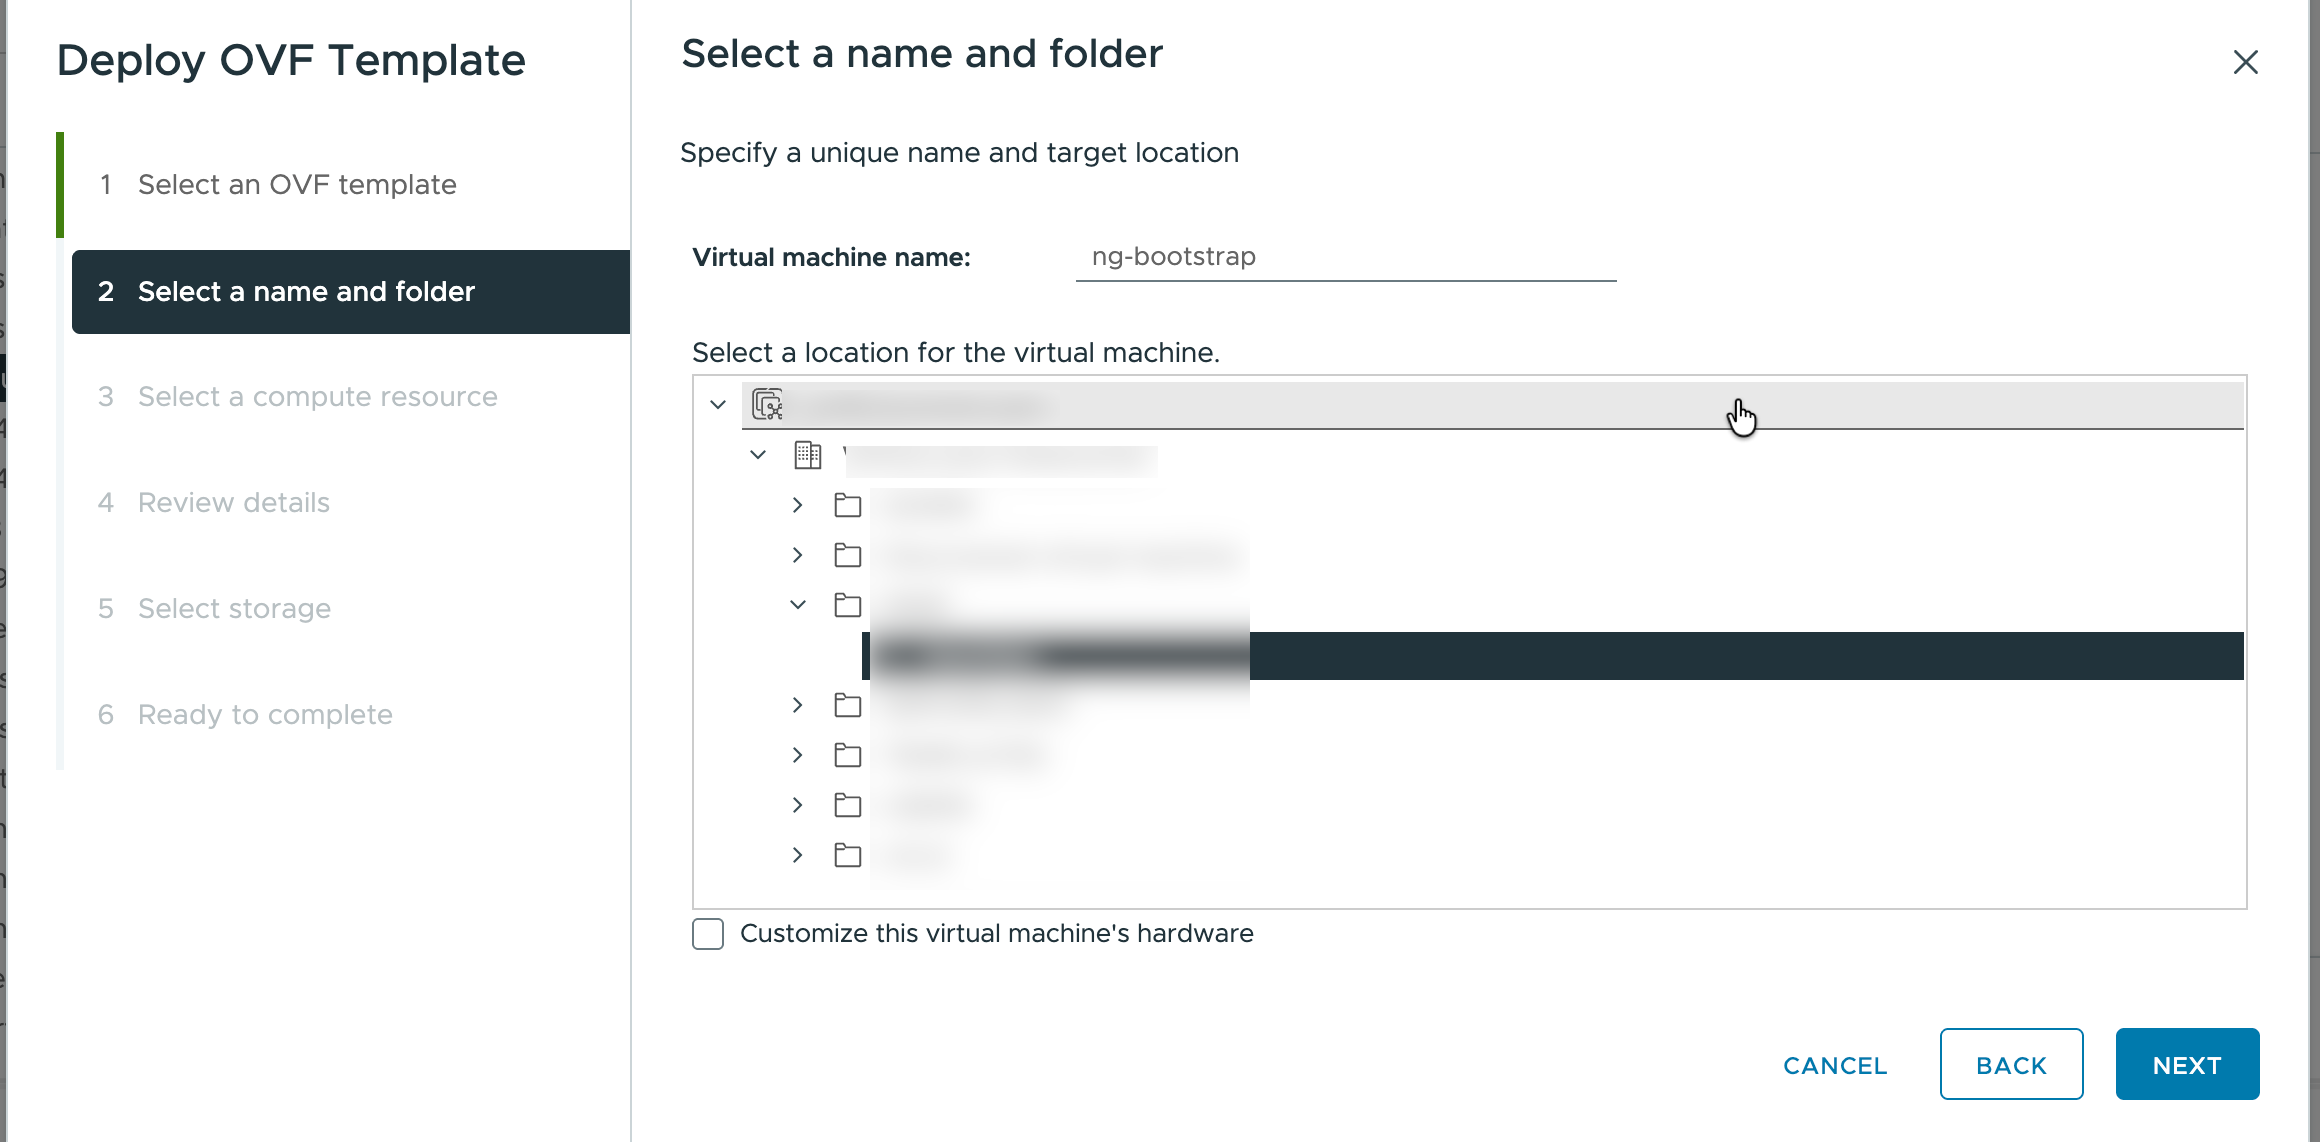
On the Select a name and folder page, enter a unique virtual machine name and select a location for the virtual machine, then click Next.
-
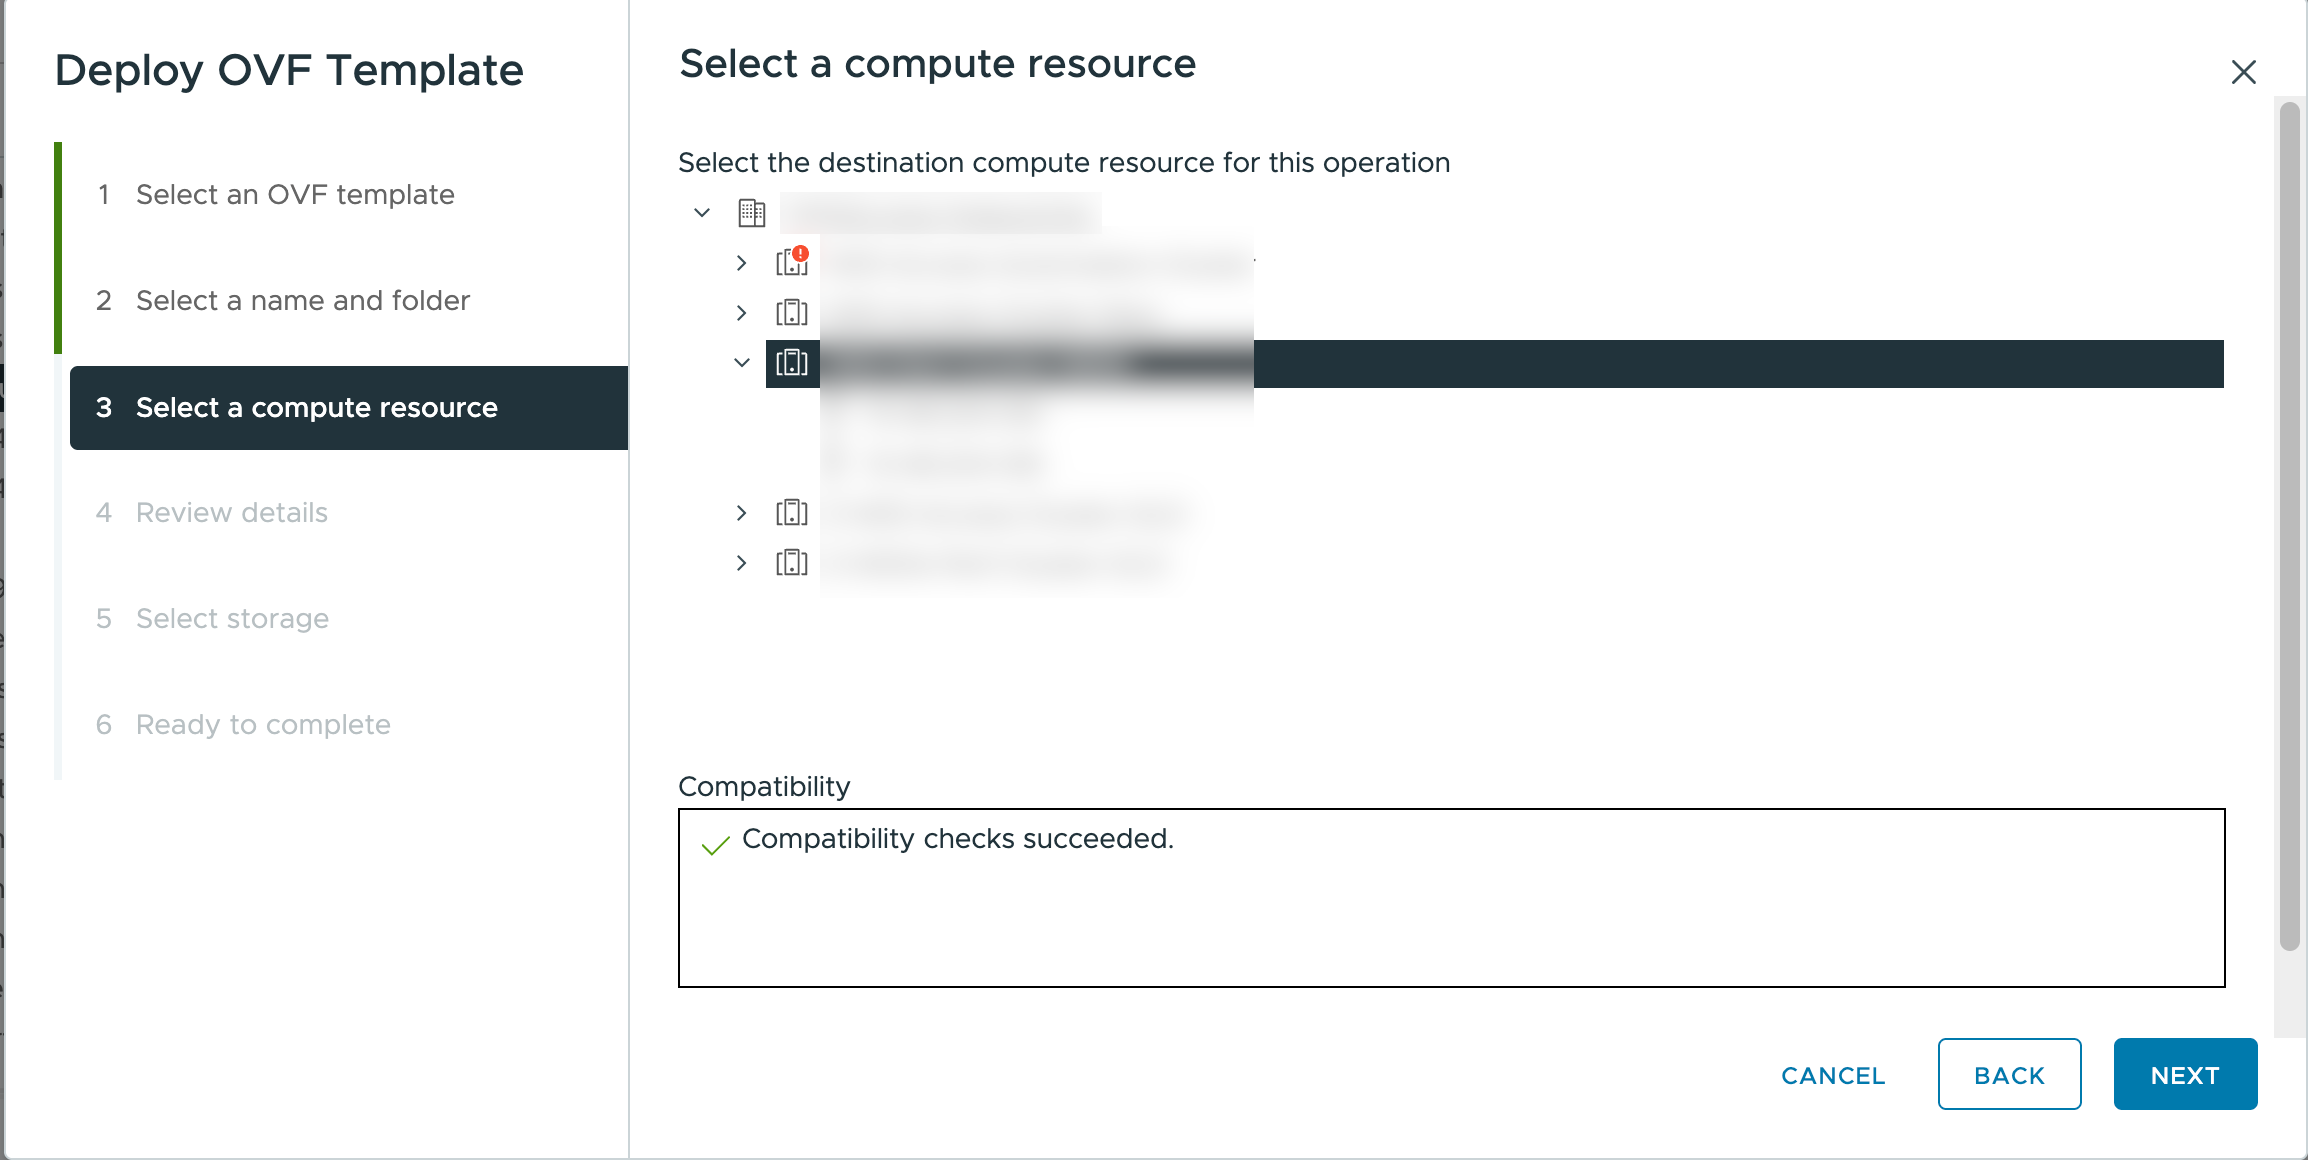
On the Select a compute resource page, select the destination compute resource, then click Next.
-
On the Review details page, verify the template details, then click Next.
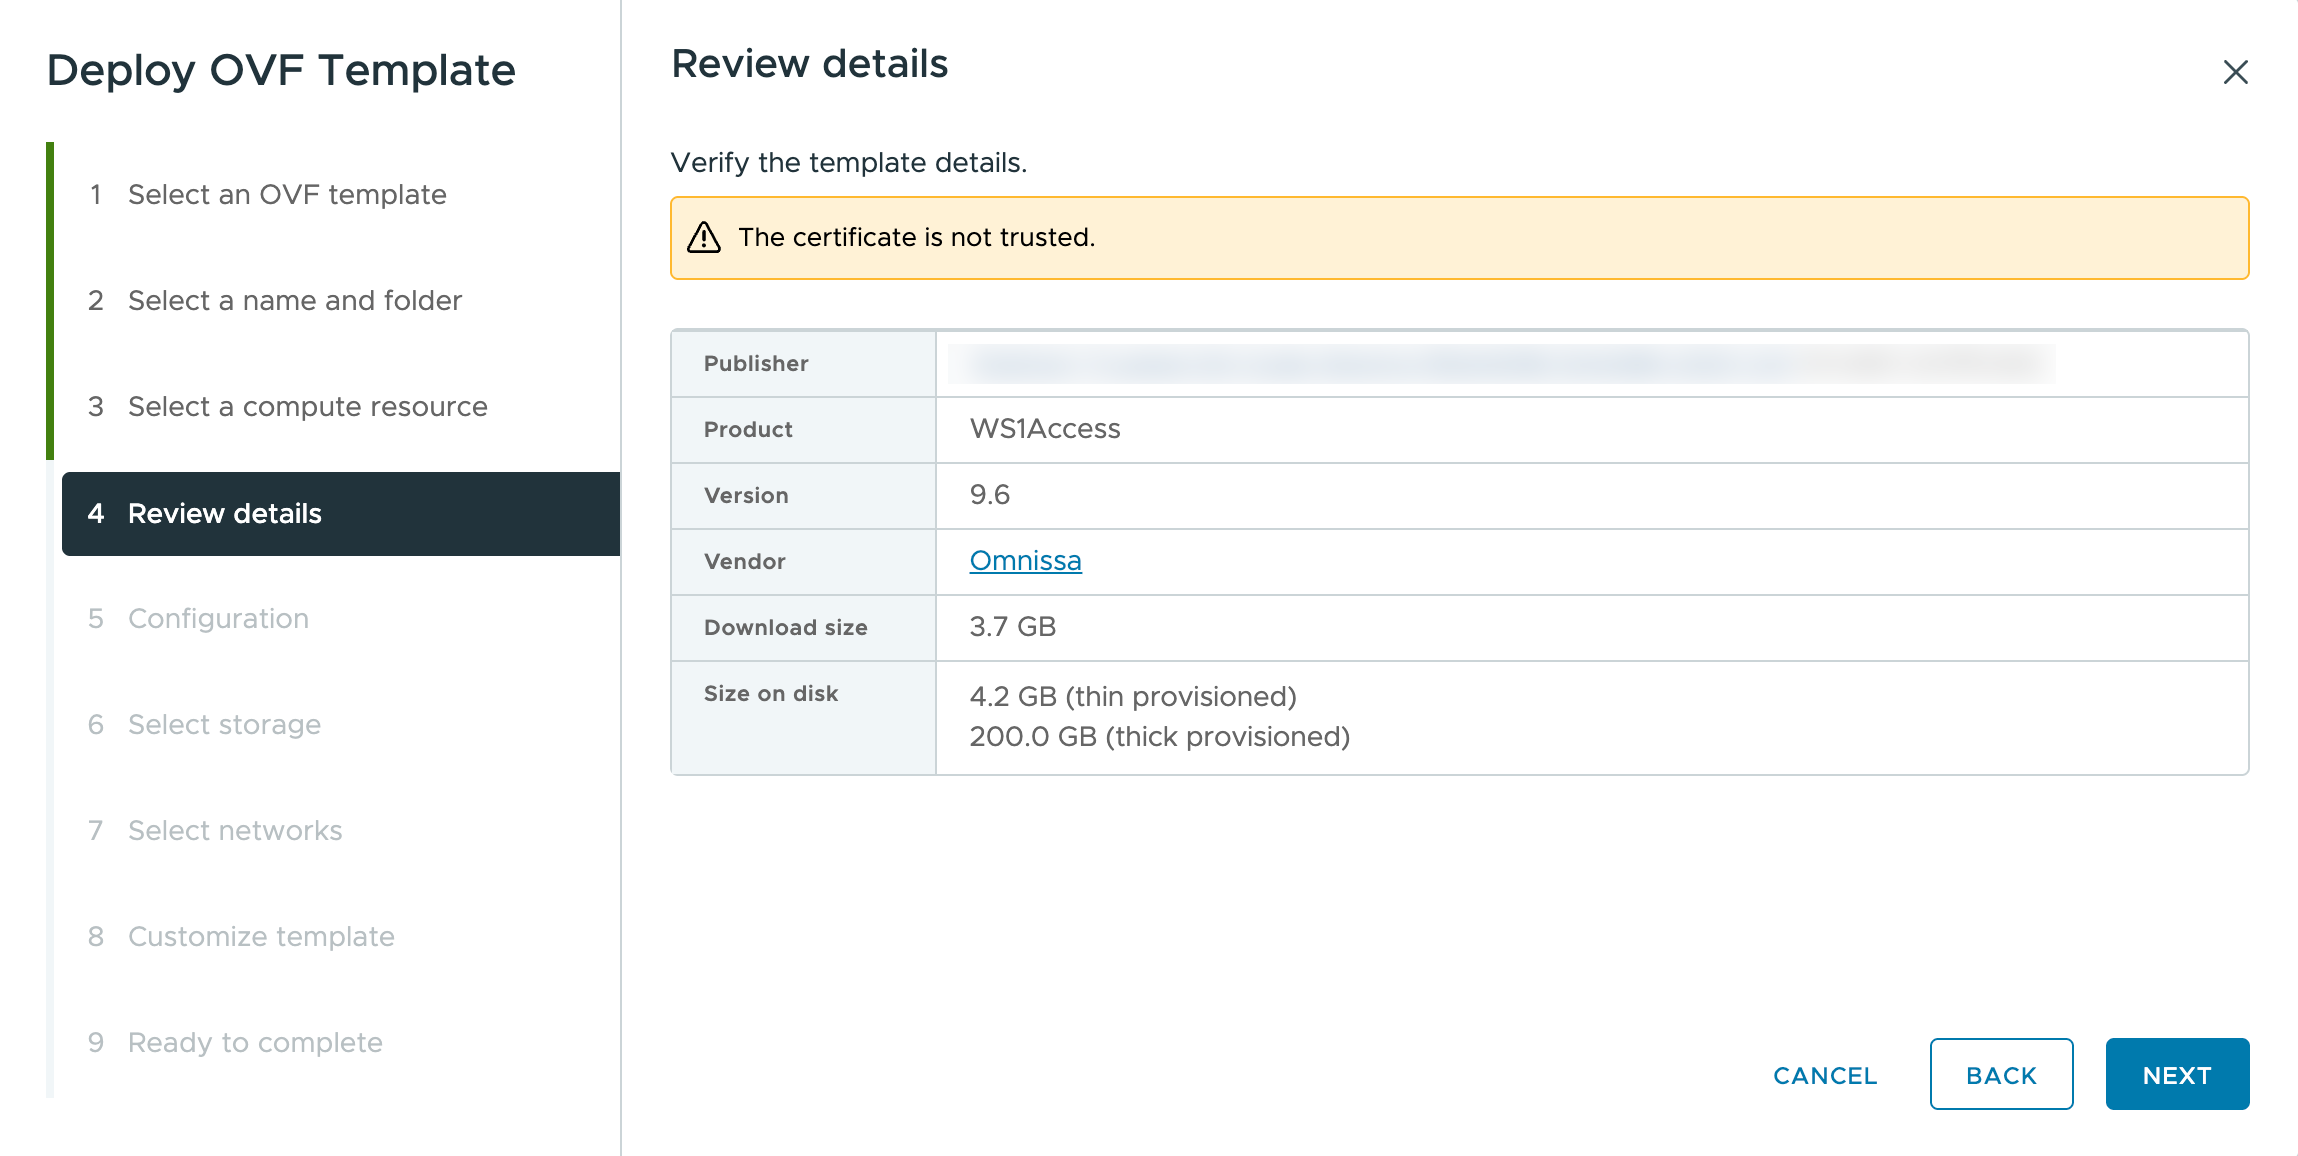
Note: vSphere may display a "The certificate is not trusted" warning at this step. This is expected if the OVA source uses a self-signed or internal certificate.
-
On the Configuration page, select the sizing option for the node you are deploying, then click Next.
Note: The sizing option you select here must match your overall deployment size. For example, if your deployment size is Small, select Infra - Small for Infrastructure/Platform nodes and Access - Small for Omnissa Access nodes. See Hardware Sizing Requirements in Prepare Virtual Machines for Omnissa Access Installation for the full sizing table.
The available options and their resource allocations are shown below:
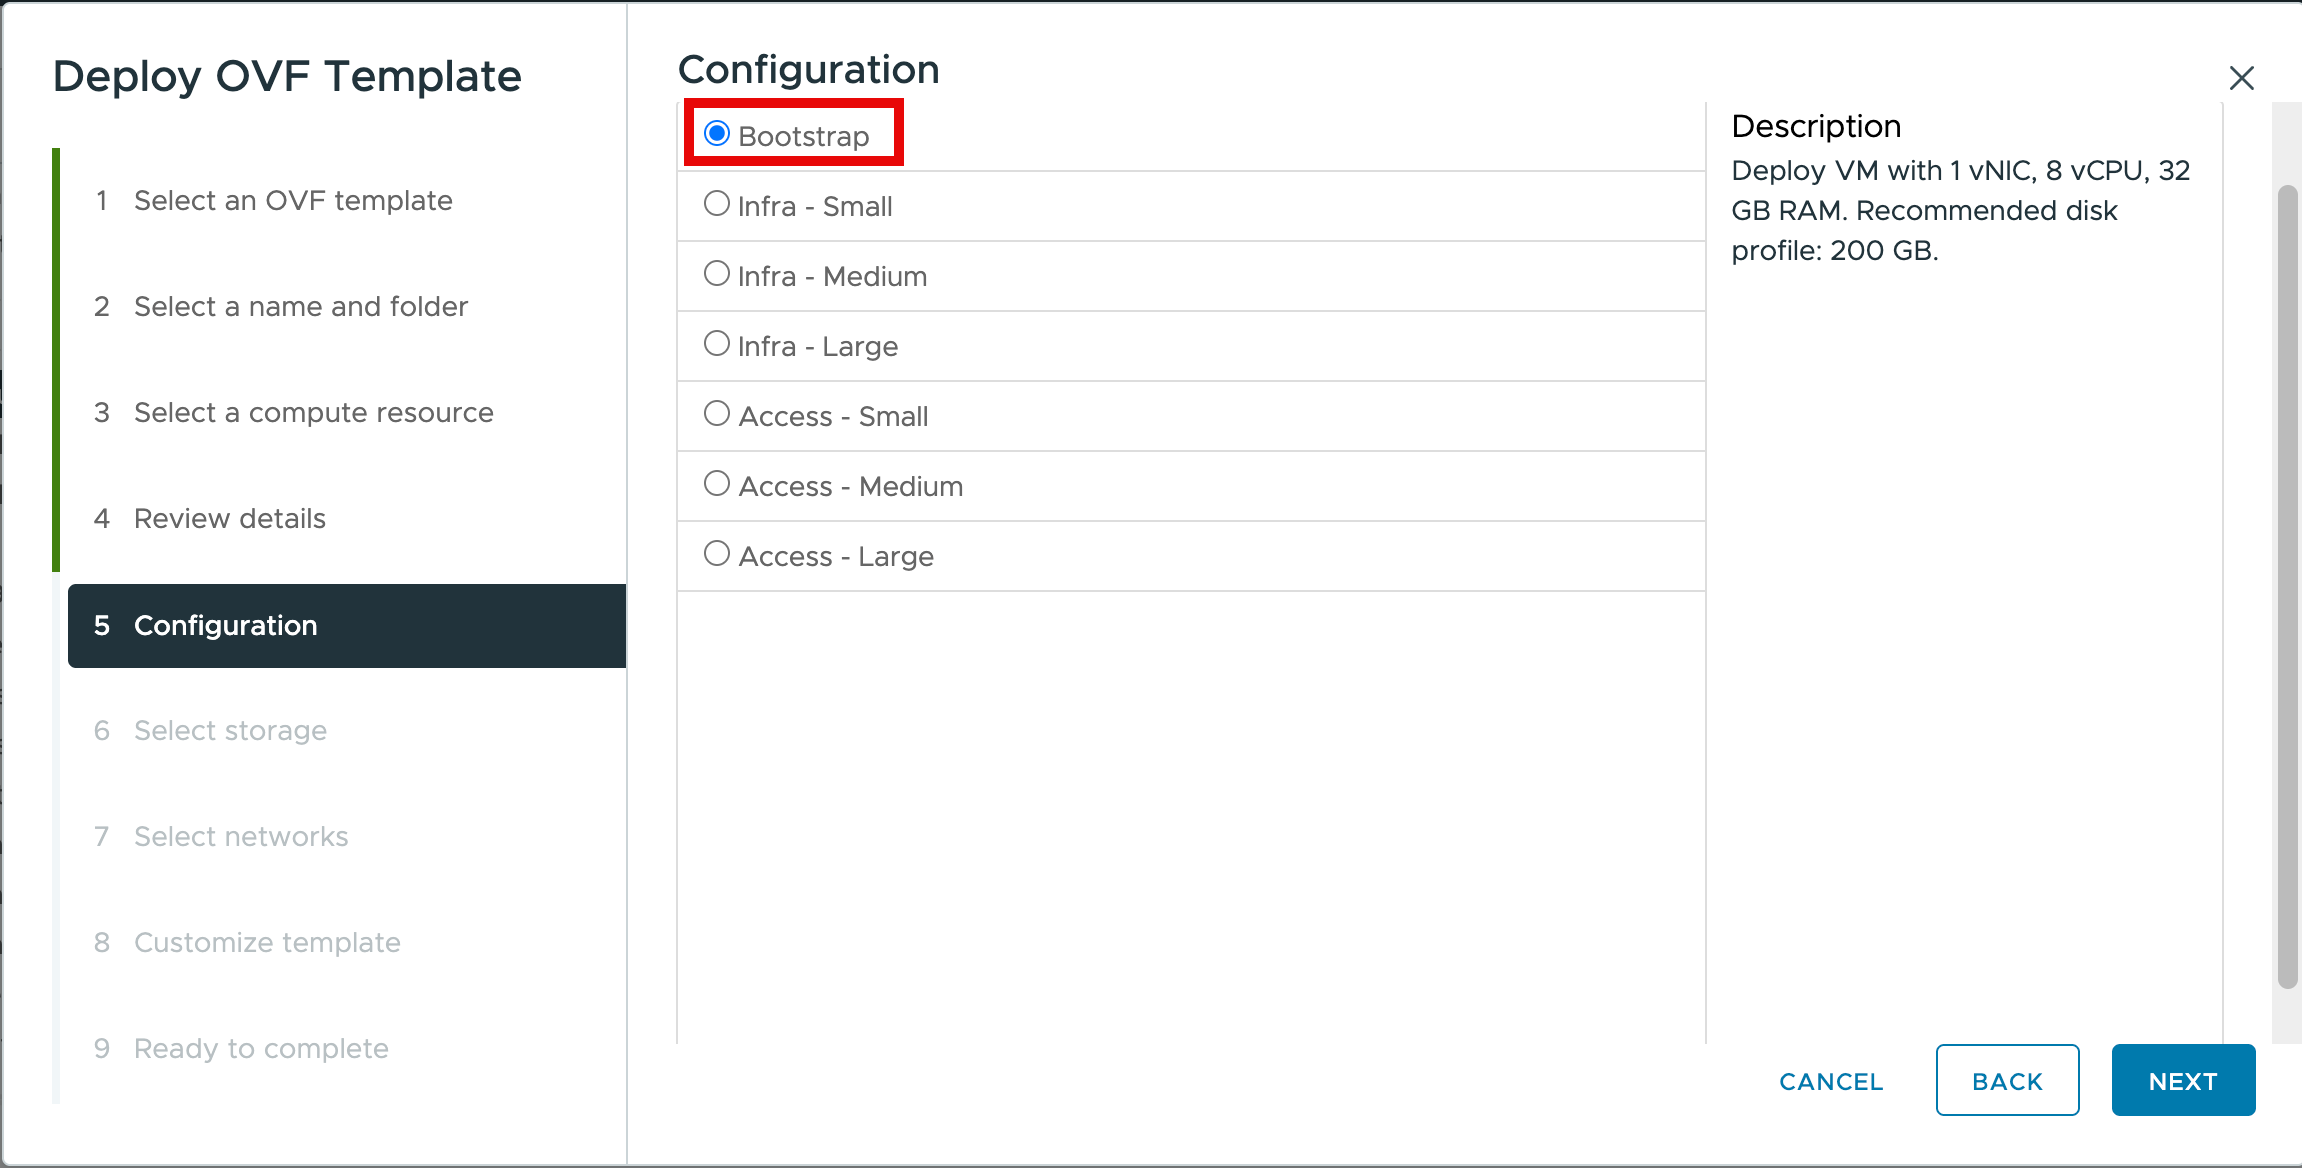
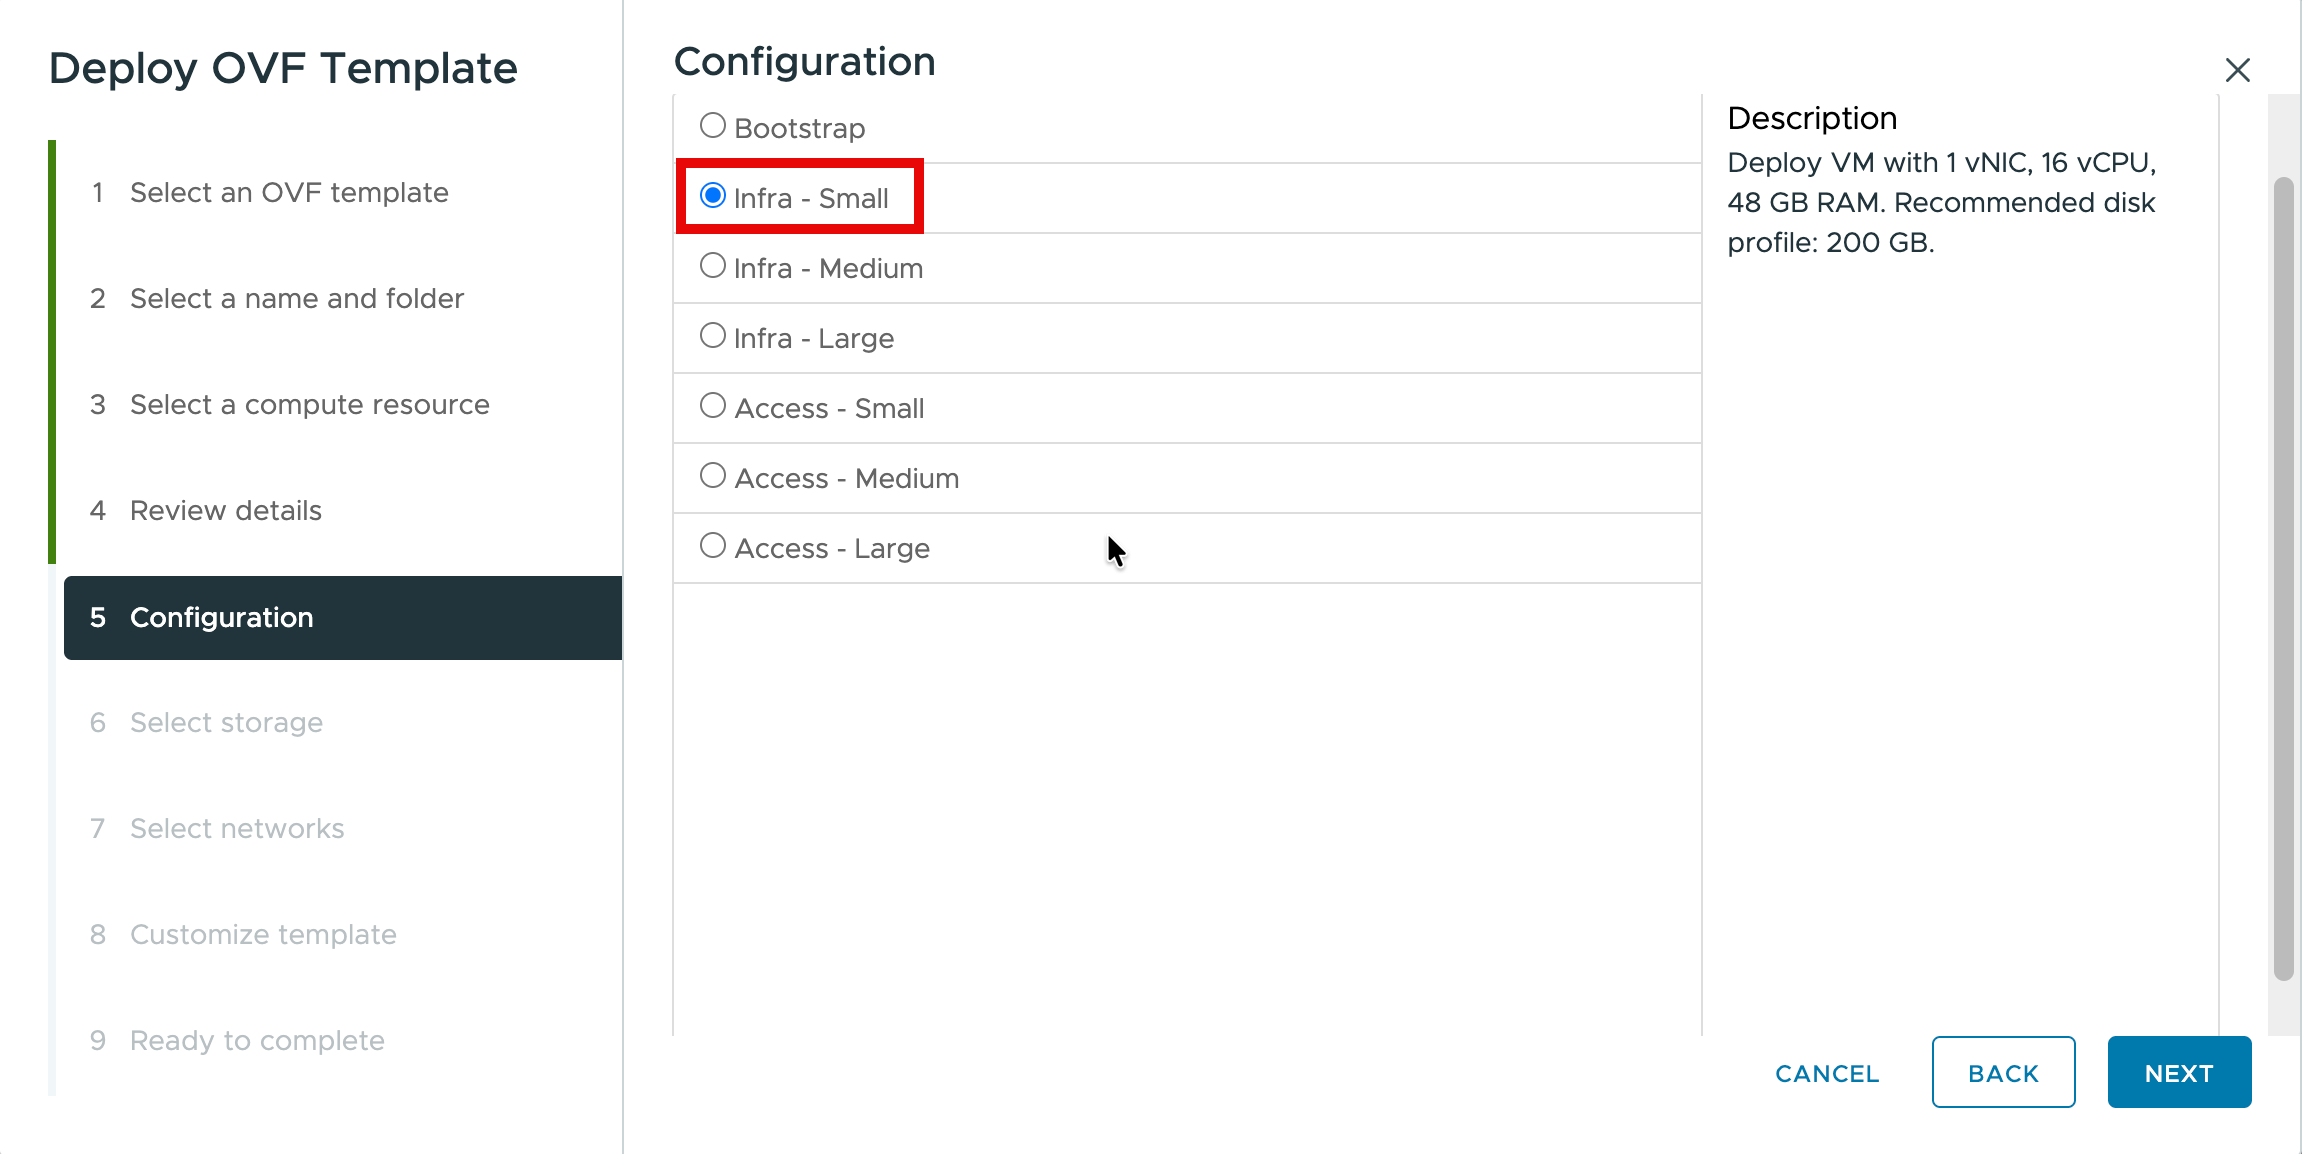
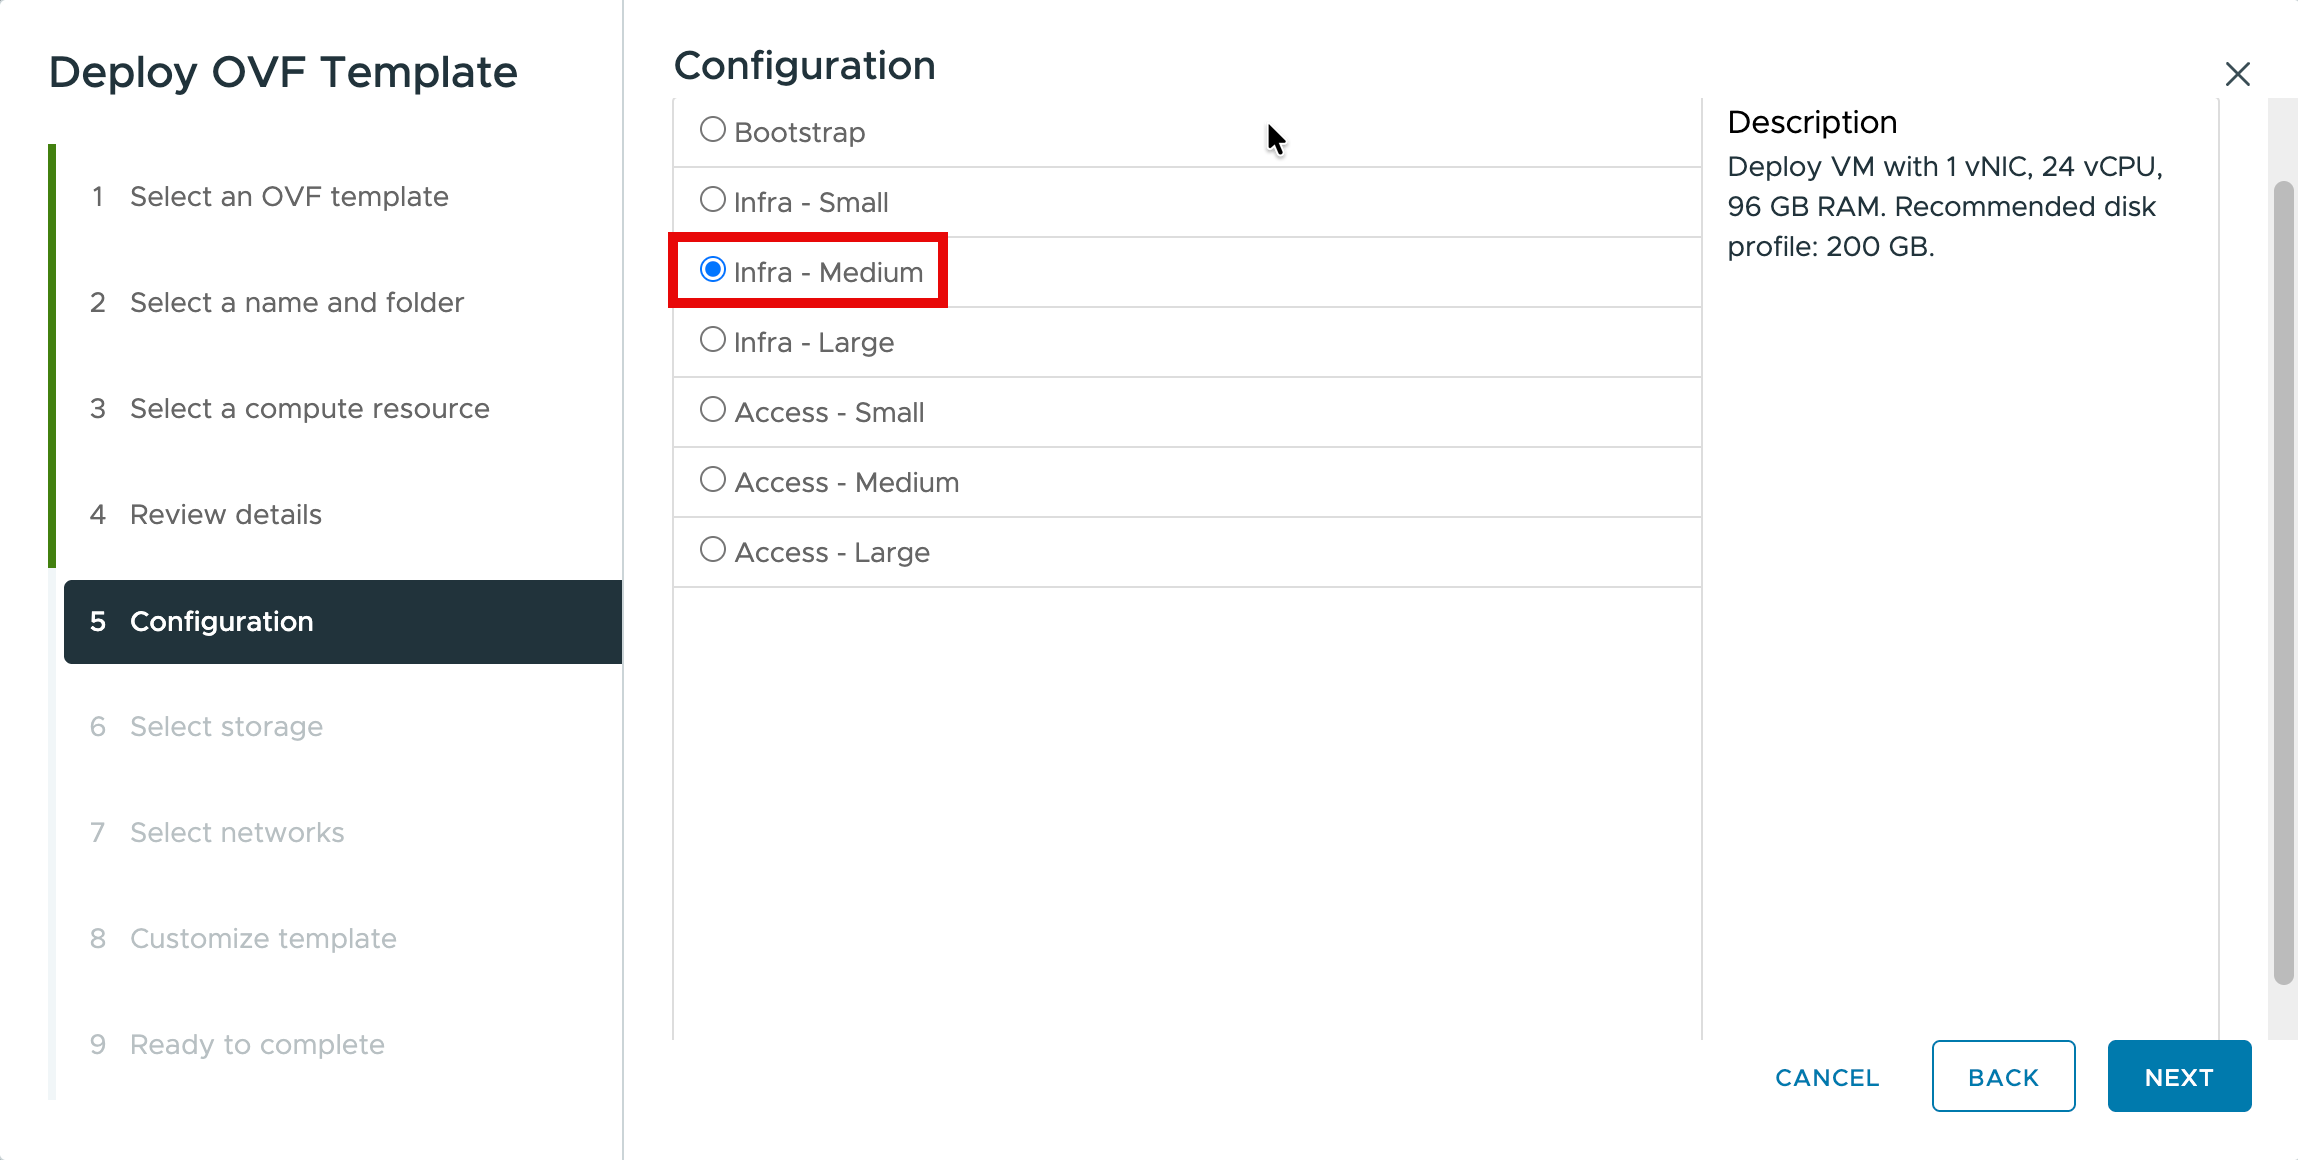
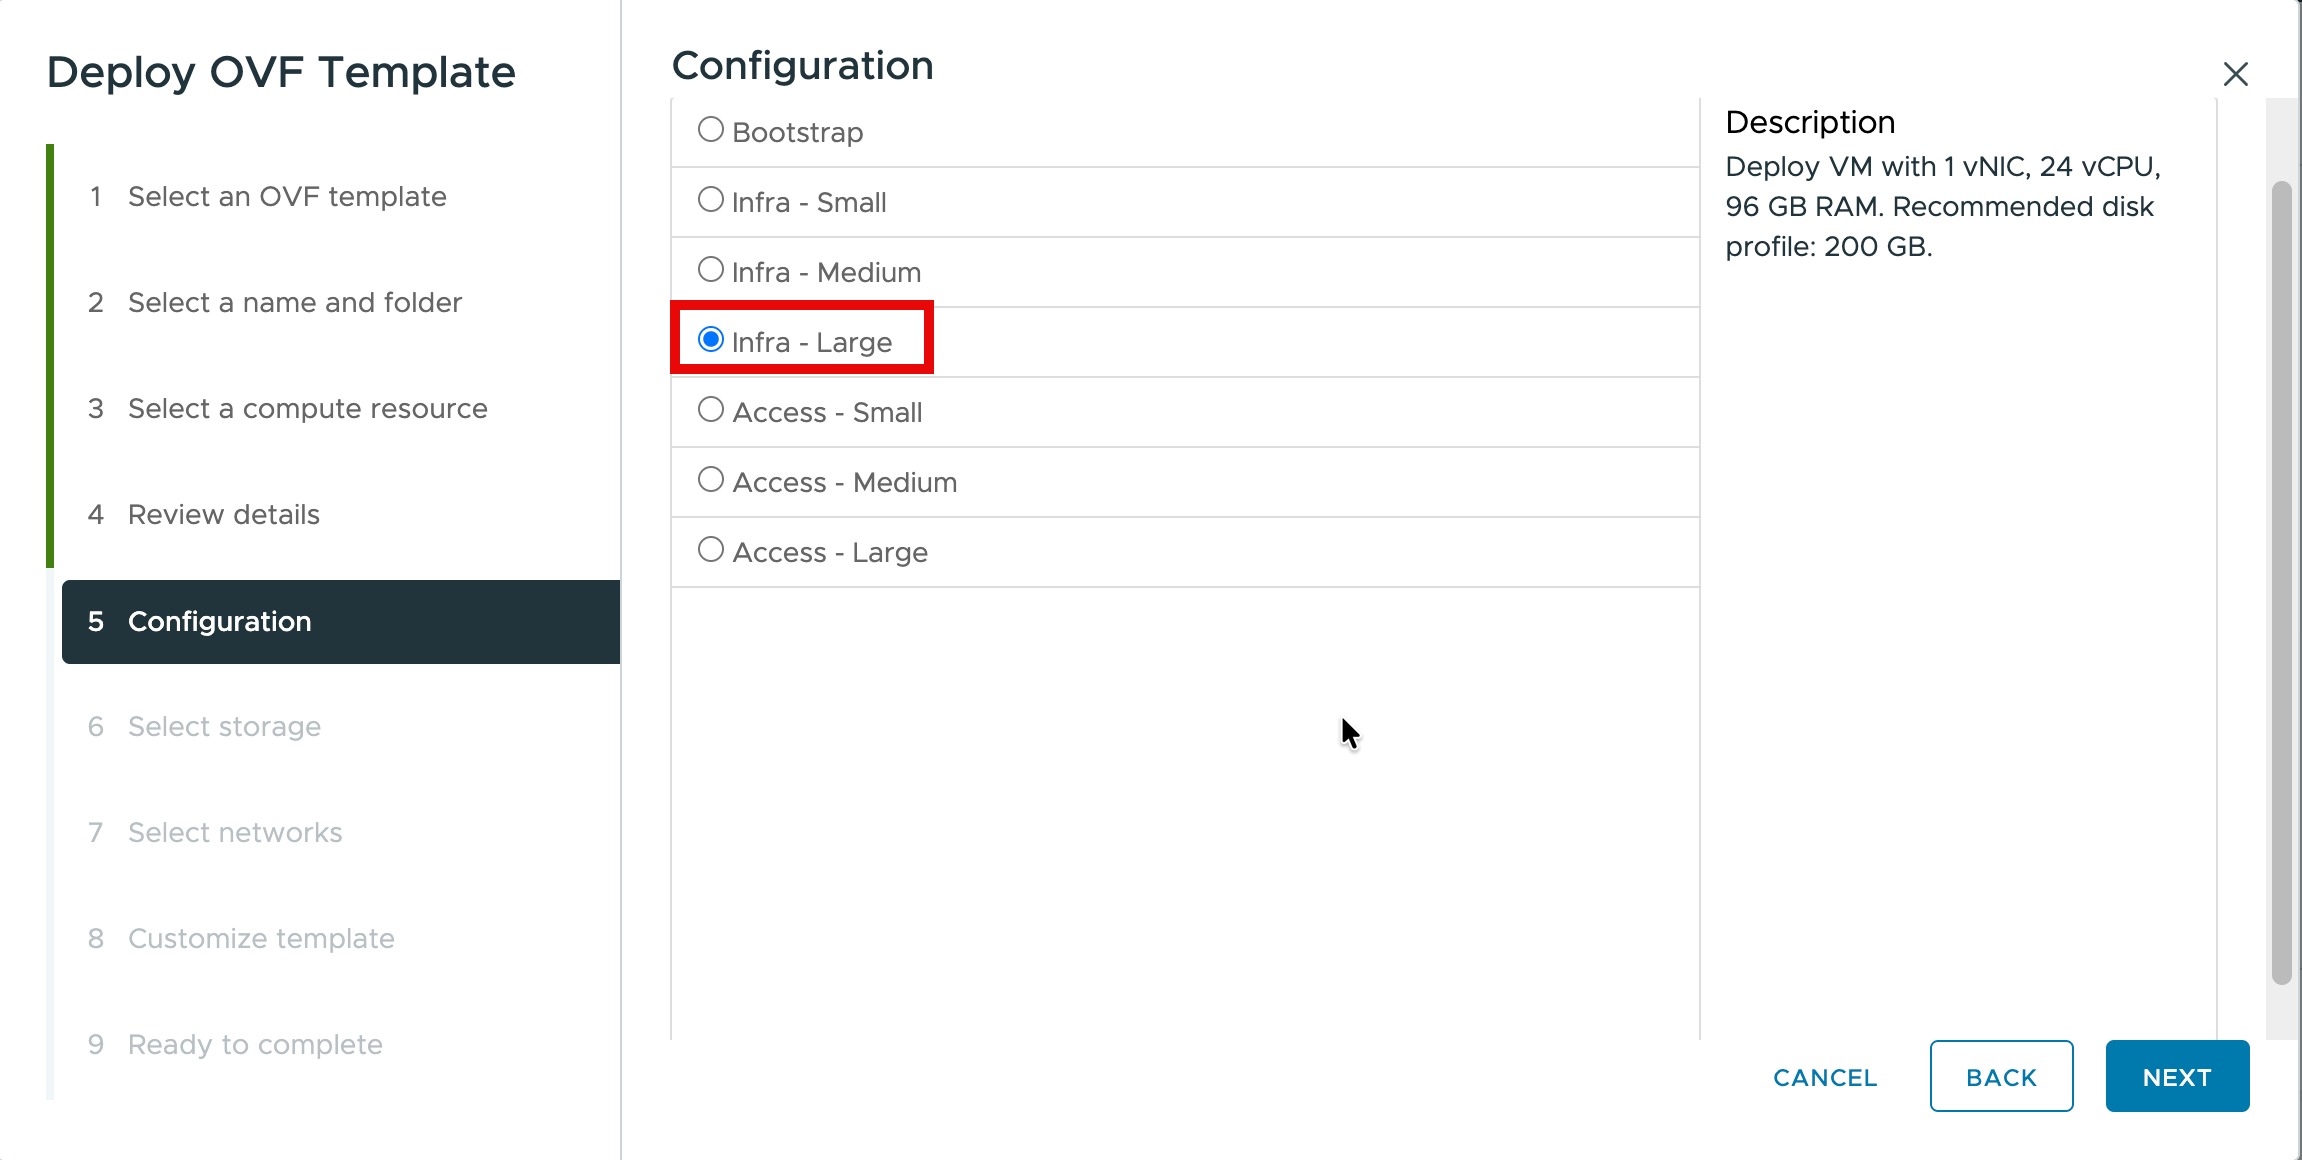
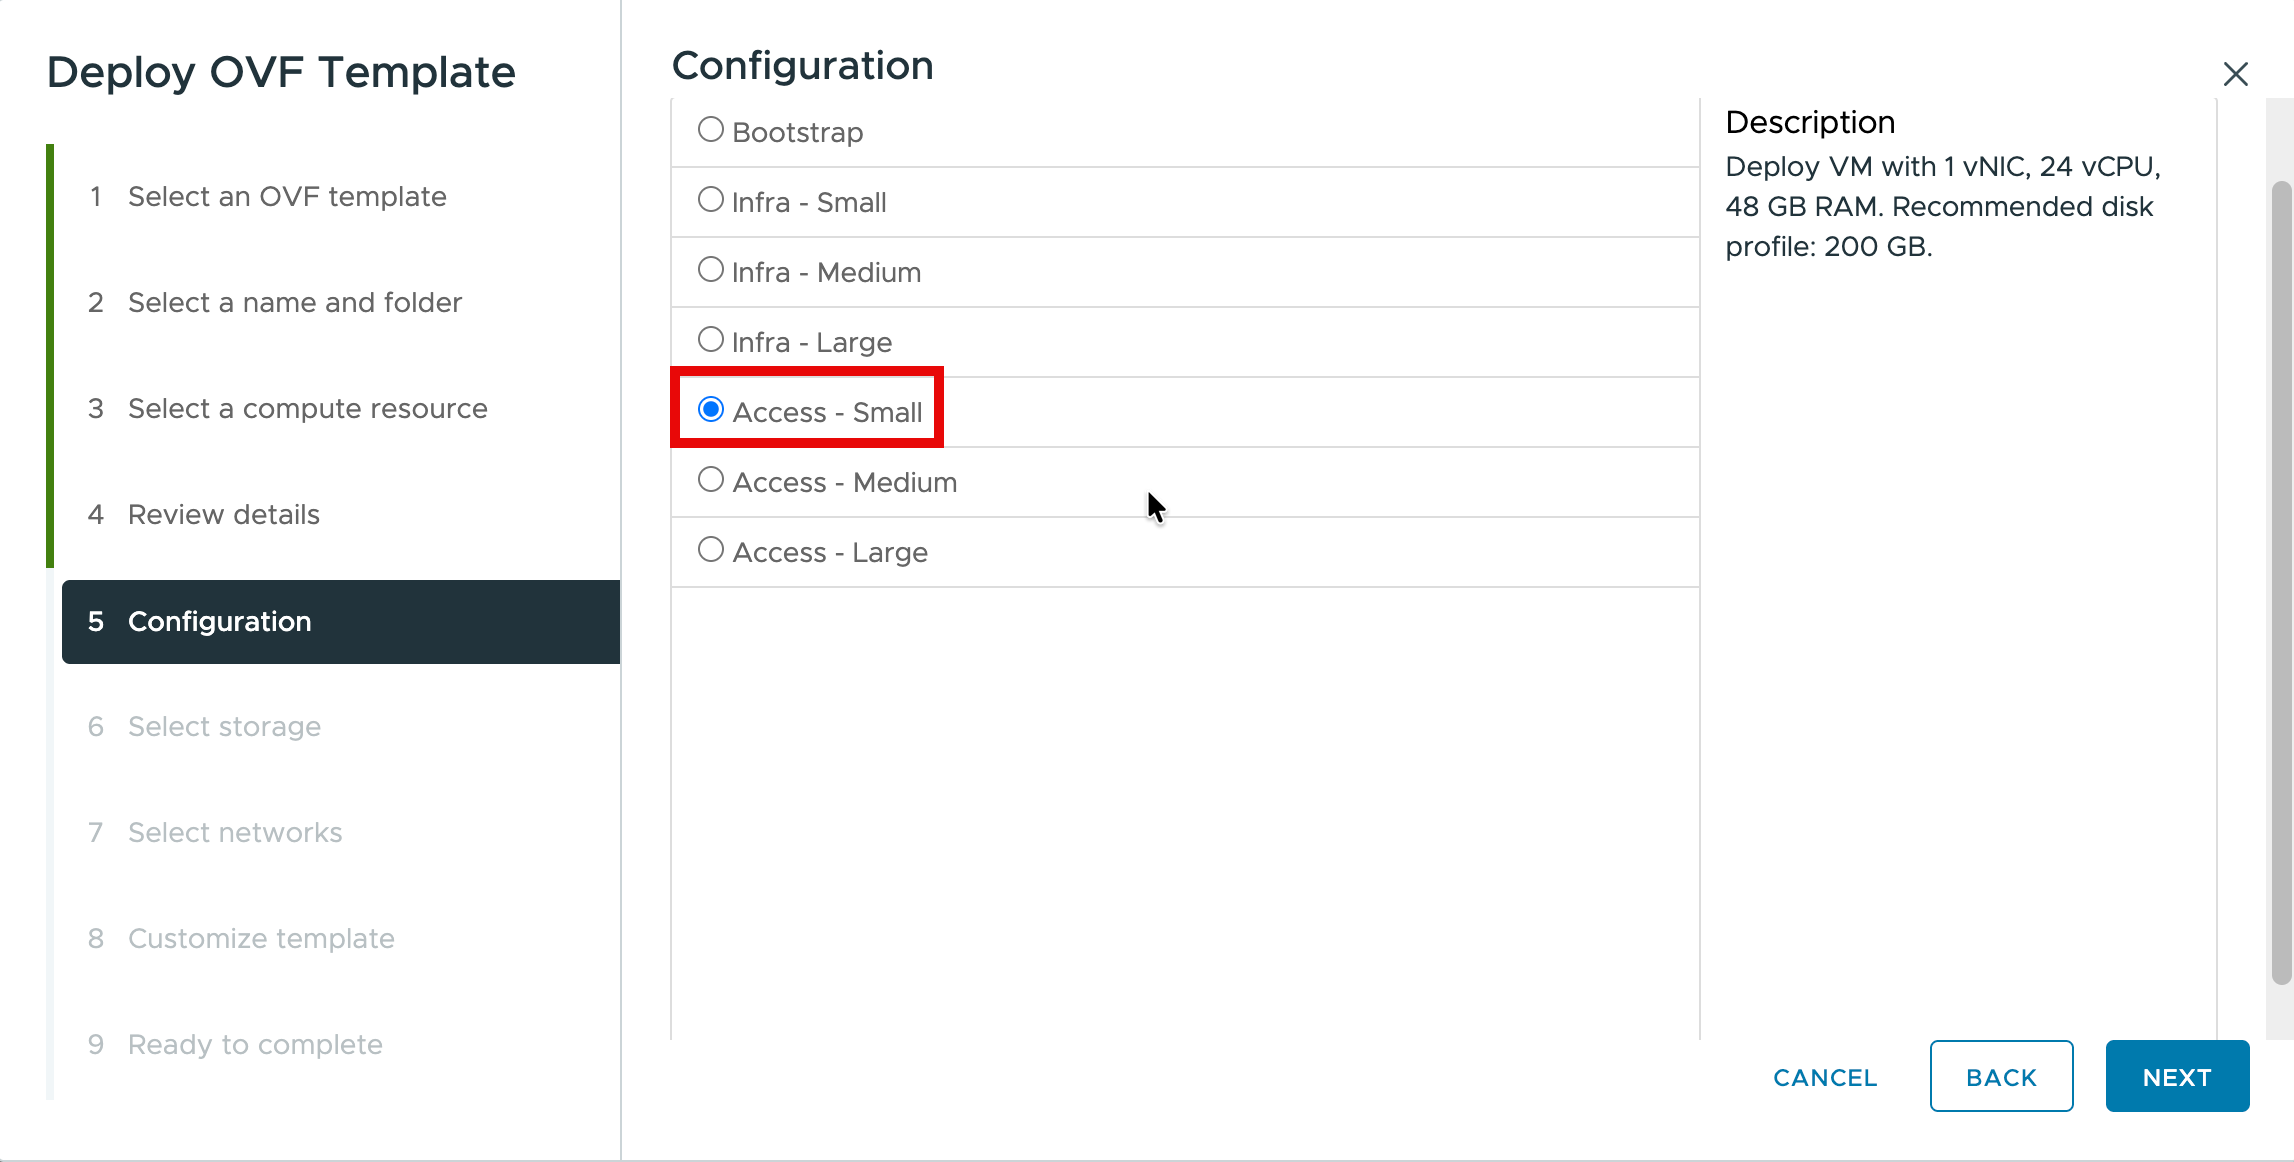
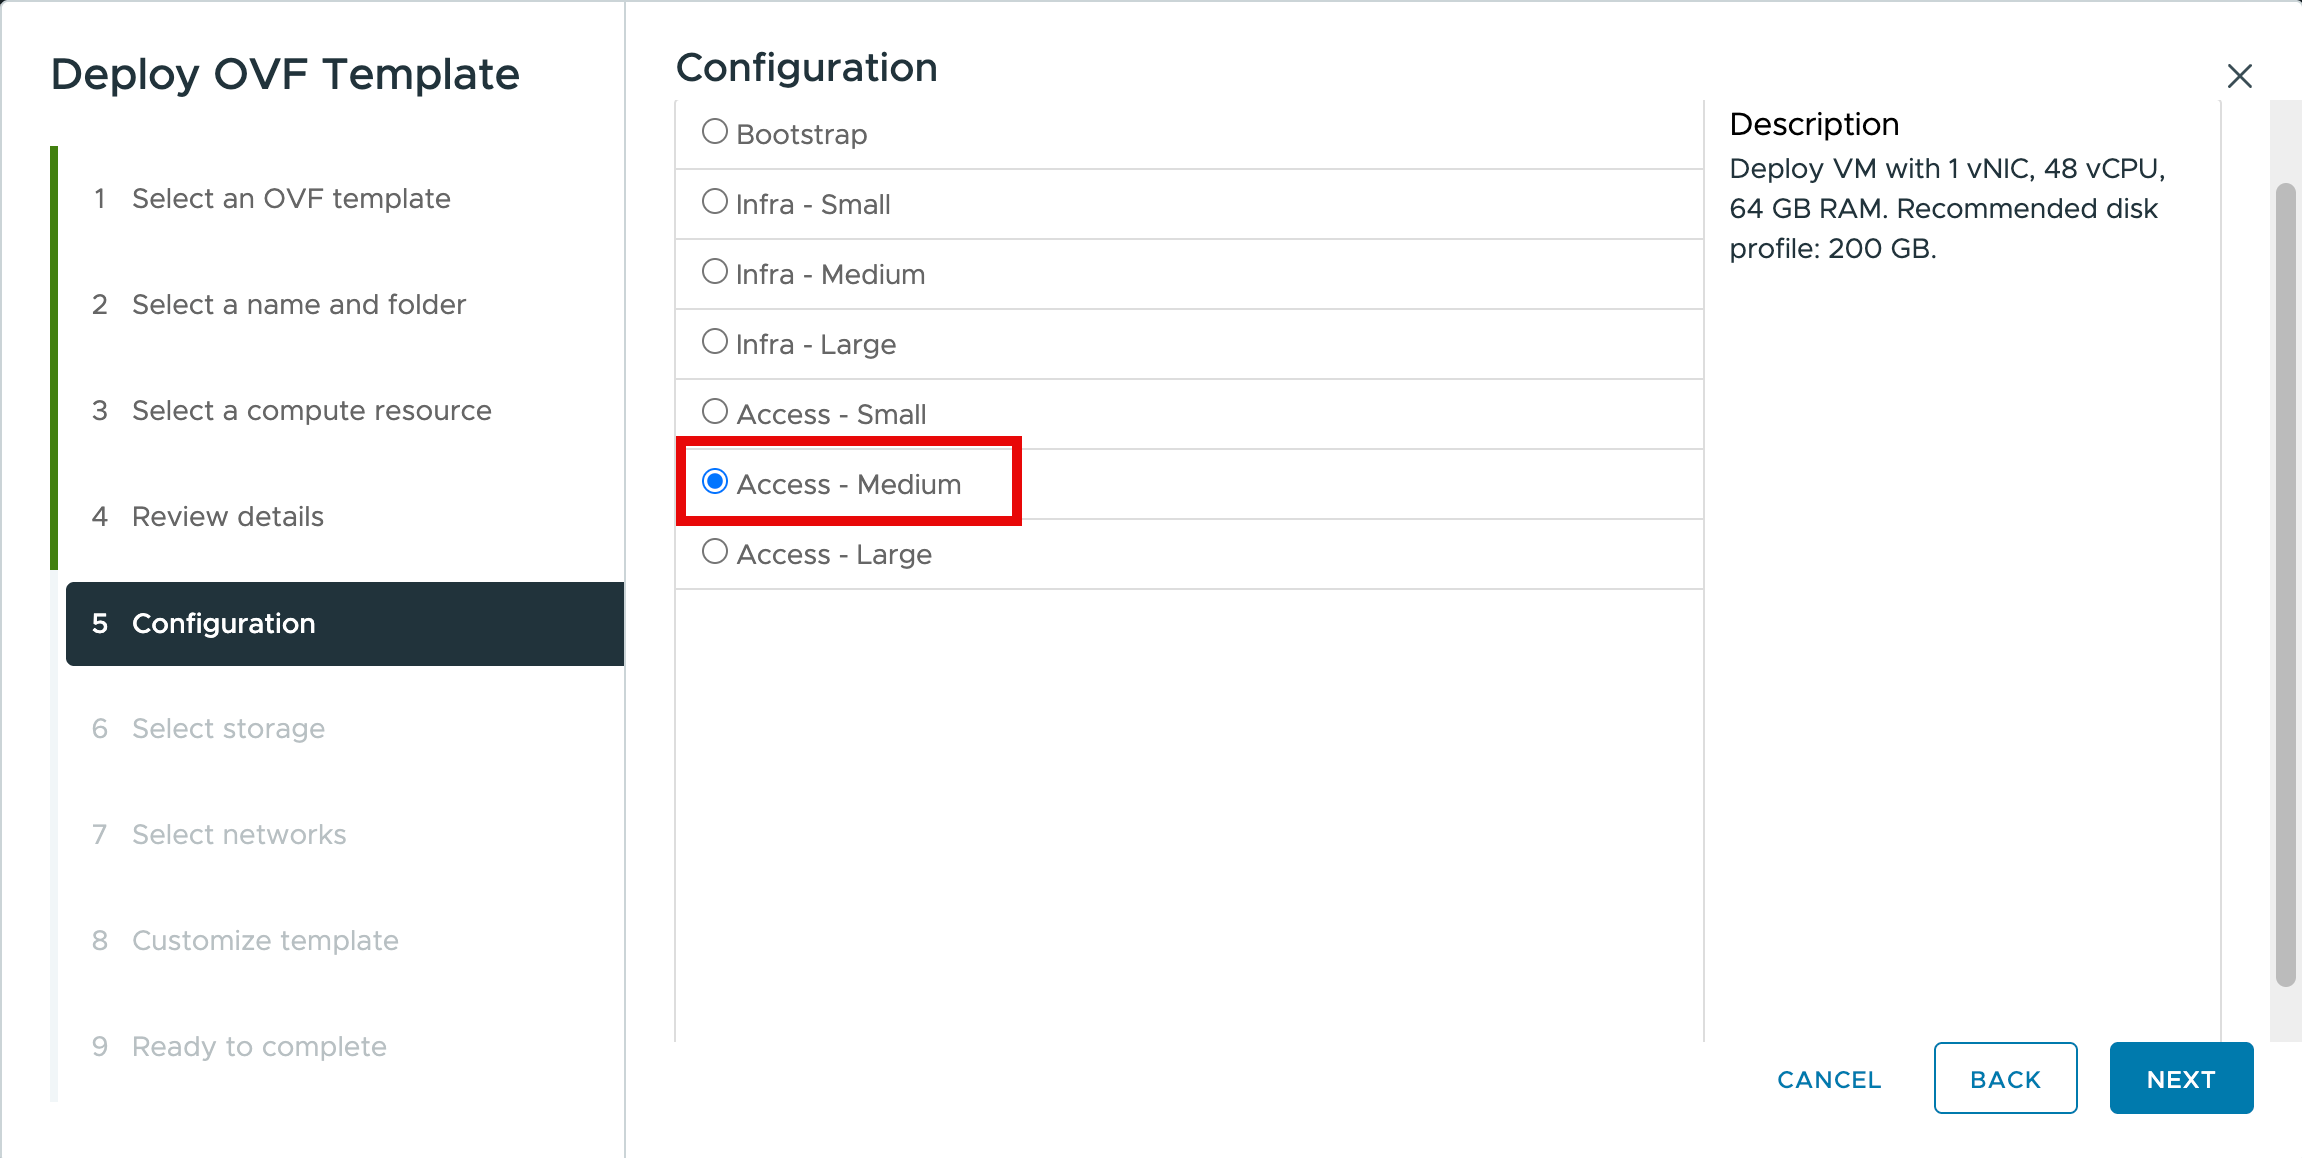
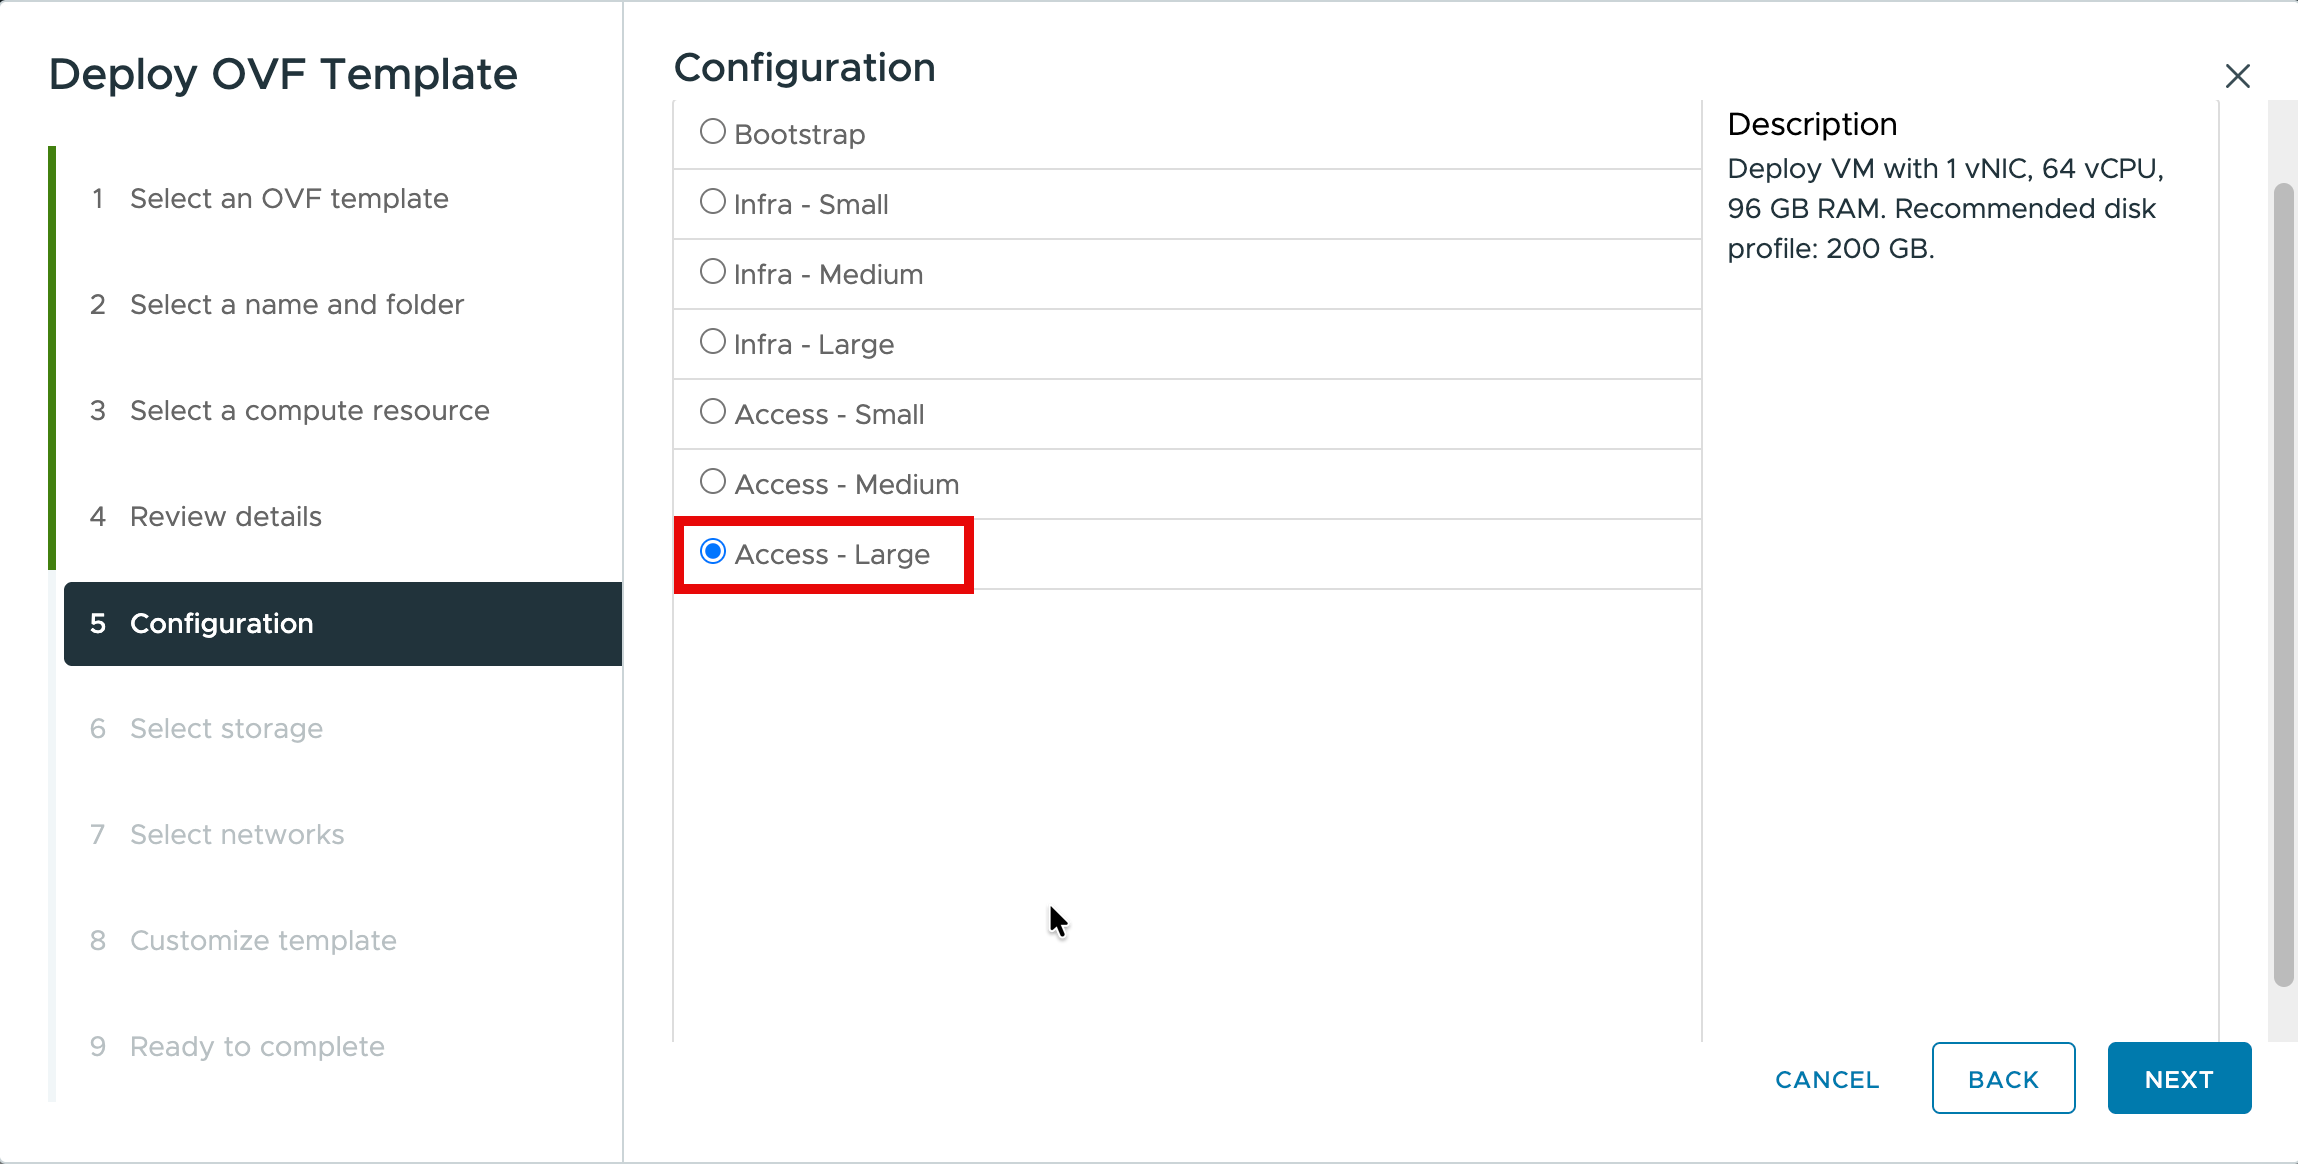 For the Bootstrap node, select Bootstrap. See Deploy Infrastructure/Platform Nodes and Deploy Omnissa Access Nodes below for the sizing option to select for those node types.
 -
On the Select storage page, select the storage for this node, then click Next.
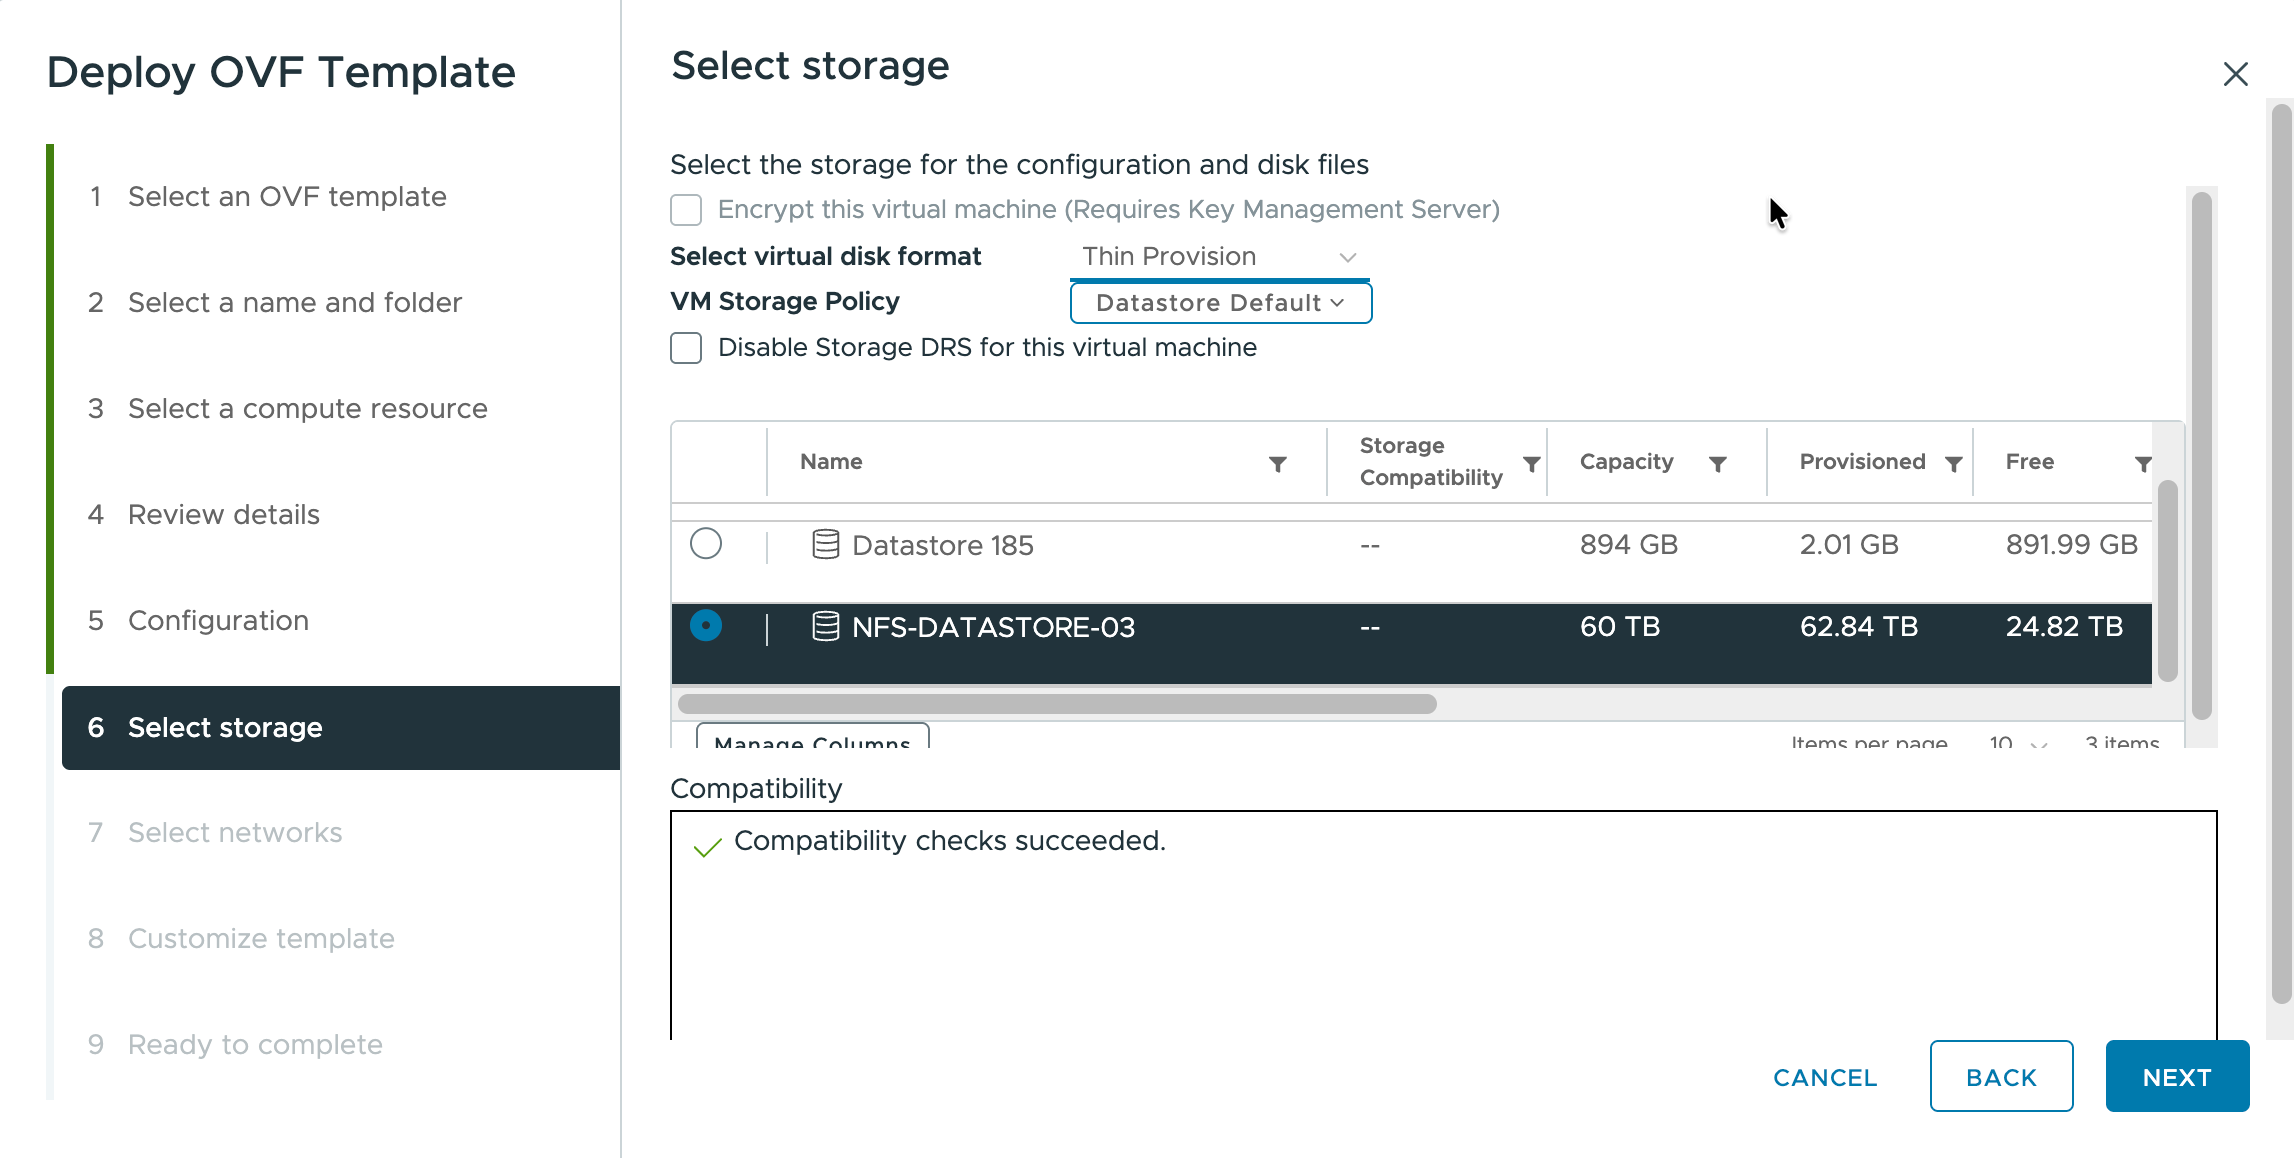
-
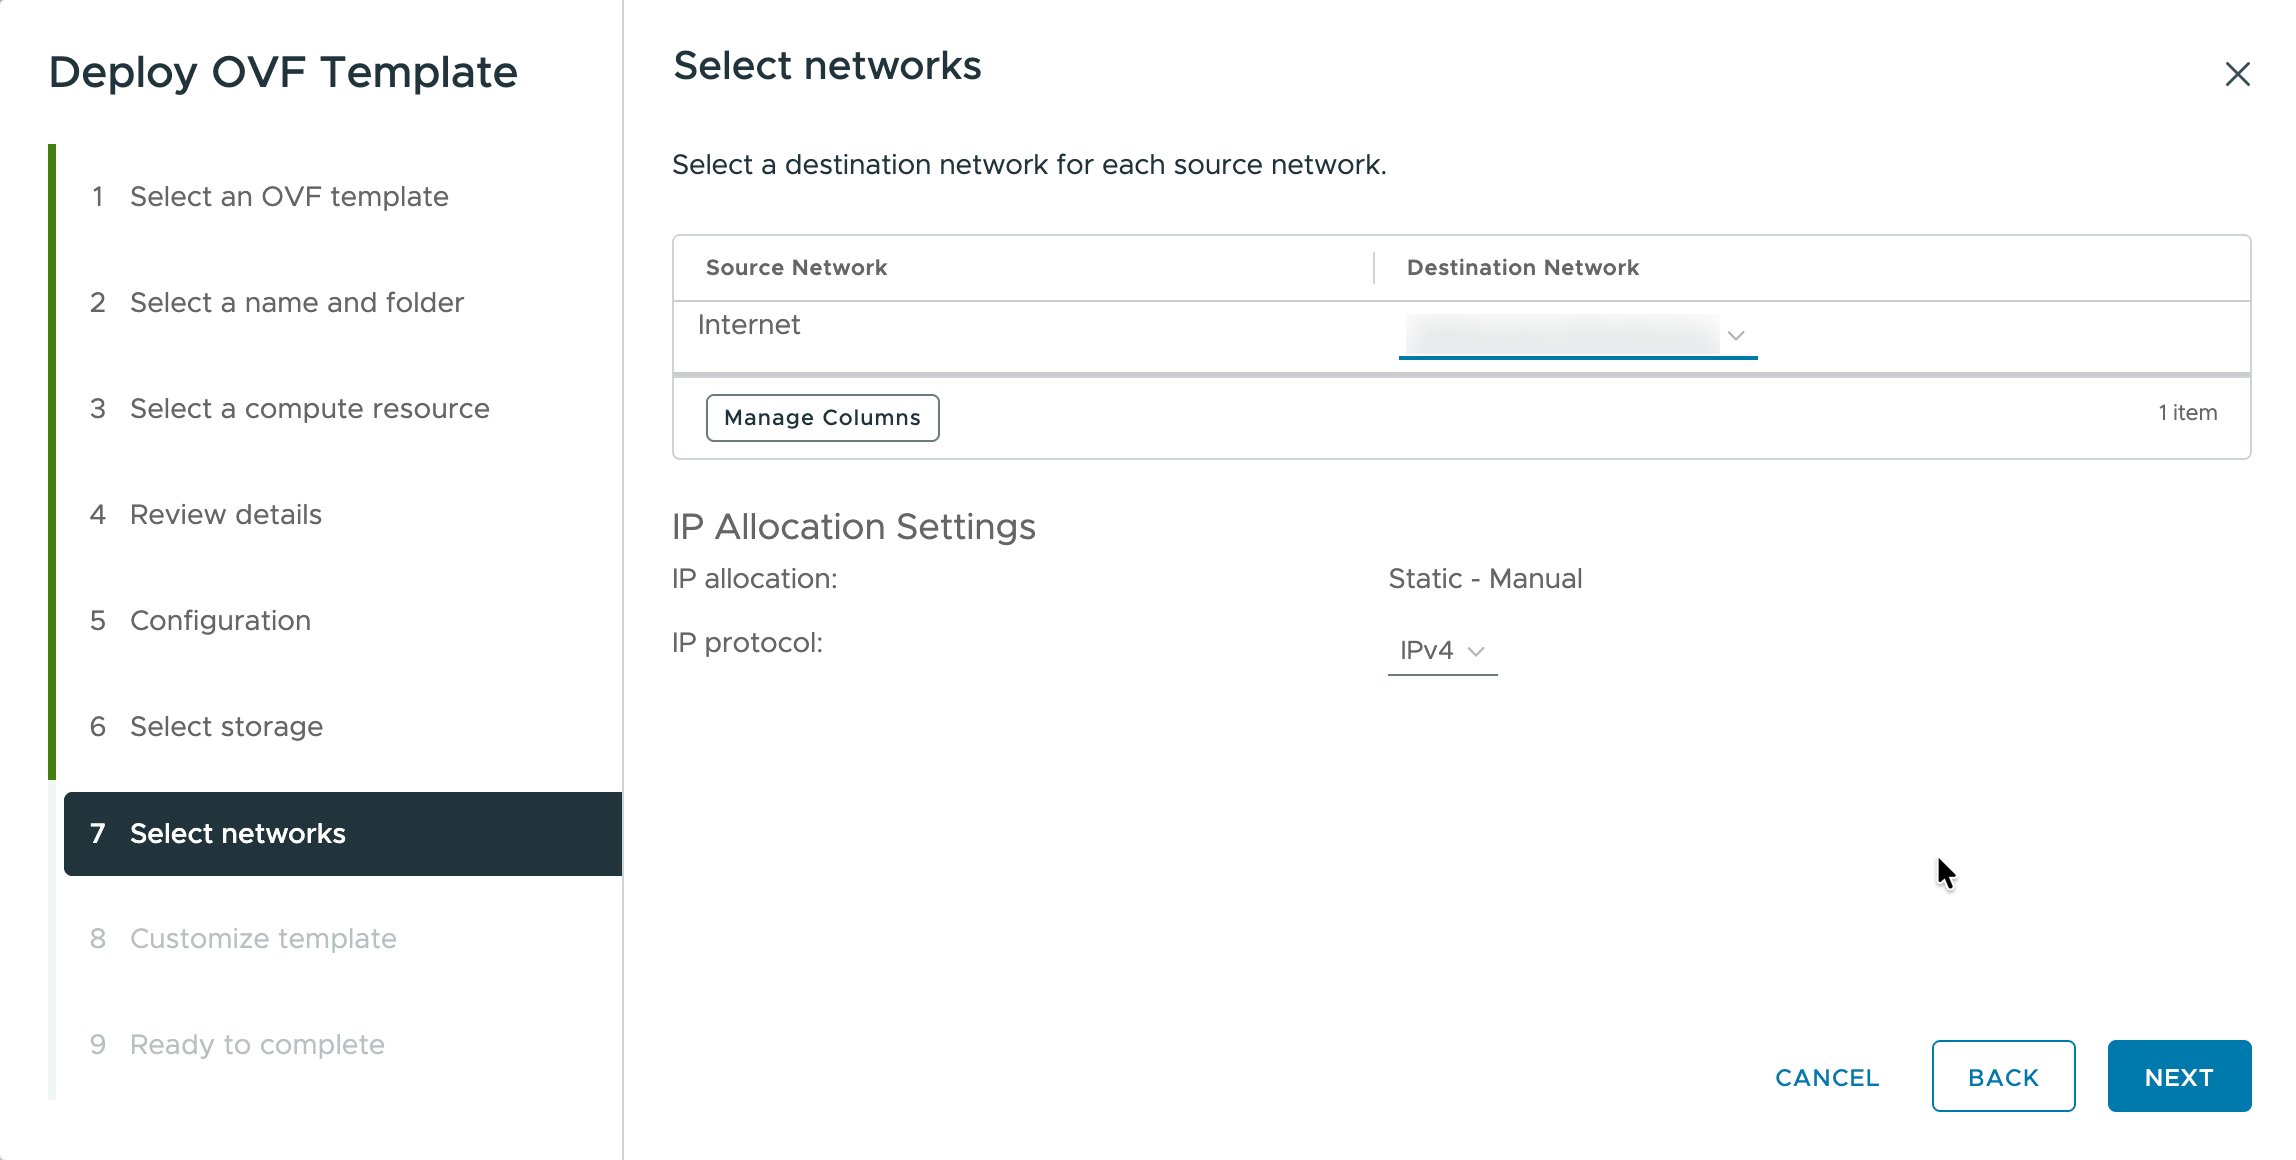
On the Select networks page, map the source network to your destination network, select "Static - Manual" and "IPv4", then click Next.
-
On the Customize template page, complete the following settings, then click Next:
-
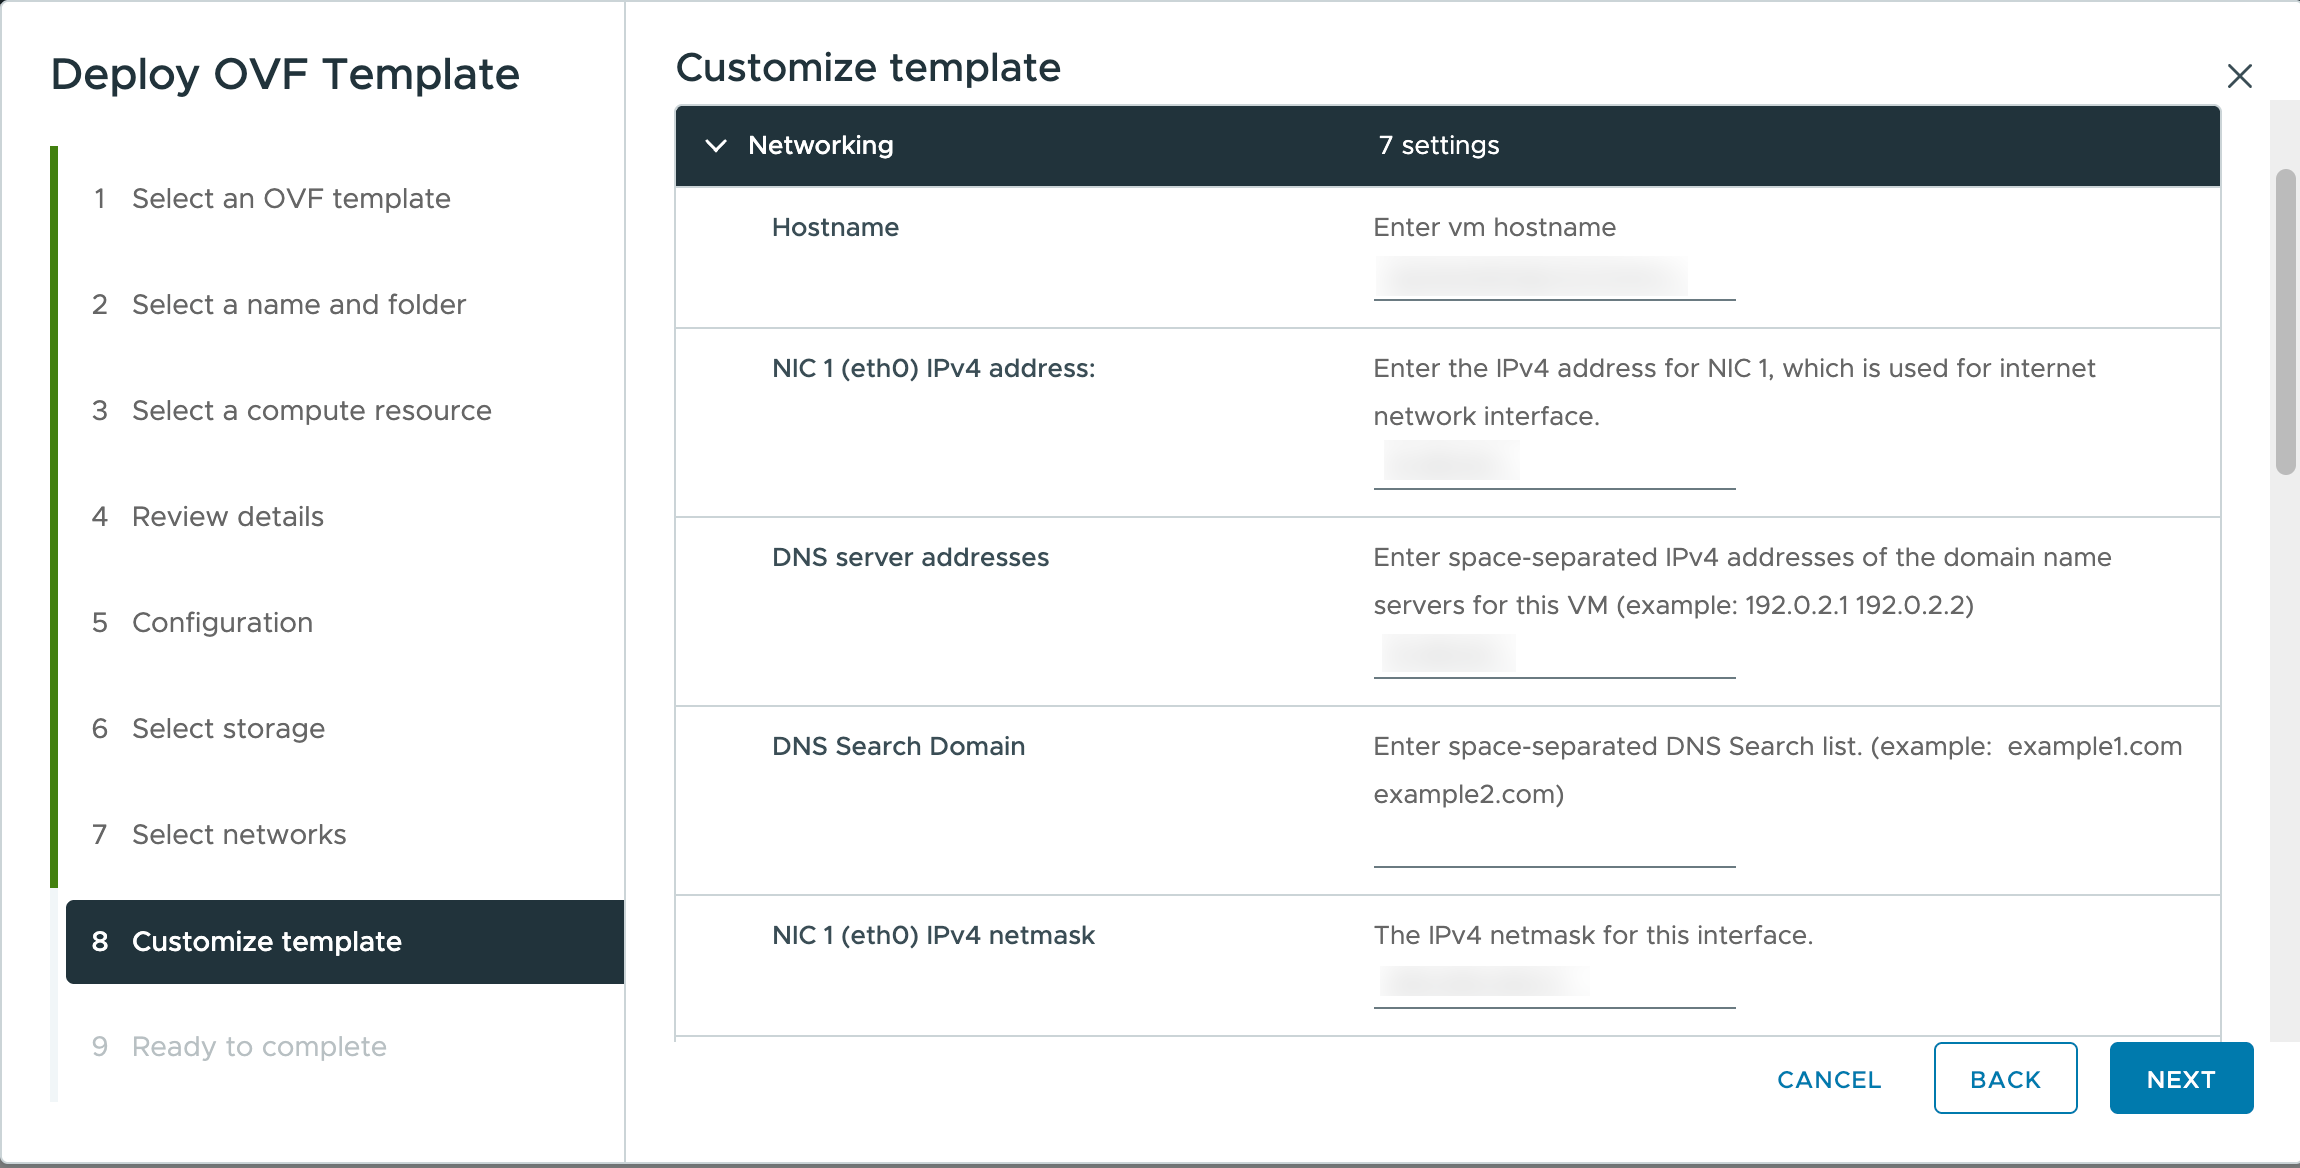
Under Networking, enter the network settings for this node.
-
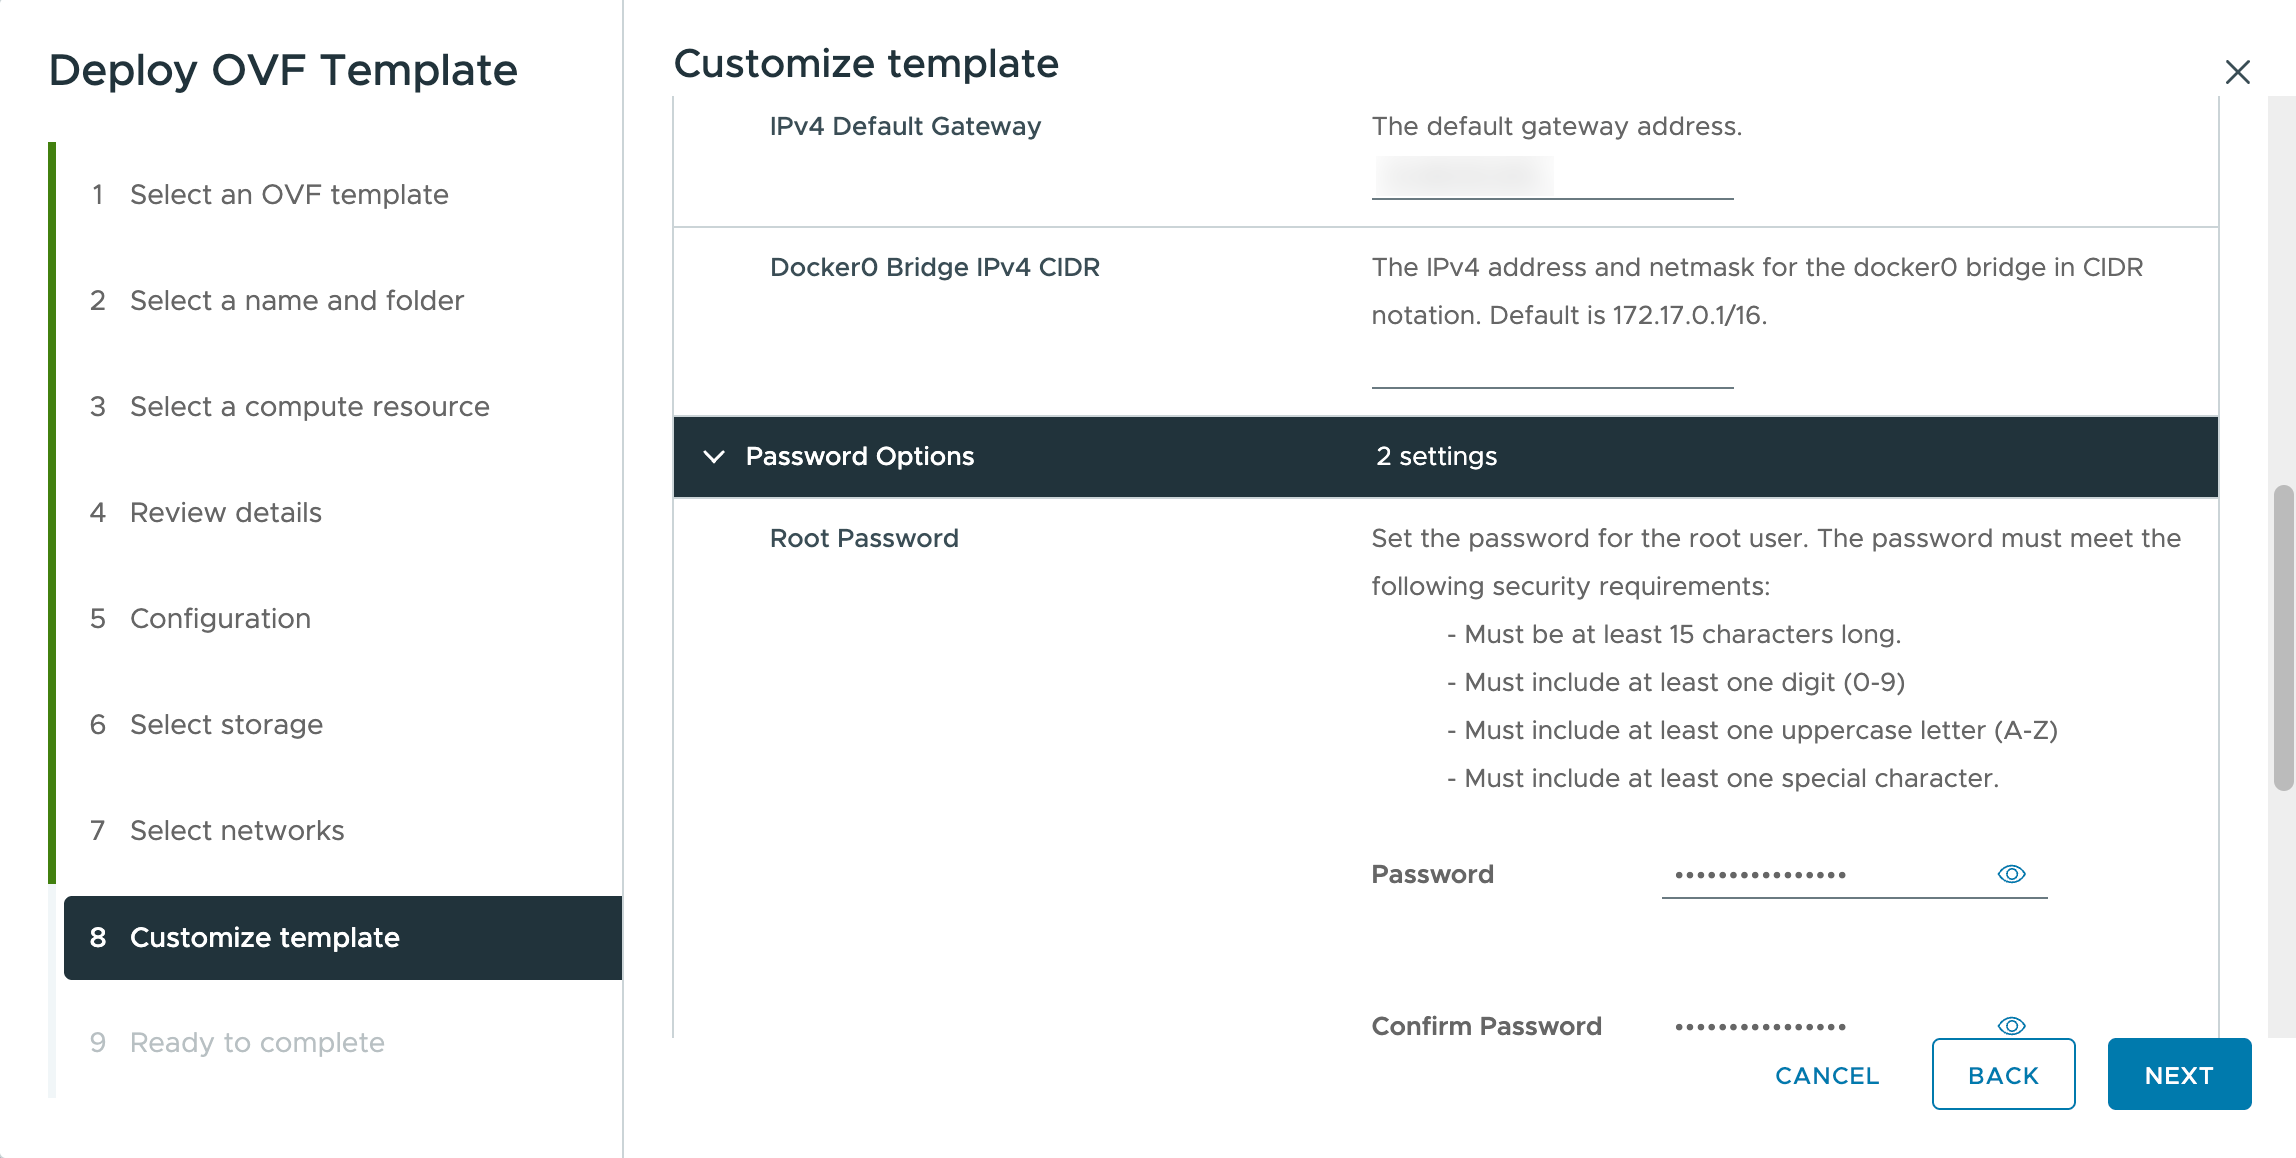
Under Password Options, set and confirm the Root Password. See Password Requirements that follow for the password rules enforced by this step.
Note:
-
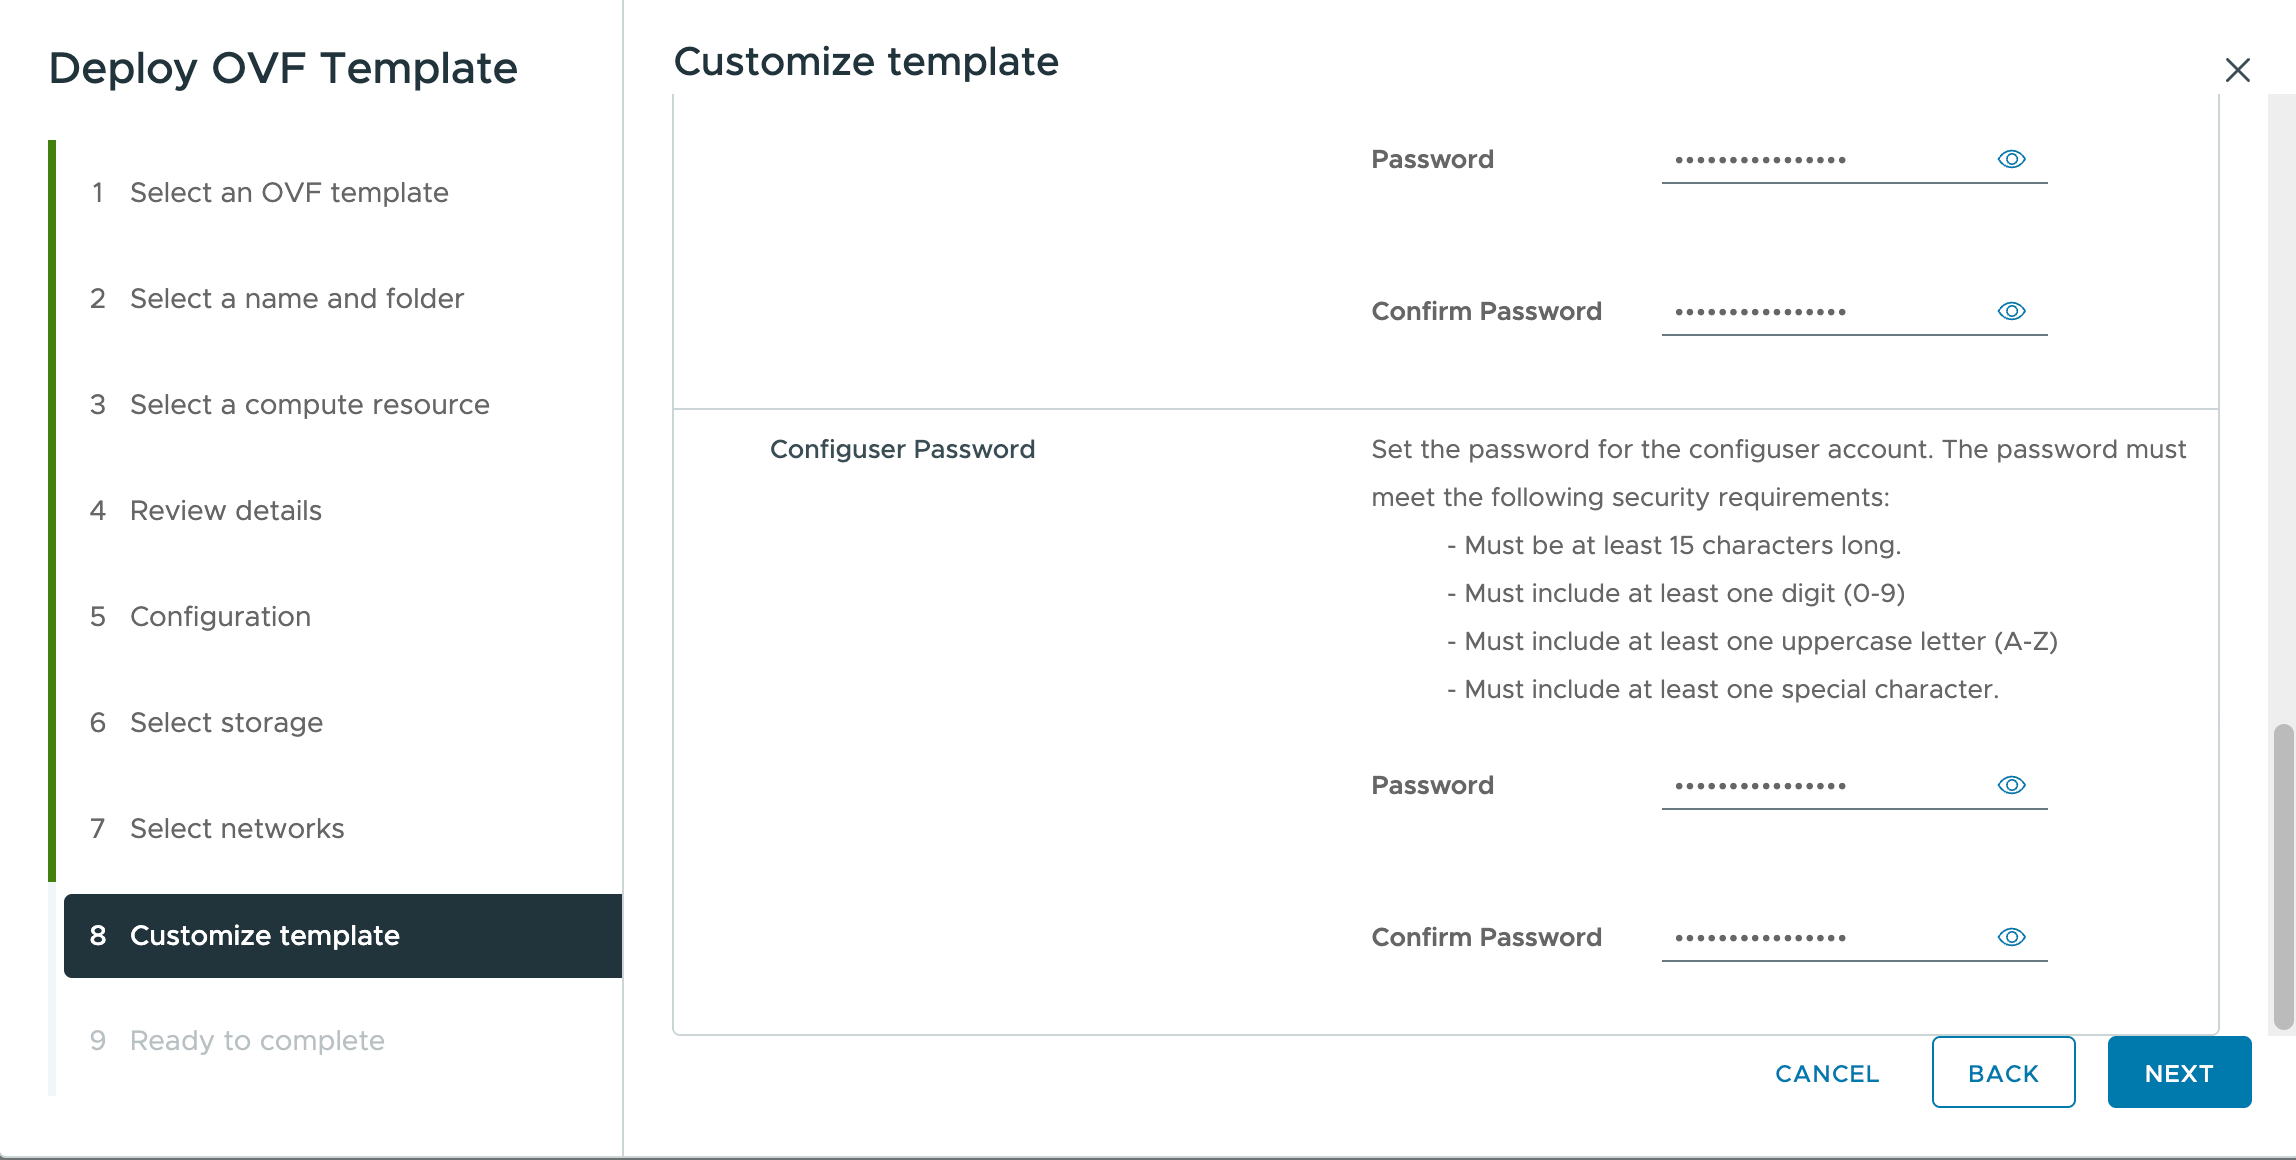
Regarding password requirements, both Root Password and the Configuser Password, set during OVA deployment and during cloning, must meet the following requirements:
- Must be at least 15 characters long.
- Must include at least one digit (0-9).
- Must include at least one uppercase letter (A-Z).
- Must include at least one special character.
In addition:
- The root password and the configuser password do not need to match each other.
- Each password must be identical across every node in the cluster. For example, the root password must be the same on every node, and the configuser password must be the same on every node.
-
-
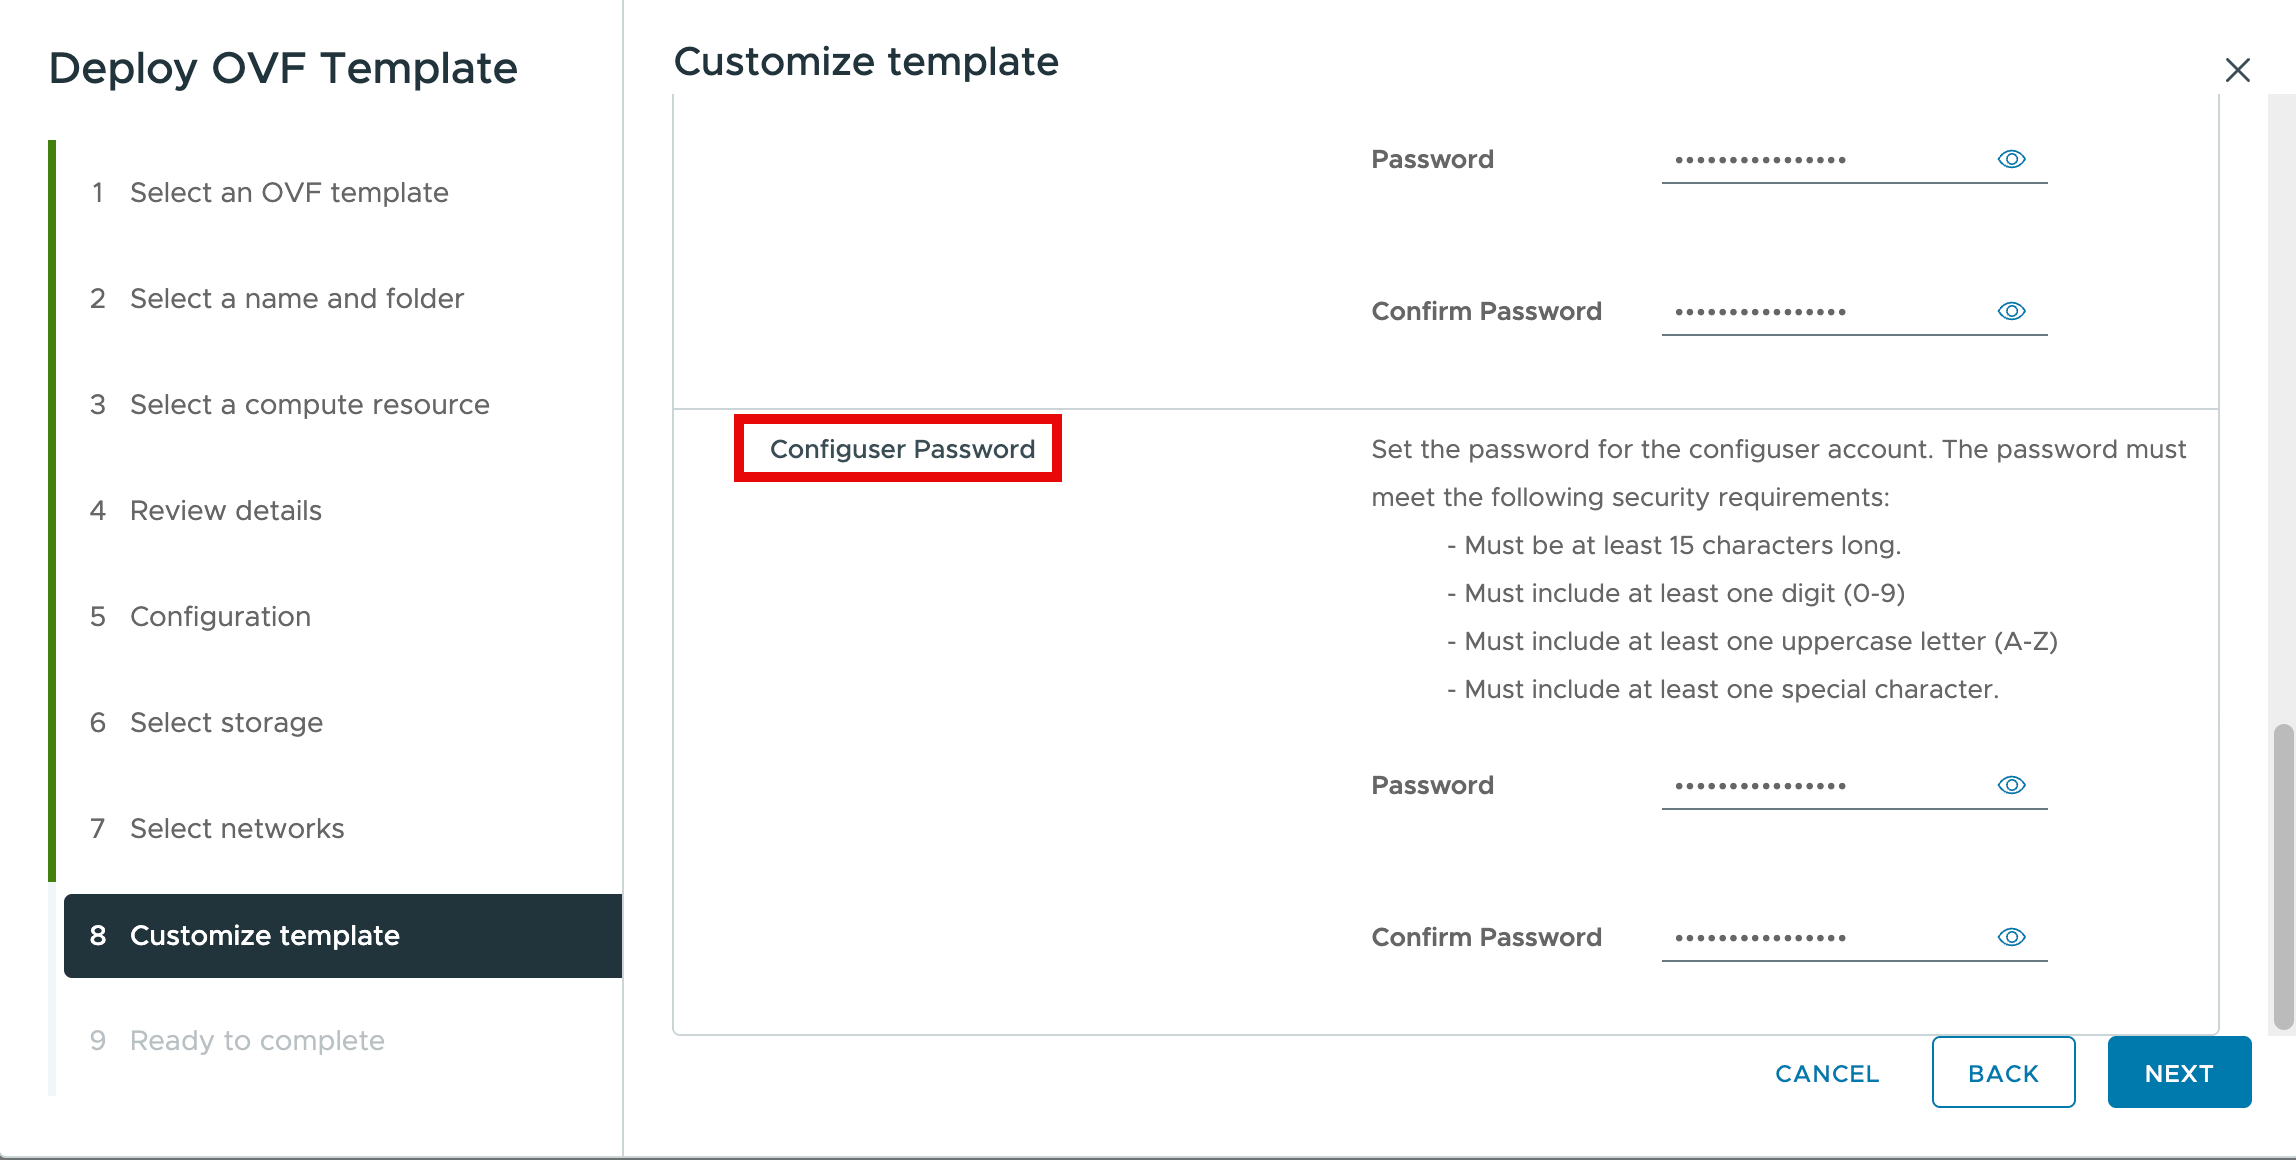
Scroll down to the Configuser Password fields and set and confirm that password as well. The Configuser Password fields sit directly below the Root Password fields and use the same layout, so confirm the label before entering the password.
-
-
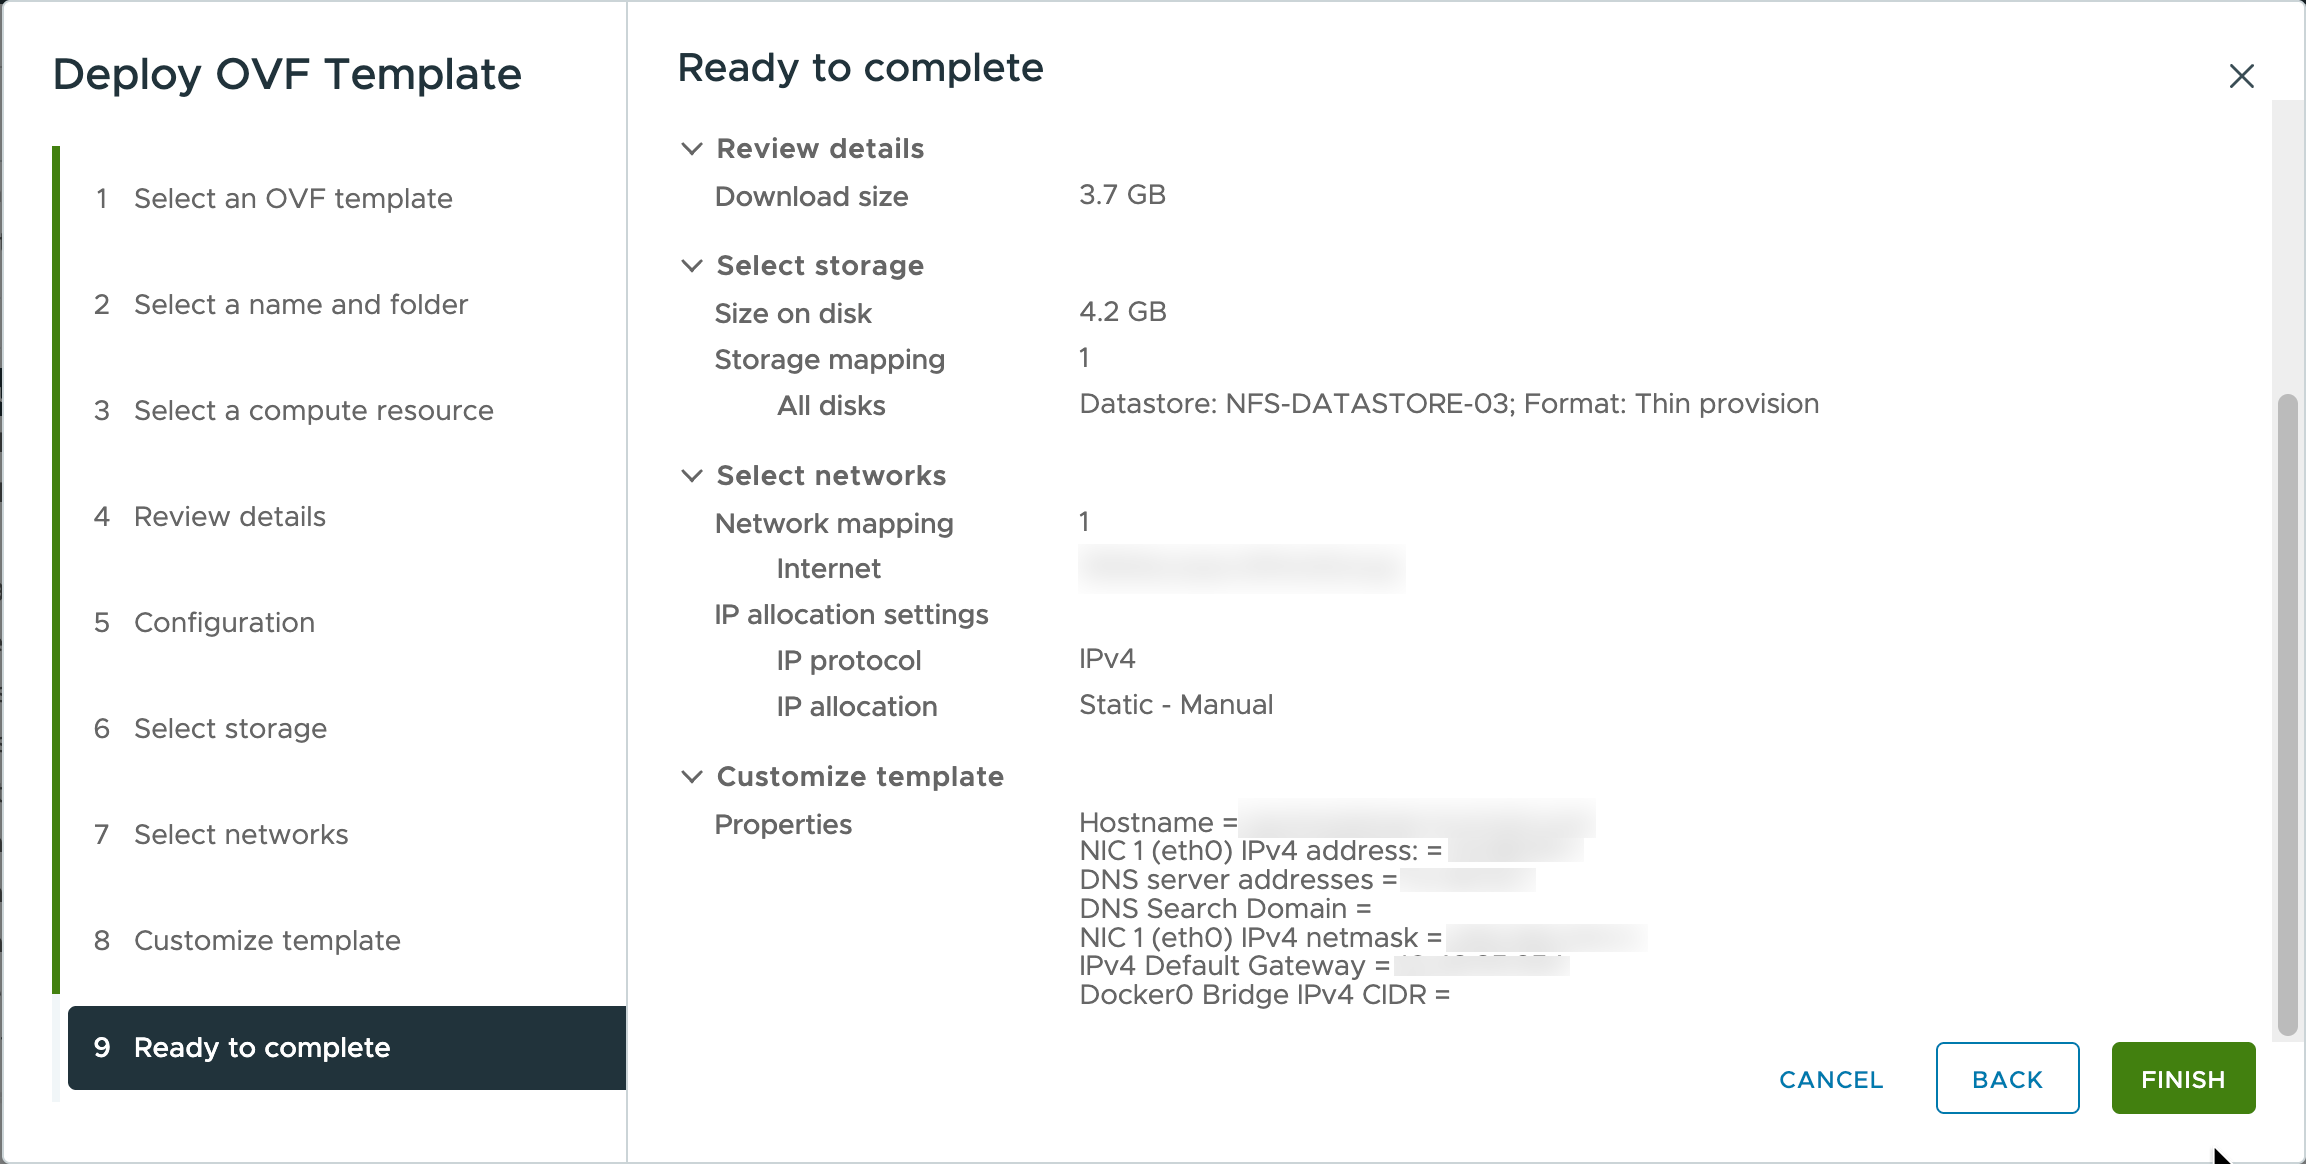
On the Ready to complete page, review the deployment summary, then click Finish.
The Bootstrap node cannot be cloned.
Deploy Infrastructure/Platform Nodes
Deploy the first Infrastructure/Platform node using the same Deploy OVF Template procedure described in Deploy the Bootstrap Node, with one difference:
- On the Configuration page, select the sizing option that matches your deployment size: Infra - Small, Infra - Medium, or Infra - Large. See the Configuration screenshots in Deploy the Bootstrap Node above for the resource allocation of each option.
See Hardware Sizing Requirements in Prepare Virtual Machines for Omnissa Access Installation for the number of Infrastructure/Platform nodes required for your deployment size.
After the first Infrastructure/Platform node is deployed, clone it to create the remaining Infrastructure/Platform nodes:
-
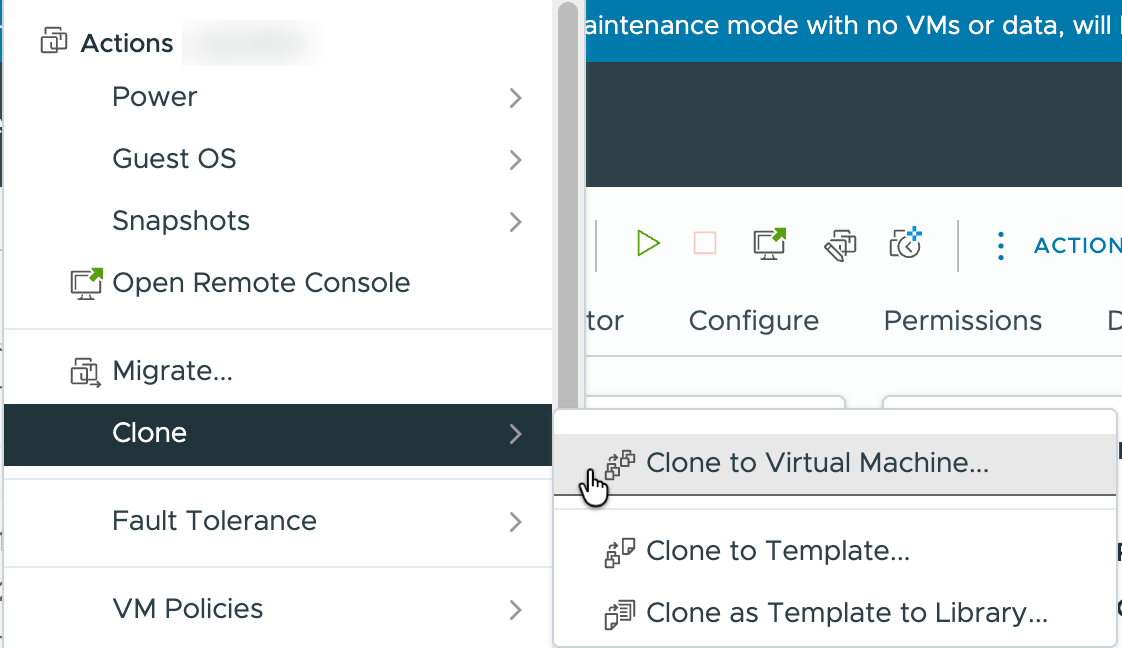
Right-click the deployed Infrastructure/Platform node and select Actions > Clone > Clone to Virtual Machine.
-
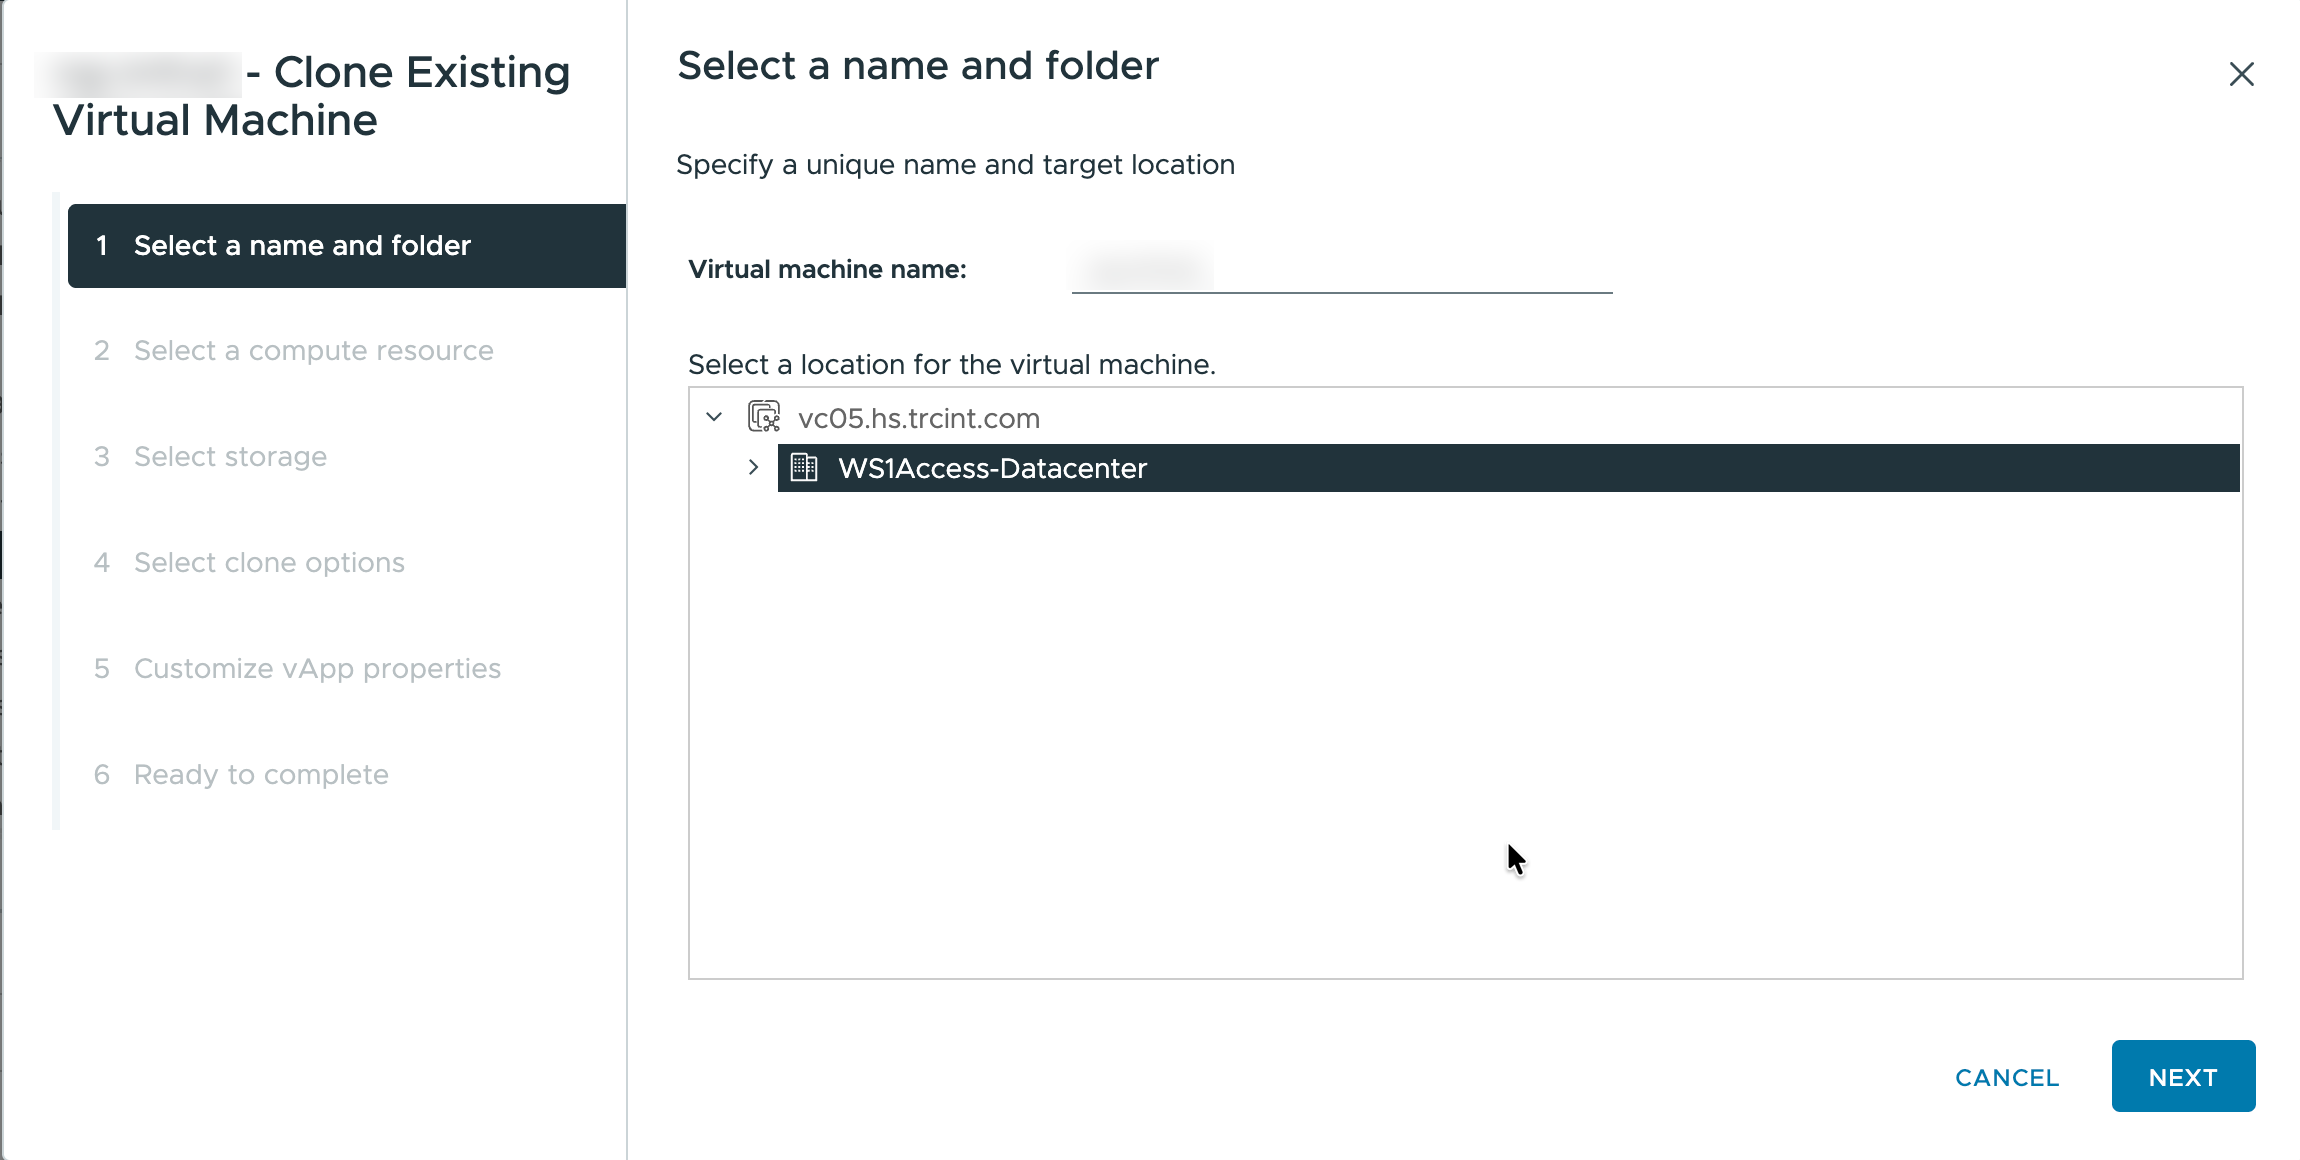
On the Select a name and folder page, enter a unique virtual machine name and select a location for the virtual machine, then click Next.
-
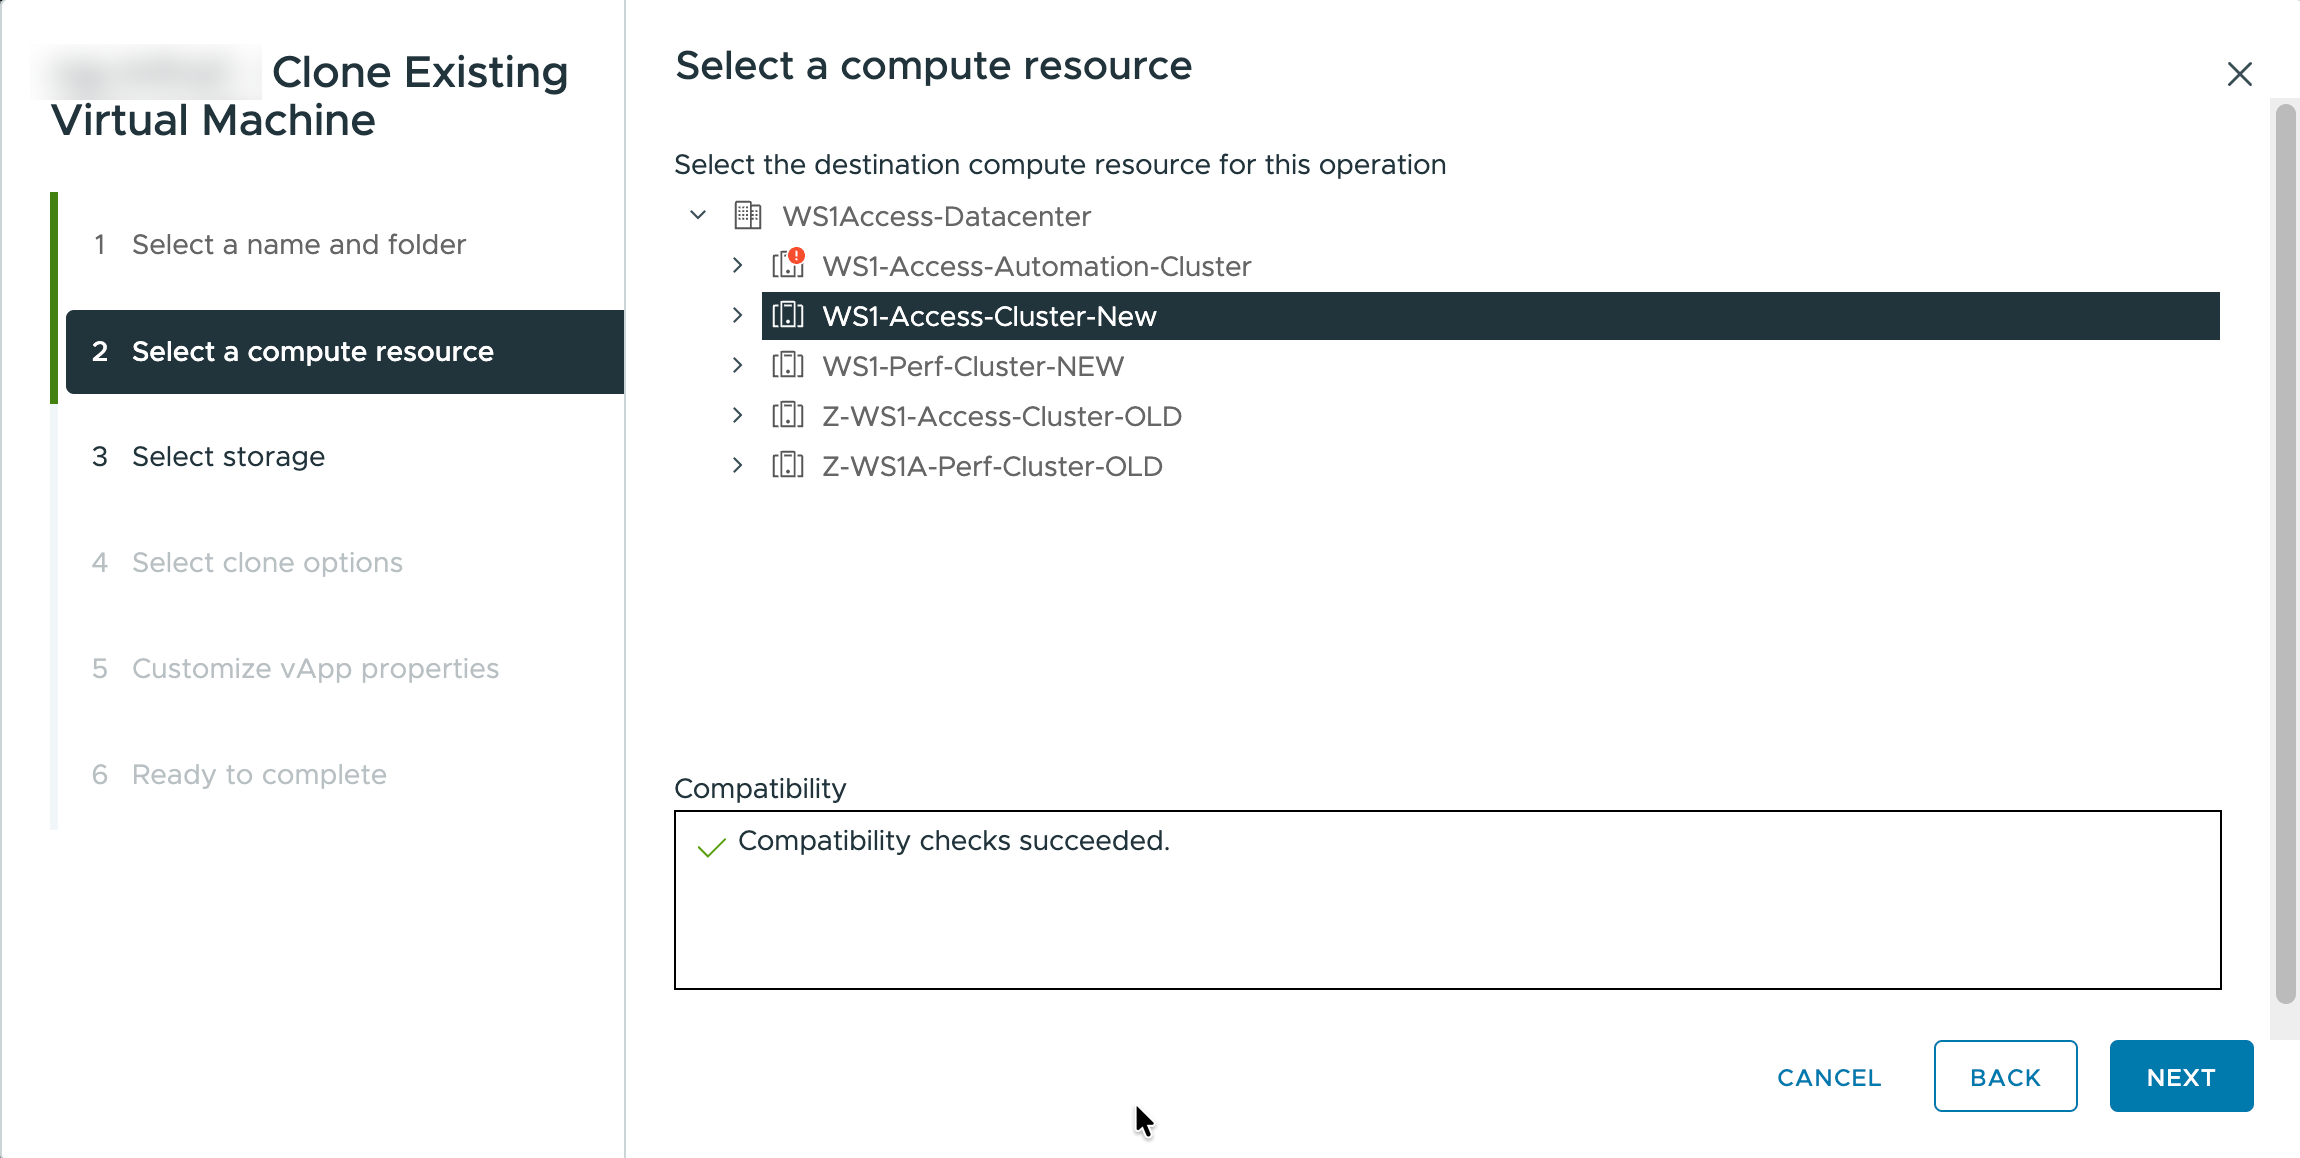
On the Select a compute resource page, select the destination compute resource, then click Next.
-
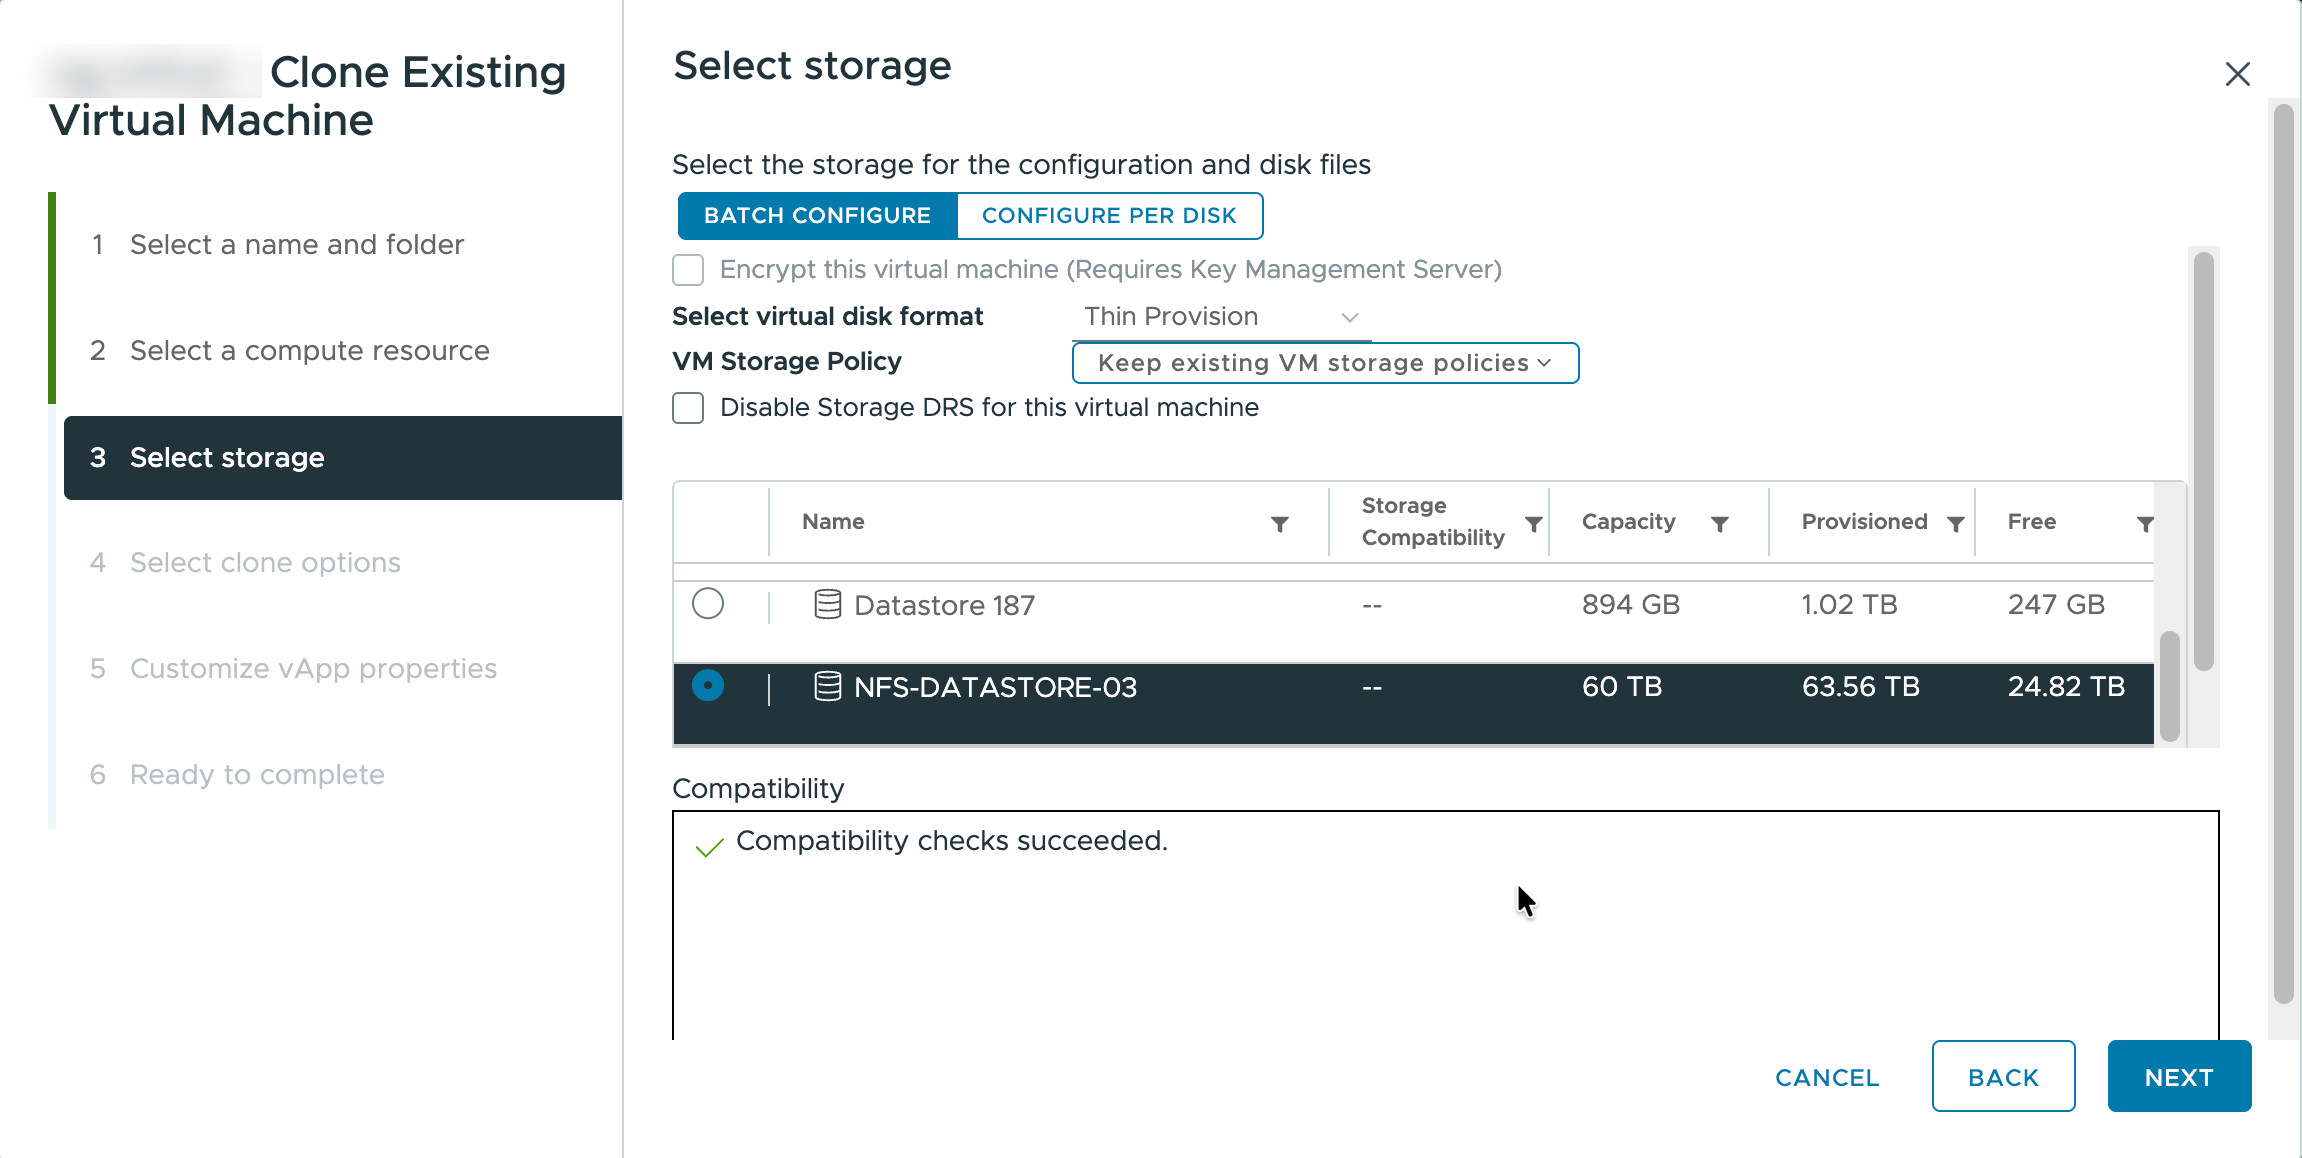
On the Select storage page, select the storage for the cloned node, then click Next.
-
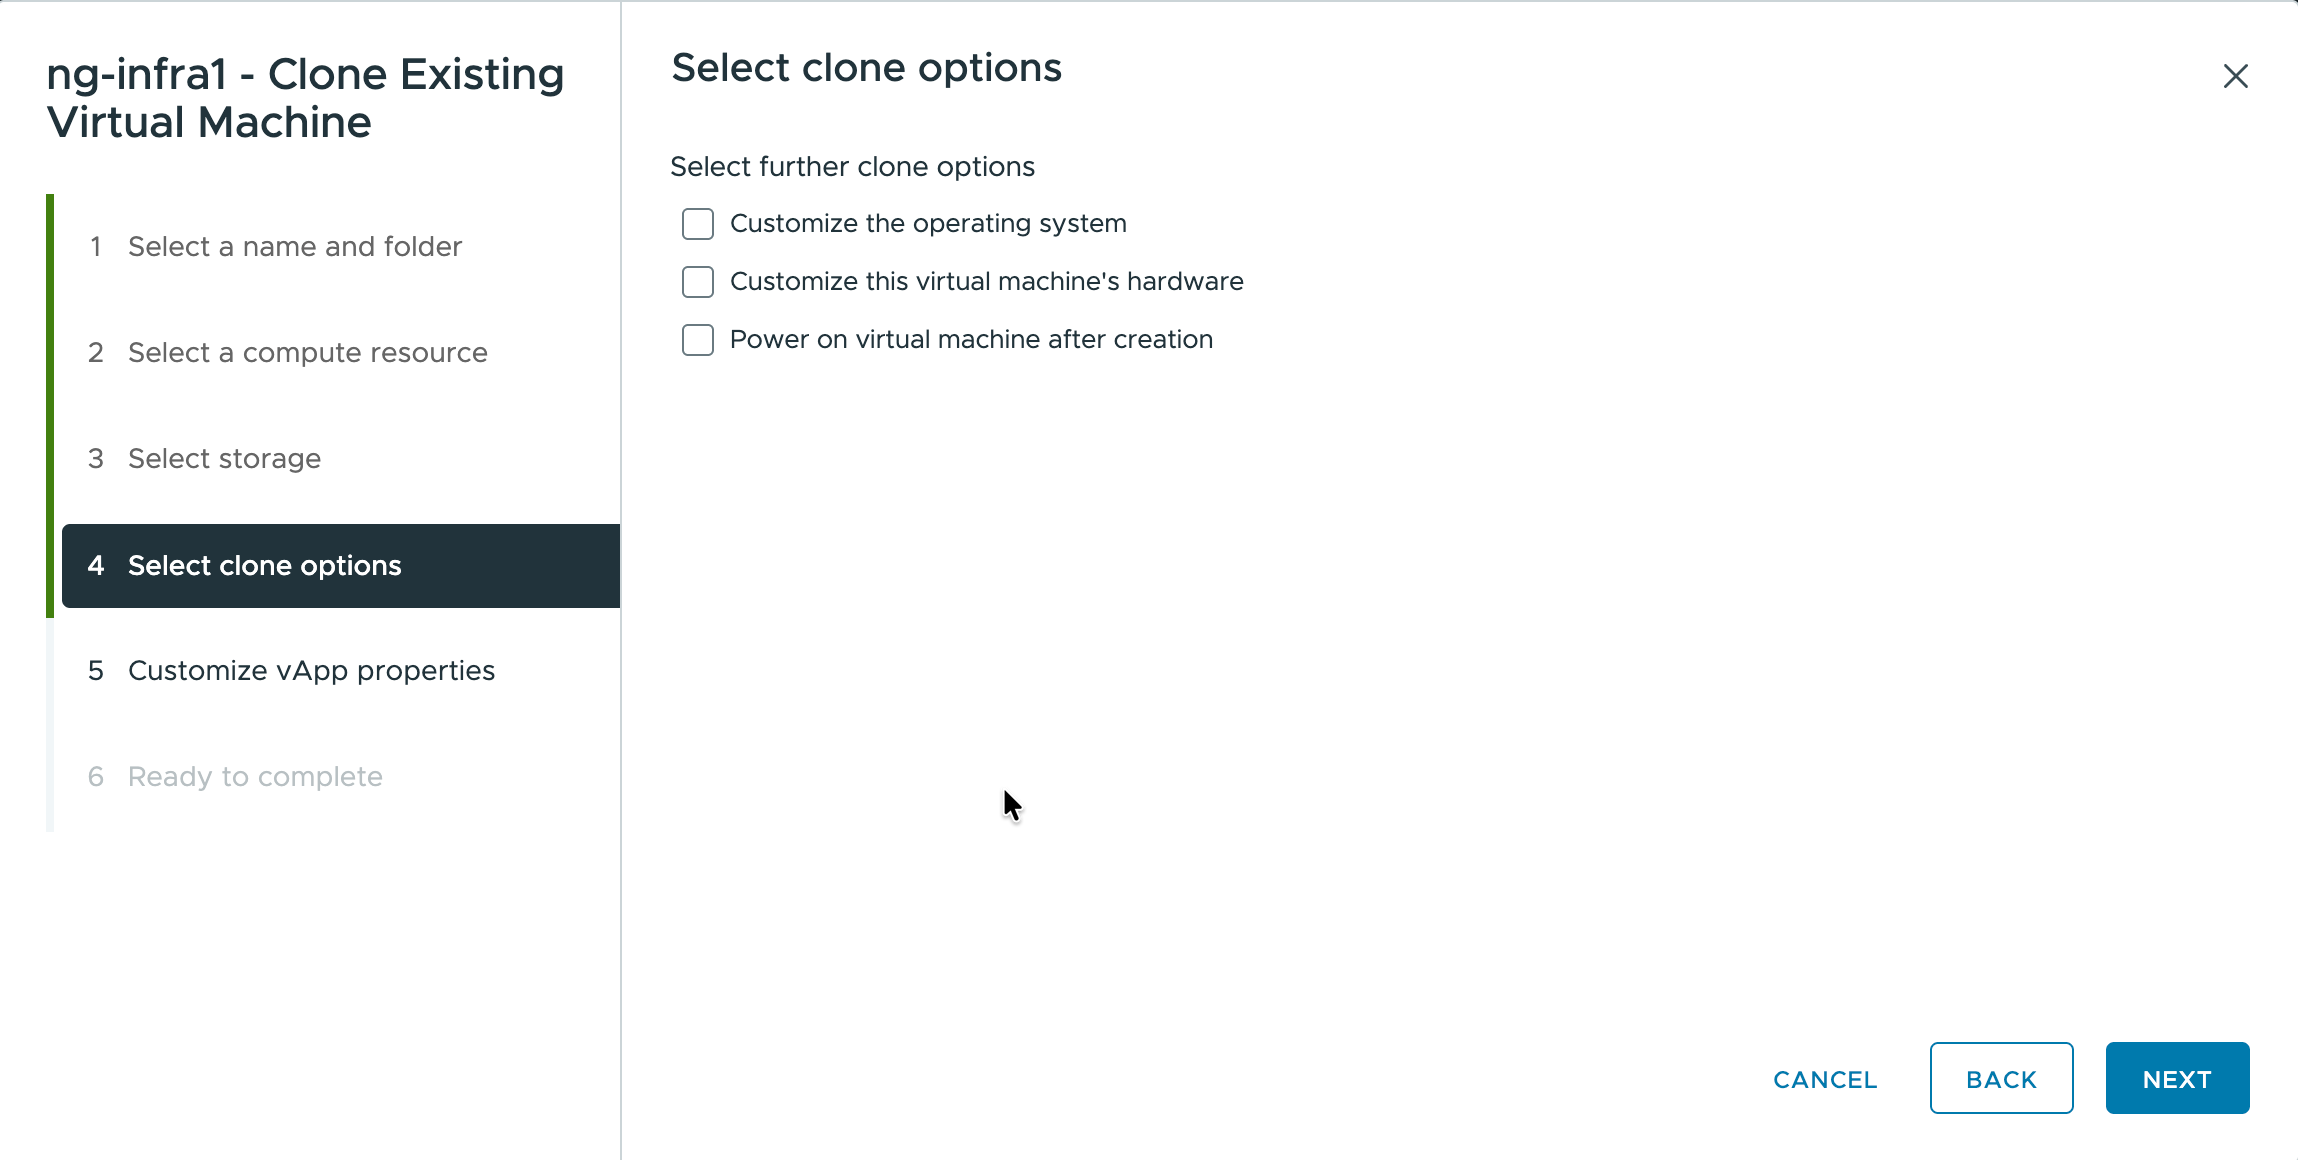
On the Select clone options page, select any additional options you need, then click Next.
-
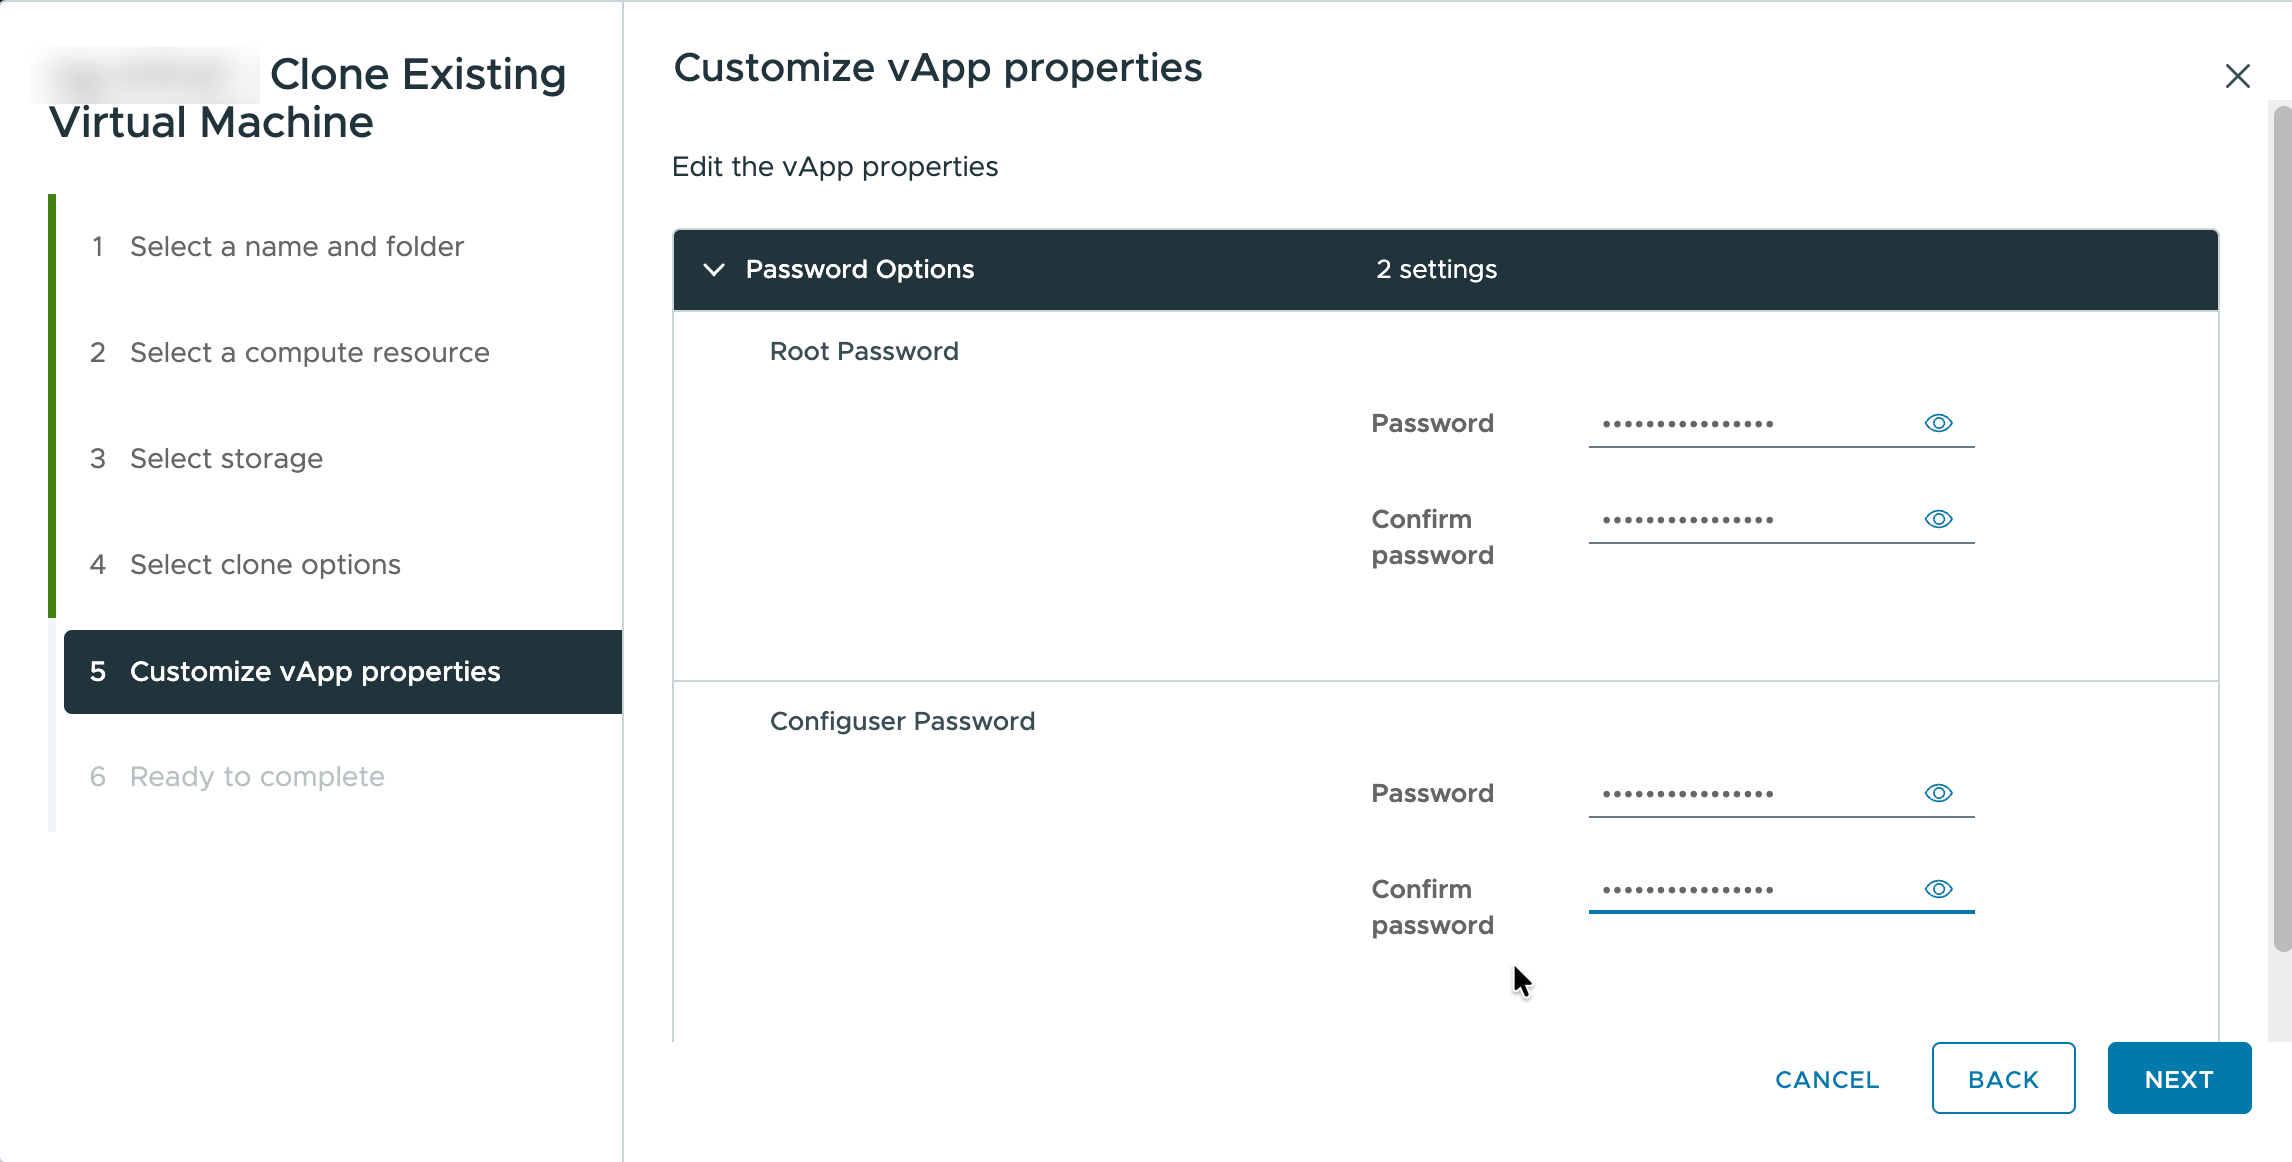
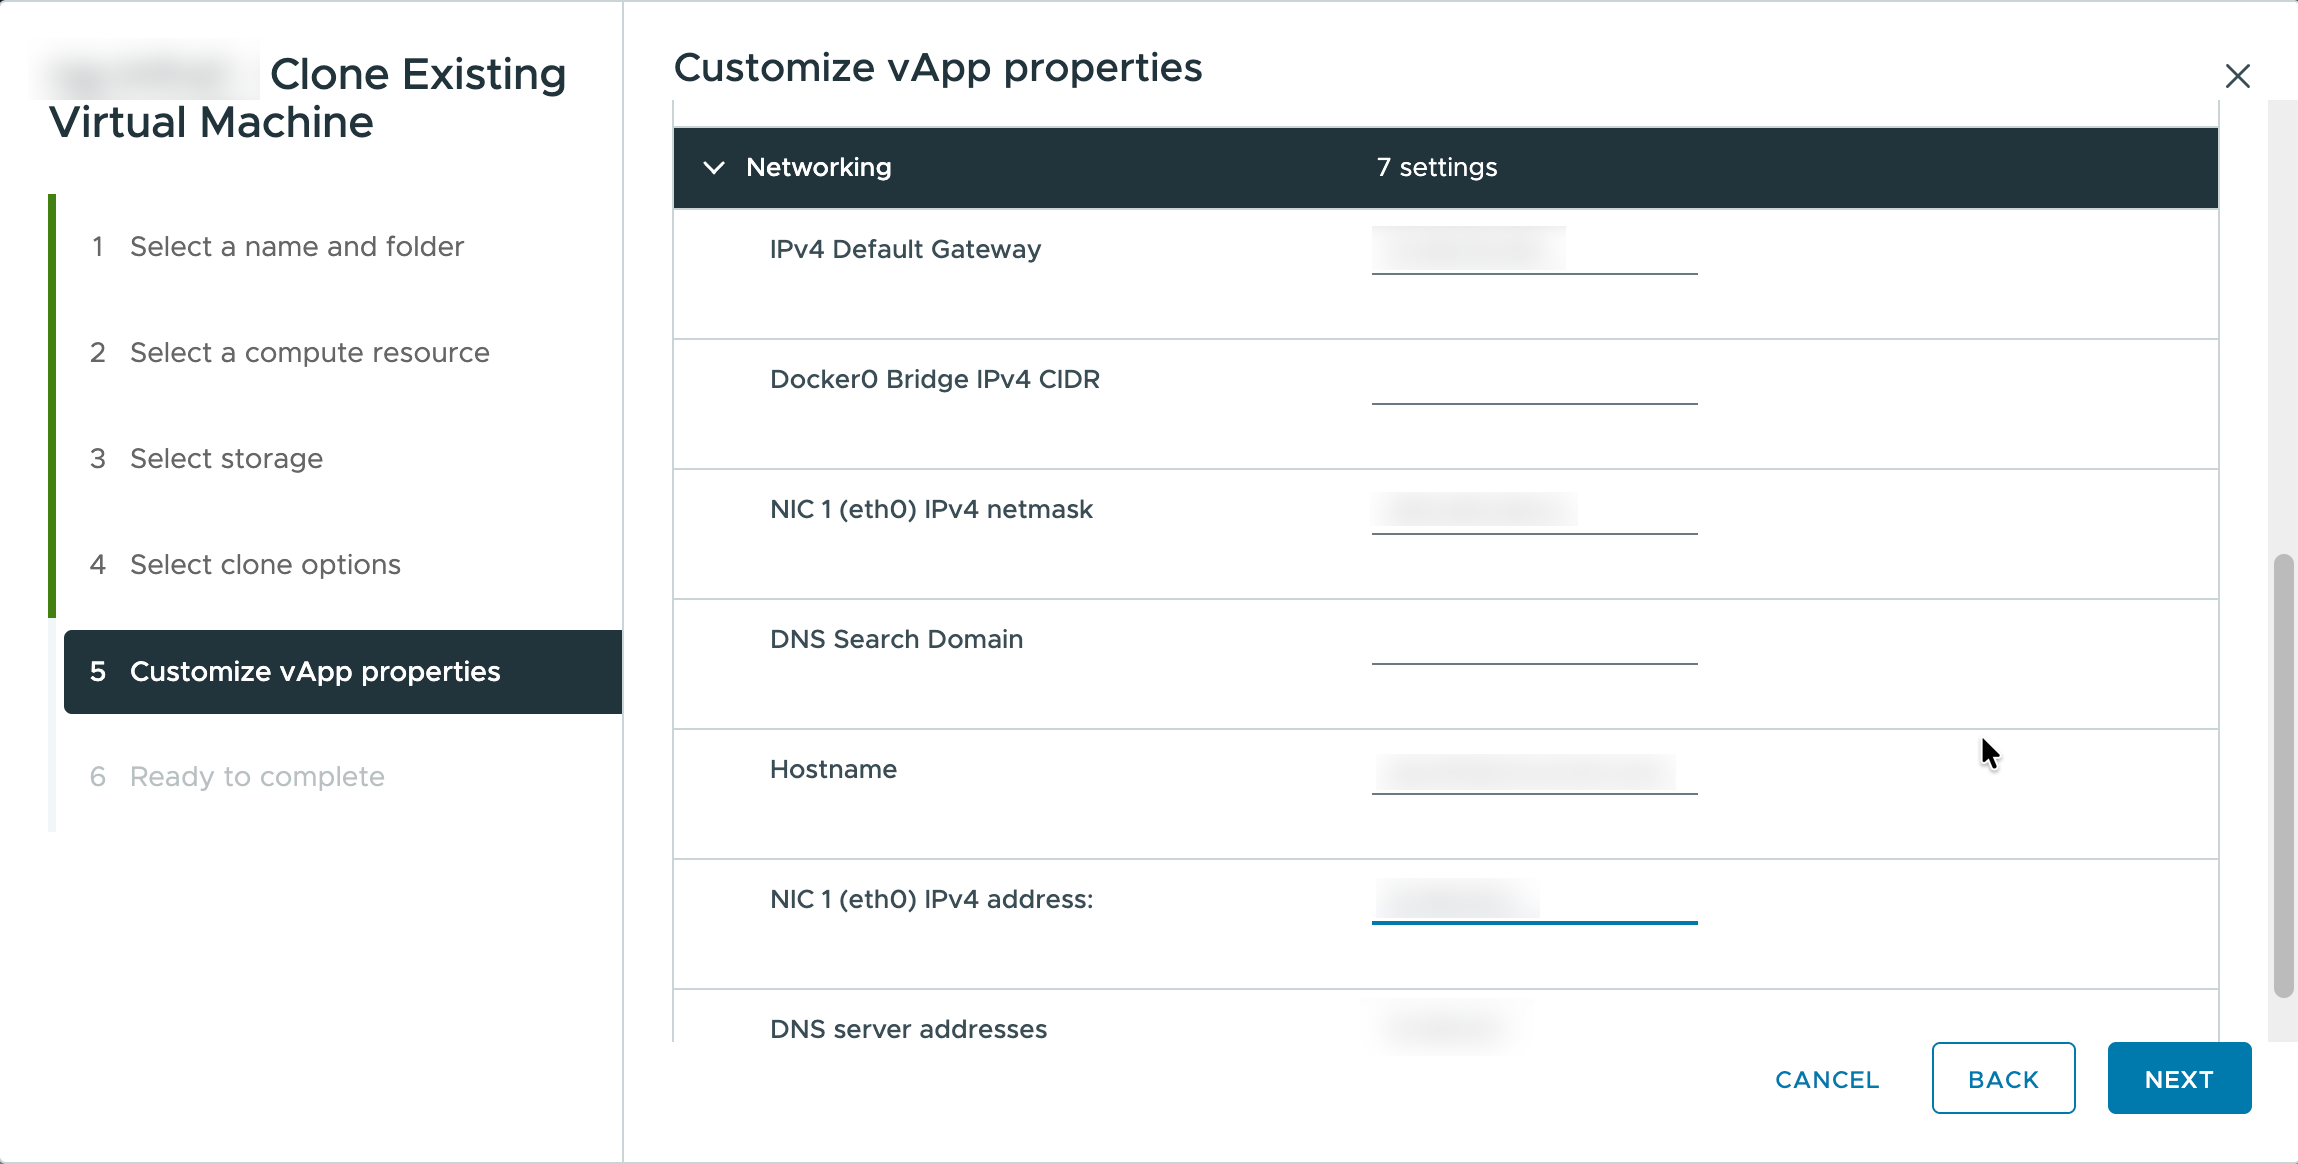
On the Customize vApp properties page, complete the following settings, then click Next:
-
Under Password Options, set and confirm the Root Password and Configuser Password. See Root and Configuser Password Requirements in Deploy the Bootstrap Node above.
-
Under Networking, update the network settings so that each value is unique to the cloned node.
-
-
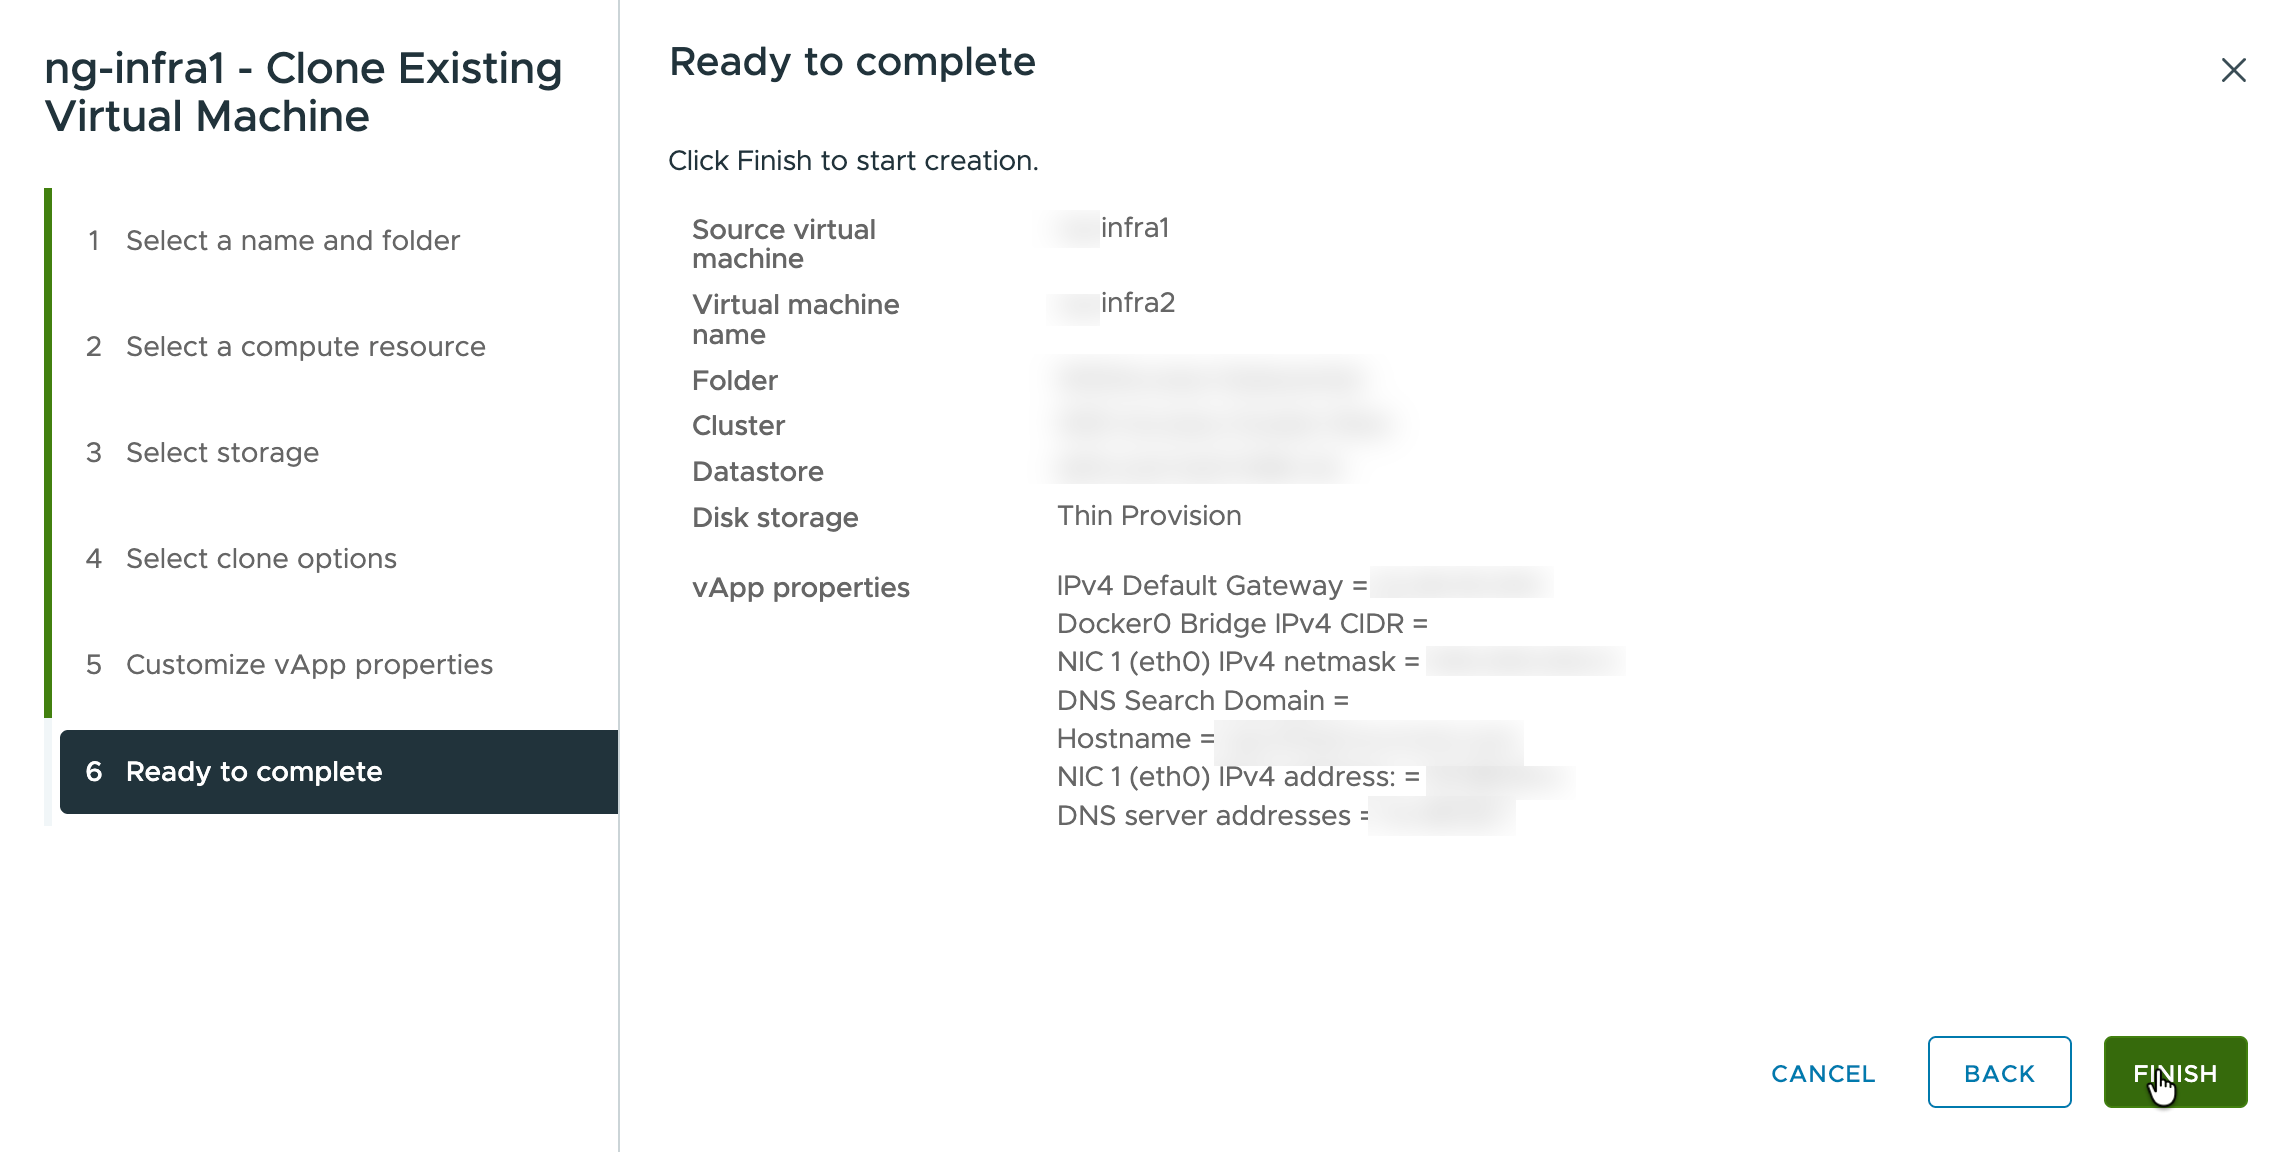
On the Ready to complete page, review the deployment summary, then click Finish.
Deploy Omnissa Access Nodes
Deploy the first Omnissa Access node using the same Deploy OVF Template procedure described in Deploy the Bootstrap Node, with one difference:
- On the Configuration page, select the sizing option that matches your deployment size: Access - Small, Access - Medium, or Access - Large. See the Configuration screenshots in Deploy the Bootstrap Node above for the resource allocation of each option.
See Hardware Sizing Requirements in Prepare Virtual Machines for Omnissa Access Installation for the number of Omnissa Access nodes required for your deployment size.
After the first Omnissa Access node is deployed, clone it to create the remaining Omnissa Access nodes using the same Clone to Virtual Machine procedure described in Deploy Infrastructure/Platform Nodes above according to your deployment size.
Important: Omnissa recommends taking snapshots of all nodes at this point.
Power On the Nodes
After all Bootstrap, Infrastructure/Platform, and Omnissa Access nodes are deployed, power on all the nodes together.
Was this page helpful?