This article describes the prerequisite tasks that you must complete before beginning the migration process from VMware NSX for vSphere (NSX-V) to VMware NSX (NSX-T).
Here's a high-level summary of the prerequisite tasks for migration.
- Split the primary and secondary NSX-V managers
- Install the NSX-T manager
- Create the ESXi IP address pool
- Install the NSX-T edge appliances
- Add the compute manager
- Set up the manager licenses
- Enable the Migration Coordinator service
The following sections describe each prerequisite task in detail. Perform the tasks in the order listed.
1. Split the primary and secondary NSX-V managers
NSX-T and NSX-V use different implementations of the NSX manager. To prepare for the migration, you must split primary managers from any secondary managers in your existing NSX-V environment.
-
In your NSX-V environment, use vSphere Client to log in to the primary vCenter Server.
-
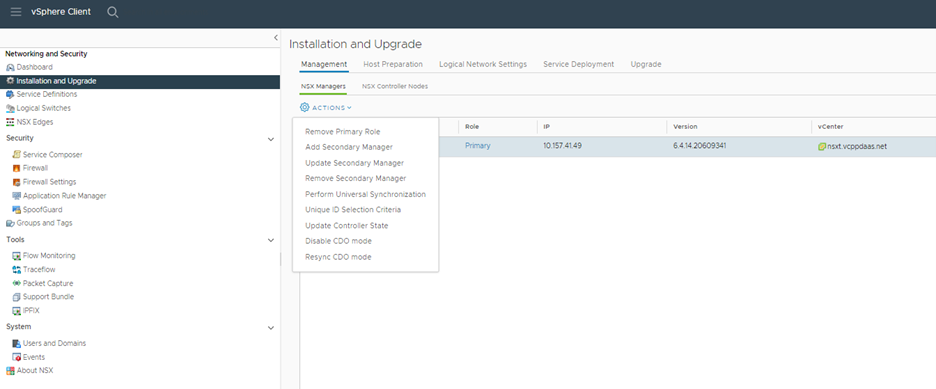
Remove the role of secondary managers.
-
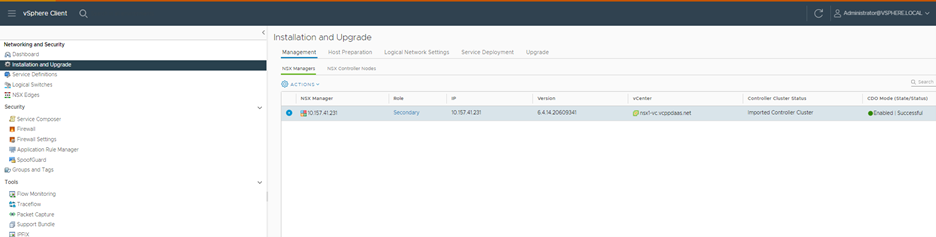
Navigate to Installation and Upgrade.
-
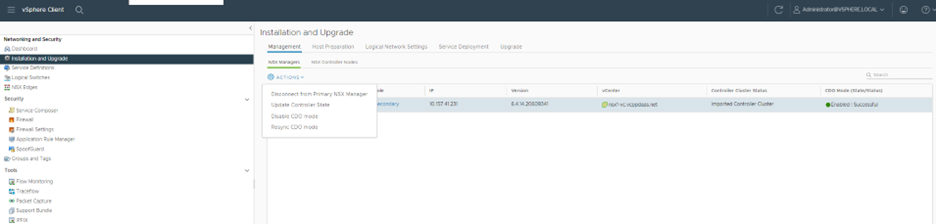
Select the secondary NSX-V manager and disconnect it from the primary manager.
2. Install the NSX-T manager
-
Visit the Broadcom Support Portal and navigate to the downloads page for VMware NSX-T Data Center.
-
Download the NSX-T manager OVA file.

-
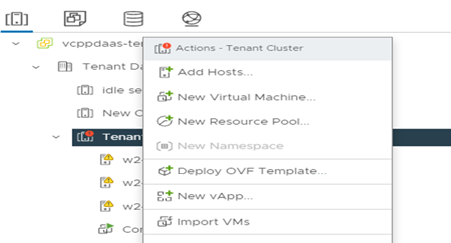
Create a new virtual machine (VM) from the OVA file by performing the Deploy OVF Template action on the tenant cluster.
3. Create an ESXi IP address pool
After installing the NSX-T manager appliance, create an ESXi IP address pool to support tunnel endpoints.
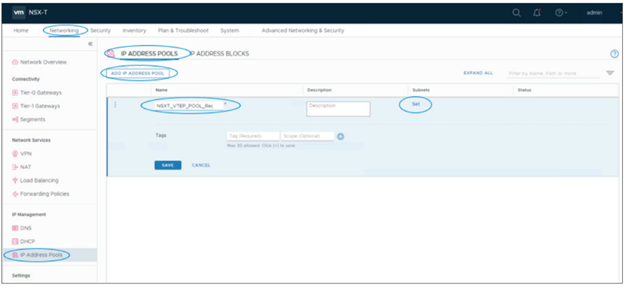
4. Install the NSX-T edge appliances
-
Visit the Broadcom Support Portal and navigate to the downloads page for VMware NSX-T Data Center.
-
Download the OVA file for the NSX edge appliance.

-
Create a new virtual machine (VM) from the OVA file by performing the Deploy OVF Template action on the tenant cluster.
-
Add the required number of edge VMs configured with resource capacities that match the existing NSX-V deployment.
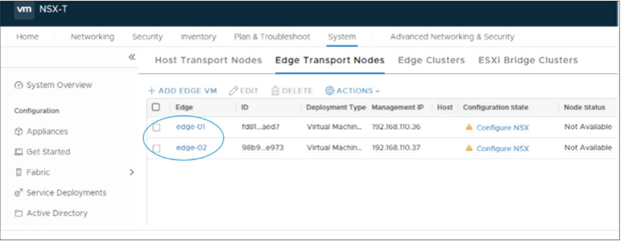
5. Add the compute manager
Add a compute manager that points to the vCenter Server associated with the NSX-V deployment that you are migrating.
-
In the NSX-T console, go to System > Fabric > Compute Managers > Add.
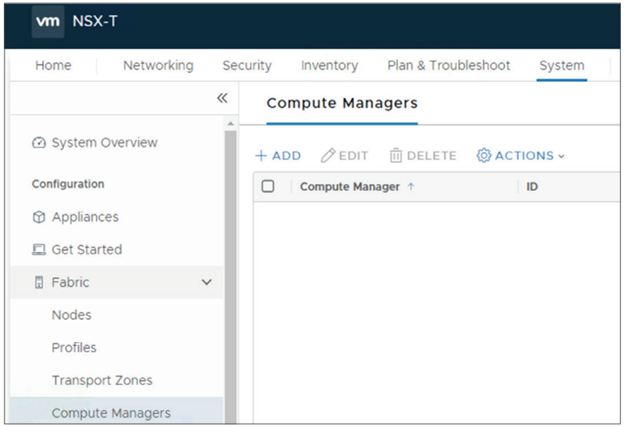
-
In the New Compute Manager dialog box, enter the details of the vCenter Server associated with your NSX-V deployment. Then click Add.
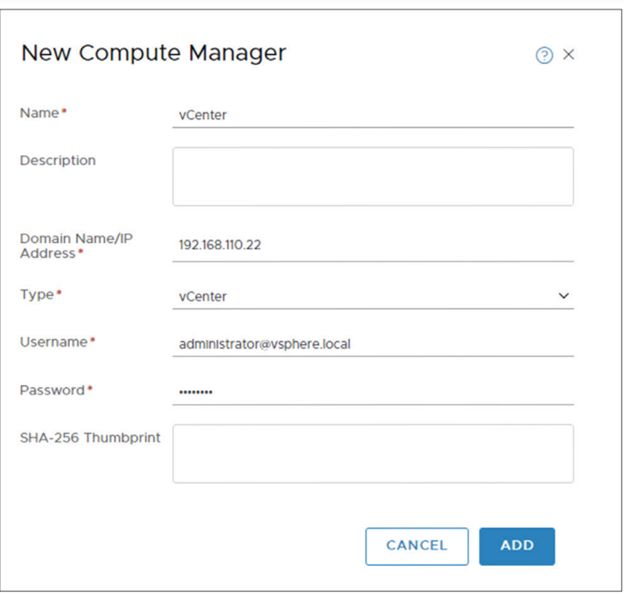
-
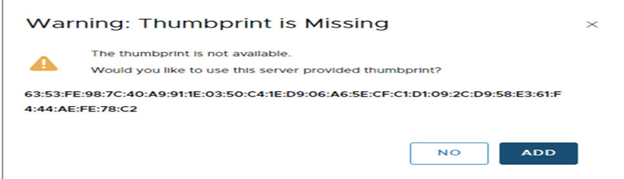
Click Add to accept the thumbprint provided by vCenter Server.
-
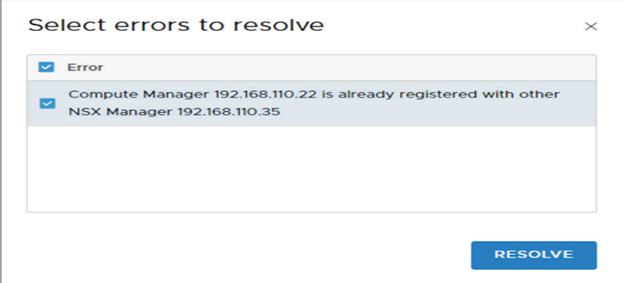
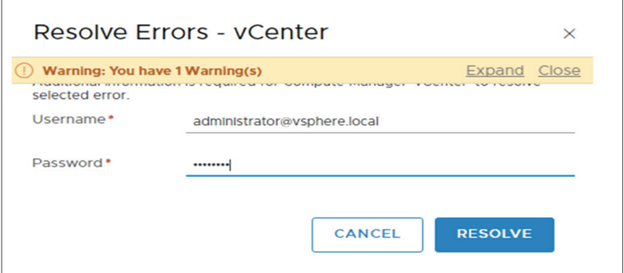
If an error message appears, select all items in the error list and click Resolve. Then provide the user name and password of the vCenter Server and click Resolve.
-
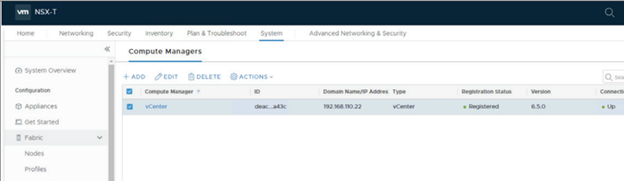
Confirm that the new compute manager is connected to the correct vCenter Server.
6. Set up the manager licenses
Gather the manager licenses and add the licenses to the edge.
7. Enable the Migration Coordinator service
The NSX-T migration process depends on the Migration Coordinator service, which is turned off by default. An alert message appears at the top of the System > Migrate page of the NSX-T console to indicate that you must first enable the service before starting the migration.
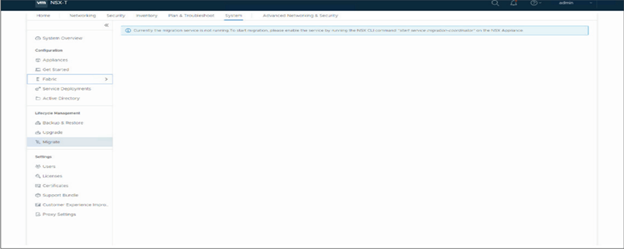
Use the following procedure to enable the Migration Coordinator service from the command-line interface (CLI) for the NSX-T manager.
-
Log in to the NSX-T manager CLI.
-
Run the following command.
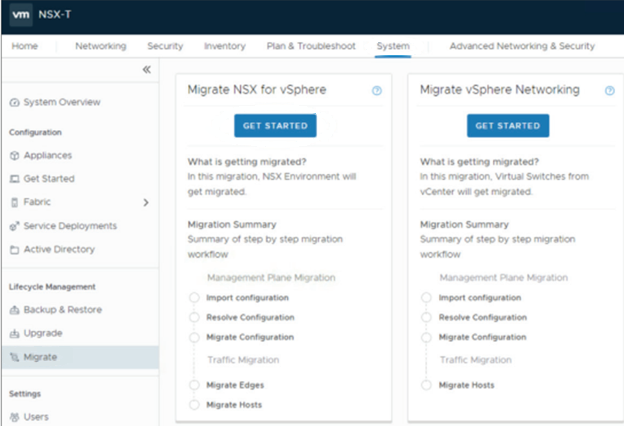
nsx-manager> start service migration-coordinatorOnce the service is enabled, the Migrate page changes to display the Migration Coordinator options.
-
Proceed to Migrate Horizon DaaS to NSX-T.
Was this page helpful?