This article explains how to use the Migration Coordinator to migrate your Horizon DaaS networking environment from VMware NSX for vSphere (NSX-V) to VMware NSX (NSX-T).
Prerequisites
Before you begin, verify that you have completed the preparation tasks described in Prepare for the Horizon DaaS Migration to NSX-T.
Start the Migration Coordinator
To start the migration process, perform the following steps.
-
Log in to the NSX-T console.
-
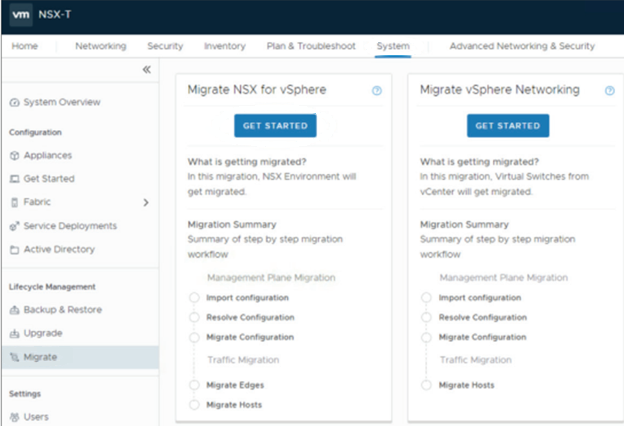
Navigate to the Migrate page.
-
Click Get Started in the Migrate NSX for vSphere tile.
The Migration Coordinator service provides a wizard interface that guides you through the five main steps of the migration.
- Import Configuration
- Resolve Configuration
- Migrate Configuration
- Migrate Edges
- Migrate Hosts
The following sections describe each step in detail. Perform the steps in the order listed.
Note: The following guidelines apply to the migration process.
- You are not allowed to make changes to the NSX-V environment during the migration process.
- Since your NSX-V environment remains unchanged during the migration, you can cancel the migration process at any step without negative consequences.
1. Import Configuration
The Import Configuration step consists of two sub-steps:
- Authenticate to NSX-V
- Import Configuration
-
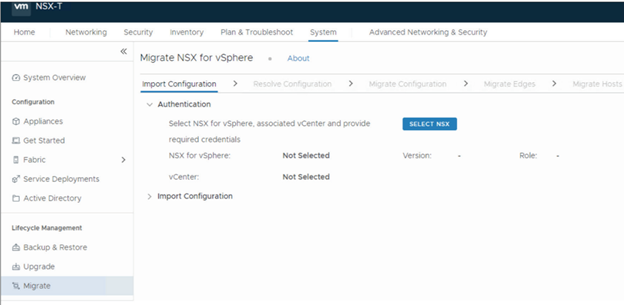
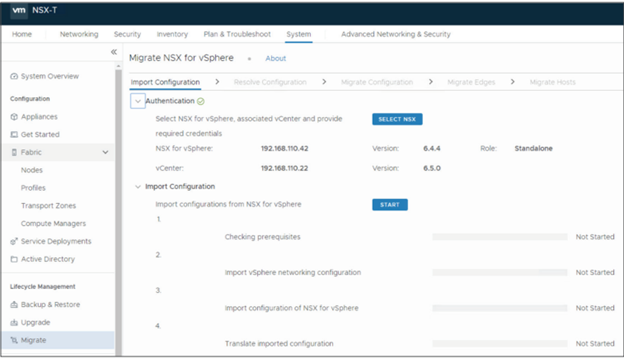
Expand the Authentication section and click the Select NSX button.
-
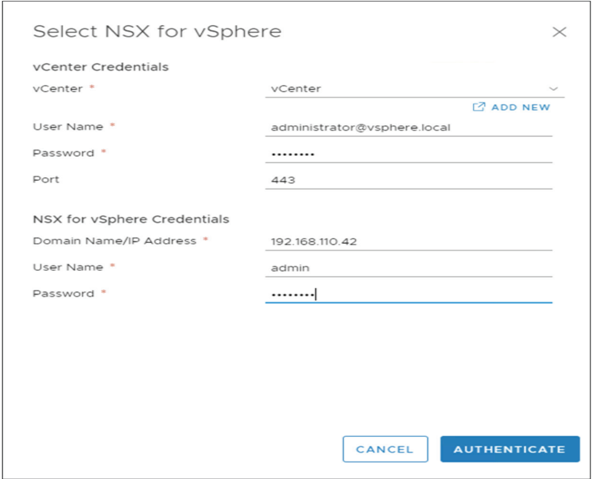
In the Select NSX for vSphere dialog box, enter the credentials for your existing vCenter Server and NSX-V deployments. Then click Authenticate.
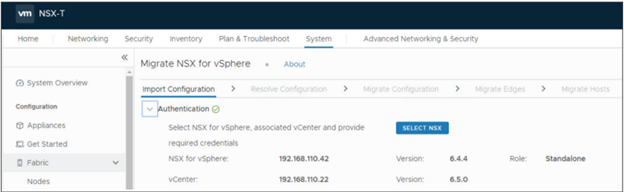
To confirm that the authentication succeeded, note the vCenter Server and NSX-V details that appear under the Authentication section.
-
To begin importing the existing configurations from your vCenter Server and NSX-V deployments, expand the Import Configuration section and click the Start button.
-
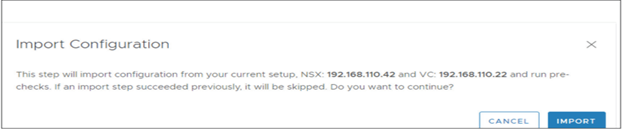
Click Import in the confirmation message to continue.
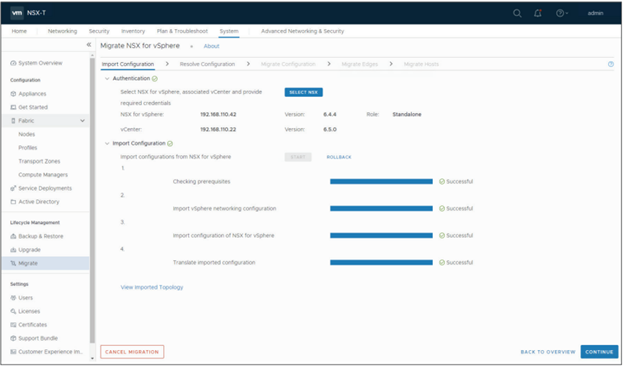
Progress bars allow you to monitor the status of the configurations being imported.
-
When the import process is complete, click Continue to proceed to the next step of the Migration Coordinator, Resolve Configuration.
2. Resolve Configuration
In this step of the migration, you resolve any configuration-related issues that may have surfaced during the import process.
To resolve, either accept the recommended value or, if applicable, modify it to match the required value.
Follow these guidelines when resolving issues:
-
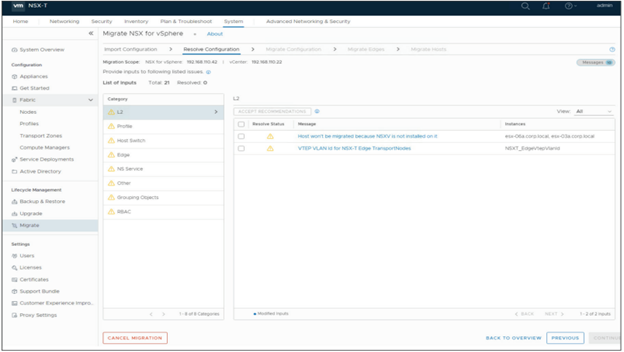
Categories of issues appear in the left pane of the page. When you select a category, the issues under that category appear in a list in the right pane of the page.
-
You must resolve each issue individually by clicking the issue item in the list. Clicking the item displays a detailed message which prompts you to take the appropriate action.
-
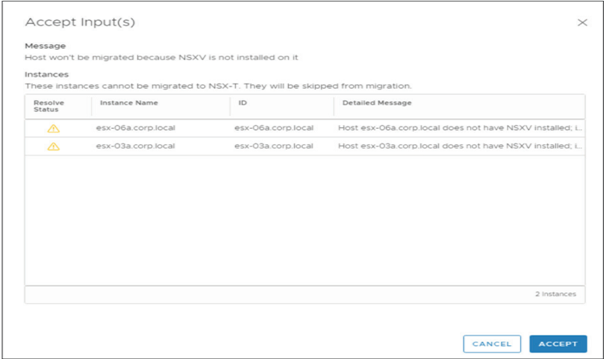
Some issues are strictly informational (for example, the Host that won’t be migrated because NSXV is not installed on it issue under the L2 category). The detailed message for an informational issue prompts you to resolve the issue by simply accepting the listed inputs.
-
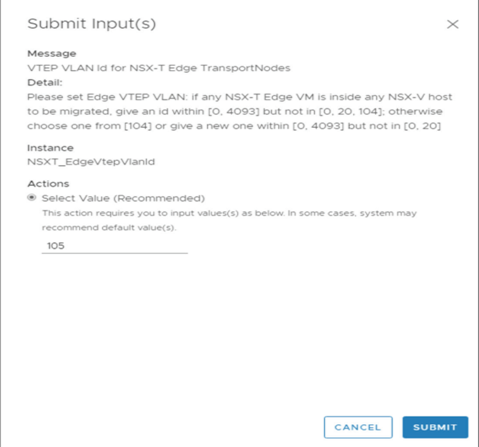
Other issues require your interaction to reach a resolution (for example, the VTEP VLAN id for NSX-T Edge Transport Nodes issue under the L2 category). The detailed message for an interactive issue prompts you to resolve the issue by modifying one or more inputs and then submitting your changes.
-
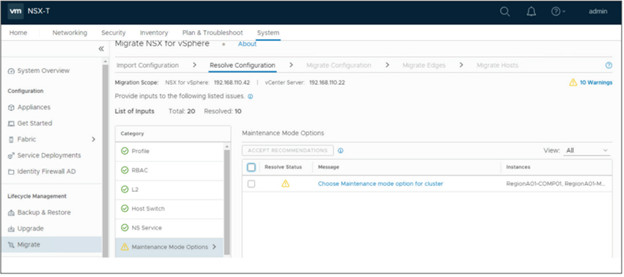
For Maintenance Mode, you have the option to select either Automated or Manual.
-
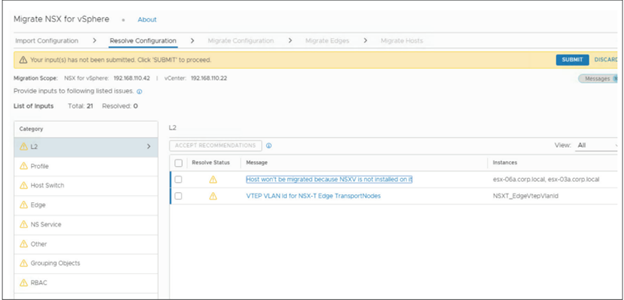
After you resolve all the issues under a category, the Submit button becomes available at the top of the page. Click Submit to save all the issue resolutions and mark the entire category as resolved.
-
After you mark all categories as resolved, click Continue to proceed to the next step of the Migration Coordinator, Migrate Configuration.
3. Migrate Configuration
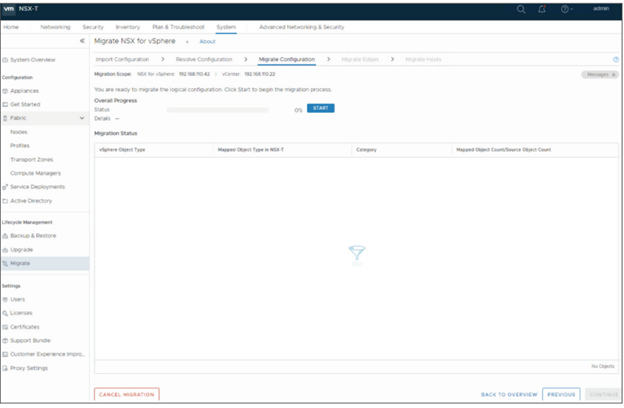
This step of the Migration Coordinator migrates the configuration from NSX-V to NSX-T. Any changes that you specified during the Resolve Configuration step are incorporated into the migrated configuration.
-
On the Migrate Configuration step, click Start.
-
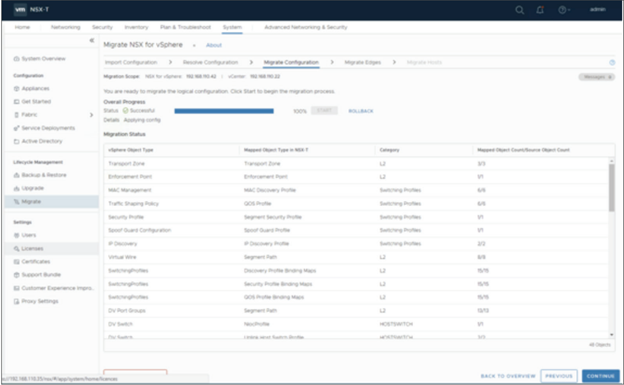
When the configurations are fully migrated, the Migration Coordinator displays a table of object types with their mappings from NSX-V to NSX-T.
-
Click Continue to proceed to the next step of the Migration Coordinator, Migrate Edges.
4. Migrate Edges
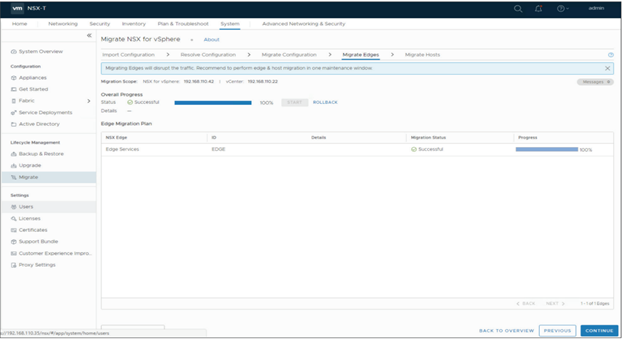
In this step of the migration process, edge services are migrated to the NSX-T environment.
-
On the Migrate Edges step, click Start.
-
When the edge services are fully migrated, click Continue to proceed to the next step of the Migration Coordinator, Migrate Hosts.
5. Migrate Hosts
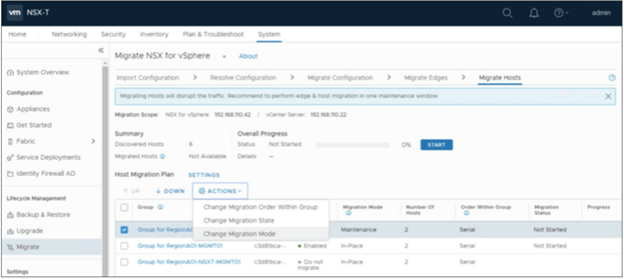
In this final step of the Migration Coordinator, hosts are migrated from NSX-V to NSX-T.
-
On the Migrate Hosts step, click Start.
-
When the host migration is complete, click Finish to exit the Migration Coordinator.
-
Proceed to Set Up the NSX-T Environment for Horizon DaaS.
Was this page helpful?