Omnissa Identity Service provides a wizard that guides you through the directory migration process. You access the wizard through the Omnissa Connect portal and perform all migration tasks there. Settings in Workspace ONE UEM (and Omnissa Access, if applicable) are automatically updated after migration is complete.
Migrating to Omnissa Identity Service is a multi-step process that involves:
- Completing directory service prerequisites
- Integrating your third-party cloud identity provider with Omnissa Identity Service and provisioning users and groups
- Comparing the Identity Service directory with the existing Workspace ONE UEM and Omnissa Access directories and resolving critical differences
- Switching to using Identity Service for authentication and provisioning
No system downtime or end user disruptions are expected during migration.
Prerequisites
-
Sign up for the Limited Availability release by following the instructions on the Identity Service page in Customer Connect.
-
Make sure that your Workspace ONE UEM and Omnissa Access tenants are migrated to Omnissa Connect, a new web-based service that provides centralized access to all Omnissa services and solutions. Omnissa Identity Service is also accessed from Omnissa Connect.
For more information, see:
-
Migrate all directory administrators in Workspace ONE UEM and Omnissa Access to Omnissa Connect.
-
Migrate all local administrators in Omnissa Access to Omnissa Connect. Your Omnissa Access tenant must not contain any local administrators or local users.
-
To configure Omnissa Identity Service, you must have the following roles:
- Omnissa Connect Organization roles: Organization Administrator or Organization Owner
- Super Admin role in the Omnissa Access service
- Console Administrator role or an equivalent custom role in Workspace ONE UEM
For information about role assignments in Omnissa Connect, see Administrators.
-
Review the Migration Requirements and proceed only after you have made the decision to migrate your Workspace ONE UEM and Omnissa Access directory services to Identity Service.
Procedure
-
Log in to the Omnissa Connect console with the administrator roles listed in the prerequisites.
-
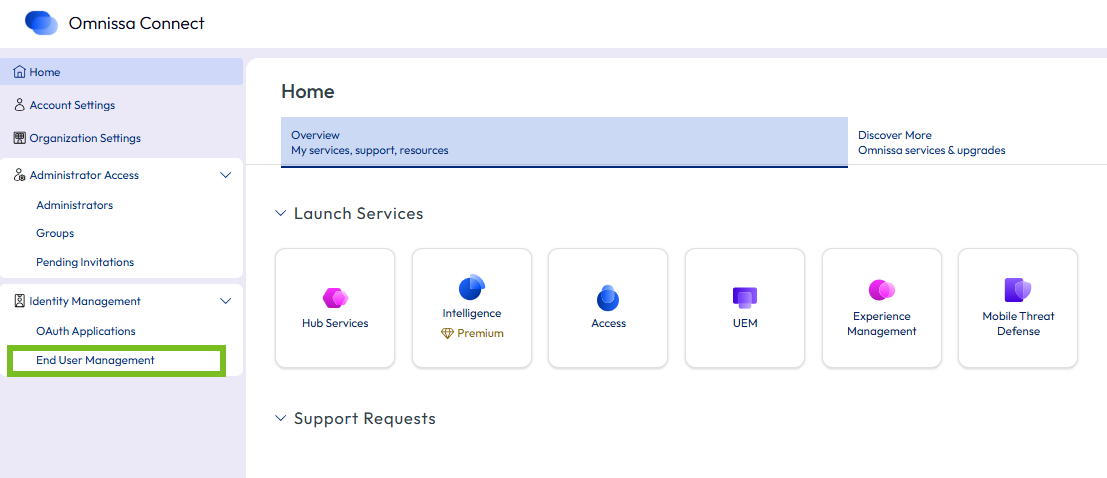
Select Identity Management > End User Management from the left pane.
-
On the End User Management page, click Launch End User Management to launch Omnissa Identity Service.
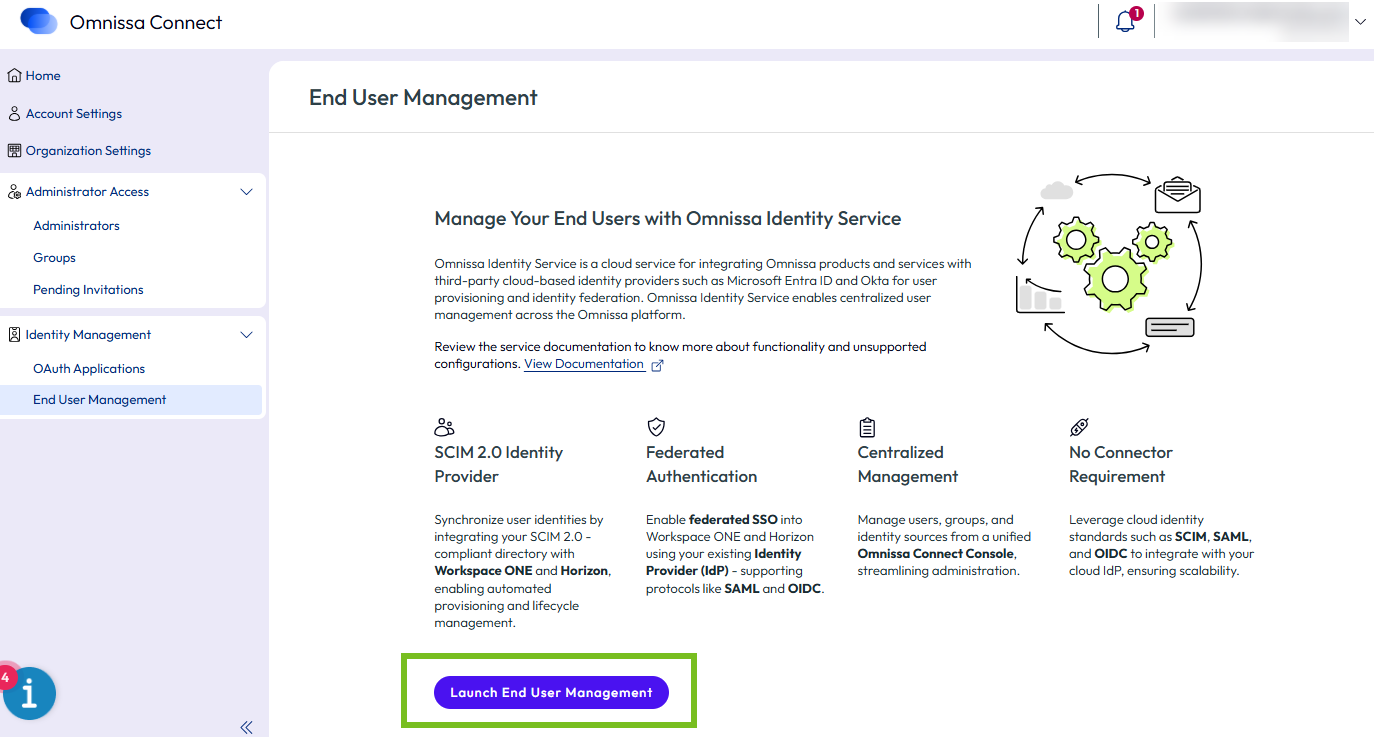
Omnissa Identity Service opens in a new tab in the browser.
-
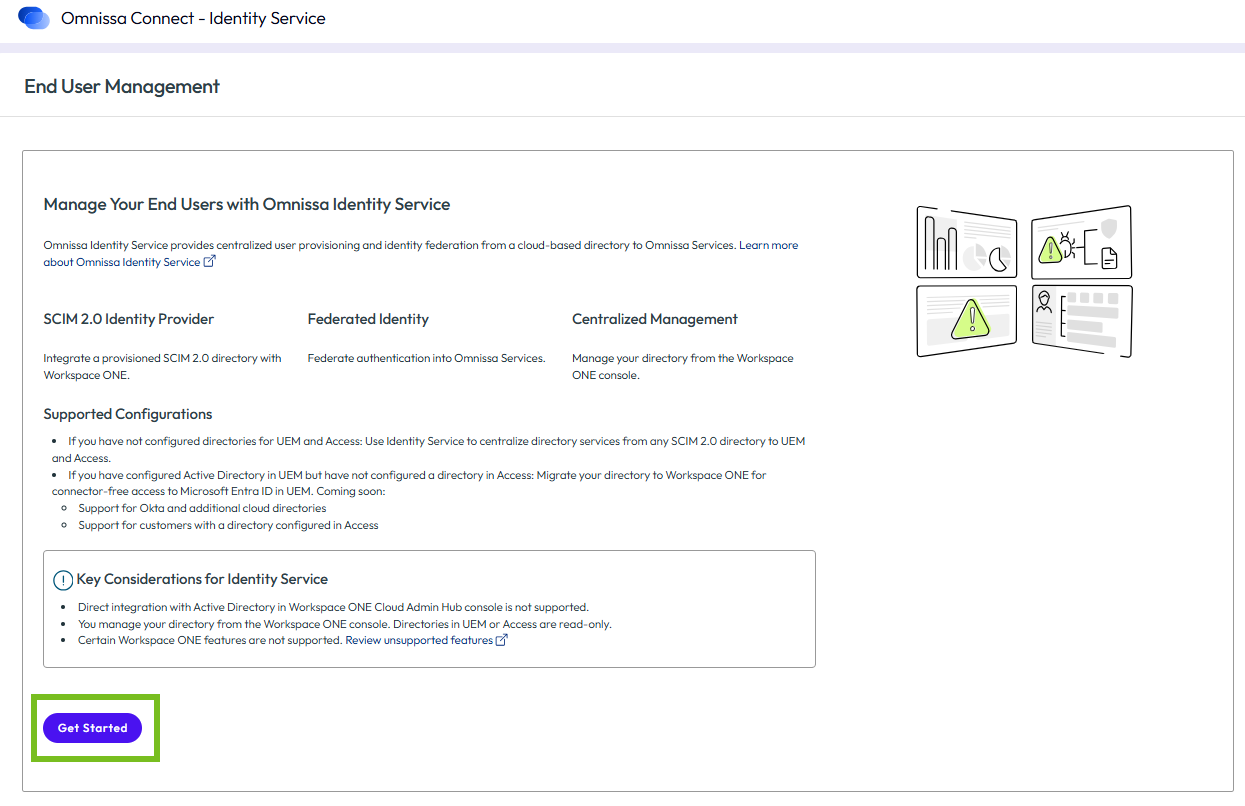
In the Omnissa Identity Service tab, review the important information, then click Get Started.
-
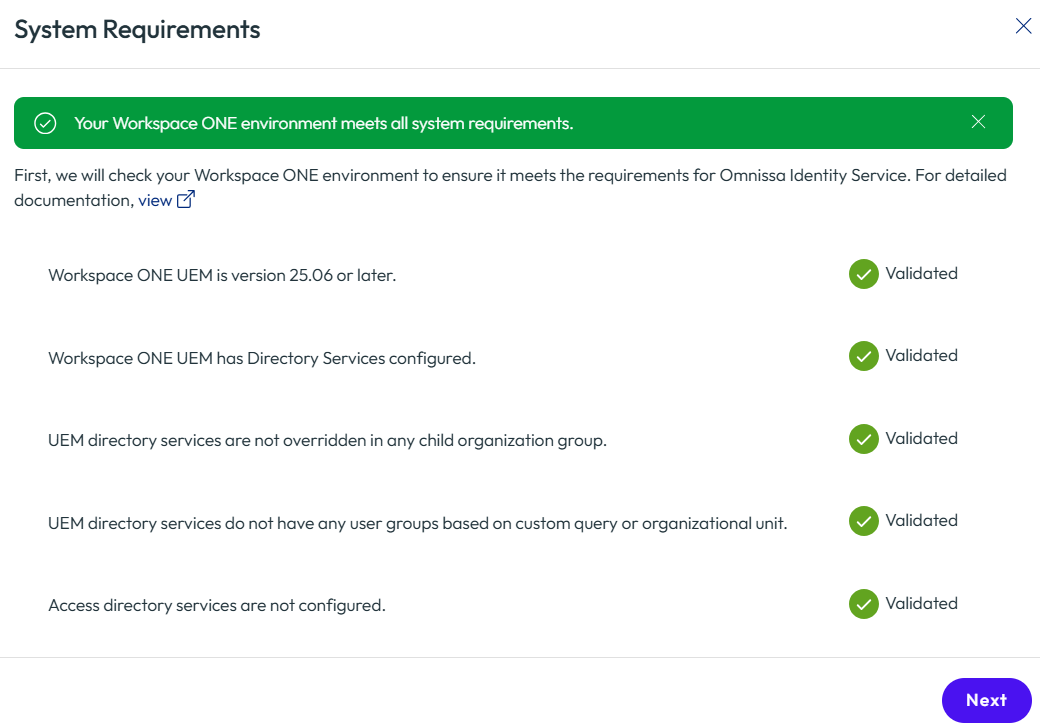
Review the System Requirements that appear in a popup window, and verify that your environment meets all the requirements. You cannot proceed with migration until all requirements are met.
The System Requirements vary based on whether you are migrating a Workspace ONE UEM directory only or if you are migrating a Workspace ONE UEM directory and an Omnissa Access directory. If you are migrating both, additional requirements appear.
Workspace ONE UEM only directory:
Workspace ONE UEM and Omnissa Access directories:
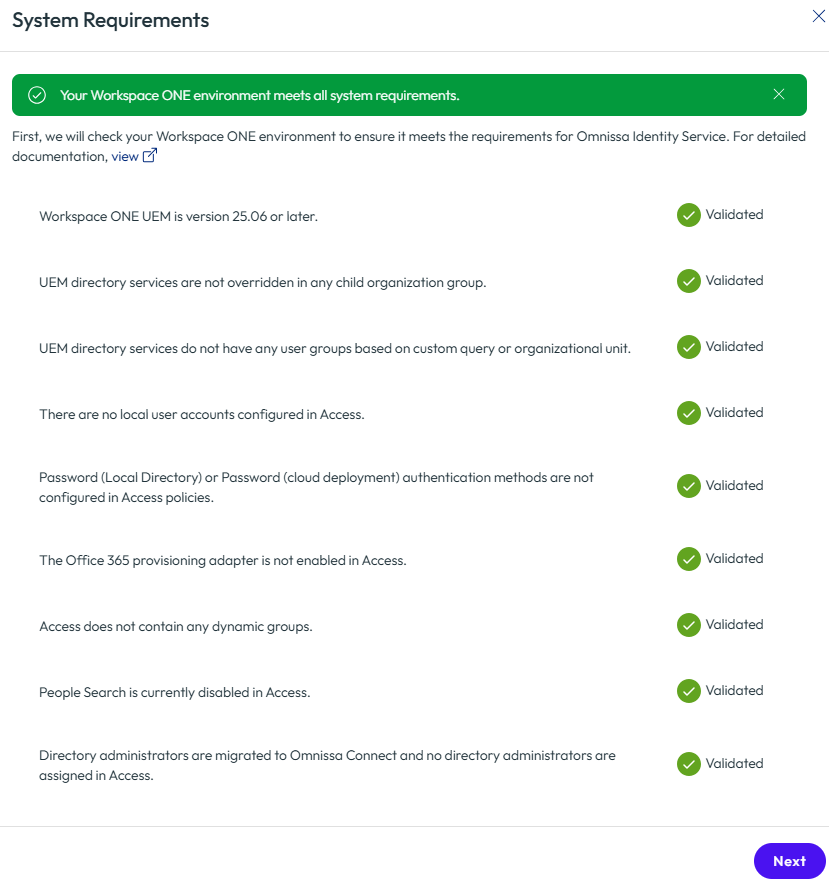
For more information about the Workspace ONE UEM-specific requirements, see the Requirements section and the Workspace ONE UEM documentation.
Omnissa Access requirements:
-
Verify that the Access tenant does not contain any local users or local administrators, including any users in the System directory. All users must be synced from Active Directory. Verify that the Password (Local Directory) authentication method is not used in any policies.
You can check for local users in the Accounts > Users page in the Omnissa Access console. You can check the policies from the Resources > Policies page.
-
Verify that the Password (cloud deployment) authentication method is not used in any policies. See Critical Considerations for more information.
You can check the policies from the Resources > Policies page in the Omnissa Access console.
-
Verify that the Office 365 provisioning adapter is not enabled in Omnissa Access.
-
Verify that the Access tenant does not have any dynamic groups. Dynamic groups are groups that are created in Omnissa Access, and not synced from Active Directory.
You can check for dynamic groups in the Accounts > User Groups page in the Omnissa Access console.
-
Verify that directory administrators have been migrated to Omnissa Connect. Also, make sure that no directory users in Omnissa Access have been assigned an administrator role.
-
-
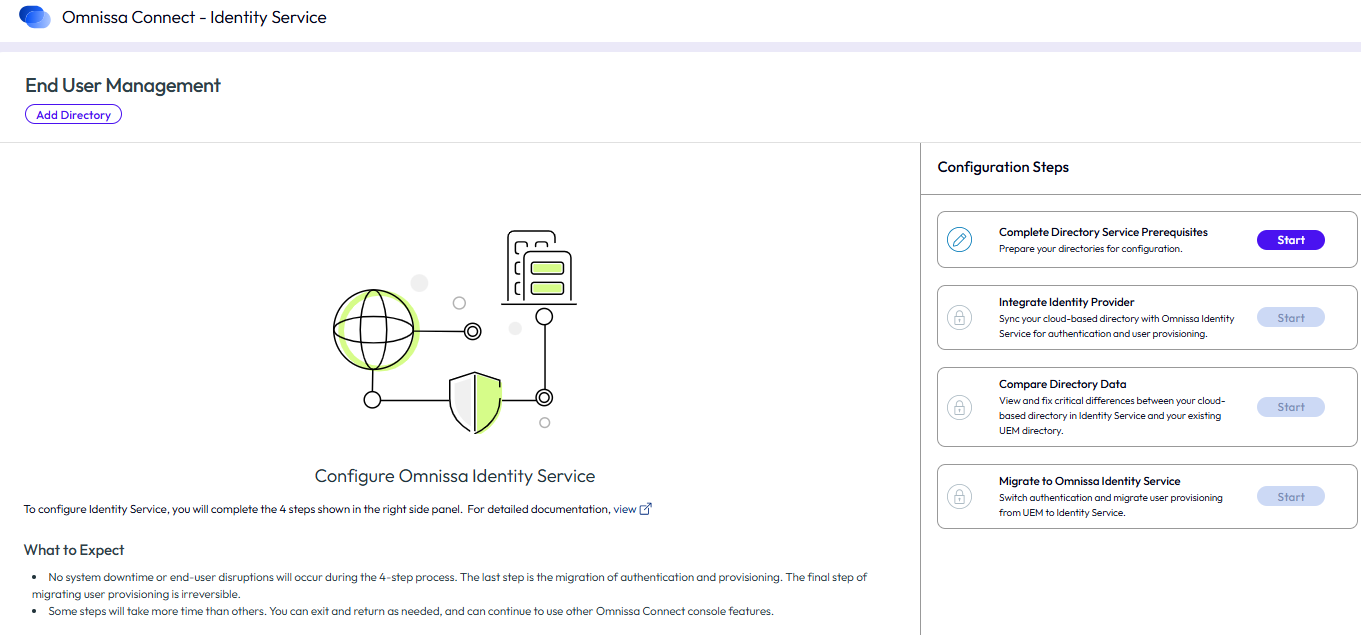
Click Next to start the configuration process.
-
Review the configuration steps listed in the right pane, which outline the migration process you will follow.
-
When you are ready to start the process, click Start on the first step, Complete Directory Service Prerequisites.
Was this page helpful?