Platform Single Sign-On (PSSO) reduces repeated credential prompts by completing registration during the macOS Setup Assistant for devices enrolled through Automated Device Enrollment (ADE). By configuring PSSO during ADE, users authenticate with their corporate Identity Provider (IdP) before reaching the desktop. This process creates a local macOS account which maps to the user's IdP identity, ensuring the device is in an SSO-ready state immediately after provisioning.
Supported Identity Providers
- Omnissa Access
- Microsoft Entra ID
- Okta
Authentication methods
- Password Synchronization: Traditional authentication where the user enters their IdP username and password, which is synchronized with the macOS local account password.
- Secure Enclave key authentication (Recommended): Hardware-backed cryptographic authentication. Requires Touch ID (Apple Silicon or Intel Mac with Touch ID).
Prerequisites
- Devices must run macOS 26 or later.
- Workspace ONE UEM 2604 or later is required for Access Microsoft Entra ID and Okta as Identity Provider (IdP).
- Workspace ONE Access 26.07 and Hub 26.06.
- The Identity Provider (IdP) application required for authentication — such as Workspace ONE Intelligent Hub for Workspace ONE Access, Microsoft Company Portal for Entra ID, or Okta Verify for Okta — must be present and managed within Workspace ONE UEM.
- An SSO Extension profile must be configured and assigned to the target Smart Group. For more information, see Configure an SSO Extension Profile.
Procedure
Step 1: Configure a PSSO Profile
-
For configuring a PSSO Profile using Access, refer to Configuring Apple macOS Platform Single Sign-On with Omnissa Access.
-
For configuring macOS Platform SSO using Microsoft Entra ID and Workspace ONE UEM, see Configuring a Platform Single Sign-On configuration profile or refer to the Tech Zone article.
-
For configuring macOS Platform SSO using Okta and Workspace ONE UEM, refer to the Tech Zone article.
Step 2: Enable PSSO in the ADE Profile
- In the Workspace ONE UEM console, navigate to Settings > Apple > Automated Enrollment.
- Select Add Profile to create a new ADE profile, or select an existing profile to edit.
- In the Onboarding section, enable the Await Configuration and PSSO during Setup Assistant setting.
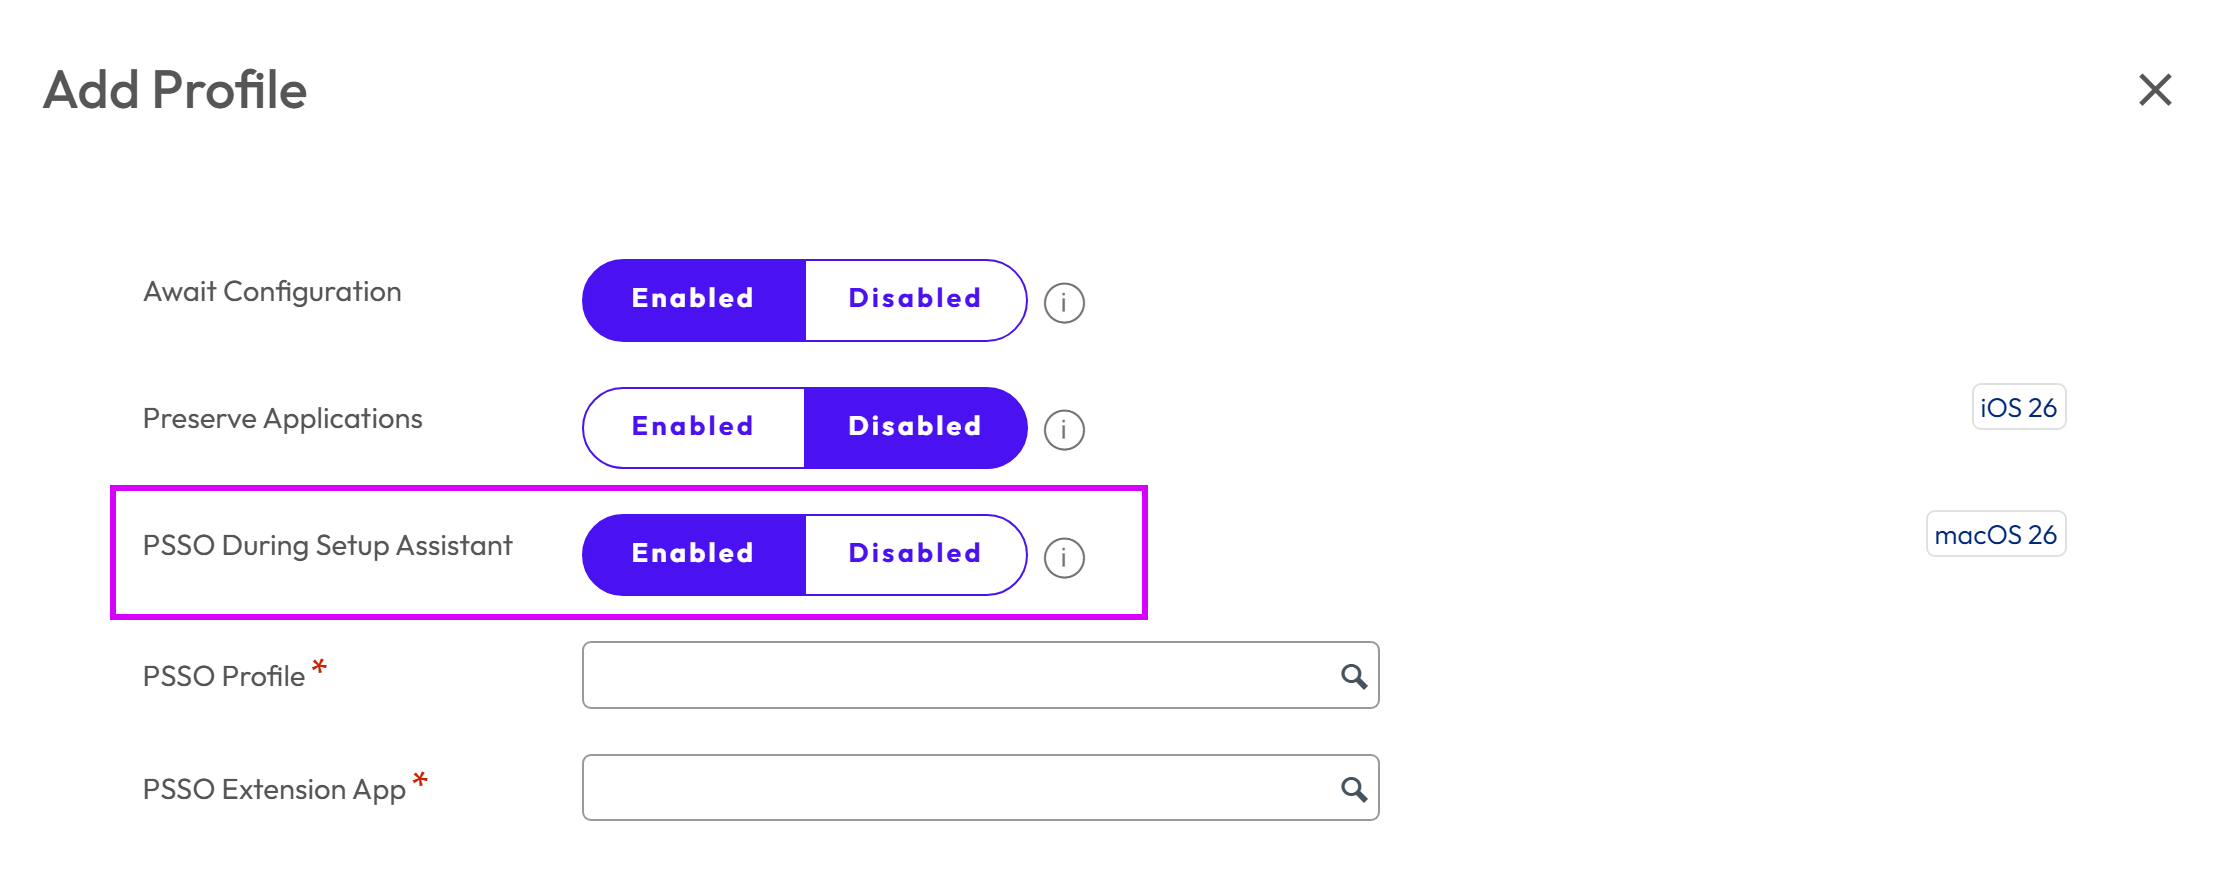
- From the drop-down menu, select the appropriate PSSO profile (the SSO Extension profile that you have created in Step 1).
- From the drop-down menu, select the corresponding PSSO Extension application (Intelligent Hub, Company Portal, or Okta Verify).
- Select Save to apply the configuration.
- On the Automated Device Enrollment page, under the Profiles section, set the default macOS enrollment profile to the profile that includes both the Platform SSO profile and the PSSO Extension app.
User Experience during Setup Assistant
You can now integrate SSO registration directly into the Setup Assistant. From the moment a user powers on a new corporate device, SSO registration is already part of the experience, with no additional IT intervention required afterward.
During onboarding, the end-to-end experience proceeds as follows:
- Power On the device. The macOS Setup Assistant launches and guides you through the standard initial screens.
- Tap Enroll to complete ADE enrollment.
- In the Single Sign-On for Mac prompt, click Continue.
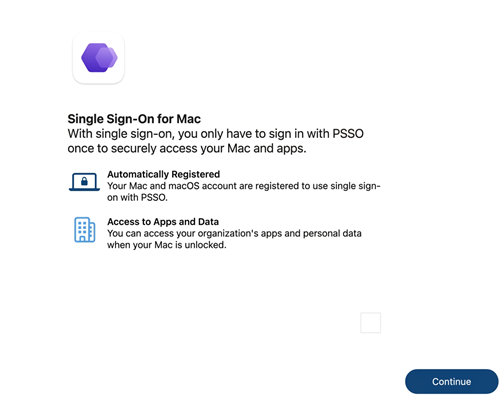
- On the IdP login screen, sign in with your corporate IdP credentials.
Upon successful authentication, the IdP generates an identity token and passes it to the Platform SSO extension on the device. This token forms the basis of your SSO session and does not require any action on your part.
- (Secure Enclave authentication only) Create a local macOS account password.
Because Secure Enclave authentication is hardware-bound, you are prompted to set a local macOS account password. You can use the same password as your IdP credentials for convenience. This password secures the local account and unlocks the Secure Enclave key.
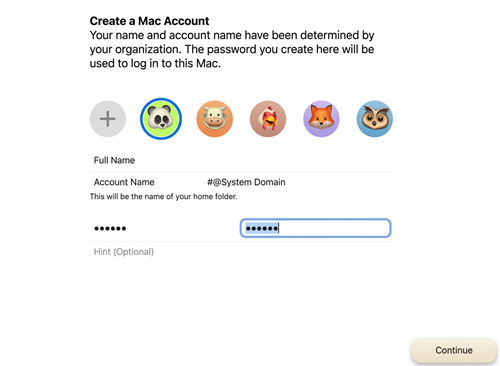
- Local macOS account is provisioned automatically.
macOS creates a local account permanently mapped to your IdP identity, giving you a single unified account — no separate macOS login distinct from your corporate identity.
- (Secure Enclave authentication only) Click Set up Touch ID to enroll your fingerprint.
When prompted, enroll your fingerprint to activate the Secure Enclave key. This enables hardware-backed authentication and eliminates password prompts for subsequent logins and application access.
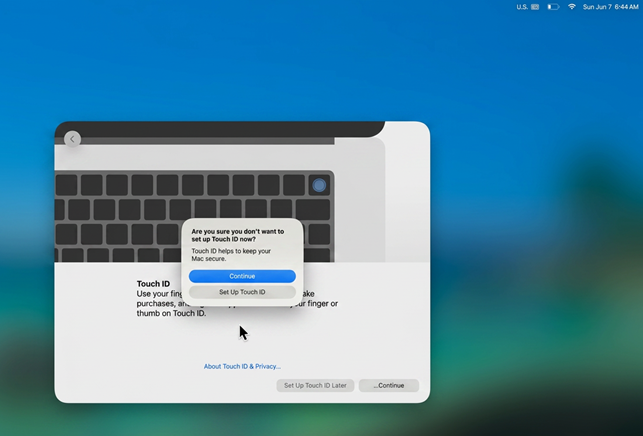
- Reach the desktop with Platform SSO active.
Once Setup Assistant completes, your Platform SSO session is fully established. You can immediately access managed web applications and native applications registered with the configured IdP, without being prompted to sign in again.
Note: The IdP authentication step during Setup Assistant cannot be skipped.
Validating PSSO Registration
After the user reaches the desktop, you can verify the PSSO registration status:
- Open System Settings > Users and Groups.
- Select the user account.
- Confirm that Registration shows as Registered.
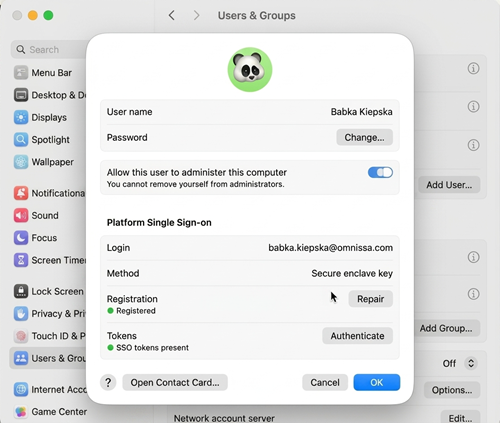
- Confirm that SSO token shows as Present.
Was this page helpful?