You can install, configure, and upgrade devices by assigning files/actions to a product. The files/actions component also contains ways to manage the file system of a device.
Note: Windows Rugged and Windows Desktop: Windows Unified Agent is a 32-bit application, so when trying to run scripts in a 64-bit machine, proper redirections must be used to get access to the 64-bit folder or the registry hive.
PROCEDURE
-
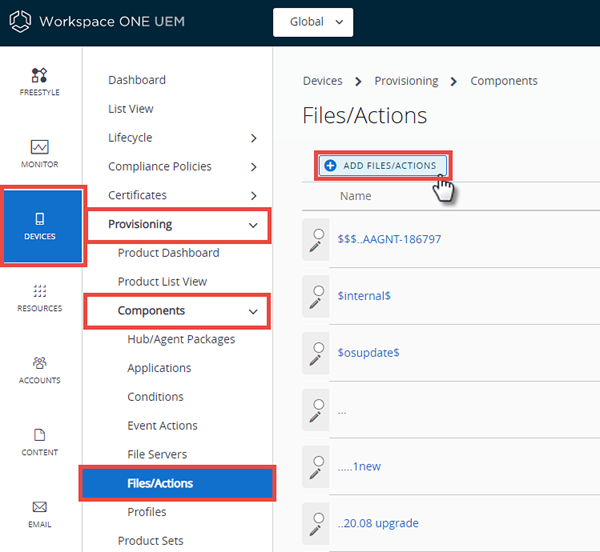
Navigate to Devices > Provisioning > Components > Files/Actions and select Add Files/Actions.
-
Select the device Platform for which you want to make the files/actions.
-
Complete the General text boxes.
Settings Descriptions Name Enter a name for the files/actions. The name cannot be longer than 255 characters. Description Enter a short description for the files/actions. Version The UEM console pre-populates this setting. Platform Read-only setting displays the selected platform. Managed By Select the organization group that can edit the files/actions. -
Select the Files tab.
-
Select Add Files.
The Add Files window displays.
-
Select Choose Files and browse for a file or multiple files to upload.
The maximum file size depends upon your server configuration according to the following table.
Content Delivery Network File Server Relay Server API Access UI Access TRUE TRUE TRUE Unlimited Unlimited (5 GB) TRUE TRUE FALSE Unlimited Unlimited (5 GB) TRUE FALSE TRUE 2 GB 2 GB TRUE FALSE FALSE 2 GB 2 GB FALSE TRUE TRUE Unlimited Unlimited (5 GB) FALSE TRUE FALSE Unlimited 200 MB FALSE FALSE TRUE 2 GB 2 GB FALSE FALSE FALSE 2 GB 200 MB Note:
Windows Rugged devices can use files/actions to install XML onto a device. For more information, see Create an XML Provisioning File, Android, Win7, WinRugg.
Android and Windows Rugged devices can use the File-Action function to upgrade the OS of the device remotely. For more information, see Create an OS Upgrade File-Action, Android and Create an OS Upgrade File-Action for WinRugg.
-
Select Save and upload the files.
Once the files upload, the file grouping screen opens. File groups allow you to assign different download paths and settings to different groups of files you have uploaded to a single file/action.
-
Select uploaded files and select Add to move the files into a new file group.
-
Define the Download Path the device uses to store the file group in a specific device folder.
If the download path entered does not exist, the folder structure is created as part of the installation.
Note: Windows Rugged devices can Store OS Update Files on Relay Server to ensure that files used to update the OS remain available on the relay server.
-
Select Save.
You can repeat the previous steps for as many files as you want.
-
Select the Manifest tab.
If you have at least one file uploaded, Actions are not required.
-
Add actions to the Install Manifest or the Uninstall Manifest if needed.
The uninstall manifest only runs when the Uninstall action is added to the product. If nothing is added to the Uninstall Manifest, uninstalling the file/action results in no effect.
Select the platform for which you are making a File-Action.
Was this page helpful?