After you upload your Win32 application to the Omnissa Workspace ONE UEM console, you can assign the applications to the Windows Desktop devices using single or multiple assignments.
You can configure the deployments for a specific time and also decide if the apps must be installed automatically on devices or on demand. If you add multiple assignments, prioritize the importance of the assignment by placing the most important assignments at the top of the list or moving the least important ones to the bottom of the list. You can also exclude certain groups from receiving assignments.
Procedure
-
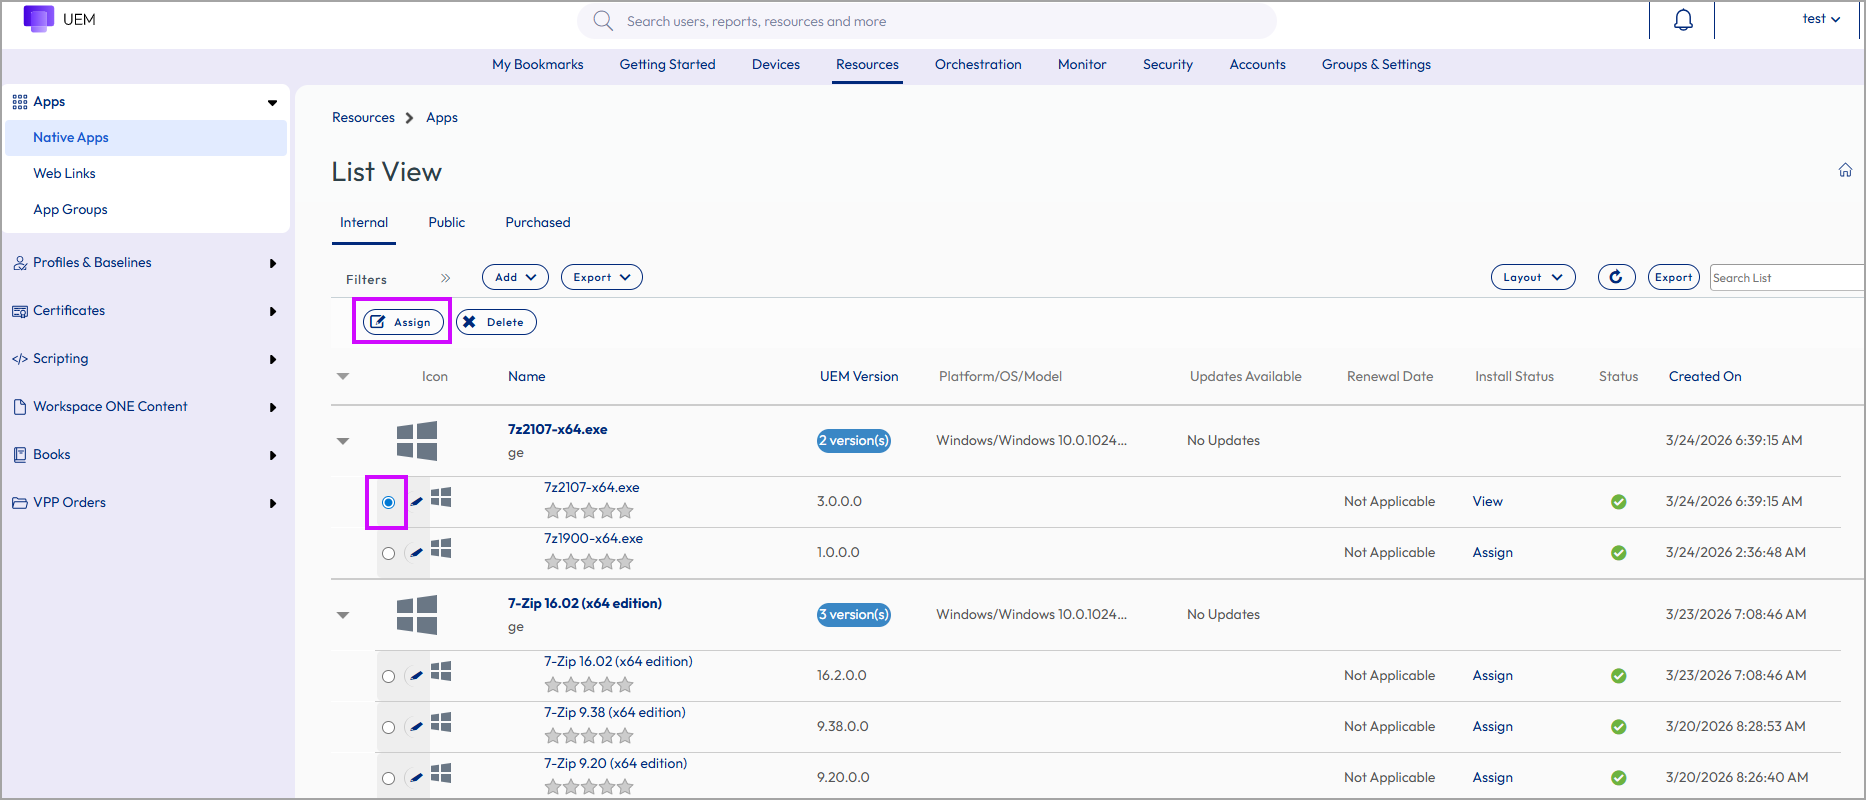
Navigate to Resources > Apps > Native Apps > Internal or Public.
-
Upload an application and select Save & Assign or select the application and choose Assign from the actions menu.
-
On the Assignments tab, select Add Assignments and configure the settings.
a. In the Distribution tab, enter the following information.
Settings Description Name Enter the assignment name. Description Enter the details to describe your assignment. Assignment Groups Enter a smart group name to select the groups of devices to receive the assignment. Deployment Begins This setting is available only for internal applications. Set a day of the month and a time of day for the deployment to start. App Delivery Method Select the delivery method for the app to end-user devices. - Auto-deploys content to a catalog or other deployment Hub on a device upon enrollment. After the device enrolls, the system prompts users to install the content on their devices.
- On-Demand - Deploys content to a catalog or other deployment agent and lets the device user decide if and when to install the content. This option is the best choice for content that is not critical to the organization
Note: Devices that already have an on-demand application installed cannot receive any updates to that application unless an administrator or end-user initiates the installation.Hide Notifications Toggle this setting to prevent displaying install and uninstall notifications for auto-deployed applications. Keep App Updated Automatically This setting is available only if you select the On Demand deployment method, and when two active versions of the app exist.
When activated, this setting ensures that newly uploaded versions of the application are automatically deployed from the UEM console to devices where the app is already installed. This setting does not affect devices that have not yet installed the application.
Note: If you choose to retire the previous version of the app while uploading the new version, this setting becomes unavailable.Allow User Install Deferral Toggle the setting to allow users to defer app installs. Use UEM or Custom Notifications Select the notification you want to use for install deferrals. - UEM
By using UEM notification, you can define for how long the end user can defer the app installs and also set a deferral message.
- Number of days after which application automatically installs - Enter the number of days up to which you can delay app installation in the field. The maximum number of days is 10.
- Number of times a user may defer installation - Enter the number of times a user can choose to defer app installation. The maximum value is 10.
- Deferral Message - Set a Default or a Custom deferral message.
- Custom
By using custom notification, you can deploy an application wrapped in Power Shell App Deployment Kit (PSADT) from UEM and take advantage of all the features that PSADT offers including application deferral.
- Installer Deferral Interval - Select the deferral timeframe.
- Installer Deferral Exit Code - Enter the code to indicate that the app install has been deferred.
Select Application Transforms This option is visible when your app has transform files associated.
Select the transform file that must be used on the devices selected in the Distribution section. If the transform file selection is changed after the app is installed, the update does not get applied to the devices. Only the newly added devices that do not have the app installed receive the updated transform.Display in App Catalog Toggle the setting to display an internal or public application in the catalog.
Note: The Show or Hide option applies only to the Workspace ONE Catalog and not the legacy AirWatch Catalog. Use this feature to hide applications in the app catalog you do not want users to access.Override Reboot Handling Activate this setting to override the Device Restart settings that you configure while uploading the Win32 applications.
The Override Reboot Handling, when activated, displays the Device Restart options. The Device Restart options, in conjunction with the Override Reboot setting configured at the app assignment level, take precedence over the restart options activated at the app configuration level. If deactivated, the reboot action defined at the app configuration level occurs.Device Restart Specify if a device restart is required to complete the successful installation of the app. 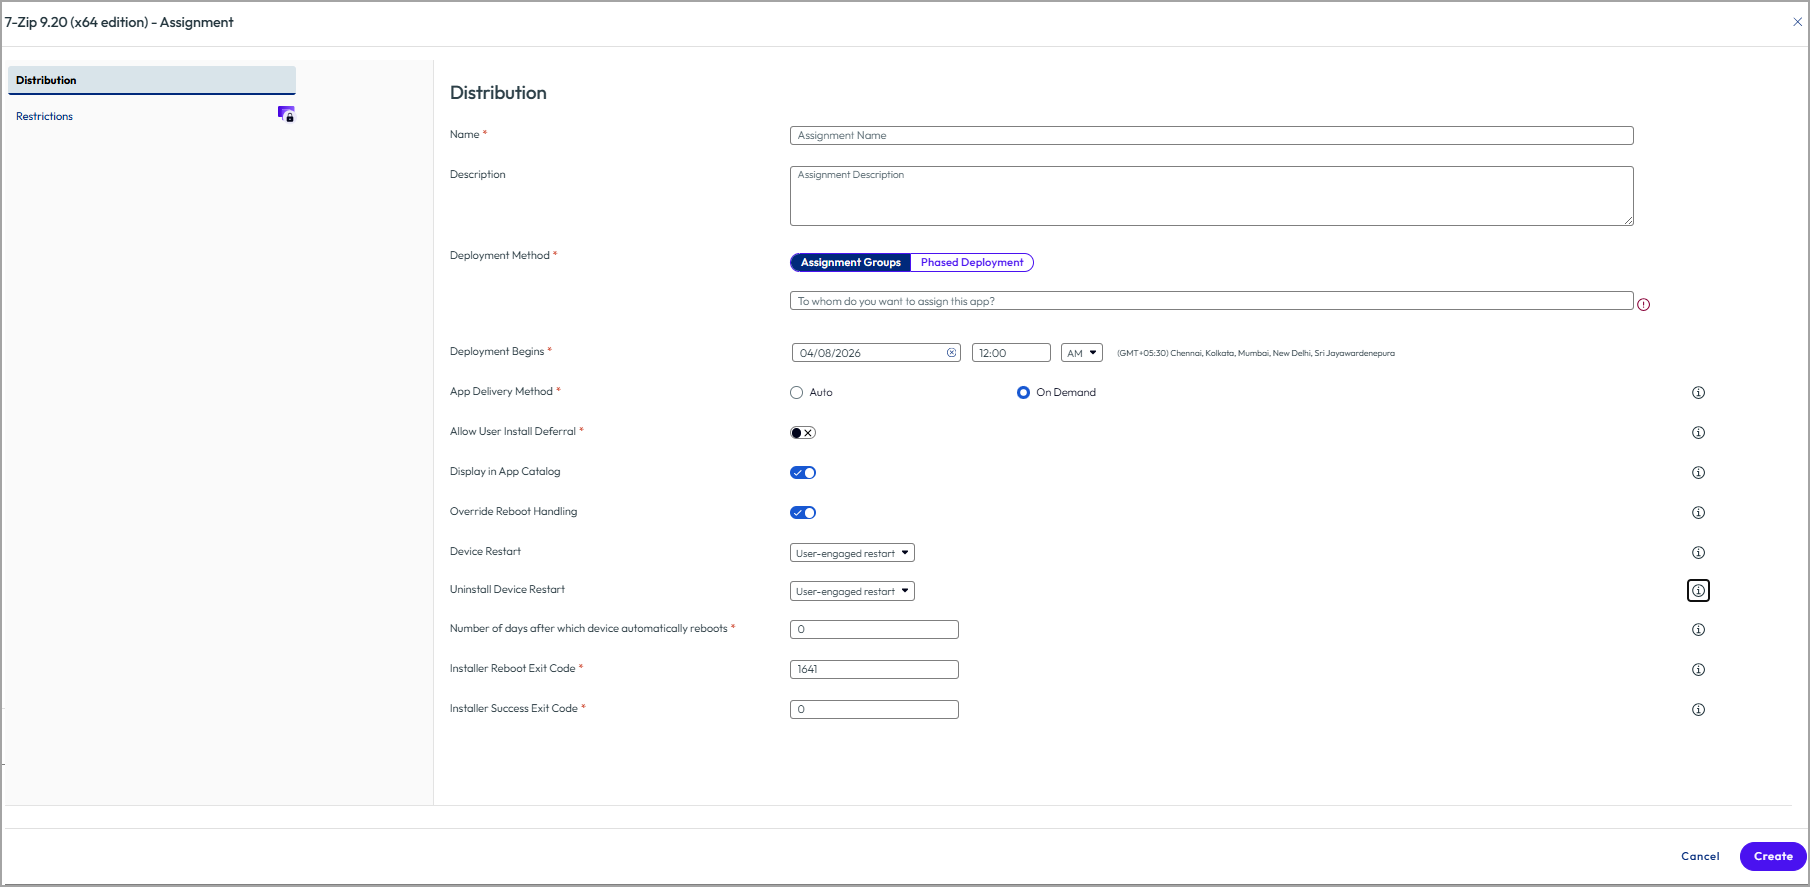
If you decide to not restart the device or force restart the device, use the device restart options Do not restart or Force restart. If you select User-engaged restart, you can specify the number of days after which the device automatically reboots.Installer Reboot Exit Code Enter the code that the installer must return after a successful app installation once the device is rebooted. Installer Success Exit Code Enter the code that the installer must return for a successful operation. Keep Application on Device after Unassignment
Keep Application on Device after Enterprise WipeUse these settings to retain or remove the Windows apps when a device is enterprise wiped or when an app is unassigned.
With these settings, you can choose to always retain critical apps (for example, security tools, VPN, firewall) on wipe or unassignment, automatically remove business or sensitive apps when devices are lost, stolen, or unenrolled. It also minimizes disruptions for end users if apps are unintentionally unassigned, and accelerates recovery after troubleshooting wipes by keeping large apps installed.
Choose one of the following to configure the setting:
- Enable - App stays on the device after it is unassigned or the device is enterprise wiped.
- Disable - App is removed.
- Default - App is removed from Windows Desktop but retained on Windows Server.
Note: Apps are removed by default on Windows desktop and kept on Windows Server, and any explicit app‑level setting overrides the existing global 'Keep Managed Applications on Device' profile for that app.b. In the Restrictions tab, enter the following information.
Settings Description Make App MDM Managed if User Installed Assume management of applications previously installed by users on their Windows Desktops. MDM management occurs automatically regardless of the application delivery method and requires privacy settings to allow the collection of personal applications. Activate this feature so that users do not have to delete the application version installed on the device. Workspace ONE UEM manages the application without having to install the application catalog version on the device Desired State Management This option is visible only if you: - Activate the Make App MDM Managed if User Installed setting.
- Set the app delivery method as Auto, and if the auto app does not use script detection.
-
Select Create.
-
Select Add Assignment to add new app assignments for your application.
-
Configure flexible deployment settings for your application by editing the schedules and priority for your deployments. Options that are displayed on this window are platform-specific.
-
Select the Exclusions tab and enter smart groups, organization groups, and user groups to exclude from receiving this application.
-
Select Save & Publish.
View Device Application Inventory
With Workspace ONE UEM, it is easy to collect, report, and view a device's application inventory, including both installed and UEM-managed applications.
To view all details related to your device, navigate to the Device > List View page in the UEM console and select your device from the list of devices.
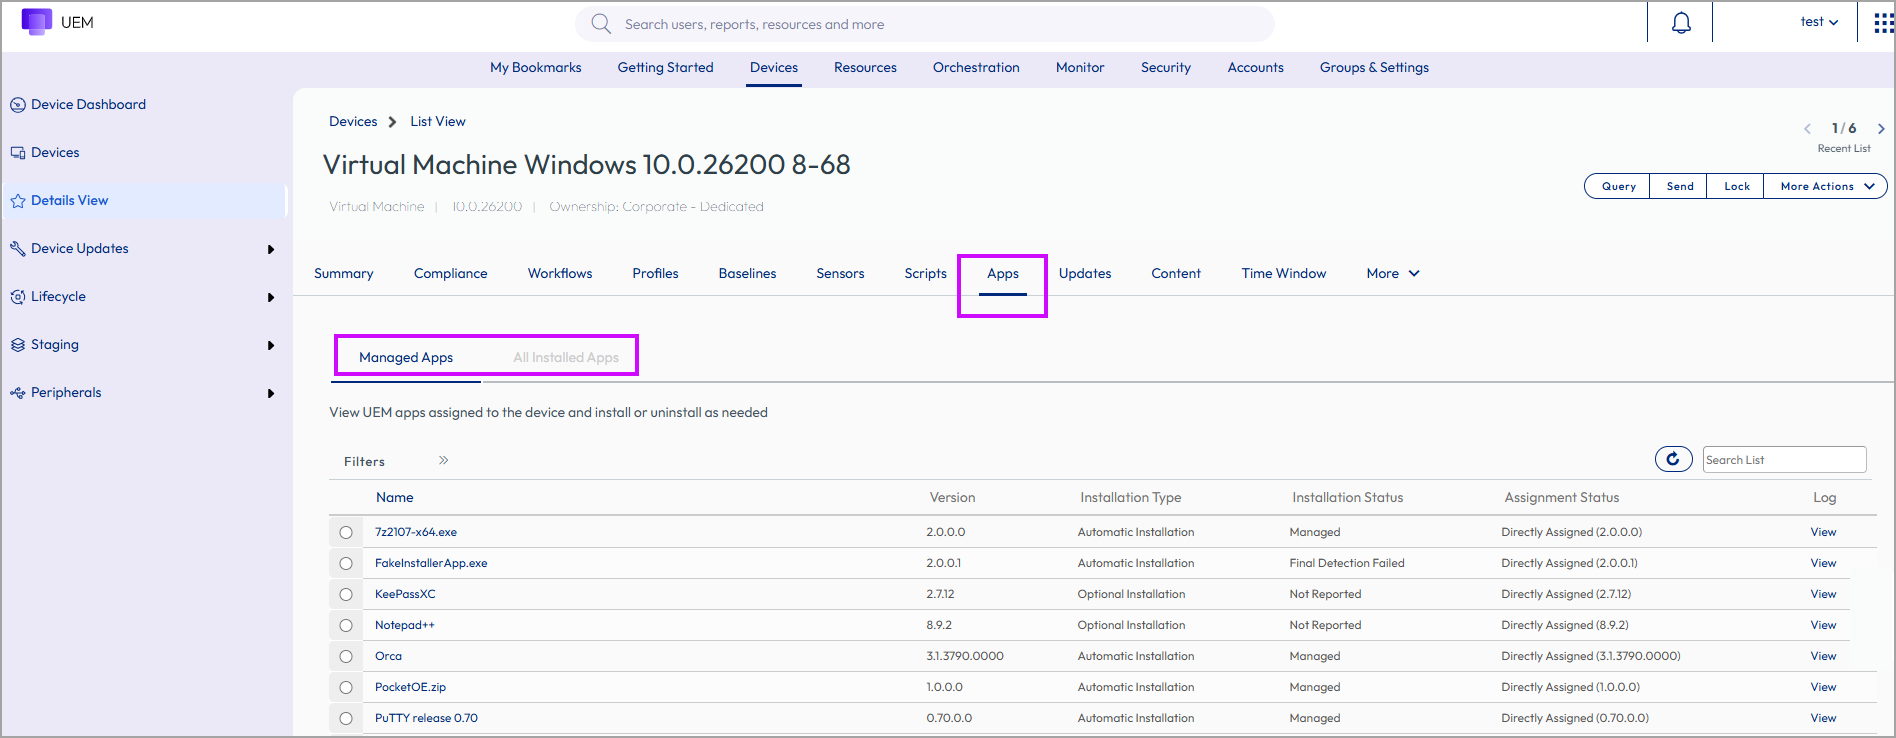
On selecting the device, the Device Details page is displayed, which provides you with a comprehensive overview of your device. You can view all the applications installed on your device by selecting the Apps tab.
Managed Apps
On selecting the Apps tab, the default view is Managed Apps. This tab displays all applications that you have assigned to the device. You can see the version number, installation type, installation status, assignment status, and the log file associated with the app.
App Last Deployment Logs for Managed Apps
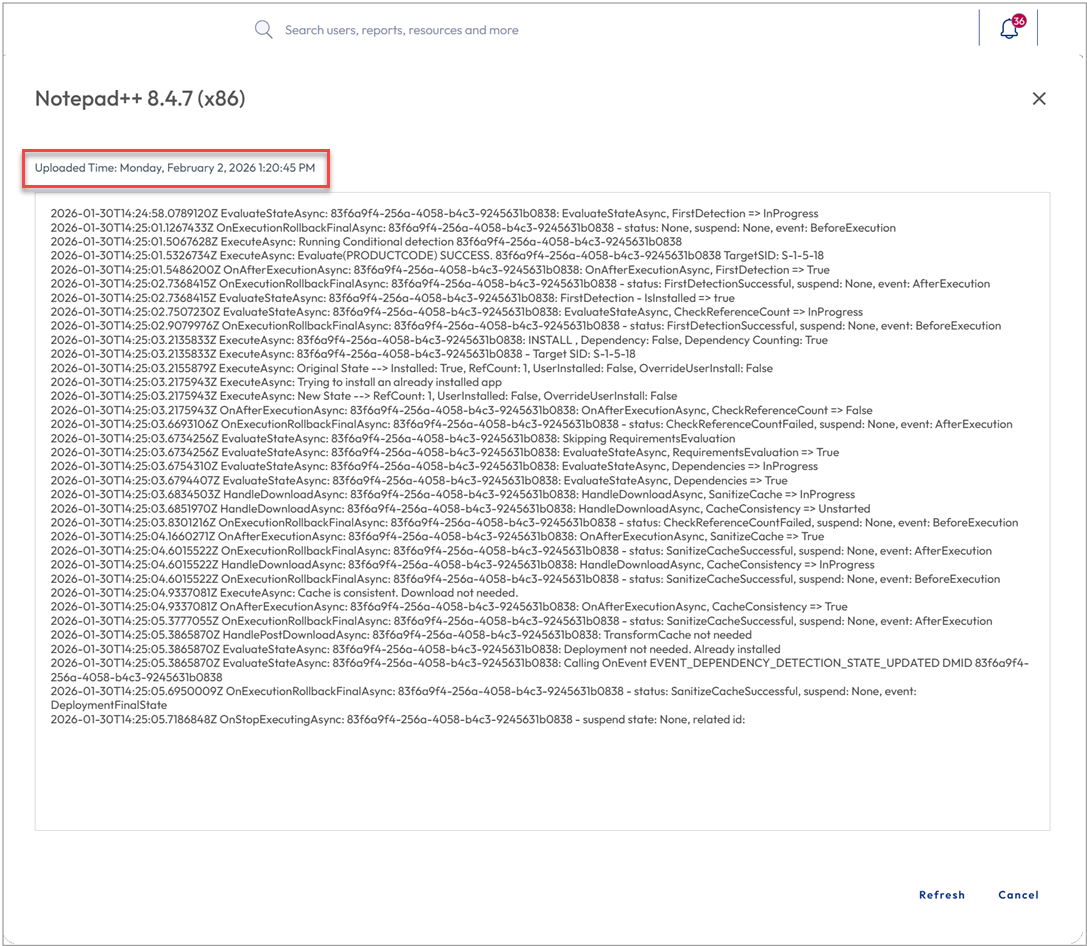
The last deployment log provides detailed information about what occurred during the most recent app deployment. It helps you quickly troubleshoot issues without reviewing the complete device logs. You can access the log file for your managed app by selecting the View hyperlink under the Log column. Only authorized administrators with device app list and device log permissions can view app deployment logs.
For successful app deployments, Workspace ONE UEM requests the last deployment log from the device. The page displays the message "Fetching last app deployment log for this application" while retrieving the result. Once the log is retrieved, it displays in line in the console so you can quickly inspect the deployment steps, errors, and status.
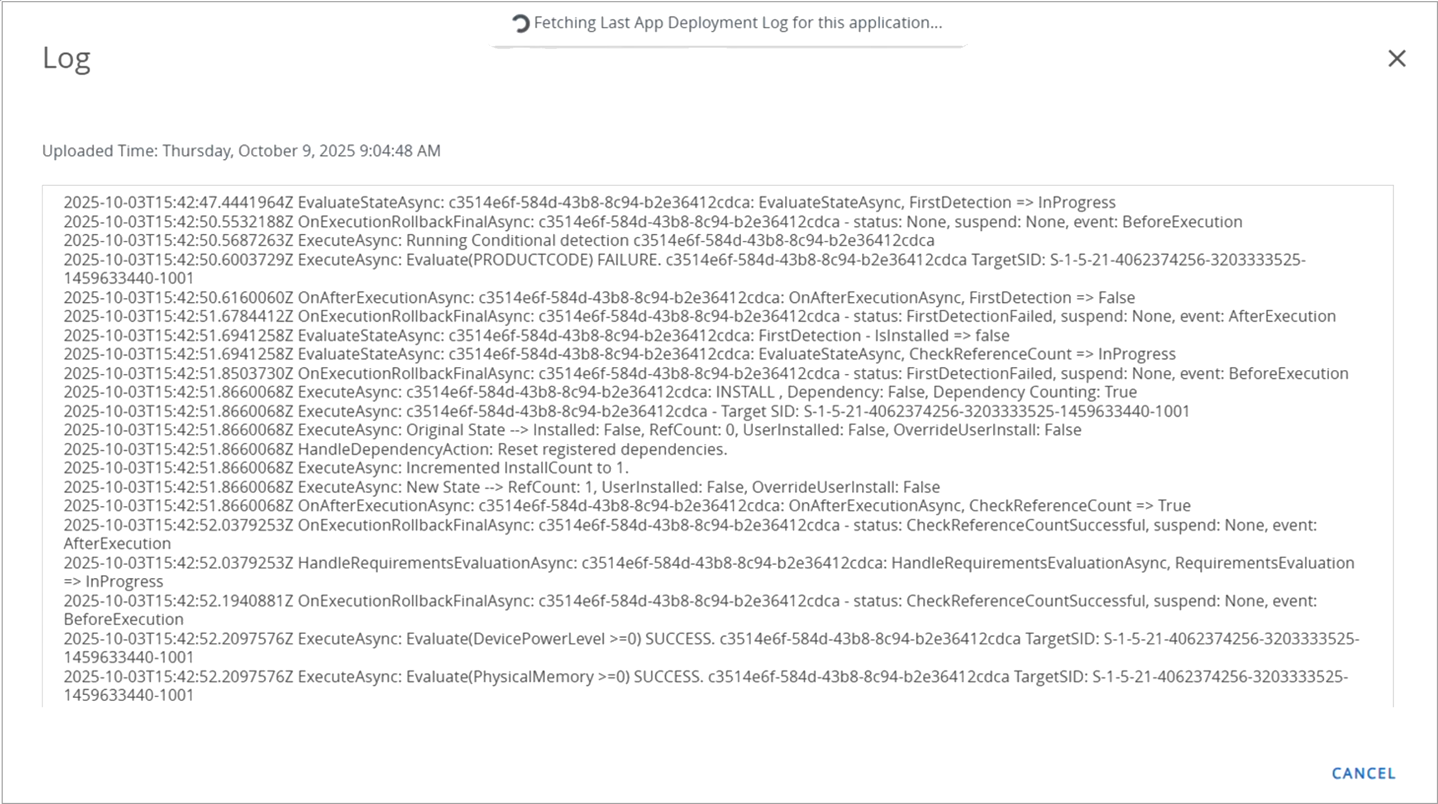
When an application deployment fails, logs are automatically retrieved and displayed immediately in a log viewer panel along with their upload time, allowing for faster troubleshooting.
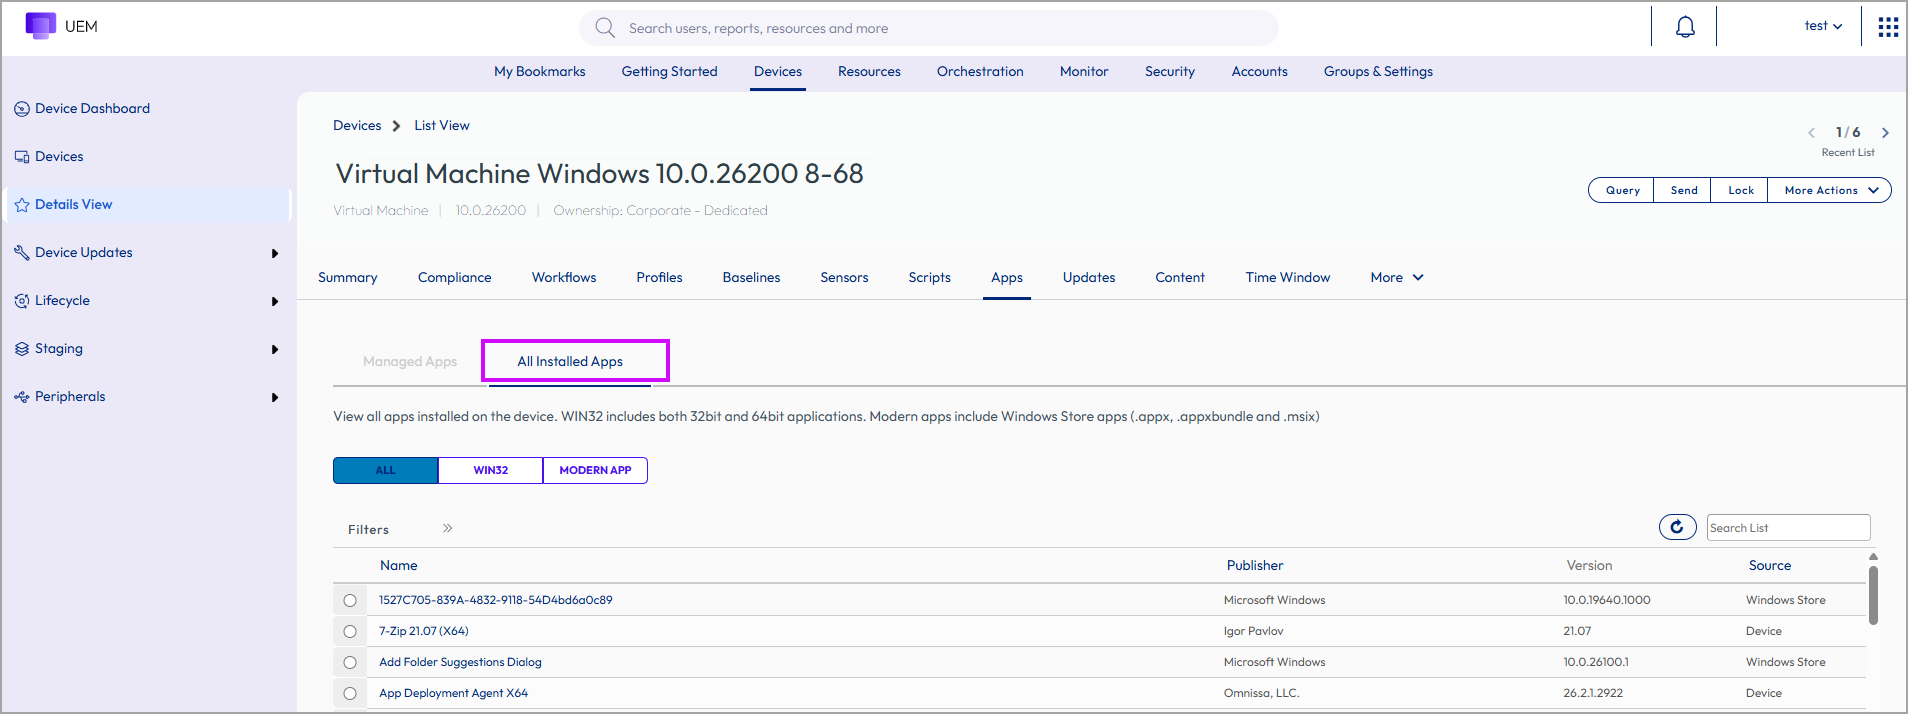
All Installed Apps
This tab shows the comprehensive view of all applications present on the device. It includes all installed applications, regardless of whether they are managed or unmanaged. This tab divides further into WIN32 and Modern APP sections, allowing you to view the application types separately. WIN32 includes both 32bit and 64bit applications, and the Modern apps include Windows Store apps (.appx, .appxbundle, and .msix). For each of these application types, you can use the available filters to easily sort and locate the specific app you need.
Uninstall Unmanaged Apps on Windows
Workspace ONE UEM's app sampling framework collects application inventory from Windows devices, including uninstall metadata published by the application. You might want to remove unwanted, unauthorized, or risky unmanaged applications from Windows devices collected through app sampling without relying on manual end-user intervention or separate remediation tooling.
You can trigger the uninstall of these sampled applications by executing the uninstall action directly from the Workspace ONE UEM Console.
Ensure all the prerequisites are in place before initiating the uninstall process.
-
UEM console version 2604 or later
-
Workspace ONE Intelligent Hub 26.04
-
Administrator with the Console Administrator role and 'Generic Application Uninstallation' permission
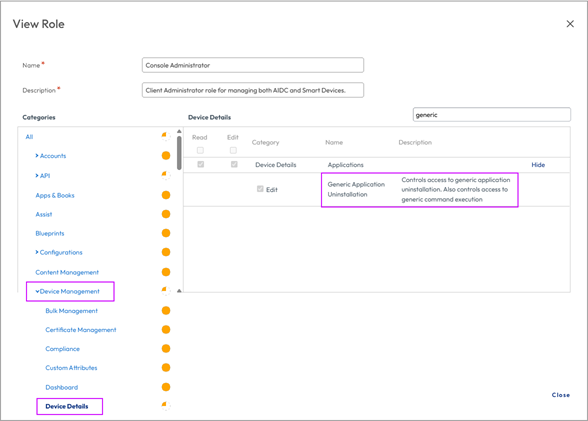
Follow the steps to uninstall an app from the UEM console:
-
Navigate to Devices > List View in the Workspace ONE UEM Console.
-
Select a Windows device to open the Device Details page.
-
Select the Apps tab and switch to All Installed Apps to view both managed and unmanaged applications.
Note: The Uninstall option is displayed only for applications discovered through app sampling.
-
Locate the unmanaged application you want to remove and click Remove.
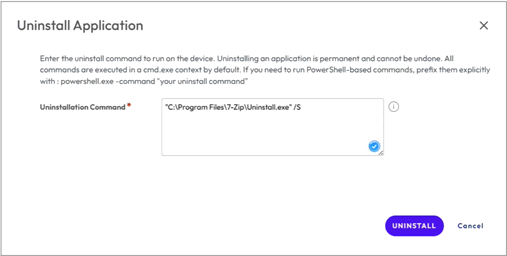
A dialog box appears displaying the collected uninstall string. By default, the silent uninstall string is used, and the command can be modified before execution. Because the collected command may not always be accurate, you must validate it before running it. If the command is not executed in silent mode, the operation may time out and fail.
If the uninstall string is unavailable from sampling, you can manually enter a custom uninstall command.
If you want to use PowerShell-based commands, then you must prefix the command withpowershell.exe-command. -
Click Uninstall.
There is no notification confirming whether the uninstallation was successful or not. However, you can verify whether the app was removed during the next application sampling.
Was this page helpful?