You run the Getting Started Wizard in the Workspace ONE UEM console to connect the Workspace ONE UEM service to the Omnissa Access service and establish a trusted relationship between the two services.
Before you can configure the integration, to establish a connection between Omnissa Access and Workspace ONE UEM, an OAuth 2.0 service client must be configured in Omnissa Access. The Omnissa Access OAuth 2.0 client ID and shared secret are configured in the Workspace ONE UEM console Getting Started wizard to establish the connection with Omnissa Access.
For newly created SaaS tenants, the OAuth 2.0 service client is generated on behalf of a new Omnissa Access client when the tenant is established. The information is prepopulated to the Getting Started wizard for that tenant.
For integration with an on-premises Omnissa Access deployment, the Omnissa Access admin generates the Omnissa Access OAuth 2.0 service client in the Omnissa Access console, Settings > OAuth 2.0 Management > UEM page. The UEM admin adds the client ID and shared secret to the Getting Started wizard when they start the configuration. See the Creating an OAuth 2.0 Service Client for Workspace ONE UEM article in the Omnissa Access Administration guide.
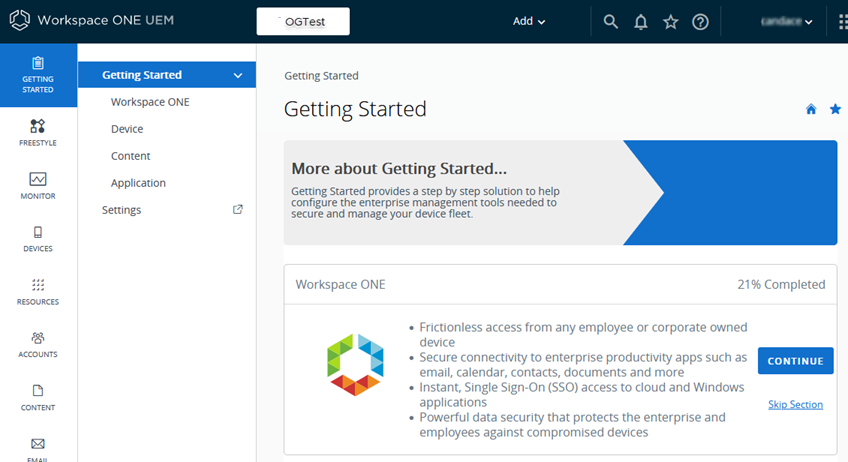
The Getting Started wizard serves as a checklist that walks you through the settings required to set up a Workspace ONE UEM and Omnissa Access. This configuration is set up in the Workspace ONE UEM console for the organization group of type Customer.
The Getting Started Wizard tracks how far along you are in the configuration process. You can start, pause, restart later, review, and change prior responses.
Important: Before you run the Getting Started Wizard, in the on-premises versions 23.09 and later Omnissa Access appliance, you must activate the API login URL endpoint /SAAS/API/1.0/REST/auth/system/login hosted by the Omnissa Access appliance. This is deactivated by default. See Enabling Omnissa Access URL Endpoint in Omnissa Access Appliance (On premise only).
-
In the Workspace ONE UEM console, click Getting Started > Workspace ONE.
-
Scroll down to the Identity and Access Management > Connect to Omnissa Access section and click CONFIGURE.
-
Enter your Omnissa Access tenant URL, the client ID and shared secret, if it is not prepopulated on the page.
Click TEST CONNECTION to verify that Workspace ONE UEM and Omnissa Access services can communicate.
Click SAVE.
The wizard creates the service account and the API Keys that are exempt from the Workspace ONE UEM built-in rate limit.
-
Go to the Settings > System > Devices & Users > General > Enrollment page and scroll to Source for Authentication for Intelligent Hub, to verify that Omnissa Access is enabled.
The following settings are automatically configured in the Workspace ONE UEM console to establish a trusted relationship between the two services and the settings values are automatically populated to the Omnissa Access console Integrations > UEM Integration page.
- Basic administrator role of Console Administrator service account is created in your Organization Group.
- REST API Admin key is generated and shared with the Omnissa Access service to communicate between the services.
- REST API Enrollment User key is generated and shared with the Omnissa Access service.
- After the admin API key is created, an admin account is added and certificate authentication is set up in the Workspace ONE UEM console. For REST API certificate-based authentication, a user-level certificate is generated in the Workspace ONE UEM console. The certificate used is a self-signed Workspace ONE UEM certificate generated from the Workspace ONE UEM admin root cert.
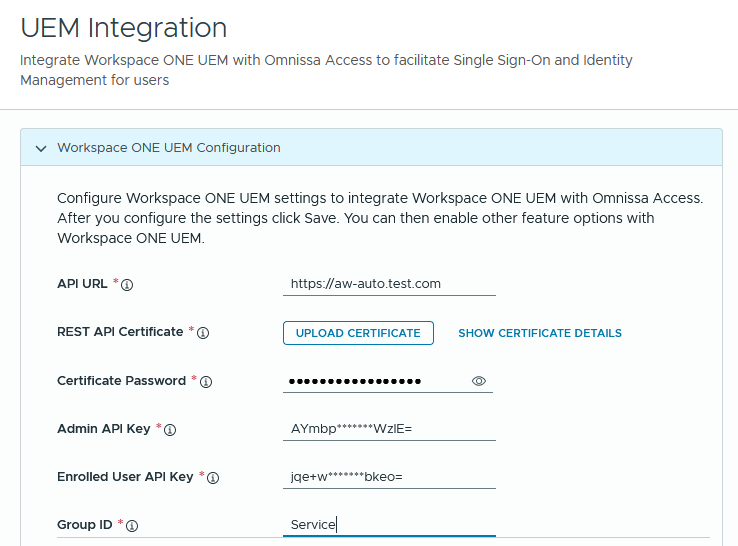
You complete setting up the integration with Workspace ONE UEM in the Omnissa Access console. See Configure Workspace ONE UEM Integration in Omnissa Access.
Was this page helpful?