Review the onboarding steps for accessing downloads through Omnissa Connect. Finance admins also help manage and audit your on-premises Omnissa subscriptions through the Account Organization.
Step 1: Purchase Omnissa services
Purchase a subscription through the Partner Hosted Service Provider program to receive an invitation to onboard into Omnissa Connect and access downloads.
Step 2: Redeem onboarding invitation
- Look for your email invitation from Omnissa.
- Check the spam folder.
- Use the email and password from your Omnissa account to log in.
- If you do not have an Omnissa account, the system prompts you to create one and to link it.
- If your email is federated, you must link your Omnissa account to your federated email so that Omnissa Customer Connect can identify you and allow you to download your Omnissa entitlements.
- In the widget, create a new organization, enter the name for organization, and select Next.
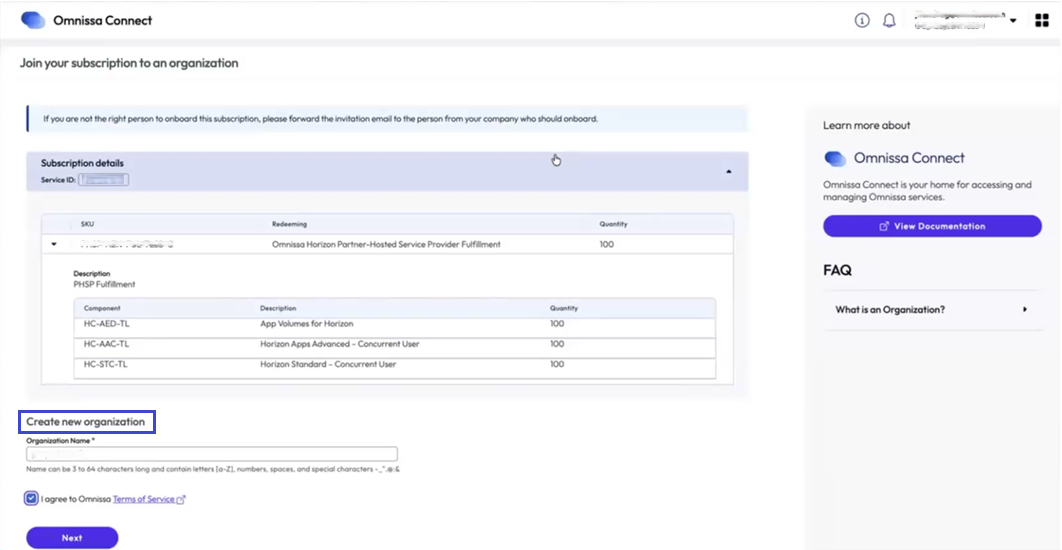
- You can see subscription details on this widget page like the Service ID, the SKU, and Horizon components that are entitled in you subscription.
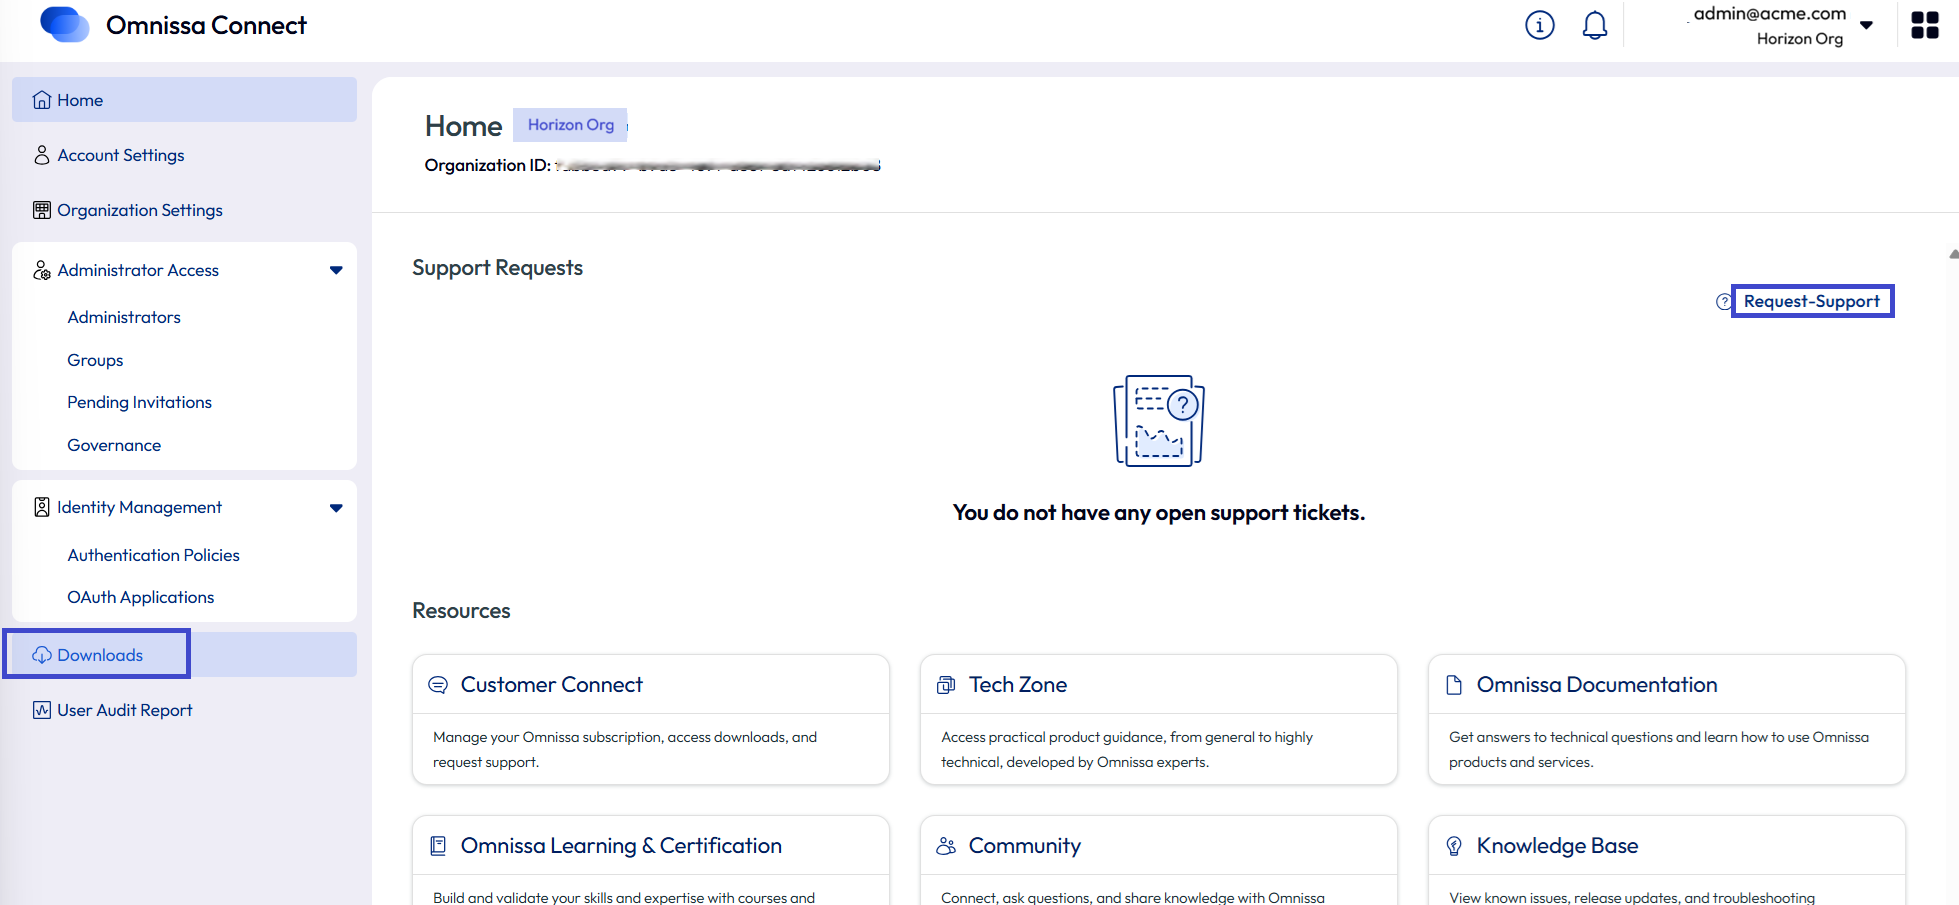
- The widget takes you to your Connect Home page. Some of the relevant areas you can access are:
- Organization ID
- Support Requests (if you have the role)
- Resources
- Download in the left navigation
Step 3: Set up federation or multi-factor authentication in Omnissa Connect.
Set up an authentication method in Connect so that your users can securely access your Omnissa services.
Enterprise federation
Omnissa Connect supports enterprise federation. As an Owner, the onboarding process gave you full Owner access to your organization.
If your organization uses an identity provider (IdP), your organization's domain is not yet federated in Connect, and you want to use enterprise federation, you can begin the enterprise federation self-service process as an Owner.
If you are setting up enterprise federation, perform this step before moving forward with adding admins.
Multi-factor authentication
If you do not use enterprise federation, consider using multi-factor authentication so that admins that use basic authentication have a more secure experience.
Step 4: Review organization and services roles (RBAC).
It is important to understand how Organization and Service roles work in Omnissa Connect to give the appropriate role-based access control (RBAC) to your admins. Omnissa Connect offers a single control plane for RBAC across the Omnissa platform. It is possible to invite someone to Omnissa Connect with access to one or more services and with very specific roles within those services.
Step 5. Add admins to Omnissa Connect.
For those organizations that are not federated and have small numbers of admins, you can select to invite admins individually or using admin groups.
Owners invite admins to the organization with the appropriate roles and service access, either individually or as part of admin groups.
The admin receives a Welcome email to access Omnissa Connect. They can also visit connect.omnissa.com to access the service.
Miscellaneous steps: Download products and enter support requests
As an Owner in an organization, you can download your entitled products and you can enter support tickets.
Download process
- Log in to Omnissa Connect and if you have access to many organizations, select the applicable organization that contains your Omnissa Horizon entitlements.
- Select your account name in the top right of the UI.
- Use the Change Organization drop-down menu to select the organization.
- Select Downloads in the left navigation.
- From the Downloads page, you can download your products from the My Products tab and see who has downloaded what products on the Download History tab.
Enter a support ticket
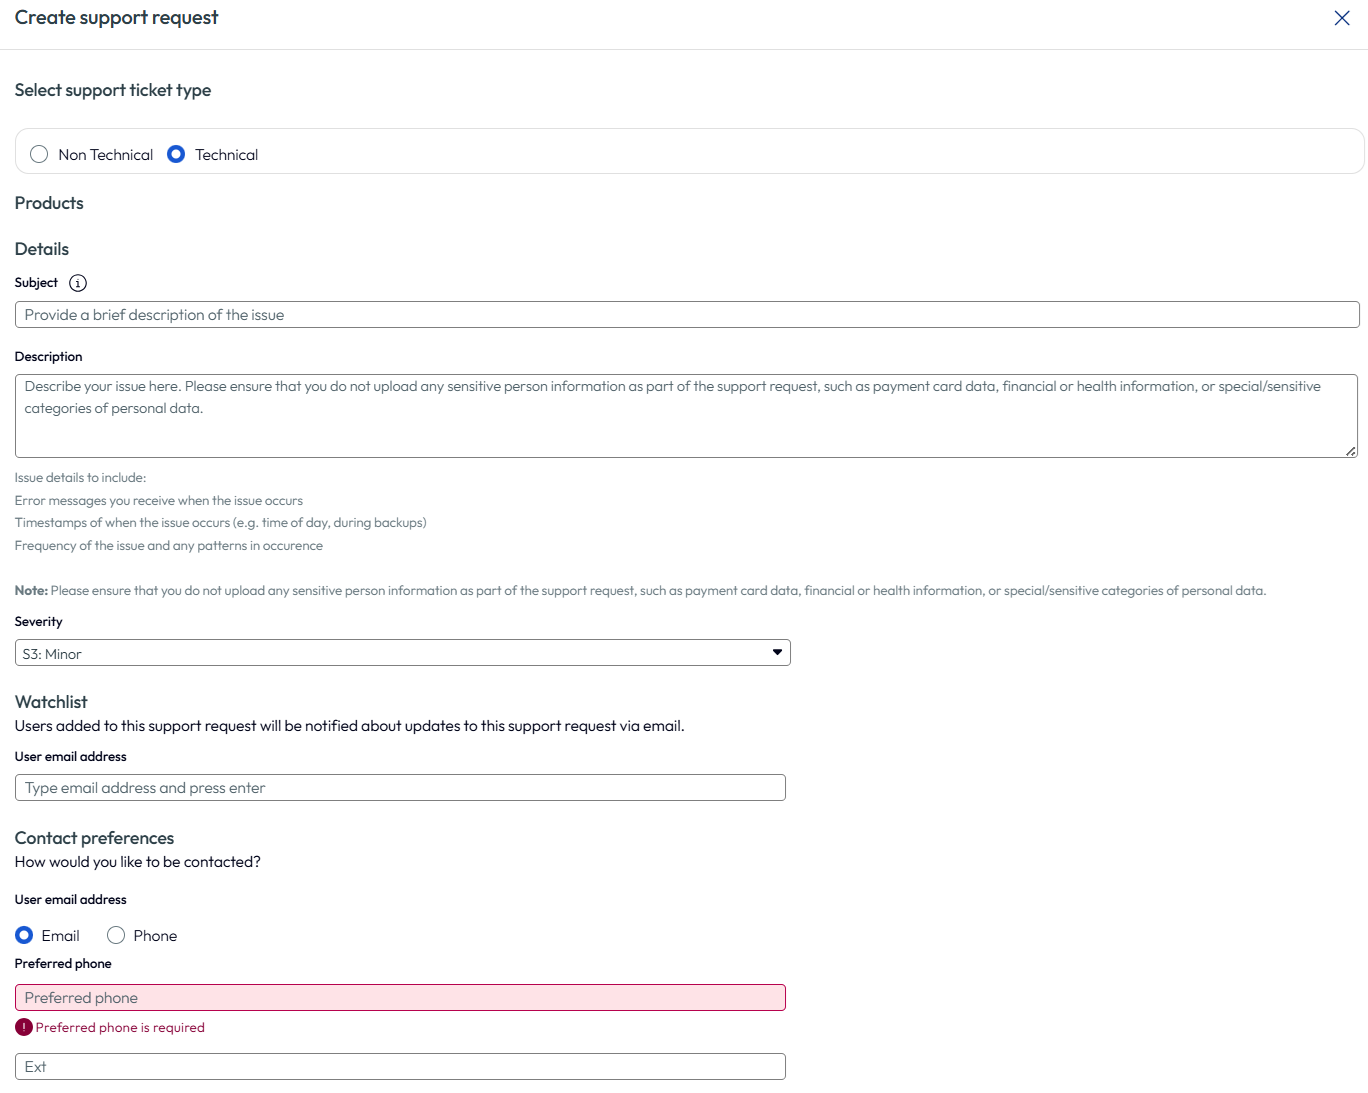
To enter support tickets, the widget requires a phone number. It can pull it from your Omnissa profile or you must enter one in the widget.
- Log in to Omnissa Connect and if you have access to many organizations, select the applicable organization that contains your Omnissa Horizon entitlements.
- Select your account name in the top right of the UI.
- Use the Change Organization drop-down menu to select the organization.
- In the Support Requests area of the Home page, select the Request-Support menu option.
- Complete the Create support request page and create the support request.
Finance admin tasks
Using the Account Overview page, which is only viewable to Finance admins, the Finance admin ensures that the licensing and billing of the business's Omnissa subscriptions is correct. On a continuous basis, the Finance admin can use the Account Overview to audit and check Omnissa licensing and billing.
If there is an issue with a subscription, the Finance admin can use the Request Support link to send a non-technical, support ticket to Omnissa to fix the issue.
Was this page helpful?