After enabling Omnissa Identity Service in Omnissa Connect, set up the integration with Google Workspace as the identity provider.
-
In the Omnissa Identity Service Getting Started wizard, click Start in step 2, Integrate a SCIM 2.0-Based Identity Provider.

-
Click Set Up on the Google Workspace card.

-
See the following steps to set up the integration with Google Workspace.
Step 1: Create Omnissa Identity Service Directory and Save Tenant URL and Secret Token Values
As the first step in setting up user provisioning and identity federation with Omnissa Identity Service, create a directory in the Omnissa Connect console for users provisioned from Google Workspace. Then copy and save the Omnissa Identity Service Tenant URL and Secret Token values that you will need to configure the integration in the Google Workspace Admin console.
Caution: After you create a directory, you cannot change your identity provider selection. Make sure that you select the appropriate identity provider before proceeding.
Procedure
-
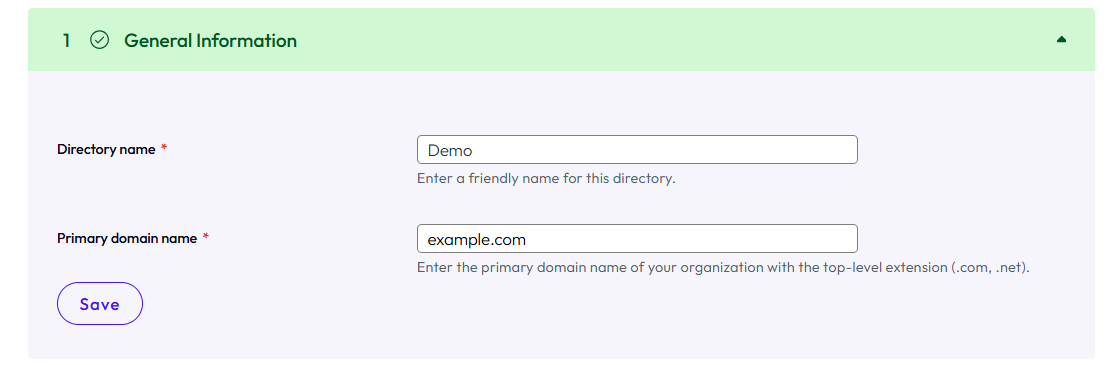
In step 1, General Information, of the wizard, enter the name that you want to use for the provisioned directory in Omnissa Identity Service.
A maximum length of 128 characters is allowed. Only the following characters are allowed: letters (a-z or equivalent in other languages), digits (0-9), space, hyphen (-), and underscore (_).
Important: You cannot change the name of the directory after it is created.
-
For Primary domain name, enter the primary domain name of your source directory, including the extension such as
.comor.net.Omnissa Identity Service currently supports only one domain. Provisioned users are associated with this domain in Omnissa services.
A maximum length of 100 characters is allowed. Only the following characters are allowed: letters (a-z or equivalent in other languages), digits (0-9), space, hyphen (-), underscore (_), and period (.).
For example:
-
Click Save, and confirm your selection.
-
Copy the values generated in step 2, Configure Identity Provider, of the wizard.
You require these values to configure the provisioning app in Google Workspace.
-
Tenant URL: Your Omnissa Identity Service tenant's SCIM 2.0 endpoint. Copy the value and save it for later use.
-
Token Lifespan: The period for which the secret token is valid.
By default, Omnissa Identity Service generates the token with a lifespan of six months. To change the token lifespan, click the down arrow, select another option, and click Regenerate to regenerate the token with the new value.
Important: Whenever you update the token lifespan, the previous token becomes invalid and provisioning of users from Google Workspace fails. You must regenerate a new token and copy and paste the new token to the Google Workspace app.
-
Secret token: The token required by Google Workspace to provision users to Omnissa Identity Service. Copy the value by clicking the copy icon and save it for later use.
Important: Make sure you copy the token before clicking Next. After you click Next, the token will no longer be visible and you will have to generate a new token. If you regenerate the token, the previous token becomes invalid and provisioning fails. Make sure that you copy and paste the new token to the Google Workspace app.
For example:

Note: When the token is about to expire, a banner notification will appear in Omnissa Identity Service. If you also want to receive email notifications, make sure that you opt in to receive emails. See How to enable email notifications.
-
-
Click Next till you reach step 5 of the wizard, Configure SAML Single Sign-On, which displays the values that are required for the next step.
Keep the page open.

Step 2: Create SAML App in Google Workspace
Create a SAML app in the Google Workspace Admin console, using the Omnissa Identity Service app that is available in the pre-integrated SAML apps catalog.
Prerequisites
You have an administrator account in the Google Workspace Admin console with the privileges required to set up provisioning and authentication.
Procedure
-
Log in to the Google Workspace Admin console.
-
Navigate to Apps > Web and mobile apps.
-
Select Add app > Search for apps.

-
Search for Omnissa Identity Service and select the app.

-
On the app page, under Option 1: Download IdP metadata, click Download Metadata.
You will upload the metadata to Omnissa Identity Service later in the integration process.

-
Click Continue.
-
In the Service provider details section, configure the following:
ACS URL: Copy and paste the Single sign-on URL value from step 5, Configure SAML Single Sign-On of the Omnissa Identity Service wizard.
Entity ID: Copy and paste the Entity ID value from step 5, Configure SAML Single Sign-On of the Omnissa Identity Service wizard.
(Optional) Name ID: If required, edit the Name ID format and Name ID settings to map users between Google Workspace and Omnissa Identity Service.
The default Name ID format is EMAIL. Note that Omnissa Identity Service only supports the following values: EMAIL, UNSPECIFIED, PERSISTENT, and TRANSIENT.
The default Name ID value is Primary email. Note that Omnissa Identity Service only supports the following values: Primary email, userPrincipalName, and userName.
For example:

-
Click Continue.
-
Click Finish.
The app is created. To edit the app name or description, click Edit Details in the left pane.
Step 3: Configure SAML Single Sign-On in Omnissa Identity Service
-
Return to step 5, Configure SAML Single Sign-On, of the Omnissa Identity Service wizard.
-
In the Identity provider metadata text box, copy and paste the IdP metadata that you downloaded from the app in Google Workspace.

-
Verify that the Name ID format and Name ID value settings match the settings you used in the SAML app in Google Workspace.
-
Click Finish.
Step 4: Configure User Provisioning
Next, configure user provisioning in Google Workspace to provision users to Omnissa Identity Service.
Important: Because Google Workspace does not support SCIM provisioning of groups, you cannot provision groups to Omnissa Identity Service.
Prerequisites
You have an administrator account in the Google Workspace Admin console with the privileges required to set up provisioning and authentication.
Procedure
-
In the Google Workspace Admin console, navigate to the SAML app you created.
-
In the Autoprovisioning section, click Configure autoprovisioning.

-
On the App authorization page, copy and paste the Omnissa Identity Service Secret token that you saved earlier, then click Continue.

-
On the Endpoint URL page, copy and paste the Omnissa Identity Service Tenant URL that you saved earlier, then click Continue.

-
In the Attributes section, review the existing attribute mappings and edit or add mappings if necessary.
- The App attributes column lists all the attributes supported by Omnissa Identity Service.
- Required attributes (marked with an asterisk in the App attributes column), are mapped by default. You can edit the mappings if needed.
- You can also map optional and custom attributes supported by Omnissa Identity Service.
See Mapping SCIM User Attributes for more information.
-
Click Continue.
-
In the Provisioning scope page, if you want to limit auto-provisioning to specific groups, select the groups, then click Continue.
If you don't select any groups, all users with Omnissa Identity Service app access are provisioned.
-
On the Deprovisioning page, select the actions you want to take when Omnissa Identity Service app access is removed for a user, when a user is suspended from Google, or when a user is deleted from Google.
-
Click Finish.
-
Configure user access to the app.
-
On the main page of the app, expand the User access section by clicking the arrow.

-
Turn on user access for the users you want to provision to Omnissa Identity Service by selecting ON for the relevant groups or organizational units.
-
Click Save.
-
-
On the main page of the app, in the Autoprovisioning section, turn on autoprovisioning.

Mapping SCIM User Attributes
An important part of configuring the integration with Google Workspace is mapping the user attributes to synchronize from Google Workspace to Omnissa services. The core set of required attributes common to all Omnissa services are mapped by default in the SAML app. However, the requirements vary by service, so make sure you review the requirements for each service.
Attributes required for Omnissa Access and Workspace ONE UEM
The following user attributes are required:
| Google Workspace Attribute | SCIM User Attribute (Required) |
|---|---|
| Username | userName |
| Email > Value | emails.value |
| Email > Is primary | emails.primary |
| Basic information > First name | name.givenName |
| Basic information > Last name | name.familyName |
Note: The table shows the typical mapping between the required SCIM attributes and Google Directory attributes. You can map the SCIM attributes to different Google Directory attributes than those listed here.
For more information about these attributes and how they map to Omnissa attributes, see User Attribute Mapping for Omnissa Identity Service.
In addition to the required attributes, you can synchronize optional attributes and custom attributes. These attributes are also available in the SAML app for you to map.
For more information, see:
- The list of attributes in Step 3, Map SCIM Attributes, of the Omnissa Identity Service wizard
- User Attribute Mapping for Omnissa Identity Service
Attributes required for Horizon Cloud
See Using Omnissa Identity Service with Horizon Cloud.
Results
After you configure user provisioning, the integration between Omnissa Identity Service and Google Workspace is complete.
The directory is created in Omnissa Identity Service and will be populated when you push users and groups from the provisioning app in Google Workspace. Provisioned users and groups will automatically appear in the Omnissa services you choose to integrate with Omnissa Identity Service, such as Workspace ONE UEM or Omnissa Access.
You cannot edit the directory in the Omnissa services. Directory, users, user groups, user attributes, and identity provider pages and settings are read-only.
What to do next
-
Select the Omnissa services to which you want to provision users and groups.
-
If Workspace ONE UEM is one of the services you select, configure additional settings in the Workspace ONE UEM console.
-
If you plan to create Basic user accounts in Workspace ONE UEM, in step 4, Select Authentication Protocol, of the Omnissa Identity Service wizard, expand Setup UEM Basic User Authentication and enable the Basic user authentication for UEM option.
See Configuring Authentication for Workspace ONE UEM Basic Users for information.
Was this page helpful?