After the imported virtual machine (VM) is created and you have paired it to Horizon Cloud, but before you convert it into a published image, you customize the VM's guest Windows operating system (OS) to install and configure the things you want and need in the image. After the VM has gone through this customization, it is sometimes called a golden image, to indicate the image is configured with all of the items that meet your business needs for the end-user desktops and remote applications that will be based on that image.
Use the links listed further below for the steps to further customize the VM. For additional tuning of the image VM to provide an improved configuration for using Blast Extreme, a best practice is to follow the guidance in Five Key Steps to Take with Your Golden Images to Get Optimal Remote Experience Performance from Horizon Cloud Farms and Desktops. Also read Tech Zone's Omnissa Blast Extreme Optimization Guide and perform additional tuning for codec options in the image according to that guide's recommendations for codec options.
About Ways to Avoid Sysprep Issues If You Did Not Use The Following Options in the Import VM Wizard or When You Manually Created the Base Image VM
If you created the base image using the Import Virtual Machine wizard and you enabled the following listed options in the wizard, the system configured the VM to avoid some typical issues that have been observed during the Microsoft Windows System Preparation (Sysprep) process that runs when the imported VM is converted to a sealed image.
- Optimize Windows Image toggle — available in the wizard for all the operating systems selectable in the wizard. This option is described in Deciding to Optimize the Windows Image When Using the Import Virtual Machine from Marketplace Wizard.
- Remove Windows Store Apps toggle — available in the wizard for the Windows 10 or 11 client-type operating systems. This option is described in Using the Remove Windows Store Apps Option When Using the Import Desktop Wizard.
If you did not use those options in the Import Virtual Machine wizard, or if you manually created the imported VM, sometimes issues have been observed to occur during the sealing process, especially those related to the Microsoft Windows System Preparation (Sysprep) process. In addition to following the steps in the topics linked further below, you might try follow some of the methods listed below before converting the imported VM to a published, sealed image.
- Manually configure the base image VM's services and registry keys according to the same settings the system uses when the Optimize Windows Image and Remove Windows Store Apps toggles are set to Yes. Use the links in the preceding list to read about those settings.
- Remove the Microsoft Windows
appxpackages as described in Microsoft KB 2769827 and Microsoft MVP article 615. For Windows 10 or 11, run theappxpackage removal steps under all accounts, removing the same apps from each and every account. Do not delete accounts or profiles from the image until you have run theappxremoval steps for every account. For details about the package removal commands that the image creation process runs when you use the Import Virtual Machine wizard's Remove Windows Store Apps toggle, see Using the Remove Windows Store Apps Option When Using the Import Desktop Wizard. - Try following the advice described in the Optimizing Images for Horizon. Even though that guide is written in the context of Horizon 8 and includes mention of Windows operating system other than those supported in your Horizon Cloud environment, it provides details on how to use the Omnissa OS Optimization Tool (OSOT) on a VM.
For a Horizon Cloud Imported VM with a Microsoft Windows Client Operating System — Customize the VM for Your Organization's Needs
After the virtual machine (VM) built on a Microsoft Windows client-type operating system is imported and you have paired it to Horizon Cloud, but before converting it into a published image, you customize the guest Windows operating system (OS) to install and configure all of the things you want to have in your end users' VDI desktops. At this time, you install all of the third-party applications you want available in the VDI desktops. Also at this time, you perform any other customizations in the Windows guest operating system, such as installing special drivers required by your organization's needs, applying wallpaper, setting default colors and fonts, configuring taskbar settings, and other such OS-level items. The VM prior to customization is sometimes referred to as an image or base image. After customization, the VM is sometimes referred to as a golden image.
After the Imported VMs page indicates that your imported VM has its agent-related status as active, you connect to it using your RDP software and install the applications into the underlying operating system.
Prerequisites
Verify the Imported VMs page indicates the agent-related status is active for the VM. To get that status, use the Imported VMs page's Reset Agent Pairing action on the VM. That action is located in the More drop-down list.
Obtain the VM's IP address as displayed on the Imported VMs page.
Note: When using the Microsoft Remote Desktop Client as your RDP software to connect to the VM, ensure it is the most up-to-date version. For example, the default RDP software in the Windows 7 operating system is not at a high enough version. The version must be version 8 or higher.
Verify you have at least one of the following credentials (user name and password) to log in to the VM's guest Windows operating system, according to how the VM was created.
| How the VM was created | Credentials to use to log in |
|---|---|
| Import Virtual Machine wizard, from the Imported VMs page. |
Starting with the December 2019 service release date, the Import Virtual Machine wizard provides the option of either having the wizard-created VM joined to a specified Active Directory domain or not having the VM joined to the domain at the end of the creation process.
|
| Manual preparation steps. |
Typically you do not need to join the VM to your Active Directory domain when you manually build the VM. To log in to that VM, use one of the following:
|
Important: Starting with pod manifest 1230 and later, domain accounts can direct connect to domain-joined image VMs that have the agent software installed. Prior to pod manifest 1230, the agent software installed in a domain-joined VM prevented domain accounts from directly connecting to that VM. Please note that such manifests that are earlier than 2298 are out of support and must be updated, as described in KB 86476.
Procedure
-
Use the VM's IP address in your RDP software to connect to the VM's operating system.
- If the VM was created with a public IP address, you can use that IP address in your RDP software
- If the VM has a private IP address, you must RDP into it by one of these two methods:
- Using another VM in your Microsoft Azure subscription that does have a public IP address and doing an outbound RDP into the imported VM.
- Use your VPN and RDP into the VM over your corporate network Note: To access a VM that is running the agent-related software components, the version of the Remote Desktop Client must be version 8 or later. Otherwise, the connection fails. Using the most up-to-date Remote Desktop Client is recommended.
-
Log in to the Windows operating system using credentials (user name and password) as described in the prerequisites here.
When using the local administrator account credentials that were specified in the Import Image wizard when the VM was created, enter the username as
\username.Note: When the VM is a domain-joined VM, as described in the prerequisites here, and you want to use a domain account instead of the local administrator account, enter the user name as
domain\usernamewhere domain is the name of the domain. -
When you are logged in to the operating system, install the third-party applications or drivers that you want available for your end users to run in the VDI desktop environment.
-
In the operating system, install any custom drivers you want in the VDI desktops.
-
Make any customizations or configurations you want to have in the VDI desktops, such as add a custom wallpaper, set default fonts or colors or themes, adjust the taskbar default settings, and so on.
-
When you are done adding your finishing touches to the VM's guest operating system, sign out of the operating system.
What to do next
Optimize the image based on your intended business scenario. See the guidance in Five Key Steps to Take with Your Golden Images to Get Optimal Remote Experience Performance from Horizon Cloud Farms and Desktops.
Follow the best practices to optimize the VM to prevent encountering sysprep or other errors during the process to convert the golden image to an assignable image in Horizon Cloud, also known as publishing or sealing the image. See Customize the Imported VM's Windows Operating System.
Convert the golden image to an assignable image, using the steps described in Convert a Configured Image VM to an Assignable Image in Horizon Cloud on a Per-Pod Basis.
For a Horizon Cloud Imported VM with a Microsoft Windows 10 or 11 Enterprise Multi-Session Operating System — Customize the VM for Your Organization's Needs
After the virtual machine (VM) built on a Microsoft Windows 10 Enterprise or Windows 11 Enterprise multi-session operating system is imported and you have paired it to Horizon Cloud, but before converting it into a published image, you customize the guest operating system (OS) to install and configure all of the things you want to have in the RDSH VMs from which your end users' remote applications and session-based desktops will be provisioned. At this time, you install all of the third-party applications you want available in the session-based desktops or available for assignment as remote applications. Also at this time, you perform any other customizations in the Windows guest operating system, such as installing special drivers required by your organization's needs, applying wallpaper, setting default colors and fonts, configuring taskbar settings, and other such OS-level items. The VM prior to customization is sometimes referred to as an image or base image. After customization, the VM is sometimes referred to as a golden image.
Tip: As described in the Microsoft documentation FAQ, Microsoft Windows 10 or Windows 11 Enterprise multi-session is a Remote Desktop Session Host (RDSH) type that allows multiple concurrent interactive sessions, which previously only Microsoft Windows Server operating systems could provide. Because Microsoft Windows 10 or 11 Enterprise multi-session is an RDSH type of operating system, it will appear in the Horizon Cloud RDSH-applicable workflows when your Horizon Cloud tenant account configuration provides for its use.
After the Imported VMs page indicates that your imported VM has its agent-related status as active, you connect to it using your RDP software and install the applications into the underlying operating system.
Prerequisites
If the imported VM is running one of the Microsoft Windows 10 or 11 Enterprise multi-session systems that includes Office 365 ProPlus by default, as part of customizing the operating system, you might have to configure that Office 365 ProPlus for shared computer activation as described in the Microsoft documentation topic Overview of shared computer activation for Office 365 ProPlus. Read that Microsoft documentation topic to determine how you want to configure Office 365 ProPlus for shared computer activation.
Verify the Imported VMs page indicates the agent-related status is active for the VM. To get that status, use the Imported VMs page's Reset Agent Pairing action on the VM. That action is located in the More drop-down list.
Obtain the VM's IP address as displayed on the Imported VMs page.
Tip: When using the Microsoft Remote Desktop Client as your RDP software to connect to the VM, ensure it is the most up-to-date version. The version must be version 8 or higher.
Verify you have at least one of the following credentials (user name and password) to log in to the VM's guest Windows operating system, according to how the VM was created.
| How the VM was created | Credentials to use to log in |
|---|---|
| Import Virtual Machine wizard, from the Imported VMs page. |
The Import Virtual Machine wizard provides the option of either having the wizard-created VM joined to a specified Active Directory domain or not having the VM joined to the domain at the end of the creation process.
|
| Manual preparation steps in Manually Build and Import a Virtual Machine from Microsoft Azure into Horizon Cloud. |
Typically you do not need to join the VM to your Active Directory domain when you manually build the VM. To log in to that VM, use one of the following:
|
Procedure
-
Use the VM's IP address in your RDP software to connect to the VM's operating system.
- If the VM was created with a public IP address, you can use that IP address in your RDP software
- If the VM has a private IP address, you must RDP into it by one of these two methods:
- Using another VM in your Microsoft Azure subscription that does have a public IP address and doing an outbound RDP into the imported VM.
- Use your VPN and RDP into the VM over your corporate network Remember: When using the Microsoft Remote Desktop Client as your RDP software to connect to the VM, ensure it is the most up-to-date version. The version must be version 8 or higher.
-
Log in to the Windows operating system using credentials (user name and password) as described in the prerequisites here.
When using the local administrator account credentials that were specified in the Import Image wizard when the VM was created, enter the username as
\username.Note: When the VM is a domain-joined VM, as described in the prerequisites here, and you want to use a domain account instead of the local administrator account, enter the user name as
domain\usernamewhere domain is the name of the domain. -
When you are logged in to the operating system, install the third-party applications or drivers that you want available for your end users in the session-based desktops or to run as remote applications.
-
In the operating system, install any custom drivers you want available in the RDSH hosts.
-
Make any customizations or configurations you want to have in the session-based desktops, such as add a custom wallpaper, set default fonts or colors or themes, adjust the taskbar default settings, and so on.
-
When you are done adding your finishing touches to the VM's guest operating system, sign out of the operating system.
What to do next
If the VM is based on one of the Microsoft Windows 10 or 11 Enterprise multi-session choices that includes Office 365 ProPlus by default, additional steps might be required. You might have to configure that Office 365 ProPlus for shared computer activation as described in the Microsoft documentation topic Overview of shared computer activation for Office 365 ProPlus. Read that Microsoft documentation topic to determine how you want to configure Office 365 ProPlus for shared computer activation and use the method appropriate for your situation.
Optimize the image based on your intended business scenario. See the guidance in Five Key Steps to Take with Your Golden Images to Get Optimal Remote Experience Performance from Horizon Cloud Farms and Desktops.
Follow the best practices to optimize the VM to prevent encountering sysprep or other errors during the process to convert the golden image to an assignable image in Horizon Cloud, also known as publishing or sealing the image. See Customize the Imported VM's Windows Operating System.
Convert the golden image to an assignable image, using the steps described in Convert a Configured Image VM to an Assignable Image in Horizon Cloud on a Per-Pod Basis.
For a Horizon Cloud Imported VM with a Microsoft Windows Server Operating System — Customize the VM for Your Organization's Needs
After the VM built on a Microsoft Windows Server operating system is imported and you have paired it to Horizon Cloud, but before converting it into a published image in Horizon Cloud, but before converting it into a published image, you customize the guest operating system (OS) to install and configure all of the things you want to have in the RDSH VMs from which your end users' remote applications and session-based desktops will be provisioned. Also at this time, you perform any other customizations in the Windows guest operating system, such as installing special drivers required by your organization's needs, applying wallpaper, setting default colors and fonts, configuring taskbar settings, and other such OS-level items. The VM prior to customization is sometimes referred to as an image or base image. After customization, the VM is sometimes referred to as a golden image.
After the Imported VMs page indicates that your imported VM has its agent-related status as active, you connect to it using your RDP software and install the applications into the underlying operating system.
For Microsoft's best practices about installing applications directly on to an RDSH server, see the TechNet Magazine article Learn How to Install Applications on an RD Session Host Server.
Prerequisites
Verify the Imported VMs page indicates the agent-related status is active for the VM. To get that status, use the Imported VMs page's Reset Agent Pairing action on the VM. That action is located in the More drop-down list.
Obtain the VM's IP address as displayed on the Imported VMs page.
Note: When using the Microsoft Remote Desktop Client as your RDP software to connect to the VM, ensure it is the most up-to-date version. For example, the default RDP software in the Windows 7 operating system is not at a high enough version. The version must be version 8 or higher.
Verify you have at least one of the following credentials (user name and password) to log in to the VM's guest Windows operating system, according to how the VM was created.
| How the VM was created | Credentials to use to log in |
|---|---|
| Import Virtual Machine wizard, from the Imported VMs page. |
Starting with the December 2019 service release date, the Import Virtual Machine wizard provides the option of either having the wizard-created VM joined to a specified Active Directory domain or not having the VM joined to the domain at the end of the creation process.
|
| Manual preparation steps. |
Typically you do not need to join the VM to your Active Directory domain when you manually build the VM. To log in to that VM, use one of the following:
|
Important: Starting with pod manifest 1230 and later, domain accounts can direct connect to domain-joined image VMs that have the agent software installed. Prior to pod manifest 1230, the agent software installed in a domain-joined VM prevented domain accounts from directly connecting to that VM. Please note that such manifests that are earlier than 2298 are out of support and must be updated, as described in KB 86476.
Procedure
-
Use the VM's IP address in your RDP software to connect to the VM's operating system.
- If the VM was created with a public IP address, you can use that IP address in your RDP software
- If the VM has a private IP address, you must RDP into it by one of these two methods:
- Using another VM in your Microsoft Azure subscription that does have a public IP address and doing an outbound RDP into the imported VM.
- Use your VPN and RDP into the VM over your corporate network Note: To access a VM that is running the agent-related software components, the version of the Remote Desktop Client must be version 8 or later. Otherwise, the connection fails. Using the most up-to-date Remote Desktop Client is recommended.
-
Log in to the Windows operating system using credentials (user name and password) as described in the prerequisites here.
When using the local administrator account credentials that were specified in the Import Image wizard when the VM was created, enter the username as
\username.Note: When the VM is a domain-joined VM, as described in the prerequisites here, and you want to use a domain account instead of the local administrator account, enter the user name as
domain\usernamewhere domain is the name of the domain. -
When you are logged in to the operating system, follow these steps to install the third-party applications or drivers that you want available to run in the multi-user RDS desktop environment.
-
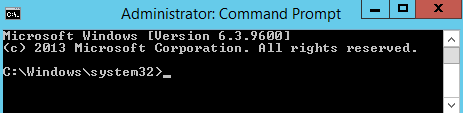
In the Windows Server operating system, open a command prompt as an administrator by right-clicking the Start and clicking Command Prompt (Admin).
-
In that command prompt, determine the server's current install mode of the server by issuing the command
change user /query.
The response
Applicaton EXECUTE mode is enabledindicates the server is in RD-Execute mode. -
In that command prompt, switch the server into RD-Install mode by issuing the command
change user /install.
As described in the Microsoft best practices document, RD-Install is a special install mode to install applications so they can run in a multi-user environment.
-
Install the third-party user applications you want to provide to your end users in their RDS desktops or as remote applications.
-
When you are finished installing the applications, return to the command prompt window and switch the server into RD-Execute mode by issuing the command
change user /execute.
-
-
In the operating system, install any custom drivers you want in the RDS desktops.
-
Make any customizations or configurations you want to have in the RDS desktops, such as add a custom wallpaper, set default fonts or colors or themes, adjust the taskbar default settings, and so on.
-
When you are done adding your finishing touches to the VM's guest operating system, sign out of the operating system.
What to do next
Optimize the image based on your intended business scenario. See the guidance in Five Key Steps to Take with Your Golden Images to Get Optimal Remote Experience Performance from Horizon Cloud Farms and Desktops.
Follow the best practices to optimize the VM to prevent encountering sysprep or other errors during the process to convert the golden image to an assignable image in Horizon Cloud, also known as publishing or sealing the image. See Customize the Imported VM's Windows Operating System.
Convert the golden image to an assignable image, using the steps described in Convert a Configured Image VM to an Assignable Image in Horizon Cloud on a Per-Pod Basis.
Was this page helpful?