This documentation page describes the steps to manually install the agent-related components that are required and appropriate for Horizon Cloud and pair the VM with the cloud plane. In the base virtual machine's Windows operating system, you run the Horizon Agents Installer. After rebooting the VM, you pair the VM with the cloud plane using the Horizon Cloud administrative console.
Keep the following points in mind as you perform this task:
-
The steps in this documentation topic are for pods that are supported manifest versions. For the Horizon Cloud on Microsoft Azure pod manifest support statements, see KB 86476. To check your pod's manifest version by using the pod's details page, see First-Gen Tenants - Managing Your Cloud-Connected Pods, for All First-Gen Horizon Cloud Supported Pod Types.
If your pod is of manifest lower than 1600, do not attempt to use these steps. Manifests lower than 1600 have reached end of general support. The steps in this page will fail for a pod of manifest lower than 1600.
-
You must install the agent-related software using a version of Horizon Agents Installer that is appropriate for the pod's manifest level. For the Horizon Agents Installer version that aligns with your pod manifest version, in the Horizon Cloud Release Notes, find the section that cites your pod manifest version. The corresponding Horizon Agents Installer version will be listed nearby.
-
Installing a version of the Horizon Agents Installer into a Windows VM that is four or more versions older than the version that aligns with your pod's manifest version can cause downstream issues when you create farms and VDI desktop assignments based on the image VM. As an example, if you create a farm based on an image VM in which you installed an older version of Horizon Agents Installer, the system might allow you to select Horizon Web Client (Blast) as a protocol. However, this selection will not be applied to the farm's RDS VMs even though it appears to have been applied successfully.
-
If the VM is running a Windows 11 OS type, single-session or multi-session, then you must use Horizon Agents Installer version 22.1 or later.
-
The Help Desk Plugin option is installed by default. If you choose not to install this option, performance-related metrics from user sessions in the desktop instances or farm RDSH instances based on this image are not collected. As a result, some data will not be available in the user card for such sessions. For details, see First-Gen Tenants - About the User Card Feature, Also Known as the Help Desk in Horizon Cloud.
-
The Horizon Monitoring Service Agent option is installed by default. If you choose not to install this option, activity-related data from user sessions in the VDI desktop instance or farm multi-session instances based on this image is not reported to the cloud plane. As a result, data from end-user activity and other types of desktop activity will not be displayed in the relevant reports in the Omnissa Intelligence console.
-
The App Volumes Agent option is not enabled by default. Selecting that option installs the App Volumes Agent, which enables use of this VM to leverage the App Volumes features supported for use with Horizon Cloud pods. See App Volumes Applications for Horizon Cloud on Microsoft Azure - Overview and Prerequisites.
-
The Dynamic Environment Manager option is not enabled by default. Selecting that option installs the Dynamic Environment Manager client component, known as the FlexEngine. Selecting that option installs FlexEngine using its typical mode. The typical mode requires a post-installation configuration step to configure the Dynamic Environment Manager Group Policy. For Dynamic Environment Manager usage information, see the Dynamic Environment Manager product documentation. Dynamic Environment Manager provides various options for achieving the persistence of end-user data, settings, and profiles of desktops provisioned by your pod.
Note: When the Dynamic Environment Manager option is selected for installation, its resulting installation path is
C:\Program Files\Omnissa\Horizon Agents\User Environment Manager.
Prerequisites
Verify that the virtual machine (VM) is created and configured as described in Create the Virtual Machine Manually in Your Pod in Microsoft Azure and Prepare the Manually Created VM Prior to Installing the Agents.
Verify that you have the version of Horizon Agents Installer that is appropriate for the pod's manifest level. You can check your pod's manifest version on the pod's details page from the First-Gen Tenants - Managing Your Cloud-Connected Pods, for All First-Gen Horizon Cloud Supported Pod Types. To see the Horizon Agents Installer version that aligns with your pod manifest version, find section that cites your pod manifest version in the Release Notes.
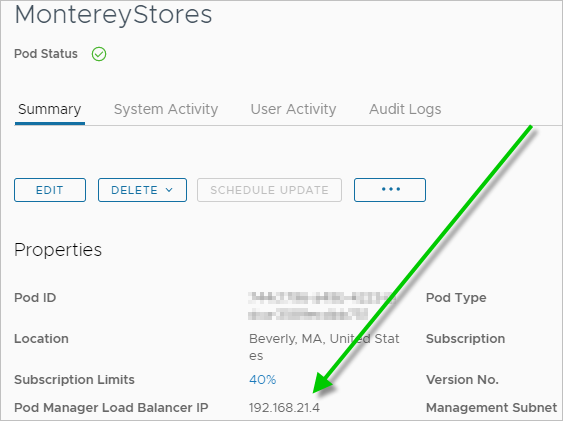
When you plan to install the App Volumes Agent so that this VM can leverage the pod's App Volumes features, you must have the IP address that the agent needs to communicate with the App Volumes Manager running in the pod. If the App Volumes Agent is selected in the agent options, the Horizon Agents Installer will display Specify the App Volumes Manager IP. The IP address to use is the one next to the label Pod Manager Load Balancer IP in the pod detail's page. The following image is an example of the pod's details page and the location of the Pod Manager Load Balancer IP.
Procedure
-
Navigate to where you downloaded the installer and start it.
Important: If you want to use the URL redirection option with the desktops or RDS-based remote applications resulting from this base VM, you must use the command line to start the installer, adding the
VDM_URL_FILTERING_ENABLED=1parameter to the command.For example,
Horizon-Agents-Installer-x.y.z-build-x64.exe VDM_URL_FILTERING_ENABLED=1Where x.y.z and build match the numbers in the file name.
After a few minutes, the installation wizard displays its Welcome screen. The installer detects whether it is running on a client operating system or on a Remote Desktop Session Host (RDSH) type of operating system and displays the appropriate Welcome screen. The RDSH types of operating systems include Microsoft Windows server operating systems that have the RDS role enabled and Microsoft Windows 10 Enterprise multi-session operating systems.
-
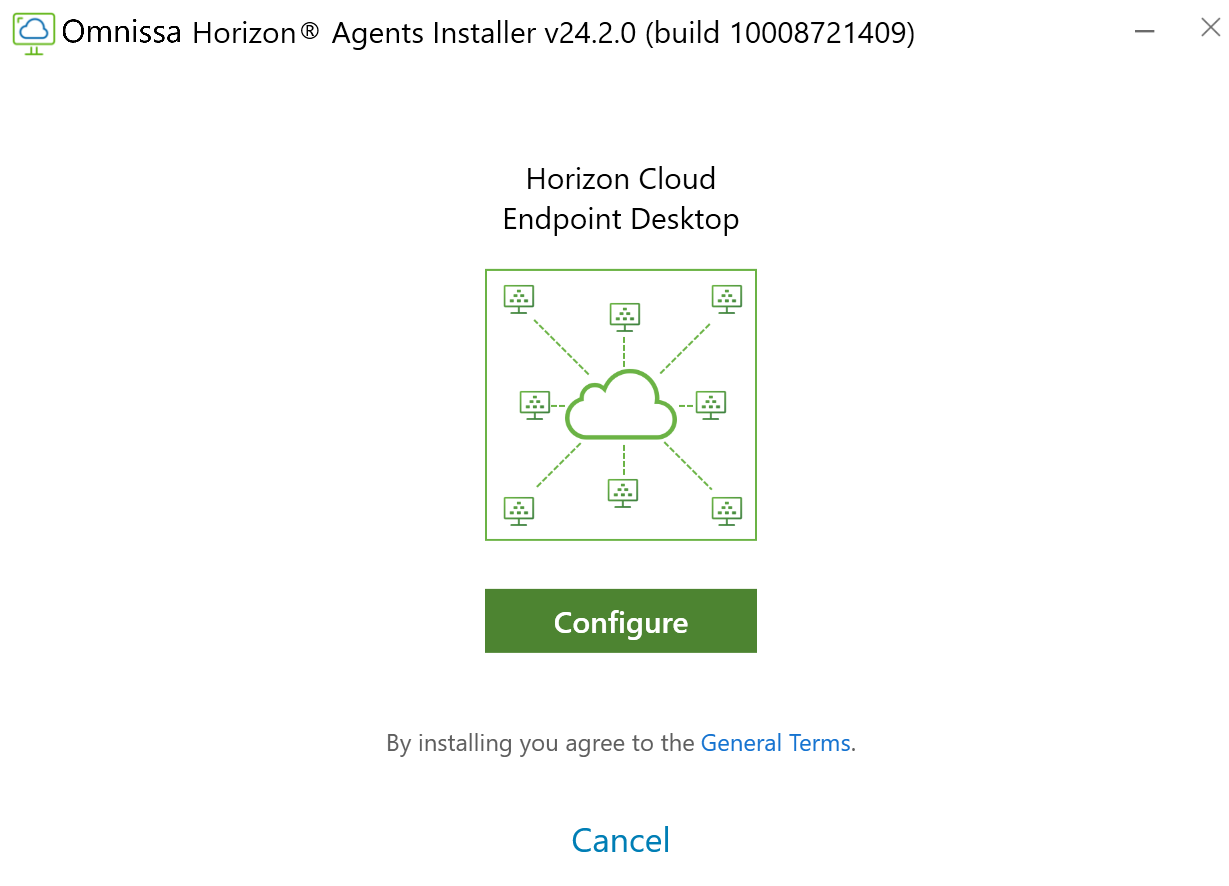
For a VM running a Microsoft Windows client operating system, the Horizon Cloud Endpoint Desktop image is displayed.
-
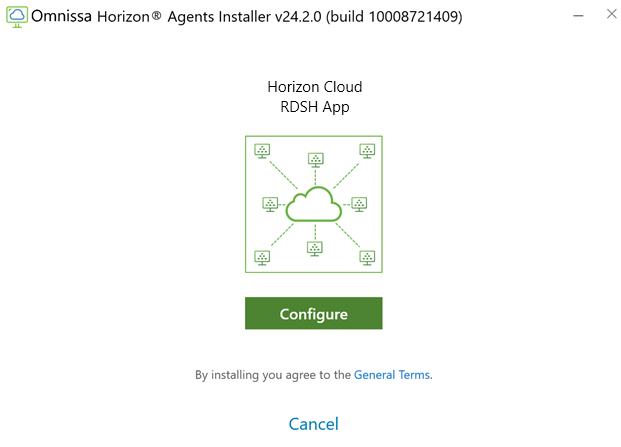
For a VM running a Remote Desktop Session Host (RDSH) type of operating system, the Horizon Cloud RDSH App image is displayed.
-
-
Click Configure.
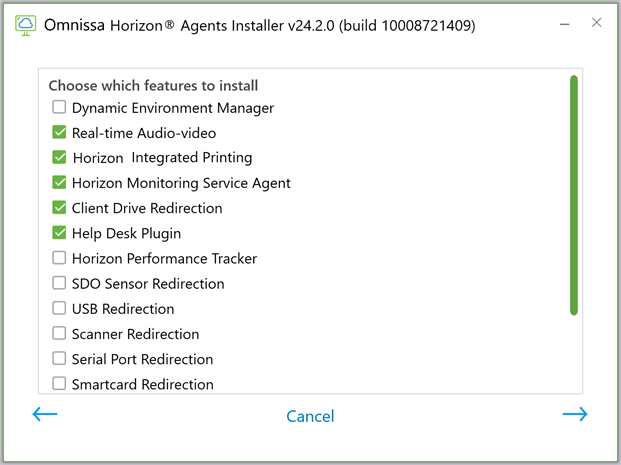
The wizard's next step displays. The following image is an example of this step when running on a VM with a Windows 11 operating system.
Note: For Windows 7 Enterprise VMs, only those agent options that are supported for use in Windows 7 Enterprise operating systems are available for selection.
-
Scroll down to see the feature options.
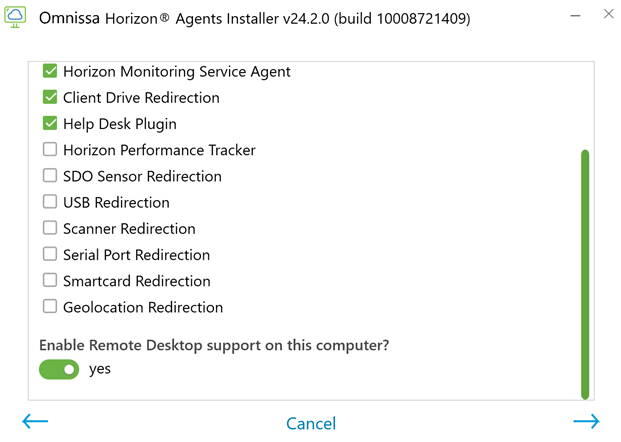
The following image is an example of this step when running on a VM with a Windows 11 operating system.
-
Select the check boxes for the features you want to install and click the arrow to move to the next step.
If the VM is a GPU-backed Windows RDSH-type operating system VM, select the 3DRDSH option.
Note: If you do not install the Help Desk Plugin option, performance-related metrics from user sessions in the desktop instances or farm RDSH instances based on this image are not collected. As a result, some data will not be available in the user card for such sessions. For details, see First-Gen Tenants - About the User Card Feature, Also Known as the Help Desk in Horizon Cloud.
-
If prompted with a message about using USB redirection securely, click OK.
-
If you selected App Volumes Agent, the installer displays Specify the App Volumes Manager IP. The IP address to use is the one next to the label Pod Manager Load Balancer IP in the pod detail's page, as described in the preceding section.
-
At the final step, click Proceed with installation.
The installer begins installing the components.
Note: If a message displays asking for confirmation to install the display adapters, click Install.
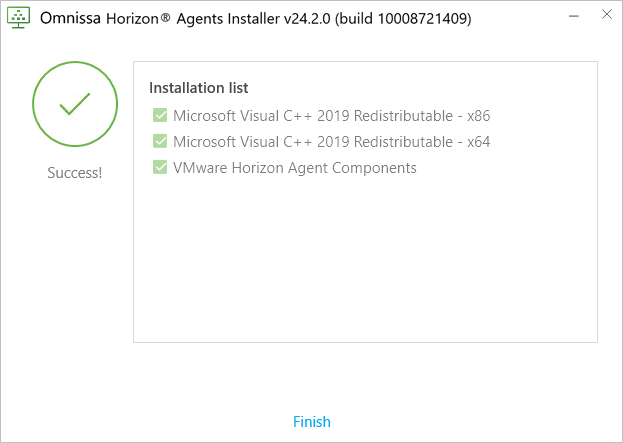
When all the components are installed, the wizard displays Finish. The following image is an illustration of the list of installed components when running the installer on an RDSH-capable image and only selecting default options. The specific entries might vary depending on the operating system and options you select.
-
When the wizard signals it is finished, click Finish.
-
Click Restart Now to reboot the VM and have the configuration changes take effect.
-
When the VM is powered back on, use the Reset Agent Pairing action in Horizon Cloud to pair it with your Horizon Cloud environment.
-
Navigate to Inventory > Imported VMs and make sure that the VM has a green dot next to it that indicates the VM is powered on.
Even though the agent software is installed on the VM, the VM is not yet paired with Horizon Cloud. The VM's Agent Status column will display
Not Paired, as illustrated in the following image.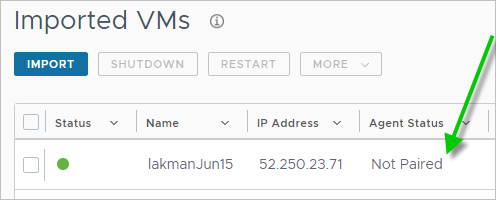
-
Select the VM, and select More > Reset Agent Pairing to pair the VM with Horizon Cloud.
Note: The pairing process can take several minutes to complete. During the pairing process, the VM is restarted and its agent status changes from
Not PairedtoUnknowntoActive. Use the circular arrow icon to refresh the Imported VMs page to see the VM's current status.
-
Results
The VM pairing process is completed when the Agent Status column displays Active and an agent version, such as 20.2.0. The following image illustrates a VM after the pairing process is completed. At this point, the base VM conforms to the Horizon Cloud environment's requirements to create an assignable image, also referred to as a sealed image.

What to do next
If you joined the VM to your Active Directory domain, you can use domain accounts to connect to the VM to customize the image. If you did not join the VM to your Active Directory domain, you can use the local administrator account to connect to the VM to customize the image.
Customize the image's Windows operating system, including configuring things like wallpapers and installing the applications you want this VM to provide to your end users. If you enabled a public IP address for the VM, you can connect to the created VM by using the IP address displayed on the Imported VMs page in an RDP client like Microsoft Remote Desktop Connection. For details, see Customize the Imported VM's Windows Operating System and its subtopics:
- For Microsoft Windows Server operating systems: For a Horizon Cloud Imported VM with a Microsoft Windows Server Operating System — Customize the VM for Your Organization's Needs
- For Microsoft Windows 10 Enterprise multi-session operating systems: For a Horizon Cloud Imported VM with a Microsoft Windows 10 or 11 Enterprise Multi-Session Operating System — Customize the VM for Your Organization's Needs
- For Microsoft Windows client-type operating systems: For a Horizon Cloud Imported VM with a Microsoft Windows Client Operating System — Customize the VM for Your Organization's Needs
Important: It is recommended that you optimize the image VM as described in Customize the Imported VM's Windows Operating System, Deciding to Optimize the Windows Image When Using the Import Virtual Machine from Marketplace Wizard, and Using the Remove Windows Store Apps Option When Using the Import Desktop Wizard.
Tip: To further tune the image VM to provide an improved configuration for using Omnissa Blast Extreme, a best practice is to follow the guidance in Five Key Steps to Take with Your Golden Images to Get Optimal Remote Experience Performance from Horizon Cloud Farms and Desktops. Another best practice is to read the Omnissa Blast Extreme Optimization Guide and perform additional tuning for codec options in the image according to that guide's recommendations for codec options.
If you selected to install the App Volumes Agent, continue with the subtopics described in App Volumes Applications for Horizon Cloud on Microsoft Azure - Overview and Prerequisites to use this image with the supported App Volumes features.
If you selected to install the Dynamic Environment Manager option, configure a separate file server in your Microsoft Azure subscription that has at least SMB 2 enabled. Then configure Dynamic Environment Manager using that file server. Also configure the GPO settings. For details, see Dynamic Environment Manager) Documentation.
For improved security regarding the use of the Horizon Agent, configure your Active Directory server domain policy GPO (Group Policy Object) to deactivate weak ciphers in SSL and TLS protocols. For the Horizon Agent information about deactivating weak ciphers when communicating using the SSL/TLS protocol, see the appropriate information at Horizon 8 Documentation. Search for the phrase 'weak ciphers' in the Horizon Agent information linked from that documentation page.
If you selected a NV-series or NVv4-series VM type, you must log into the VM's operating system and install the appropriate supported graphics drivers to get the GPU capabilities in the VM. You install the drivers after the VM is created and the Imported VMs page shows the agent state is active for the VM. See Install the Appropriate GPU Driver.
If the licensing associated with your Horizon Cloud environment entitles you to use Workspace ONE Assist for Horizon, and you want to use its remote-support features with the end-user virtual sessions that will be based on this VM, install the Workspace ONE Assist for Horizon agent into this VM. For information about using Workspace ONE Assist for Horizon, see Workspace ONE Assist for Horizon and Horizon Cloud.
After you are finished customizing the image, convert the image to an assignable image:
-
When the image has a multi-session type of operating system or when your tenant environment does not yet meet the criteria to have the multi-pod image management features available in it, use the New Image workflow to convert the image to an assignable image. See Convert a Configured Image VM to an Assignable Image in Horizon Cloud on a Per-Pod Basis.
-
When the image has a single-session VDI type of operating system and your tenant environment has the multi-pod image management features available, you can use this image with those features by performing the Move to Multi-Pod Images workflow. As of the July 2021 service release, when all of your Horizon Cloud pods are of manifest 2632 or later and your tenant is configured to use Universal Broker, the features of the Horizon Image Management Service and multi-pod image management are available to you.
CAUTION:
Use of the Move to Multi-Pod Images workflow has a number of things be cautious about, especially when you installed the App Volumes Agent into the image, moved it to the console Multi-Pod Images page, and the publish the image, and you plan to use that golden image with App Volumes on Azure features. Refer to the page Move to Multi-Pod Images workflow for details of what to watch out for.
Previous topic:Prepare the Manually Created VM Prior to Installing the Agents
Was this page helpful?