Associate the local directory with a built-in identity provider in the Omnissa Access console and enable the Password (Local Directory) authentication method so that the local users can be authenticated.
Prerequisites
In the Integrations > Authentication Methods page, enable and configure the Password (Local Directory) authentication method.
In the Resources > Policies > NETWORK RANGES page, add Network ranges to define IP addresses local users can use.
Procedure
-
In the Omnissa Access console Integrations > Identity Providers page, click Add Identity Provider.
-
Select Create Built-in IDP.
-
Enter the following information.
Option Description Identity Provider Name Enter a name for the identity provider. For example, Local Users. Users Select the local directory you created. Network Select the networks from which this identity provider can be accessed. Authentication Methods Select Password (Local Directory). KDC Certificate Export Download the certificate if you are configuring mobile SSO for Workspace ONE UEM-managed iOS devices. 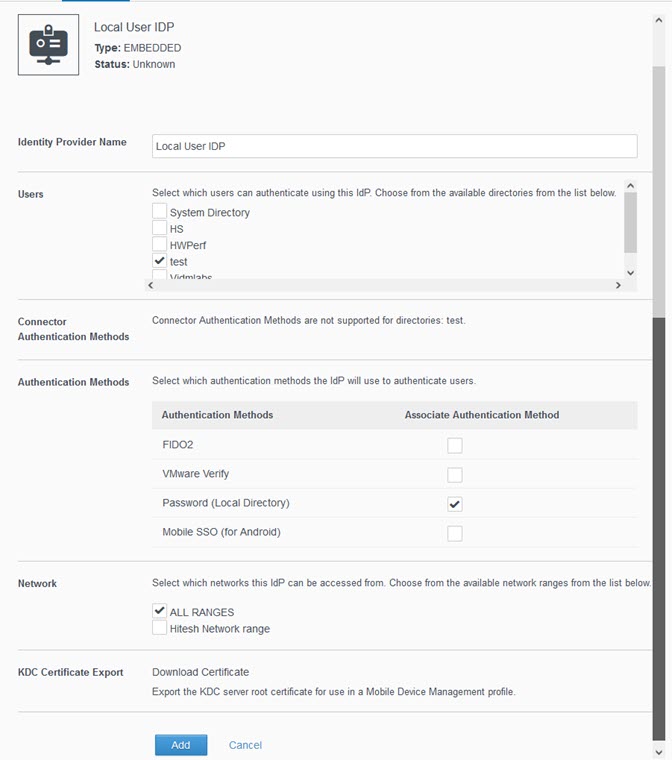
-
Click Add.
Results
The identity provider is created and associated with the local directory.
You can use the same identity provider for multiple local directories.
What to do next
Create local users and groups. You create local users and groups in the Accounts > User Groups page. See Managing Users and Groups in Omnissa Access for more information.
Was this page helpful?