To configure Citrix server farms in Omnissa Access, you create one or more virtual apps collections from the Virtual Apps Collections page. The collections contain configuration information such as the Citrix servers from which to sync applications, desktops, and assignments, the Virtual App service instance to use for sync, and sync settings.
You can add all your Citrix server farms in one virtual apps collection or create multiple collections, based on your requirements. For example, you might choose to create a separate collection for each server farm for easier management and to distribute the sync load across multiple Virtual App service instances. Or, you might choose to include all the server farms in one collection for a test environment and have another identical collection for your production environment.
Note: If multi-site aggregation is configured in your Citrix environment, and you select the Enable multi-site aggregation setting for the virtual apps collection in Omnissa Access, you only add a single server farm to your virtual apps collection.
Before you configure Citrix published resources in Omnissa Access, ensure that you meet all the prerequisites.
Also follow these guidelines for Citrix server farm settings.
-
If you use the Limited Visibility Group option to restrict users, ensure that the Limited Visibility Group contains users or groups. If it does not contain any users or groups, no entitlements are synced to Omnissa Access.
-
Ensure that all Citrix-published applications and desktops in a Site contain valid users. If you delete a user or group, make sure that you remove the user or group from the Citrix-published applications and desktops too.
-
Make sure that users and groups have been assigned to the correct Delivery Group.
If you select settings to restrict users, make sure that they include users and groups.
-
XenDesktop and XenApp 7.x and later versions allow you to set entitlements for all authenticated users at the delivery group level with the "Allow any authenticated user to use this delivery group" setting. Omnissa Access does not support this setting. To ensure that users have the correct entitlements in Omnissa Access, set explicit entitlements for the users and groups.
-
Omnissa Access does not support the Citrix anonymous user group feature.
Prerequisites
-
Configure your Omnissa Access environment. See Installing and Configuring Omnissa Access and Omnissa Access Administration for information.
-
Install the Virtual App service component of the Omnissa Access connector. See the latest version of Installing Omnissa Access Connector for information.
-
Sync users and groups with Citrix entitlements from your enterprise directory to Omnissa Access using directory sync.
While creating the directory in Omnissa Access, map the userPrincipalName attribute to the Active Directory attribute userPrincipalName and the distinguishedName attribute to the Active Directory attribute distinguishedName. Also make sure that users have a value set for the userPrincipalName and distinguishedName attributes, otherwise they might not be able to run their desktops and applications.
-
Ensure that you meet the StoreFront requirements listed in Providing Access to Citrix-Published Resources in Omnissa Access.
-
If multi-site aggregation or keyword filtering is configured in StoreFront, complete the prerequisites in Configuring Citrix Multi-site Aggregation and Keyword Filtering in Omnissa Access before creating the virtual apps collection. Also see [Multi-site Aggregation Feature Requirements](ConfiguringCitrixMulti-siteAggregationandKeywordFilteringinWorkspaceONEAccess.md#multisite requirements).
-
Review the Citrix documentation for your version of Citrix software.
-
To perform this task in the Omnissa Access console, use an administrator role that can perform the Manage Desktop Apps action in the Catalog service.
-
At the end of this procedure, you are redirected to the Network Ranges page to configure Client Access FQDNs. To edit and save network ranges, you require a Super Admin role, or a custom role that can perform the Manage Settings action in the Identity and Access Management service. You can choose to perform that step separately.
Procedure
-
Log in to the Omnissa Access console.
-
Select Resources > Virtual Apps Collections.
-
If an information page appears, review the information and click Get Started, otherwise click New.
-
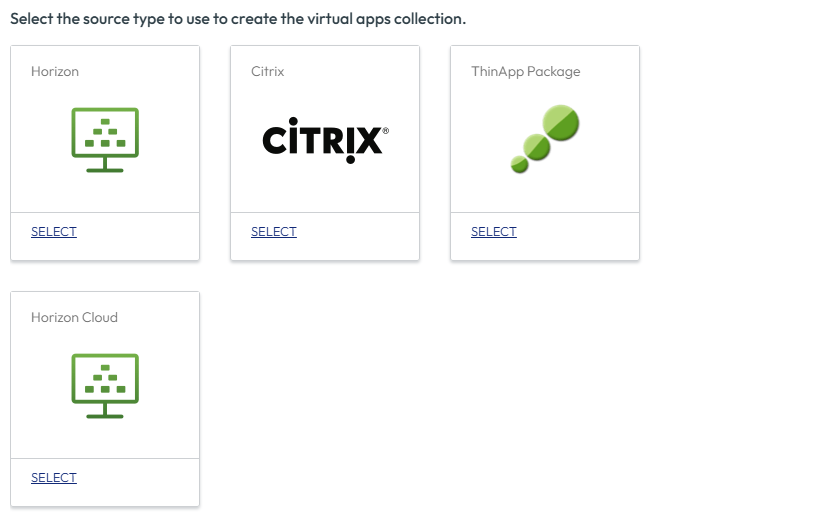
Select Citrix as the source type.
-
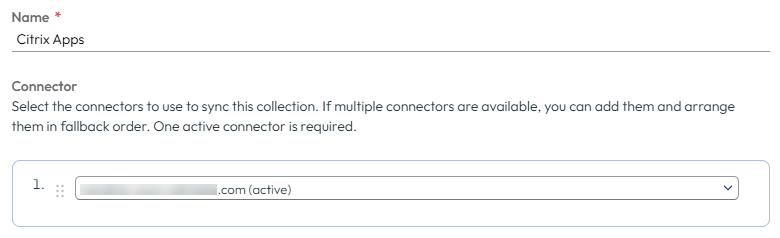
In the New Citrix Collection wizard, enter the following information in the Connector page.
Option Description Name Enter a unique name for the Citrix virtual apps collection. Connector Select the connectors to use to sync this collection. You can add multiple connectors and arrange them in failover order. Only connectors that have the Virtual App service installed appear in the list.
Important: A maximum of five connector instances is supported per Citrix virtual apps collection.For example:
-
In the Server Farm page, click Add Server Farm and enter your Citrix server farm information.
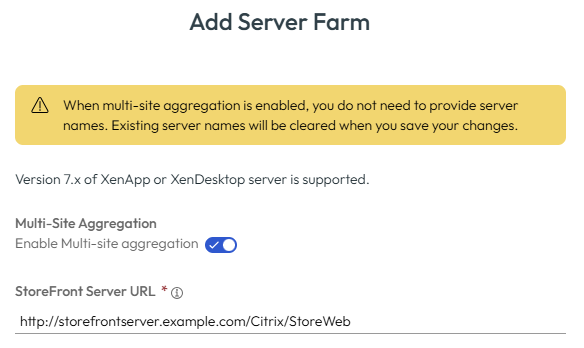
Option Description Multi-Site Aggregation If multi-site aggregation is configured in StoreFront, select the Enable multi-site aggregation option. Multi-site aggregation is a Citrix feature that aggregates and de-duplicates application and desktop resources from multiple sites.
When the Enable multi-site aggregation option is selected for a virtual apps collection in Omnissa Access, the only other information required to set up the integration is the StoreFront URL. Do not add any Citrix XML servers.
If you enable multi-site aggregation for an existing virtual apps collection, the Citrix XML server entries are deleted.
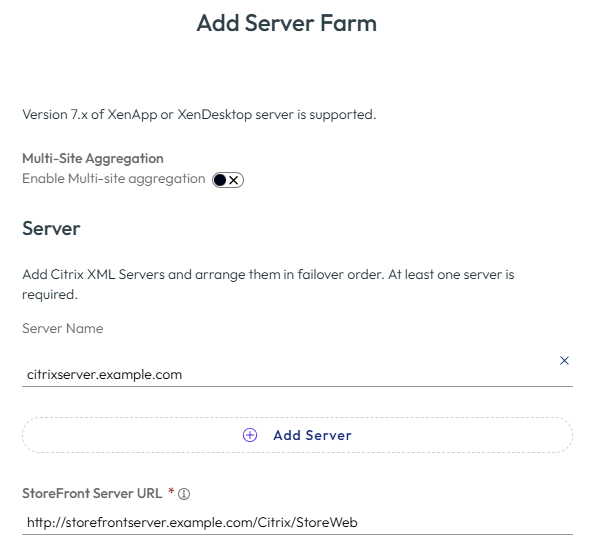
Important: To use the Multi-Site Aggregation option, you must complete the prerequisites described in Configuring Citrix Multi-site Aggregation and Keyword Filtering in Omnissa Access before creating the virtual apps collection. Also see [Multi-site Aggregation Feature Requirements](ConfiguringCitrixMulti-siteAggregationandKeywordFilteringinWorkspaceONEAccess.md#multisite requirements).Server If you did not select the Enable multi-site aggregation option, click Add Server and add the fully-qualified domain name of your Citrix XML server (XML broker). For example, xenappserver.example.com. You must add at least one Citrix XML server.
To add multiple servers, click Add Server and add the servers.
Arrange the servers in failover order. Omnissa Access follows this order. To rearrange the list, click and drag the rows to the desired position. To delete a server from the list, click the x icon at the right of the row.
StoreFront Server URL Enter the StoreFront server URL in the following format:
transportType://storefrontServerFQDN/Citrix/storenameWeb
For example:http://xen76.example.com/Citrix/mystoreWeb
Note: This is the StoreFront server Website URL.
Important: After creating the virtual apps collection, when you configure internal network ranges for the collection, ensure that you enter the same StoreFront server URL in the Client Access URL Host text box.The following example shows how to add a Citrix server farm when multi-site aggregation is configured.
The following example shows how to add a Citrix server farm when multi-site aggregation is not configured.
-
In the Configuration page, enter the following information.
Option Description Sync Frequency Select how often you want to sync applications, desktops, and assignments from the Citrix server farm to Omnissa Access.
You can set up an automatic sync schedule or choose to sync manually. To set a schedule, select the interval such as daily or weekly and select the time of day to run the sync. If you select Manual, you must click Sync > Sync with safeguards or Sync > Sync without safeguards on the virtual apps collection page after you create the collection and whenever there is a change in the Citrix resources or assignments.
For more information about sync, see Syncing Virtual Apps Collections in Omnissa Access.
Sync Duplicate Apps Set to No if you want to prevent duplicate applications from being synced from multiple servers.
When Omnissa Access is deployed in multiple data centers, the same resources are set up in the multiple data centers. Setting this option to No prevents duplication of the applications and desktops in the Intelligent Hub catalog.
Sync Categories from Server Farms Select this option if you want to sync categories from the Citrix servers to Omnissa Access. Keyword Filtering If keyword filtering is configured in StoreFront, select this option. The Citrix keyword filtering feature lets administrators control resource display and launch by using keywords.
Important: To use this option, you must complete the prerequisites in Configuring Citrix Multi-site Aggregation and Keyword Filtering in Omnissa Access before creating the virtual apps collection.
Safeguard Thresholds Limits Configure sync safeguard thresholds if you want to limit the number of changes that can be made to applications, desktops, and entitlements when a virtual apps collection syncs. If any of the thresholds is met, sync is cancelled.
By default, Omnissa Access sets the threshold for all categories to 10%.
Sync safeguards are ignored the first time a collection syncs and are applied to all subsequent syncs.
For more information about sync safeguards, see Syncing Virtual Apps Collections in Omnissa Access.
Activation Policy Select how you want to make resources in this collection available to users in the Intelligent Hub portal and app. If you intend to set up an approval flow, select User-Activated, otherwise select Automatic.
With both the User-Activated and Automatic options, the resources are added to the Apps tab. Users can run the resources from the Apps tab or mark them as favorites and run them from the Favorites tab. However, to set up an approval flow for any of the apps, you must select User Activated for that app.
The activation policy applies to all user entitlements for all the resources in the collection. You can modify the activation policy for individual users or groups per resource, from the user or group page under Accounts > Users or Accounts > User Groups.
-
In the Summary page, review your selections, then click Save & Configure to configure network ranges.
The collection is created but the resources in the collection are not yet synced. The Network Ranges tab appears.
What to do next
-
Configure network ranges for resource launch. See Configuring Citrix Resource Launch in Omnissa Access.
-
To sync the resources and entitlements in the collection from the Citrix servers to Omnissa Access, you can either wait for the scheduled sync time or select the collection in the Virtual Apps Collections page and click Sync > Sync with safeguards or Sync > Sync without safeguards.
Note: Omnissa Access does not support the Citrix anonymous user group feature.
Was this page helpful?