Configure Horizon pods and pod federations in the Omnissa Access console to sync resources and assignments to the Omnissa Access service.
To configure the pods and pod federations, you create one or more virtual apps collections in the Resources > Virtual Apps Collections page and enter configuration information such as the Horizon Connection Servers from which to sync resources and entitlements, pod federation details, the Omnissa Access Virtual App service to use for sync, and administrator settings such as the default launch client.
If you are integrating individual pods, you can create a separate virtual apps collection for each pod or add all the pods to one virtual apps collection. If you are integrating a cloud pod federation, you must configure the pod federation and its pods in a single virtual apps collection. A pod federation cannot be split into multiple virtual apps collections.
After creating a virtual apps collection, you configure client access FQDNs for specific network ranges so that end users connect to the correct servers when they launch apps and desktops.
Important: If you change any settings or the SAML configuration on the Horizon server after setting up the integration, and you want to propagate the changes to the Omnissa Access service immediately, edit the virtual apps collection page in the Omnissa Access console and click Save. Otherwise, updates are propagated at the next sync.
Prerequisites
- Set up Horizon according to Requirements for Integrating Horizon Pods with Omnissa Access and Requirements for Integrating Horizon Pod Federations with Omnissa Access.
- Set up Omnissa Access according to Set up Your Omnissa Access Environment for Horizon Integration.
- For each Horizon pod that you want to configure in Omnissa Access, ensure that you have the Horizon Connection Server administrator user name and password. The user must have the Administrators role in Horizon.
- To perform this procedure in Omnissa Access, you must use an administrator role that includes the Manage Desktop Apps action in the Catalog service.
- At the end of this procedure, you are redirected to the Network Ranges page to configure Client Access FQDNs. To edit and save the Network Ranges page, you require a Super Admin role. You can choose to perform that step separately.
Procedure
-
Log in to the Omnissa Access console.
-
Select Resources > Virtual Apps Collections.
-
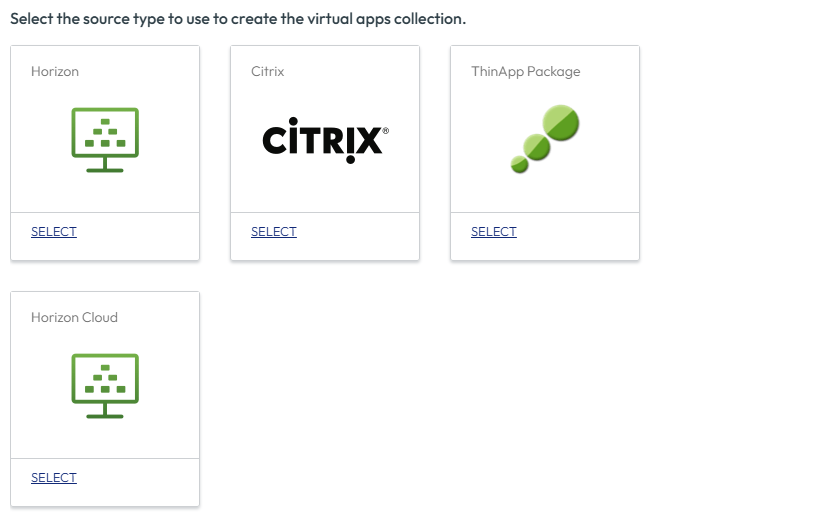
Select Horizon as the source type.
-
In the New Horizon Collection wizard, enter the following information in the Connector page.
Option Description Name Enter a unique name for the Horizon virtual apps collection. Connector Select the connectors to use to sync this collection. You can add multiple connectors and arrange them in failover order. Only connectors that have the Virtual App service installed appear in the list.
Important: A maximum of five connector instances is supported per Horizon virtual apps collection. -
Click Next.
-
In the Pod and Federation page, click Add a Pod and enter the pod information.
If the pod has multiple Horizon Connection Server instances, enter the information for any of the instances.
Option Description Horizon Connection Server Enter the fully qualified host name of any one of the Horizon Connection Server instances within the pod. For example, connectionserver.horizondomain.com. The domain name must match the domain name to which the Horizon Connection Server instance is joined.
Important: If the pod has multiple Horizon Connection Server instances, add only one of the instances. Omnissa Access pulls the information for all the instances within the pod.
Important: You must specify a Horizon Connection server instance. Load balancers and Virtual IP addresses (VIP) are not supported.Username Enter the Horizon Connection Server administrator user name. The user must have the Administrators role in Horizon. Password Enter the Horizon Connection Server administrator password. Smart Card Authentication Select this option if users will use smart card authentication instead of passwords to sign in to the Horizon Connection Server. True SSO Select this option only if True SSO is enabled for the Horizon Connection Server.
When this option is enabled, users logged into the Omnissa Intelligent Hub app or portal with a non-password authentication method such as SecurID will not be prompted for a password when they launch their Horizon desktops or apps.Sync Local Assignments Select this option to sync local entitlements from the Horizon Connection Server, in addition to global assignments. Custom ID Mapping This section appears only in Omnissa Access tenants that have Omnissa Identity Service enabled. The Name ID Format and Name ID Value fields are automatically configured and cannot be edited.
In the third-party identity provider that is integrated with Omnissa Identity Service, you must map the onPremisesUserPrincipalName attribute to the Omnissa Identity Service attribute (SCIM attribute) for users. You must also map the distinguishedName attribute for users and groups. See Set up Your Omnissa Access Environment for Horizon Integration - Omnissa Access tenants that have Omnissa Identity Service enabled for more information. -
Click Add.
-
To add more pods, click Add a Pod and enter the information for each pod.
-
If the Cloud Pod Architecture option is enabled in Horizon for any of the pods that you added, follow these steps to add the pod federation information.
Important: A pod federation and its pods must be configured in a single virtual apps collection. A pod federation cannot be part of multiple virtual apps collections.
-
Set the Have you enabled Cloud Pod Architecture for any of the pods added above option to Yes.
-
Click Add a federation.
-
Enter the pod federation information, then click Add.
Option Description Federation Name The name of the pod federation. Default Client Access FQDN The fully qualified domain name (FQDN) of the server to which to direct clients accessing global entitlements on this pod federation. This value is typically the global load balancer of the pod federation deployment. For example, federationA.example.com.
The Default Client Access FQDN is used to set an intial, default value for the View CPA Federation - Client Access FQDN text box for all network ranges that are currently configured.
After creating the collection, go to the collection's Network Ranges tab to customize the View CPA Federation - Client Access FQDN value for each network range. After creating the collection, if you want to update the pod federation's Client Access FQDN, go to the Network Ranges tab and edit the Client Access FQDN value in the View CPA Federation section for each network range. Editing the Default Client Access FQDN value in the Edit Horizon Collection wizard does not update the value in the network ranges.
Note: If you create a network range after creating the collection, make sure that you go to the collection's Network Ranges tab, select the new network range, and add a Client Access FQDN value in the View CPA Federation section. Otherwise, clients using that network range will not be able to access their Horizon desktops and apps.Horizon Pods Select the pods that belong to the pod federation. The Available Pods column displays the pods that you added to the collection. When you select a pod, it is added to the Selected Pods column. You can arrange the pods in the Selected Pods column in failover order. -
To add another pod federation, click Add a federation and enter the pod federation information.
-
-
In the Configuration page, enter the following information.
Option Description Sync Frequency Select how often you want to sync applications, desktops, and assignments from the Horizon servers to Omnissa Access.
You can set up an automatic sync schedule or choose to sync manually. To set a schedule, select the interval such as daily or weekly and select the time of day to run the sync. If you select Manual, you must click Sync > Sync with safeguards or Sync > Sync without safeguards on the virtual apps collection page after you create the collection and whenever there is a change in the Horizon resources or assignments. For more information about sync, see Syncing Virtual Apps Collections in Omnissa Access.Sync Duplicate Apps Set to No if you want to prevent duplicate applications from being synced from multiple servers.
When Omnissa Access is deployed in multiple data centers, the same resources are set up in the multiple data centers. Setting this option to No prevents duplication of the desktop or application pools in the Intelligent Hub catalog.Safeguard Thresholds Limits Configure sync safeguard thresholds if you want to limit the number of changes that can be made to applications, desktops, and assignments when the virtual apps collection syncs. If any of the thresholds is met, sync is cancelled. By default, Omnissa Access sets the threshold for all categories to 10%.
Sync safeguards are ignored the first time a collection syncs and are applied to all subsequent syncs.
For more information about sync safeguards, see Syncing Virtual Apps Collections in Omnissa Access.Activation Policy Select how you want to make resources in this collection available to users in the Omnissa Intelligent Hub app and portal. If you intend to set up an approval flow, select User-Activated, otherwise select Automatic.
With both the User-Activated and Automatic options, the resources are added to the Apps tab. Users can run the resources from the Apps tab or mark them as favorites and run them from the Favorites tab. However, to set up an approval flow for any of the apps, you must select User Activated for that app.
The activation policy applies to all user assignments for all the resources in the collection. You can modify the activation policy for individual users or groups per resource, from the user or group page available from the Accounts > Users or Accounts > User Groups pages.Default Launch Client Select the default client for end users accessing Horizon desktops and applications from the Intelligent Hub app or portal.
None: No default preference is set at the administrator level. If this option is set to None and the end user does not set a preference either, the Horizon Default display protocol setting is used to determine how to launch the desktop or application.
Browser: Horizon desktops and applications are launched in a web browser by default. End user preferences, if set, override this setting.
Native: Horizon desktops and applications are launched in the Horizon Client by default. End user preferences, if set, override this setting.
This setting applies to all users for all resources in this collection.
The following order of precedence, listed from highest to lowest, applies to the default launch client settings:- End user preference setting, set in Intelligent Hub.
- Administrator Default Launch Client setting for the collection, set in the Omnissa Access console.
- Horizon Remote Display Protocol > Default display protocol setting for the desktop or application pool, set in Horizon Console. For example, when the display protocol is set to PCoIP, the application or desktop is launched in the Horizon Client.
-
In the Summary page, review your selections, then click Save & Configure.
The Network Ranges tab appears.
-
In the Network Ranges tab, edit each network range and specify Client Access FQDNs for Horizon pods and pod federations so that end users accessing Horizon applications and desktops from that network range connect to the correct server.
See Setting Client Access FQDNs for Horizon Virtual Apps in Omnissa Access for more information on configuring network ranges.
What to do next
The Horizon collection is created and appears in the Resources > Virtual Apps Collections page. Resources in the collection are not yet synced. You can either wait for the next scheduled sync or sync the collection manually from the Resources > Virtual Apps Collections page.
Was this page helpful?