The Okta and Omnissa Access SCIM integration currently has the following known issues:
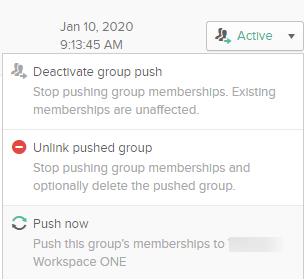
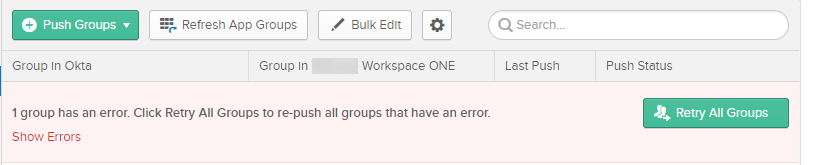
Known Issue: When you push groups from Okta to Workspace ONE using the Push now command, you might get an error.
Solution: Click the Retry All Groups button.
Known Issue: When you delete a user in Okta, the user is deactivated in Omnissa Access. However, if you recreate the user with the same attributes in Okta again, instead of a new user being created in Omnissa Access the old user is updated.
Solution: If you delete a user from Okta, also delete the user from Omnissa Access using the SCIM API and from Workspace ONE UEM using the administration console.
To delete the user in Omnissa Access, use the following API:
DELETE /SAAS/jersey/manager/api/scim/Users/userID
Host: WorkspaceONEAccessTenantFQDN
Authorization: Bearer token
WorkspaceONEAccessTenantFQDN is your Omnissa Access tenant's fully qualified domain name, such as example.workspaceoneaccess.com, and userID is the user ID that you want to delete.
For example:
DELETE https://myaccess.example.com/SAAS/jersey/manager/api/scim/Users/123456
Known Issue: User groups created from Okta are associated with the System domain in Omnissa Access instead of the actual domain, and they are not associated with the directory that you created for Okta.
Solution: First, create the group with the correct domain name in Omnissa Access manually using the SCIM API, then link the group to the Workspace ONE application in the Okta Admin console.
-
Open a new tab in Postman.
-
Add the authorization header.
-
For the HTTP method, select POST.
-
For the URL, enter:
https://tenantURL/SAAS/jersey/manager/api/scim/GroupstenantURL is your Omnissa Access URL.
-
Under Headers, set the Content-Type to:
application/json -
Click the Body tab.
-
For each group that you want to create, use the following as a sample and click Send.
{
"schemas": [
"urn:scim:schemas:core:1.0",
"urn:scim:schemas:extension:workspace:1.0"
],
"displayName": "groupName",
"urn:scim:schemas:extension:workspace:1.0": {
"Domain": "domainName",
}
}
groupName is the name of the group in Okta. domainName is the same domain that you used in Create a Directory of Type Other in Omnissa Access and that you set in Okta.
The group is created in Omnissa Access and associated with the correct directory.
-
In the Okta Admin console, verify that the group exists before continuing with the next steps.
-
In the Okta Admin console, navigate to the Workspace ONE application, and click Push Groups.
-
Click Refresh App Groups to ensure Okta has a complete list of groups in Omnissa Access.
-
Select Push Groups > Find Groups by Name.
-
Enter the name of the group.
-
Ensure that a match is found in Omnissa Access with the option to Link Group.
-
Click Save.
-
Verify that the group linking was successful.
The group can now sync with Omnissa Access.
Was this page helpful?