For this procedure, start on the Amazon WorkSpaces screen. Then, switch to the Horizon 8 Administration Console for the Set Golden Image action to pair the agent. When complete, switch back to the Amazon WorkSpaces screen for the final steps of converting the machine into an image and creating the bundle from that image, to make the bundle that's needed for the desktop pool wizard.
-
On the AWS WorkSpaces screen, create a desktop Windows BYOL image. This step is equivalent to creating the VM in vSphere.
Notes:
- Creating a new image (instead of importing an existing image) is suggested. See Create a BYOL image using the WorkSpaces console.
- The suggested Amazon Import process is Bring Your Own Windows desktop licenses in WorkSpace
-
Convert the image into a bundle.
Note: Use the UI to launch an Always On instance or use cloudshell to launch a Manual (hourly billing) or decoupled (no user) instance to customize.
- Always On - Billed per month based on calendar date.
- Manual/Power Optimized - Billed hourly and can be suspended when not in use.
Example of cloudshell command:
aws workspaces create-workspaces --workspaces DirectoryId=d-XXXXXXXX,UserName="'[UNDEFINED]'",BundleId=wsb-XXXXXXX,WorkspaceProperties={RunningMode=MANUAL},WorkspaceName=XXXXXXXXwhereDirectoryIDis the directory in which you want to place the WorkSpace instanceBundleIDis the bundle you want to make a copy of (the Windows OS)WorkSpaceNameis customizable
-
Use that bundle to create a WorkSpaces Core instance.
-
Use RDP to go to the instance, do your customizations, and run the Horizon Agent installation.
-
Ensure that you install the latest version of the Horizon Agent.
-
The agent installer's final message states the system must be restarted for the configuration changes to take effect. You can restart it now or restart it after Step 5.
-
-
Switch to the Horizon Console. Go to Registered Machines > Others, select the machine and Set Golden Image on that machine.
- This Set Golden Image action registers the instance from Step 4 with the Connection Server. This action provides for the pairing of the Horizon Agent with the Connection Server.
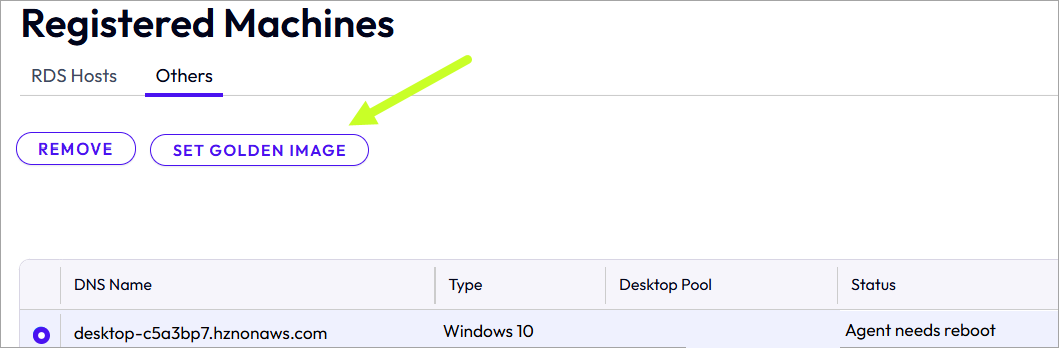
Note: Before clicking Set Golden Image, verify the displayed DNS name matches the DNS name of the machine in the AWS console.
-
If the WorkSpaces instance wasn't restarted in Step 4, then restart that instance.
-
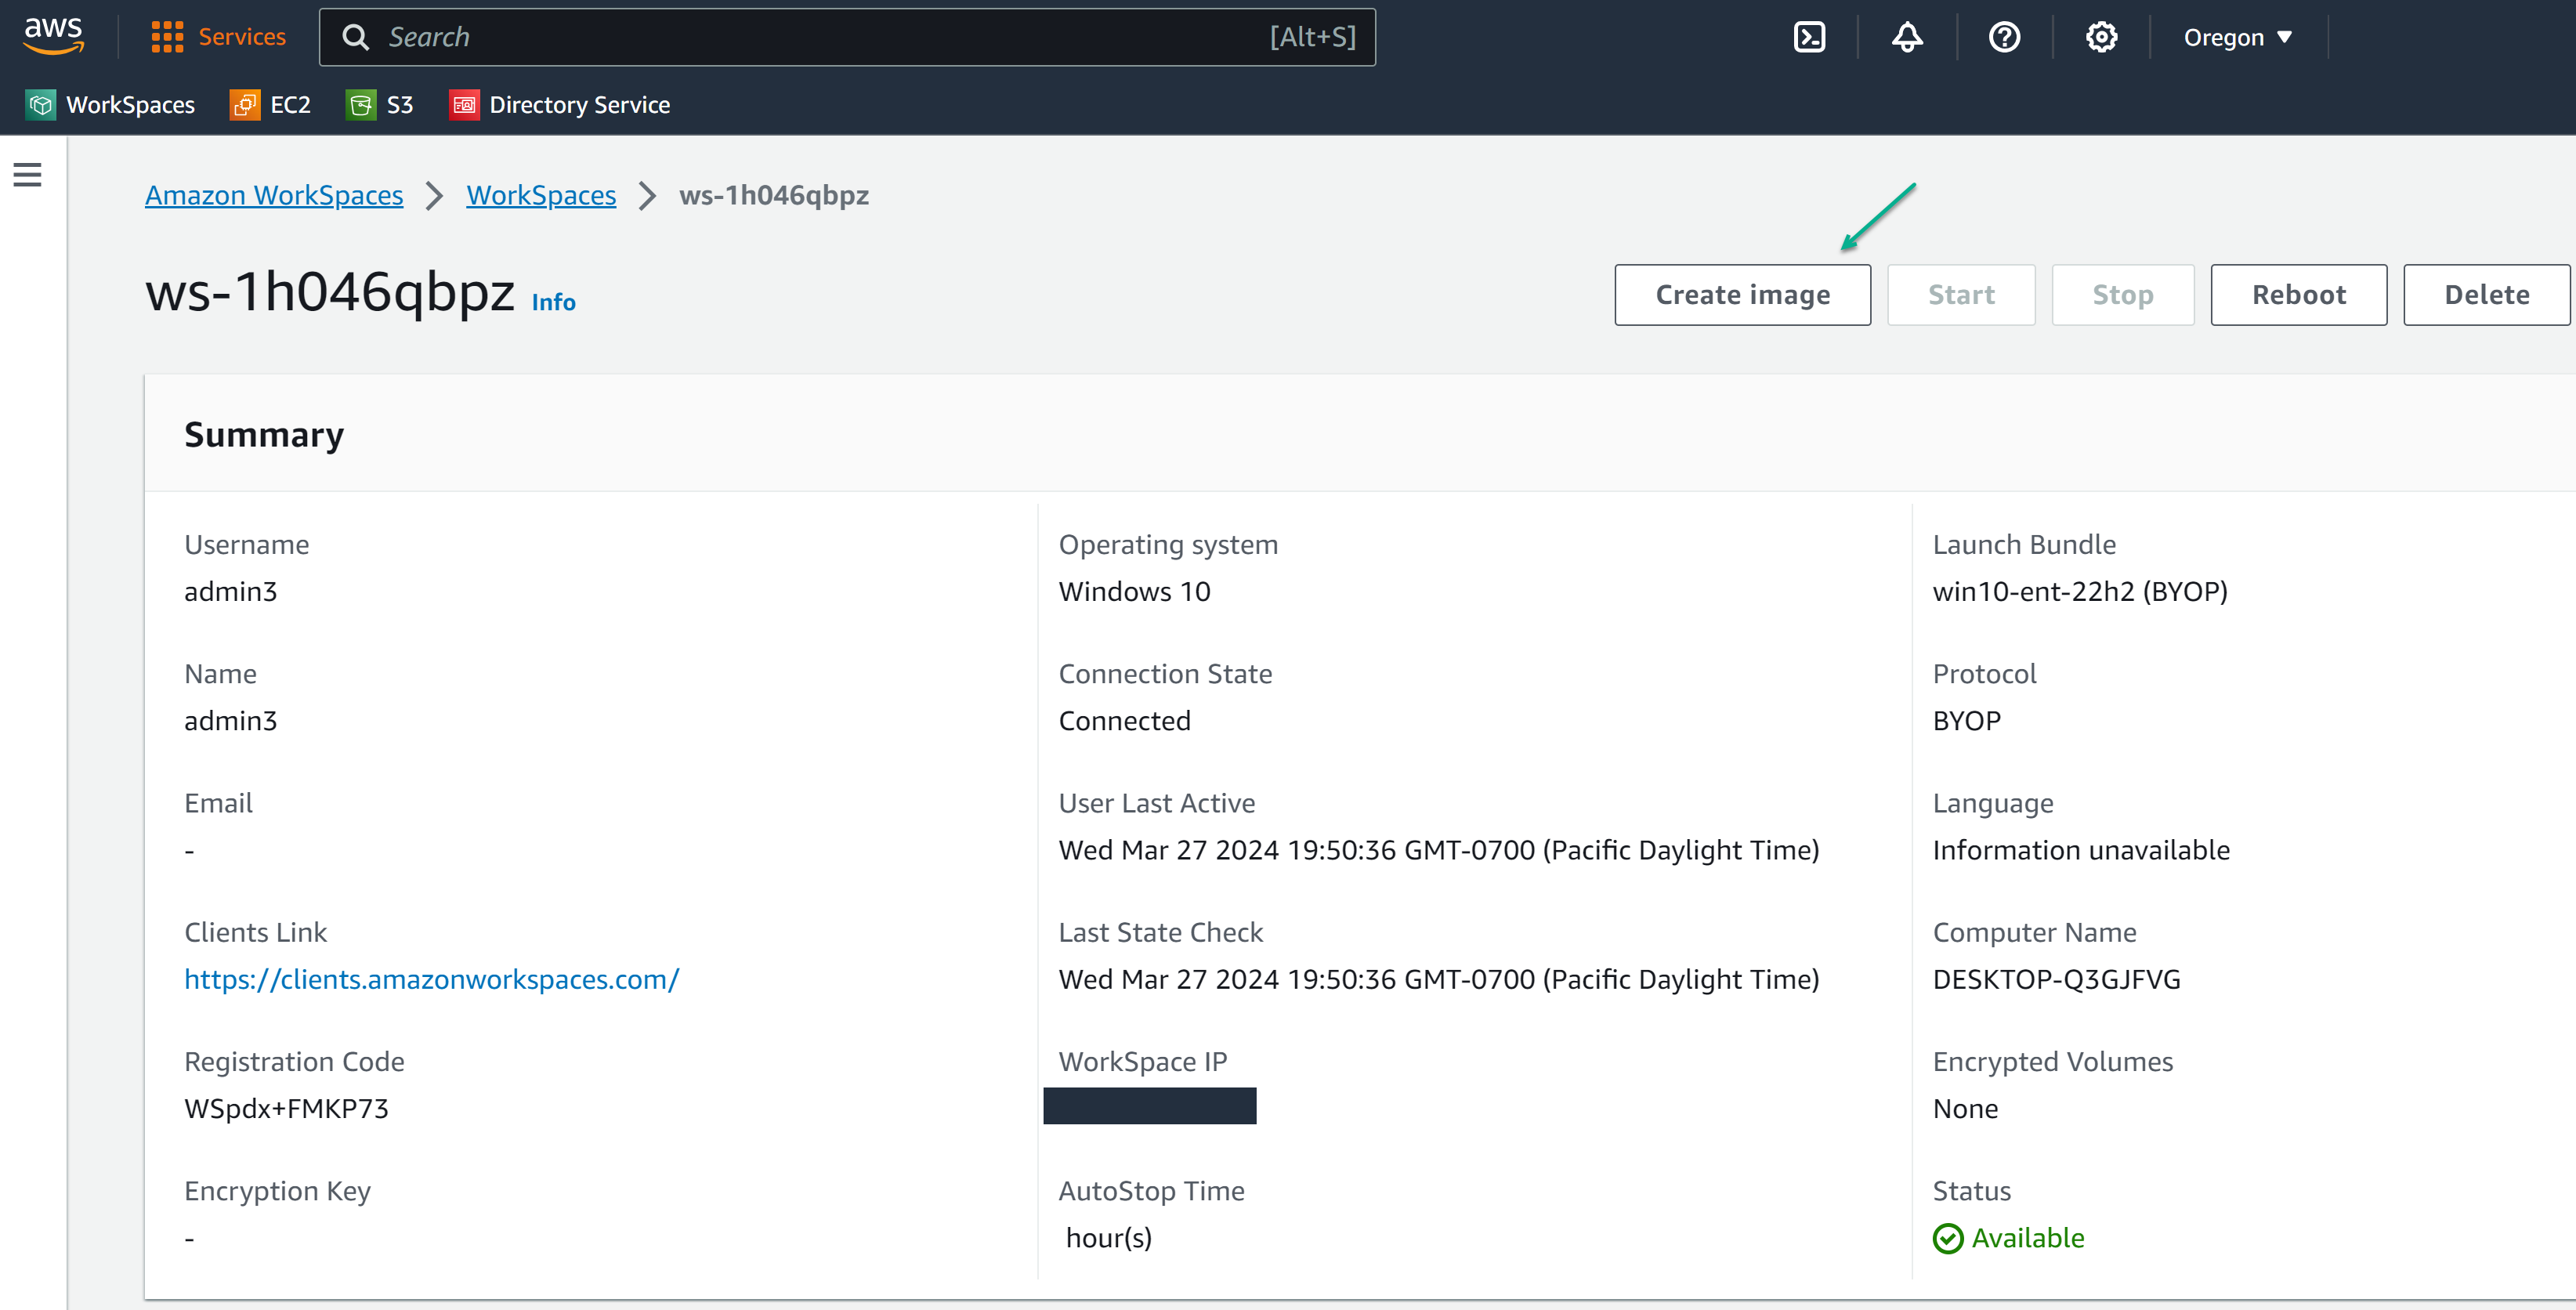
On the WorkSpaces screen, navigate to that rebooted instance's details and then convert the instance to an AWS WorkSpaces image using the Workspaces UI's Create image action. This clones the now-paired instance that has the Horizon Agent to a WorkSpaces image. The Create image Action is used for the cloning process.
- The following image shows the details UI for an instance named ws-1h046qbpz and the location of the Create image button. Some displayed values are redacted for privacy.
-
After the bundle is created in Step 7, verify that its status is Available. Create a bundle from that image, which combines that image with the desired hardware type for the pool's machines.

-
The hardware type selected is not dependent on the original hardware type selected for the bundle created in Step 2. The hardware type chosen here is the one that the pool's machines will have.
-
The following image is an example of performing the Create bundle menu option on an image named TPCS02GP. In the New bundle screen, select the hardware options for the bundle.
Tip: To help distinguish the bundles that have the Horizon Agent installed from the other bundles in the WorkSpaces UI's Bundles list, use the bundle's description to keep notes, like
Horizon Agent installed.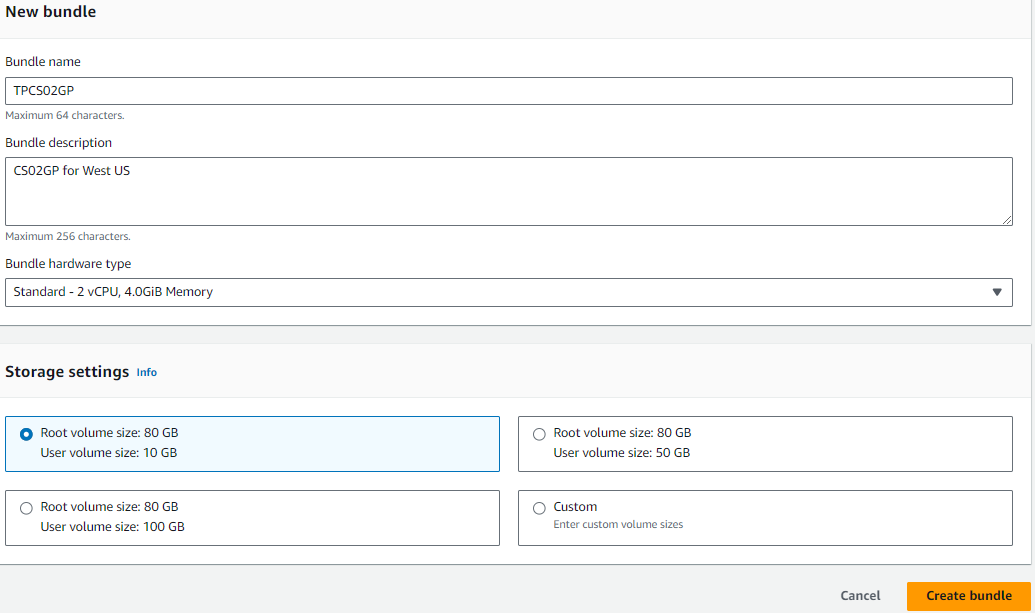
- After the bundle is created, verify that the status is Available. The following image shows that the bundle with ID wsb-xttnbll2j is Available.
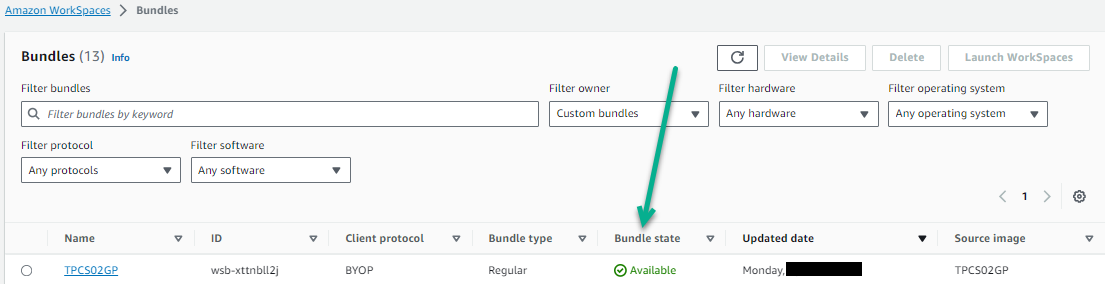
- A bundle is created which is the combination of the golden image with Horizon Agent and the hardware type for the desktop pool.
-
-
In the Automated Desktop Pool wizard, select that bundle as the source of the pool's desktops.
Importing an AMI to Use for an Image in Amazon Workspaces Core
Some functions for WorkSpaces Core do not work through the AWS Console. To manually import an EC2 AMI into WorkSpaces Core for use as a BYOL/BYOP image, see Import Workspace Image.
Note: The suggested Amazon Import process is Bring Your Own Windows desktop licenses in WorkSpace.
Verify that your account has quota for the types of images you need. For more information, see Amazon WorkSpaces quotas.
Example Command for Graphics Import:
aws workspaces import-workspace-image --ec2-image-id ami-0824ddd4572dbc8fa --ingestion-process BYOL_GRAPHICS_G4DN_BYOP --image-name win10-ent-GPU-new-ami --image-description "AddADescription"

--ec2-image-id "ami-xxxxxxxxxxx" - is the ami that you want to import

--ingestion-process BYOL_GRAPHICS_G4DN_BYOP  - is dependent on the type of image you want to have in WorkSpaces Core

--image-name "descriptive_name"

--image-description "AddADescription"

Valid Values for WorkSpaces Core ingestion-process: BYOL_REGULAR_BYOP | BYOL_GRAPHICS_G4DN_BYOP
Was this page helpful?