You can use Omnissa Workspace ONE UEM to distribute, track, and manage your internal applications for Windows Desktop and Windows Server managed devices. Additionally, use the Workspace ONE Intelligent Hub for Windows to provide an application catalog for Windows Desktop devices.
Workspace ONE Productivity Apps
Use Workspace ONE Content to safeguard corporate content on mobile devices. Deploy the Workspace ONE Web to enable secure Web browsing for your end users. Download the Workspace ONE Intelligent Hub for Windows to monitor your devices on a more granular level.
Deploying Win32 apps to Windows Desktop devices requires the Workspace ONE Intelligent Hub to be present on the device.
Important: All public applications deployed to Windows Desktop devices are unmanaged applications. Unmanaged apps cannot be pushed to devices (end users must download the app themselves) nor can unmanaged apps be removed from devices through Enterprise Wipe.
Workspace ONE Intelligent Hub for Windows
When the Workspace ONE Intelligent Hub is installed on Windows Desktop devices, users can sign in to Workspace ONE to access a catalog of applications that your organization enabled for them. When the application is configured with single sign-on, users do not need to reenter their sign-in credentials when they start the app.
The Workspace ONE Intelligent Hub allows a user to click to Install, Reinstall, or Remove (Uninstall) native applications assigned to that device or user. Native applications as well as websites can be Favorited by clicking the star and categorized to enable easier user browsing of available applications.
Installing Native Apps
Currently apps can only be installed from the catalog, not launched from the hub. For detailed instructions on installing apps, refer to TechZone: Deploying Workspace ONE UEM applications to Windows devices.
A new feature for the 2506 release (feature flag: WindowsNativeAppLaunchFeatureFlag) allows admins to define the launch path for applications and launch native Windows apps directly from Intelligent Hub.
Once the feature flag is enabled, go to the Console and navigate to: Resources > Native Apps > Internal > Add > Application File. In the Details box, select the Deployment Options tab. Under How To Install, you’ll find two new fields: Launch Type and Launch Command.
Launch Type can be set to either LaunchPath or LaunchUri. Launch Command should be the path or URI for the application, for example: C:\Program Files\Adobe\Acrobat\acrobat.exe (when using LaunchPath). This command is executed locally by Intelligent Hub allowing end users to launch native applications from the Intelligent Hub App catalog as well.
For existing applications, once the feature flag is turned on, admins will see an empty Launch Command field and a default value selected for Launch Type.
Troubleshooting:
When the feature flag is ON: Two new fields become visible. For existing applications, once the feature flag is enabled, the admin will see an empty LaunchCommand textbox and the default option selected for LaunchType. To enable the launch option for an existing application, enter the LaunchCommand and republish the application.
When the feature flag is OFF: These two new fields are hidden.
API's can also be uploaded using the following API endpoints
- mam/apps/internal/begininstall
- mam/apps/internal/application
Software Delivery (SFD) Package Deployment
In the current workflow, when devices are enrolled, SFD needs to be downloaded before it can be pushed down to the device and installed. Starting in 2506 and later, SFD will be installed from the local resource instead of a separate download, which will reduce the time needed from enrollment to the first installation.
Configure the Workspace ONE Intelligent Hub for Windows Desktop
You can update the Workspace ONE Intelligent Hub settings to meet certain business needs.
- Navigate to Groups & Settings > All Settings > Devices & Users > Windows > Windows Desktop > Intelligent Hub Settings.
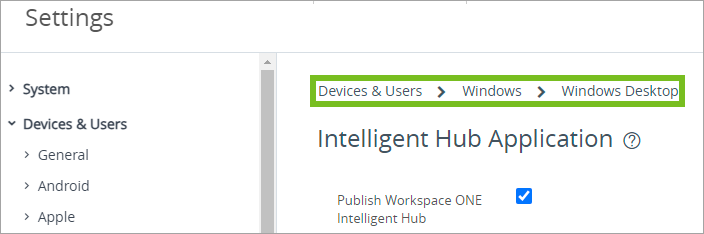
- Configure the Data Sample Interval (min) menu item to define the intervals at which the Workspace ONE Intelligent Hub takes samples of data.
- Configure the MDM Channel Security menu item to set the app-layer security between the device and the Workspace ONE UEM console.
- Configure the Privacy settings if you use analytics tools for data collection.
- Show Privacy Screen - Display a screen to tell your users that you collect data.
- Collect Analytics - Collect various data points, like app crashes and endpoint numbers and send that data to your app analytics vendor.
What to Do Next
You can prevent end users from disabling the Workspace ONE UEM Service on their device using a Custom Settings profile.
Note: UI Lockdown - Enable to lock down completely the UI so end users cannot change settings.
Adding Win32 Applications and Management
When installing any new Win32 application, you will start in the Workspace ONE UEM console, under Resources > Apps > Native > Add > Application File. You can choose the file from either a local file or link and then click Save. Once the app is chosen, you will see an Add Application window open that will allow you to set and customize the settings. After successful installation, the extracted content from the .zip files will be removed.
Note: Beginning with 2410 and later, an optimized SFD Download behavior no longer requires a full application download when the cache is cleared where an application is using scripts for detection or uninstallation. This optimization significantly reduces bandwidth consumption and speeds up application deployment.
Defer the Application Installation in the UEM
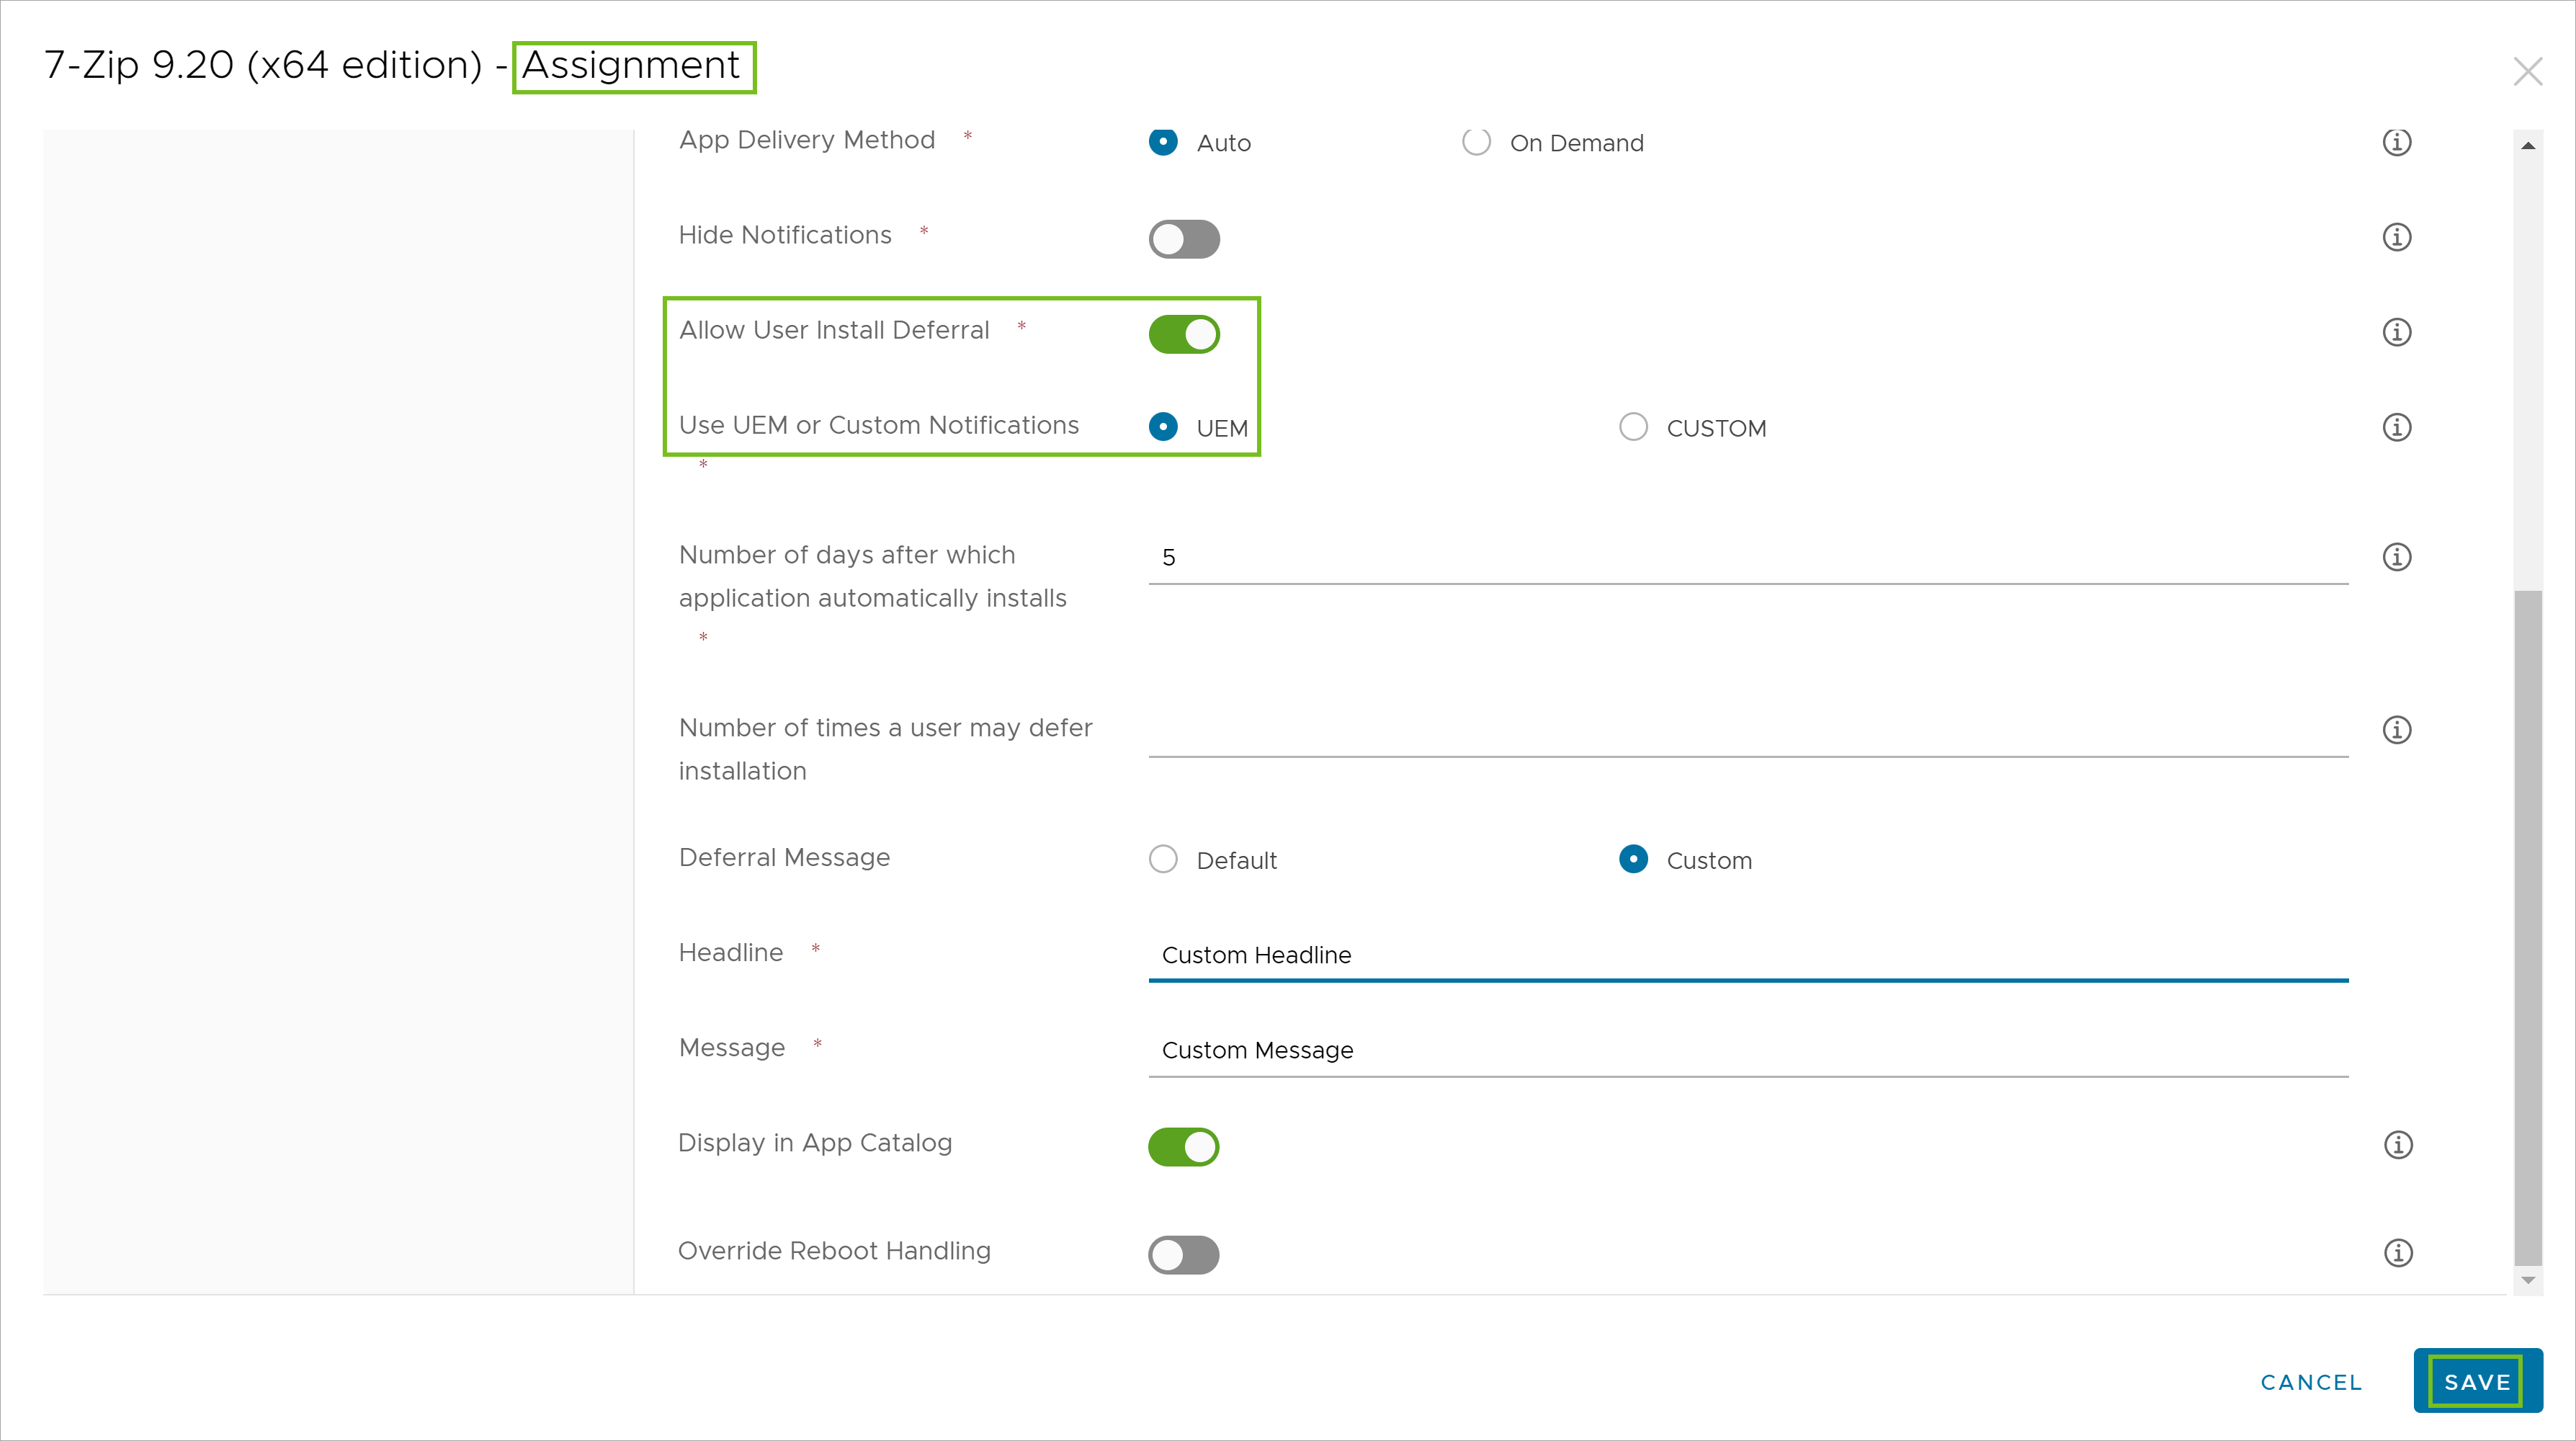
As an admin you can enable the option to allow users to manage and defer the app installs. In the Application Assignment menu, under Distribution, toggle on the Allow User Install Deferral option. Then, under Use UEM or Custom Notifications choose UEM. Now you can define how long the end user can defer the app installs. Note: Application Installation Deferral is supported on Windows Desktop devices with an active logged in user and Workspace ONE Intelligent Hub for Windows installed.
You can choose to set:
-
The Deferral Deadline- The number of days after which the application automatically installs.
-
The Deferral Count- The number of times a user may defer installation.
-
Both the Deferral Deadline and the Deferral Count.
If you choose to set both options, the first deferral option timeline that is reached will be when this would take effect. At that point, the user will be given the ability to defer one last time, but only for 30 minutes. After that the app will start the install process. Example: The admin sets both the Deferral Deadline to 10 Days and sets the Deferral Count to 3. The event that happens first will be the one that applies. So if the user reaches that 3rd deferral count option in 4 days, that is when the user will see the option to defer for only 30 minutes and then the app will start the installation.
The UEM does offer a default deferral toast notification message. However, if you would like to create your own, under Deferral Message choose Custom and provide your own deferral Headline and Message.
Managing Extracted Content Removal
The Extracted Content Removal feature determines whether temporary files generated during application installation are automatically deleted once the process is complete. Although this helps optimize disk space, some applications may need these extracted files to remain available for troubleshooting or future updates.
To avoid problems from deleting these files early, Workspace ONE UEM allows administrators to deactivate the Extracted Content Removal feature, either globally for all applications or individually for specific apps.
Note: The Extracted Content Removal feature requires a minimum SFD version 24.10.7 or later.
Disabling Extracted Content Removal Globally
The Extracted Content Removal feature can be deactivated without any console or UI configuration. Administrators can instead use a Windows registry setting to turn off this feature globally.
The Registry location is: HKLM\SOFTWARE\AirWatchMDM\AppDeploymentAgent\Common\{00000000-0000-0000-0000-000000000000}
Note: By default, if no registry value is configured, the extracted files are automatically removed after the installation completes.
| Flag Name | Type | Value (Data) | Description |
|---|---|---|---|
| Feature.DisableExtractedContentsCleanup | REG_SZ | True | Retains extracted contents after installation (deactivates cleanup). |
| NA | NA | False | Deletes extracted contents after installation (activates cleanup). |
| NA | NA | Empty or any other non-true value | Deletes extracted contents after installation (default behavior). |
The configuration behavior of the Extracted Content Removal feature is as follows:
- When the global registry flag is set to True, cleanup of extracted installation files is deactivated for all applications.
- When the flag is absent or set to False, the cleanup process functions normally.
- The registry settings are read and applied during App Deployment Agent startup or the next relevant initialization phase. These changes take effect automatically, without requiring any console updates.
Was this page helpful?