To achieve the single sign-on experience when users access apps from the Workspace ONE Intelligent Hub app or from their Hub portal in the browser, the default access policy is configured with rules for each type of device that is used in your environment, Android, iOS, and macOS, and set the order in which the authentication methods are used for authentication.
Prerequisites
- The authentication methods that your organization supports configured and enabled.
- Network ranges of defined IP addresses created and assigned to the identity providers.
You chain Device Compliance to the device authentication method to measure the health of the managed device, resulting in pass or fail based on Workspace ONE UEM defined criteria.
Create a rule for each device type that can be used to access the Workspace ONE Intelligent Hub app.
This example is for the rule to allow access from the device type iOS and with device compliance.
Create policy rules that apply to all authentication method in every directory that is configured. If a directory uses an authentication method that is not configured in a policy rule, users in that directory cannot log in.
Procedure
- In the Omnissa Access console Resources > Policies page, Default Policy section, click EDIT.
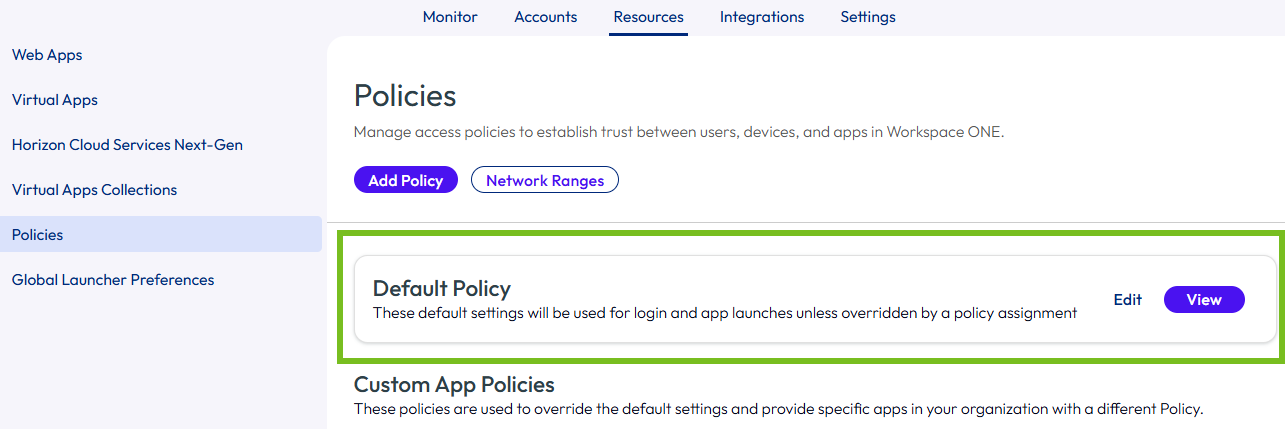
-
In the Definition page, you can change the policy name to be more specific. For example, default_access_policy_set- MyCo.
This policy applies to all apps that are configured in the Resources Web or Virtual Apps pages, except for apps that are assigned to a custom access policy.
-
Click Next to open the Configuration page.
-
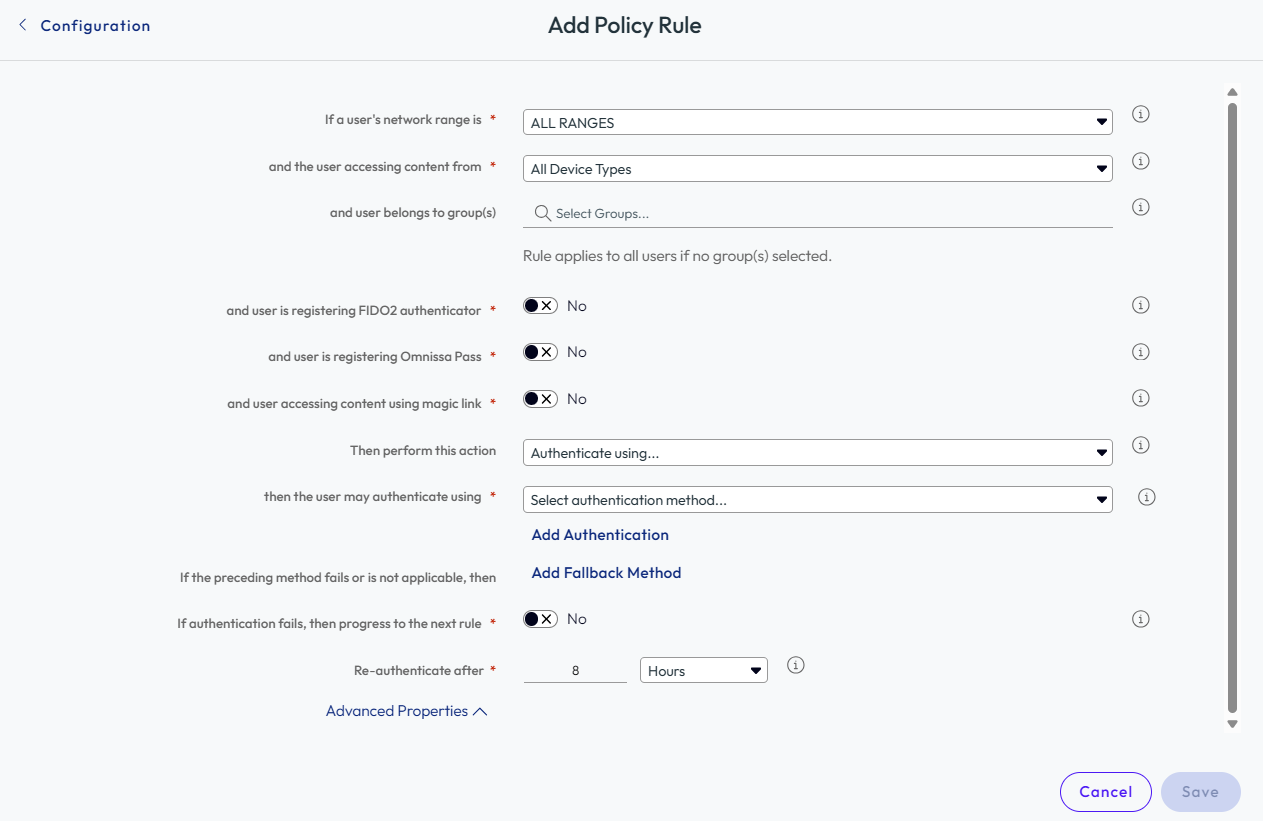
Select the rule name to edit, or to add a new policy rule, click Add Policy Rule.
Option Description If a user's network range is Verify that the network range is correct. If adding a rule, select the network range. and user accessing content from Select the device type that this rule manages. See Access Policy Settings in Workspace ONE Access, Device Types. and user belongs to groups If this access rule is going to apply to specific groups, search for the groups in the search box. If no group is selected, the access policy rule applies to all users. If appropriate for the rule you want to configure, you can toggle none or one of the following three options to Yes. and user is registering FIDO2 authenticator Toggle this option to Yes to enforce specific conditions when a user is registering a FIDO2 security key. and user is registering Omnissa Pass Toggle this option to Yes to enforce specific conditions when a user is registering an Omnissa Pass mobile authenticator app. and user accessing content using magic link Toggle this option to Yes to enforce specific conditions when a user is authenticating using a magic link. Then perform this action Select Authenticate using.... and select the authentication method to apply.
Select Deny access to deny access by network range and device type.then the user may authenticate using Configure the authentication method order. Select the authentication method to apply first. To require users to authenticate through two authentication methods, click + and in the drop-down menu select a second authentication method. If the preceding method fails or is not applicable, then Configure fallback authentication methods as Password. This configuration provides the best experience to manage devices, while still providing a manual sign-in option for unmanaged devices. If authentication fails, then progress to the next rule Toggle this option to Yes if you want the next rule to apply when authentication fails. Re-authenticate after Select the length of the session, after which users must authenticate again. -
(Optional) In Advanced Properties, create a custom access denied error message that displays when user authentication fails. You can use up to 4000 characters, which are about 650 words. If you want to send users to another page, in the Custom Error Link URL text box, enter the URL link address. In the Custom Error Link text box, enter the text to describe the custom error link. This text is the link. If you leave this text box blank, the word Continue displays as the link.
-
Click Save
-
Click Next to review the Summary page and then click Save.
What to do next
Create additional rules, if necessary.
After all the rules are created, order the rules in the list as to how they are applied.
The edited policy rules take effect immediately.
-
Was this page helpful?