Conditional access in Omnissa Access allows organizations to define specific access policies based on a variety of conditions such as the context of both the device and the user at the time of access. For example, conditional access can detect that a user is attempting to log in from an uncommon location or using a non-compliant device to access the app. Depending on this assessment, Omnissa Access can take actions such as granting full access to corporate resources, requiring multi-factor authentication (MFA), or revoking access and quarantining the device.
You can configure custom conditional access policies with specific rules on Omnissa Access for SaaS apps such as Workday and Salesforce or for virtual applications such as Horizon and Horizon Cloud Service Next-Gen desktops and apps.
End users can access Horizon and Horizon Cloud Service Next-Gen desktops and apps through the Workspace ONE Intelligent Hub desktop and app. Horizon and Horizon Cloud Service Next-Gen enforce the Omnissa Access conditional policies irrespective of whether the user is logging in through Workspace ONE Intelligent Hub app or through Horizon client.
In a custom access policy, you can set network range, device types that can be used to access content, and user group membership to control who can authenticate and access Horizon Cloud Service Next-Gen desktops and published apps.
You add a custom policy and configure authentication rules to apply when users access the applications that are associated with this policy. After the custom policy is configured, you select the apps to associate with the policy. You can edit your custom policies, add and remove apps from policies, and delete apps and policies.
Prerequisites
-
Configure the appropriate authentication methods for your deployment.
-
If you plan to edit the default policy (to control user access to the service as a whole), configure it before creating an application-specific policy.
-
Add the applications to the Workspace ONE Access console Resources pages.
When WS-Fed Web Application (Office 365) clients (Boxer, iOS, and Android native email clients) use the legacy authentication flow user name and password authentication, you configure client access policies in the Office 365 application from the Resources > Web Apps page.
Note: Access policies are not created for applications that are managed by an Application Source nor for weblinks. See Providing Access to Third-Party Managed Applications in Omnissa Access
Procedure
-
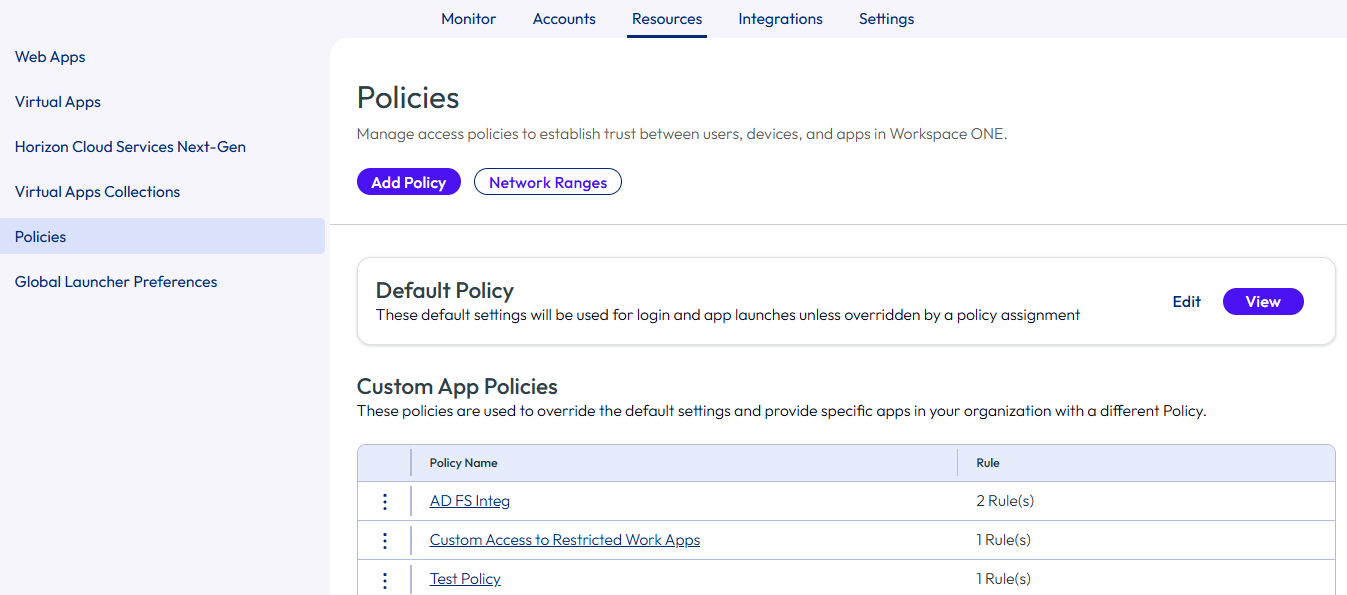
In the Omnissa Access console Resources > Policies page, click Add Policy.
-
Add a policy name and description in the respective text boxes.
-
Click Next.
-
Click Add Policy Rule to add a rule.
For more information about the access policy settings, see Access Policy Settings in Omnissa Access
Option Description If a user's network range is Select the network range. and user accessing content from Select the device type that this rule manages. and user belongs to groups If this access rule is going to apply to specific groups, search for the groups in the search box. If no group is selected, the access policy rule applies to all users. Then perform this action Action managed by rules. - Authenticate using. Select this action and continue to configure the policy rule.
- Deny access. This action denies access to applications by network range and deice type.
- Allow access with no further action. This action lets users that are authenticated through the default access policy access apps associated with this policy without requiring additional authentication.
then the user may authenticate using Configure the authentication method order. Select the authentication method to apply first. To require users to authenticate through two authentication methods, click ADD AUTHENTICATION and in the drop-down menu select a second authentication method. Click ADD. If the preceding method fails or is not applicable, then (optional) Configure fallback authentication methods. Re-authenticate after Select the length of the session, after which users must authenticate again. -
Click Save.
-
Configure additional rules, if needed and click NEXT.
-
The Summary page is displayed. Click SAVE.
Assign Apps to Custom Access Policies
After the custom policy is configured, you select the apps to associate with the policy. You can assign or remove apps without editing the actual policy.
-
In the Resources > Policies > Custom App Policies section, select the custom app policy to which you want to assign apps.
-
In the app policy page, click ASSIGN or from the Policies page Custom App Policies section you can select ASSIGN from the 3-dot menu.
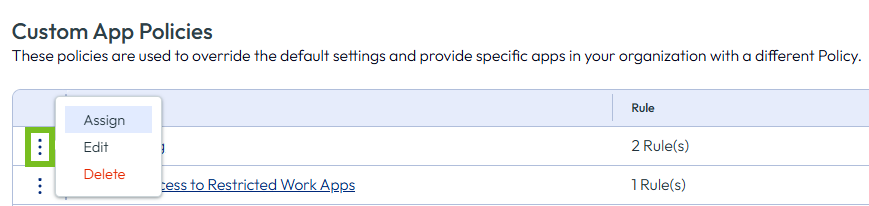
In the Assign Policy page, the apps are organized in tabs based on whether they are Web apps, Virtual apps, or Horizon Cloud Service Next Gen apps. You can expand the view to display up to 50 apps at a time.3. Select apps to assign to this access policy. To search for an app, enter at least three characters of the app name on the Search line. As you type, a list of apps matching your search criteria appear.
You can also search for apps by type of app. In the **Select Type** drop-down menu, select the specific app types, such as SAML 2.0 in Web Apps or Horizon Desktop in Virtual Apps, to narrow the list displayed.

You can select apps from each tab. Apps you select display in the respective **Preview** panes.

If you select an app that is assigned to another custom policy, a warning displays in the preview pane to let you know that you are attempting to override another policy that is assigned with this app.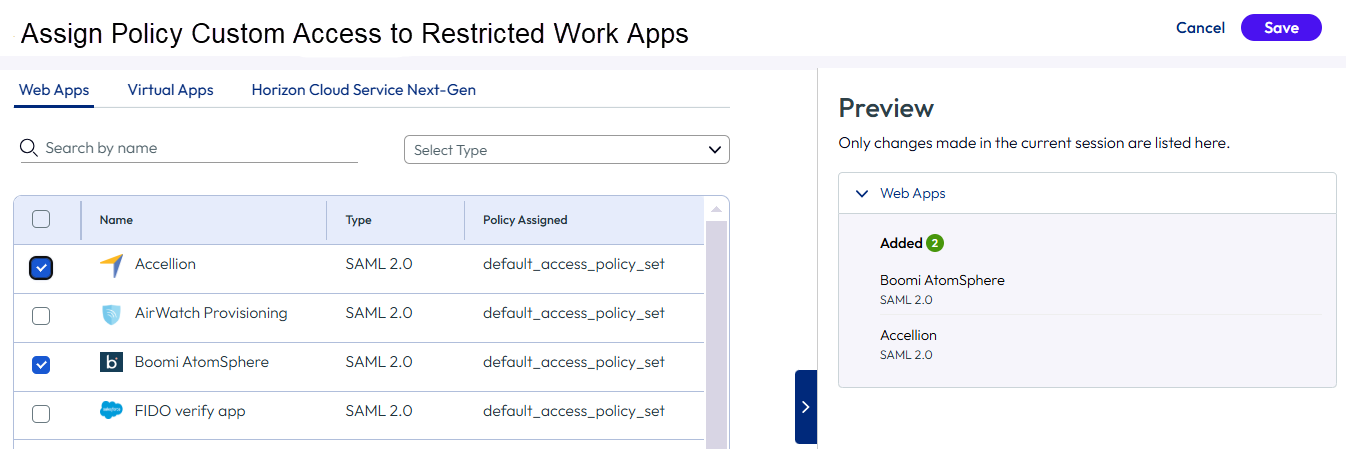
- Click SAVE.
Note. If you assigned an app that is associated to another policy, after you click SAVE, a Save Confirmation page displays to alert you that the applications policy assigment will be overridden with this new policy. If this policy configuration is correct, click SAVE again.
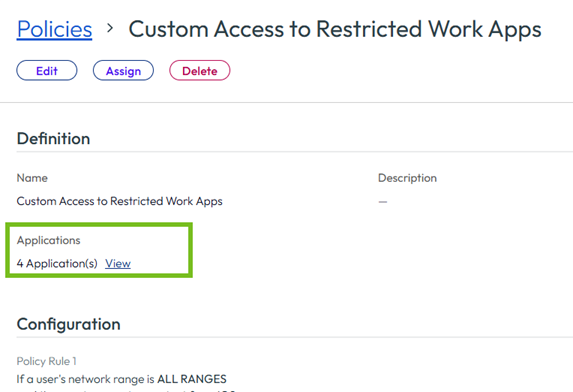
The Applications section in the policy page is updated to show the number of apps associated with that policy.
Was this page helpful?