Configuring the identity provider (IdP) in the Enterprise Federation workflow in Omnissa Connect includes working in both the provider and Omnissa Connect consoles, and this procedure outlines using Okta in the SAML (Security Assertion Markup Language) protocol with JIT (Just-in-Time) provisioning.
The Omnissa Access tenant is provisioned automatically to help with this step. Omnissa Access acts a service provider and self-service federation provides a presentation layer to help simplify connecting your identity provider with your service provider.
General workflow
In general, whether you are configuring Microsoft Entra ID, Okta, or another identity provider, take the listed steps.
- Establish trust between your identity provider and the service provider.
- Configure how admins and groups are identified for authentication.
- Configure single sign-on (SSO).
Okta documentation
- This topic outlines using Okta as the identity provider, but if you want the latest Okta documentation, see the Okta documentation site.
- See the topic Okta Expression Language overview for information on expressions used in Okta attribute mappings.
Requirements
You must complete the Verify Domains step before you can access the Configure identity provider area of the Set up Enterprise Federation widget in Omnissa Connect.
Configuring SAML SSO with Okta
Work in both the Omnissa Connect console and in Okta. It is best to use two browser instances to facilitate copying and pasting values between the consoles.
- Open a browser instance and go to your Omnissa Connect console.
- Go to Set up Enterprise Federation > Configure identity provider and select Start.
- In Omnissa Connect, On the Select your identity provider tab, select these settings and then select Next.
- Identity Provider: Okta
- Provisioning Type: JIT-based
- Authentication Protocol Type: SAML
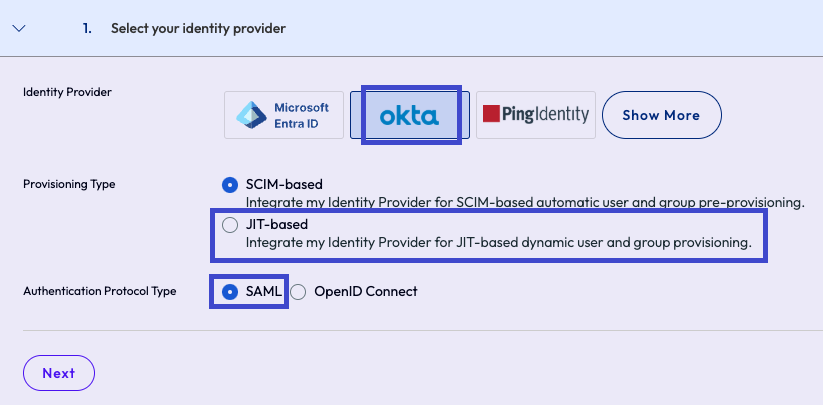
- Go to Set up Enterprise Federation > Configure identity provider and select Start.
- In another browser instance, log in to your Okta admin console with admin permissions and select the right Okta organization.
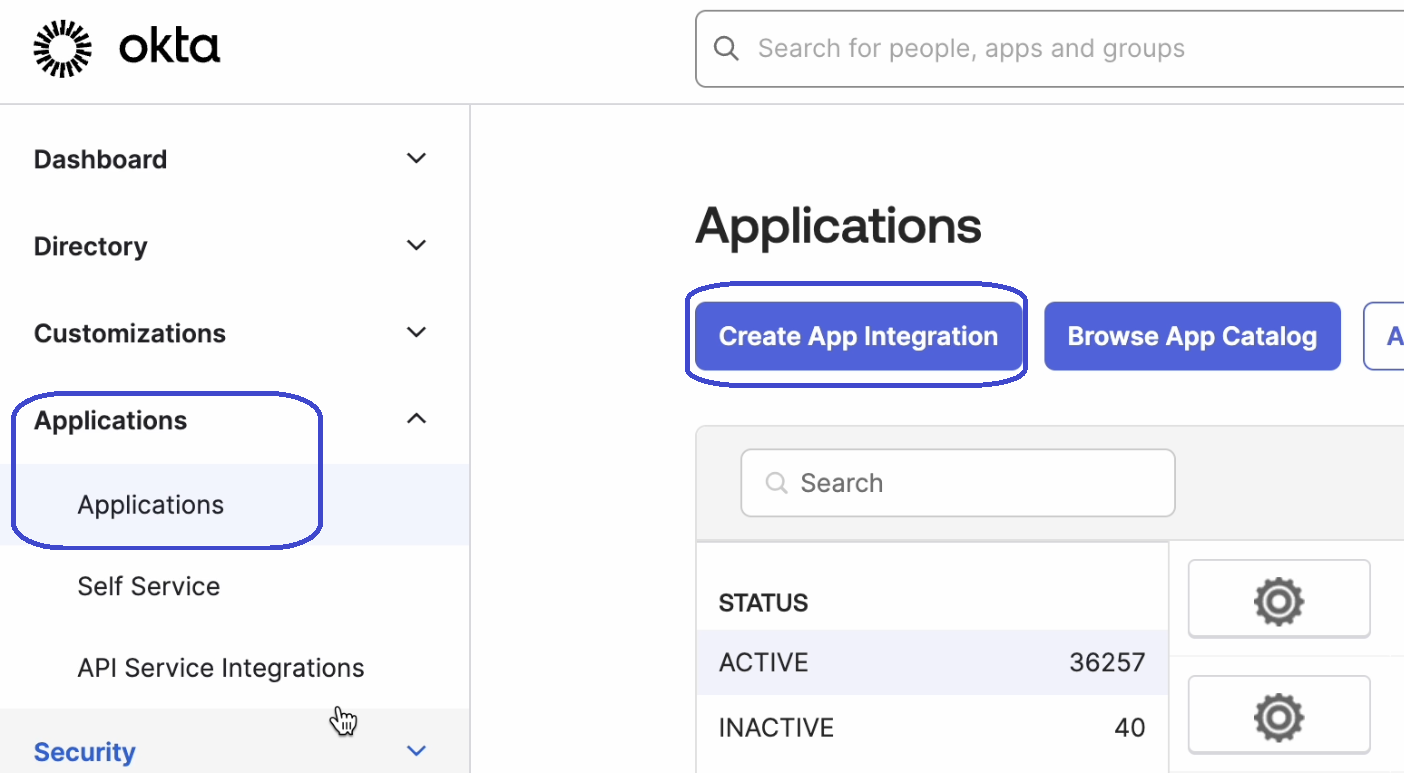
- In Okta, go to the Applications menu and select Create App Integration.
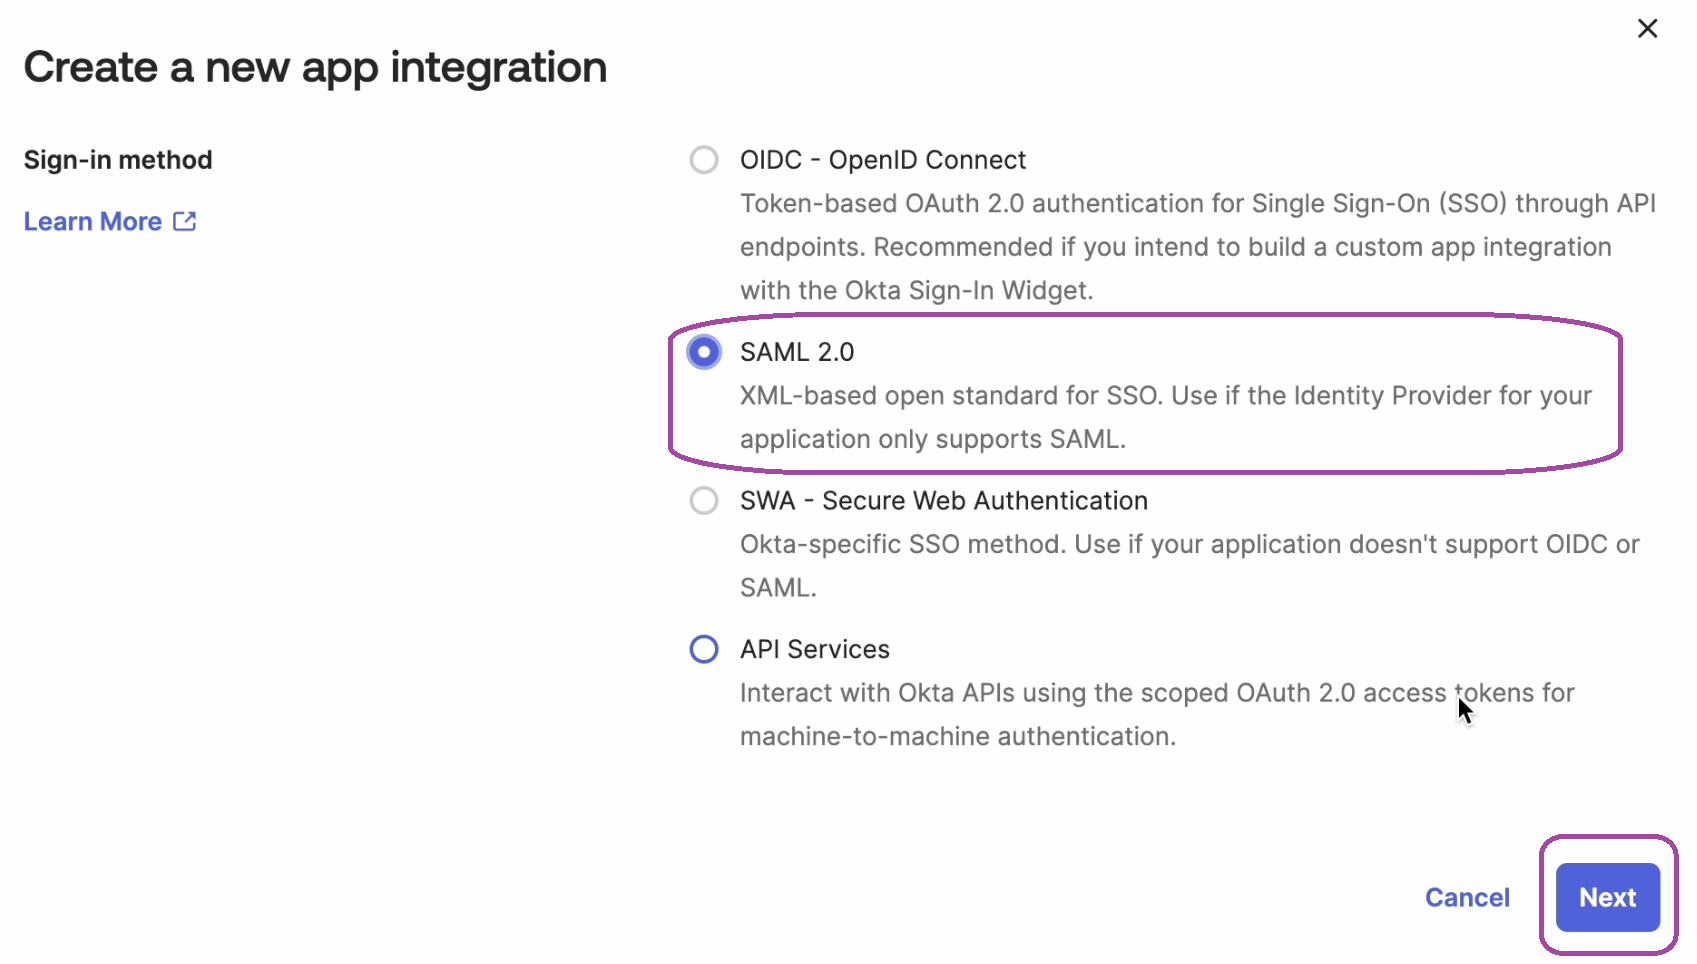
- In the Create a new app integration widget, select SAML 2.0 and select Next.
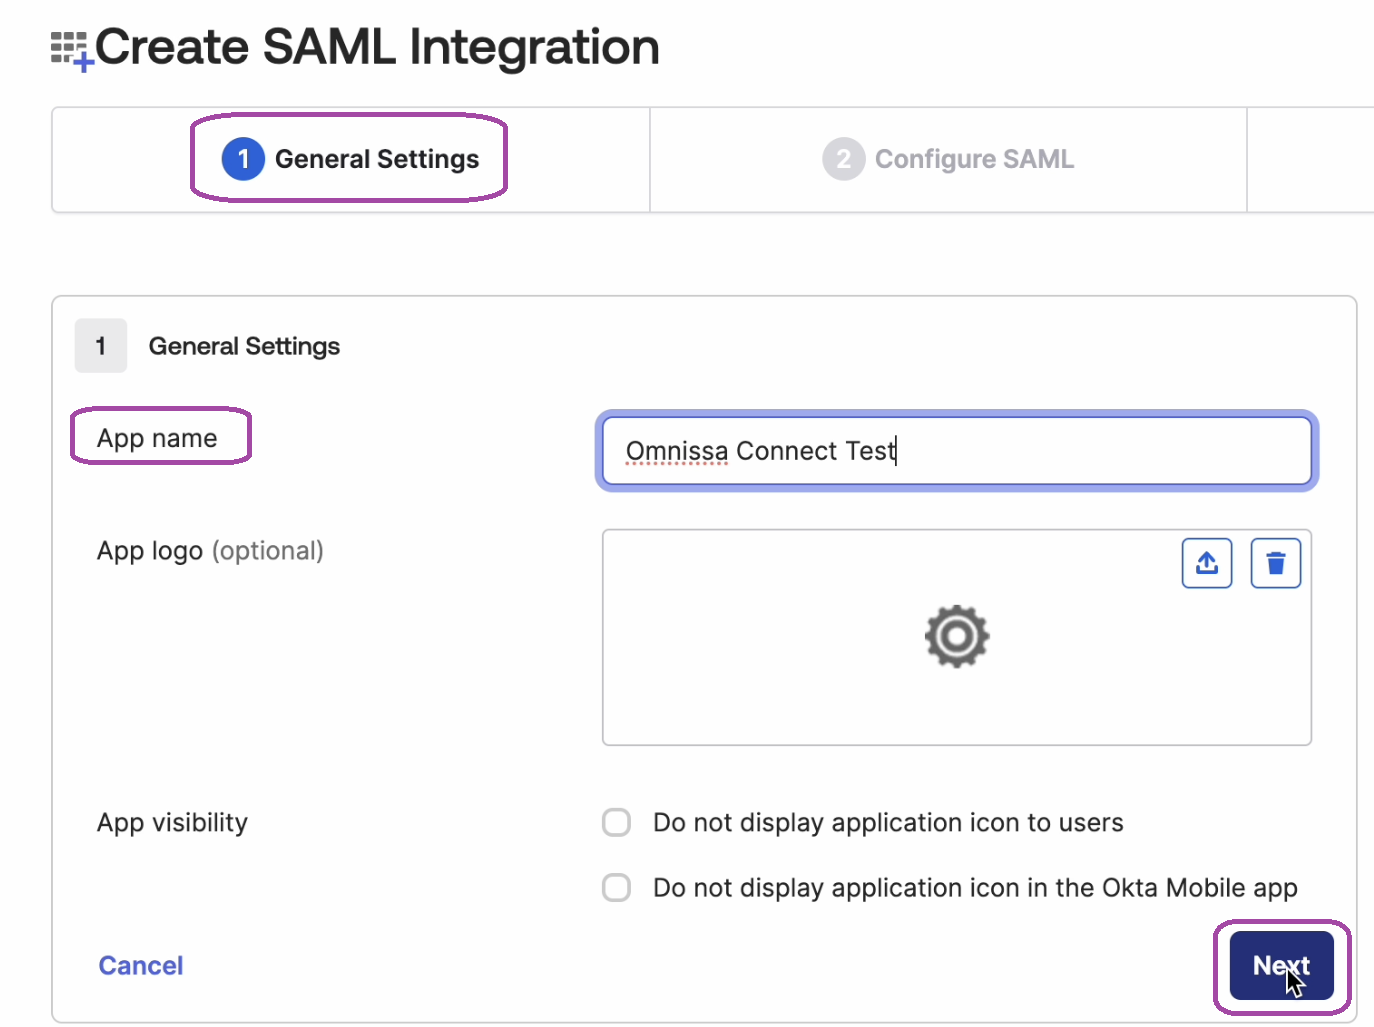
- In the General Settings area of the Create SAML Integration widget, enter an App name and other details as needed and select Next.
- In Okta, go to the Applications menu and select Create App Integration.
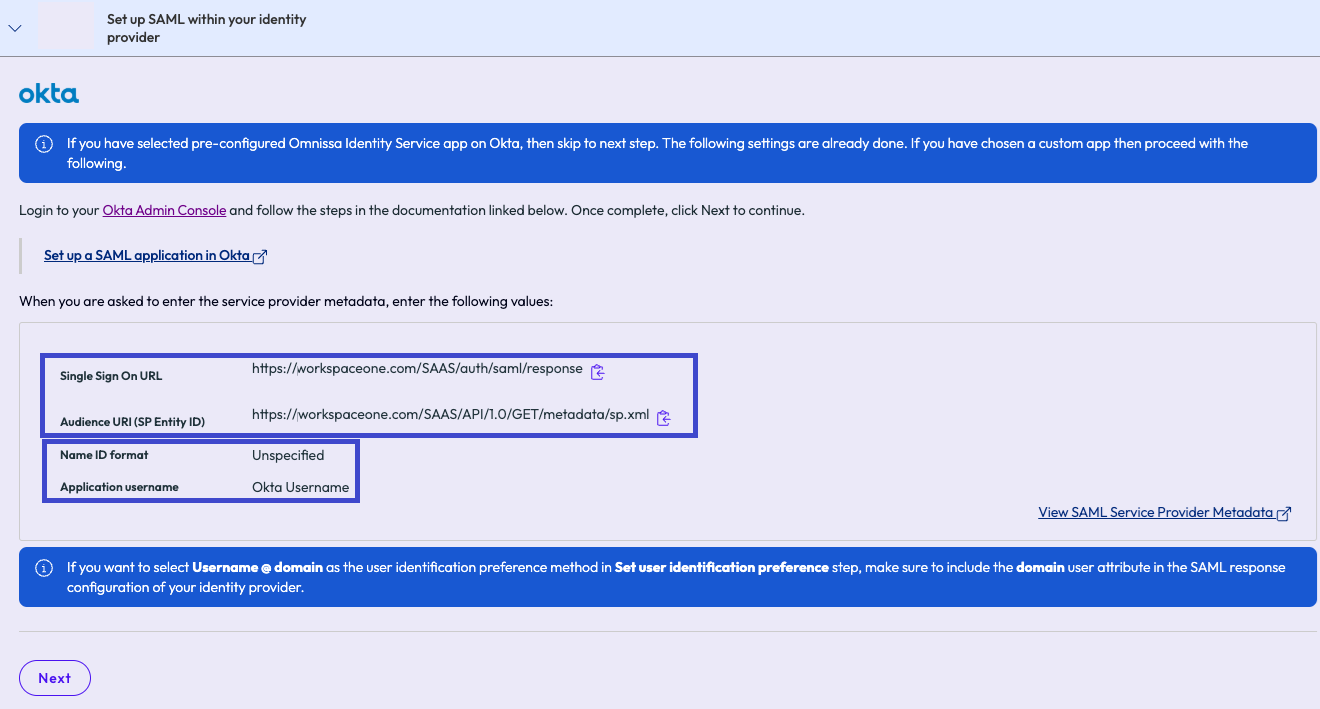
- In Omnissa Connect, in the Set up SAML within your identity provider step, copy and note the listed settings.
- Copy the Single sign-on URL and the Audience URI (SP Entity ID) values.
- Note the entries for the Name ID format and the Application username. When you set the Attributes Statements in Okta, the values for Name ID format and Application username must match the values in Connect.
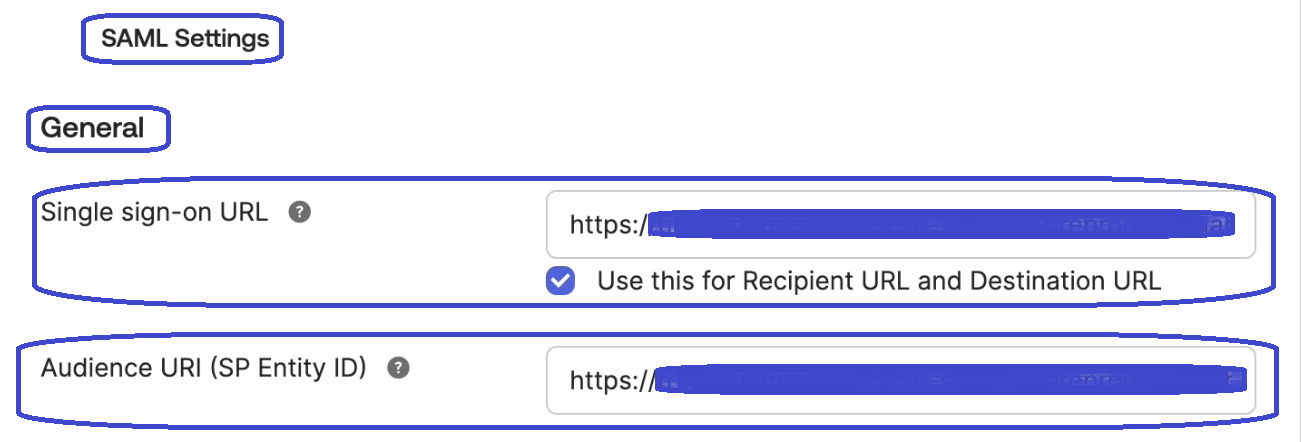
- Go to your Okta instance and paste the copied Omnissa Connect values in to the SAML Settings > General area, leaving other fields in Okta as they are.
- In Okta, in the Attribute Statements section, add the required user attributes that match those in Omnissa Connect.
- Ensure that the Name format are unspecified (except for the userName entry) to match the attribute values in Connect.
- Update userName to the Name format > Okta Username to match the attribute value in Connect.
- Select to Add Group attribute Statements if you plan to provision group memberships.
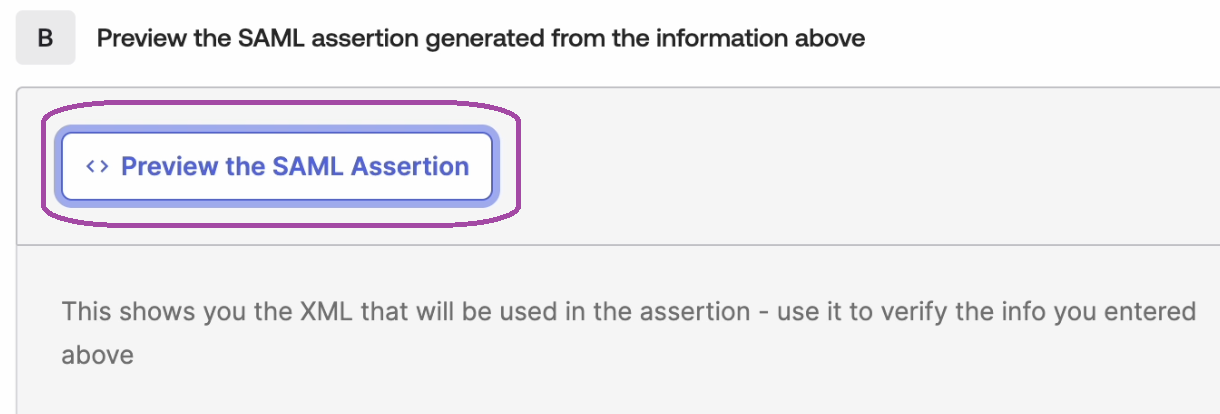
- (Optional) Preview the XML that is used in SAML assertions to ensure everything looks right, then select Next to continue.
- Go to your Omnissa Connect instance, in the Configure your identity provider step, and enter a name for the provider to display in Omnissa Connect.
- Select URL as the method of sharing for the Metadata menu option.
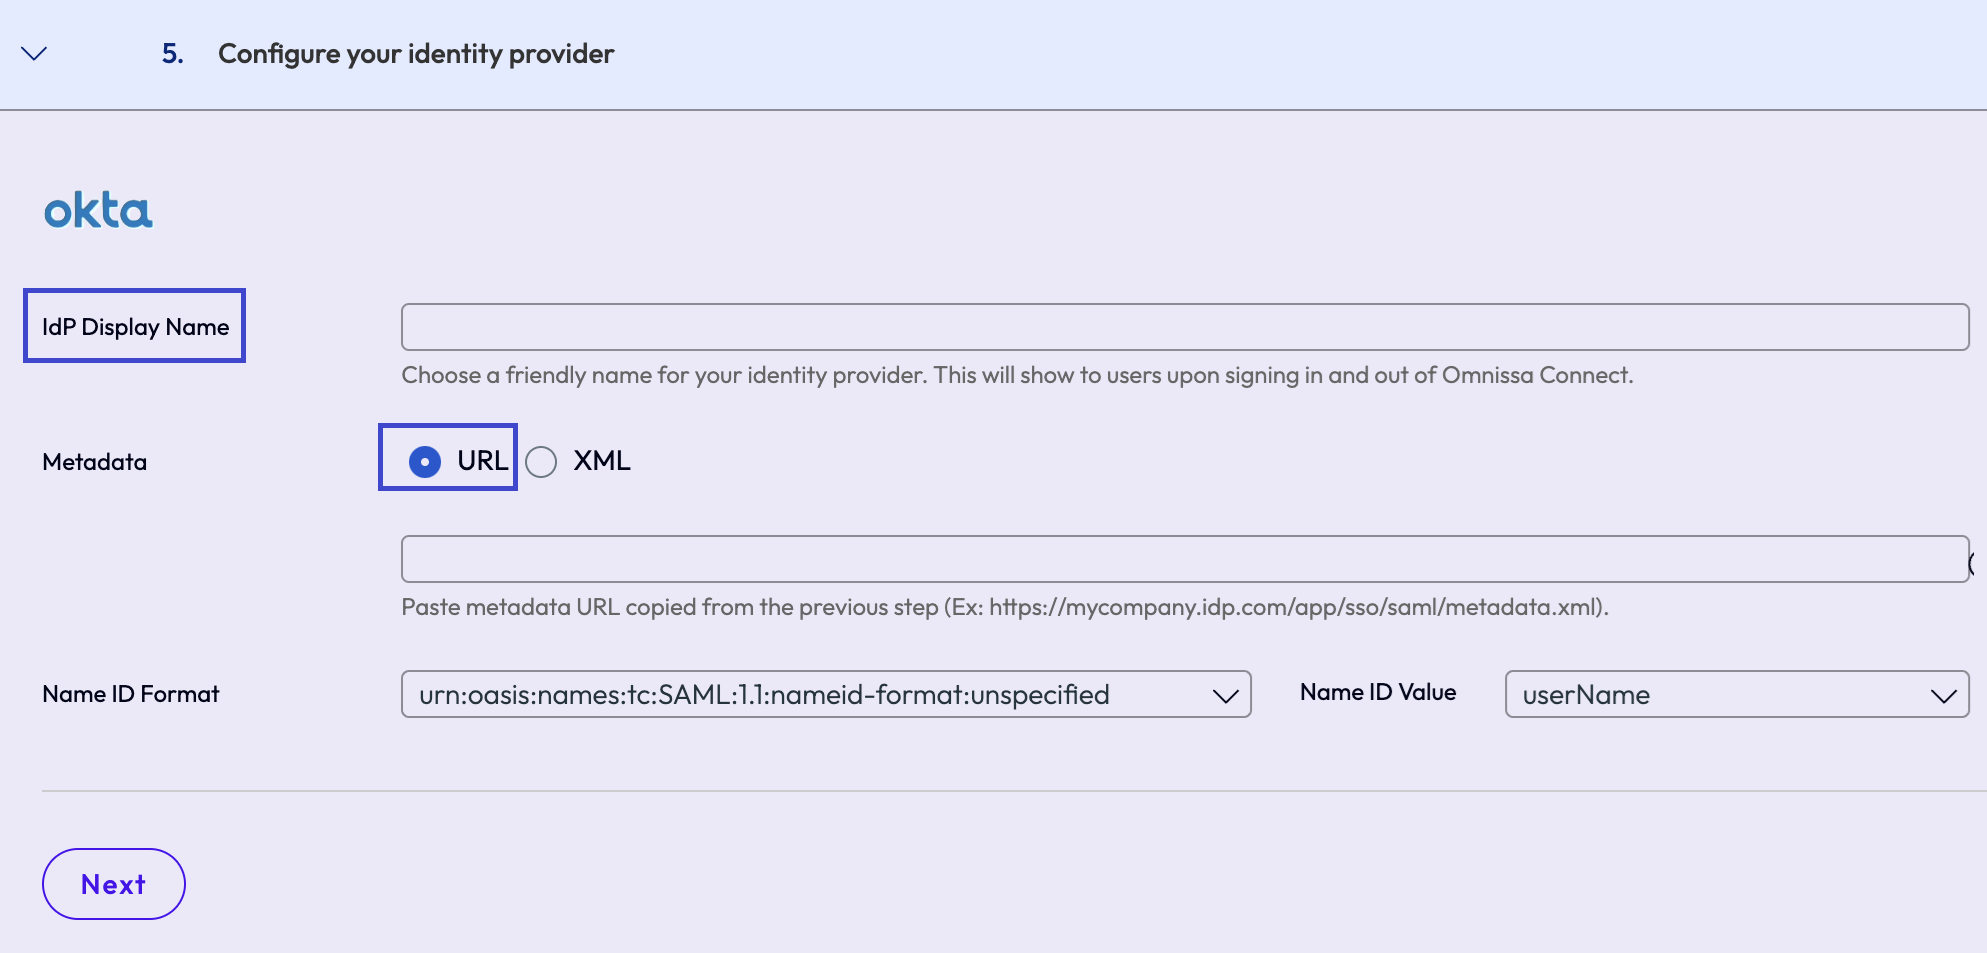
- Select URL as the method of sharing for the Metadata menu option.
- In Okta, go to the Assignments tab of your Omnissa app and assign users and groups to the application so that they can SSO in to Omnissa Connect.
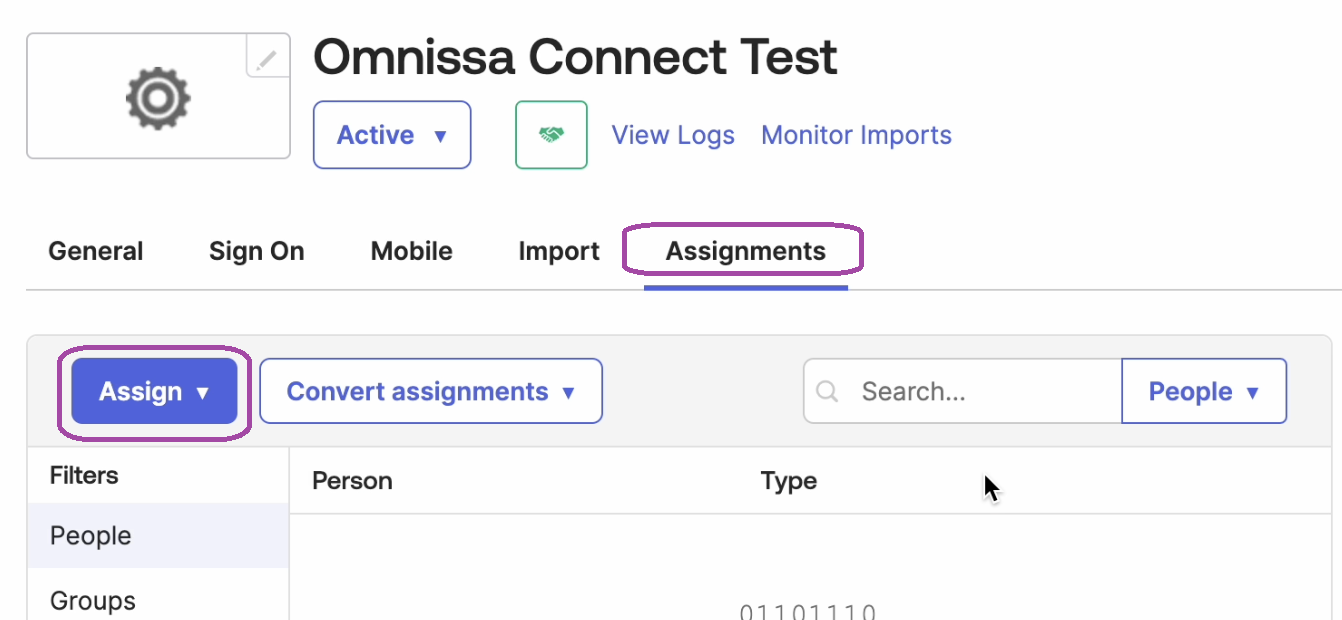
- In Okta, go to your application's Sign On tab and copy the Metadata URL.
- Go back to Omnissa Connect, still on the Configure your identity provider step, and paste the copied Okta metadata URL in to the Metadata URL text field.
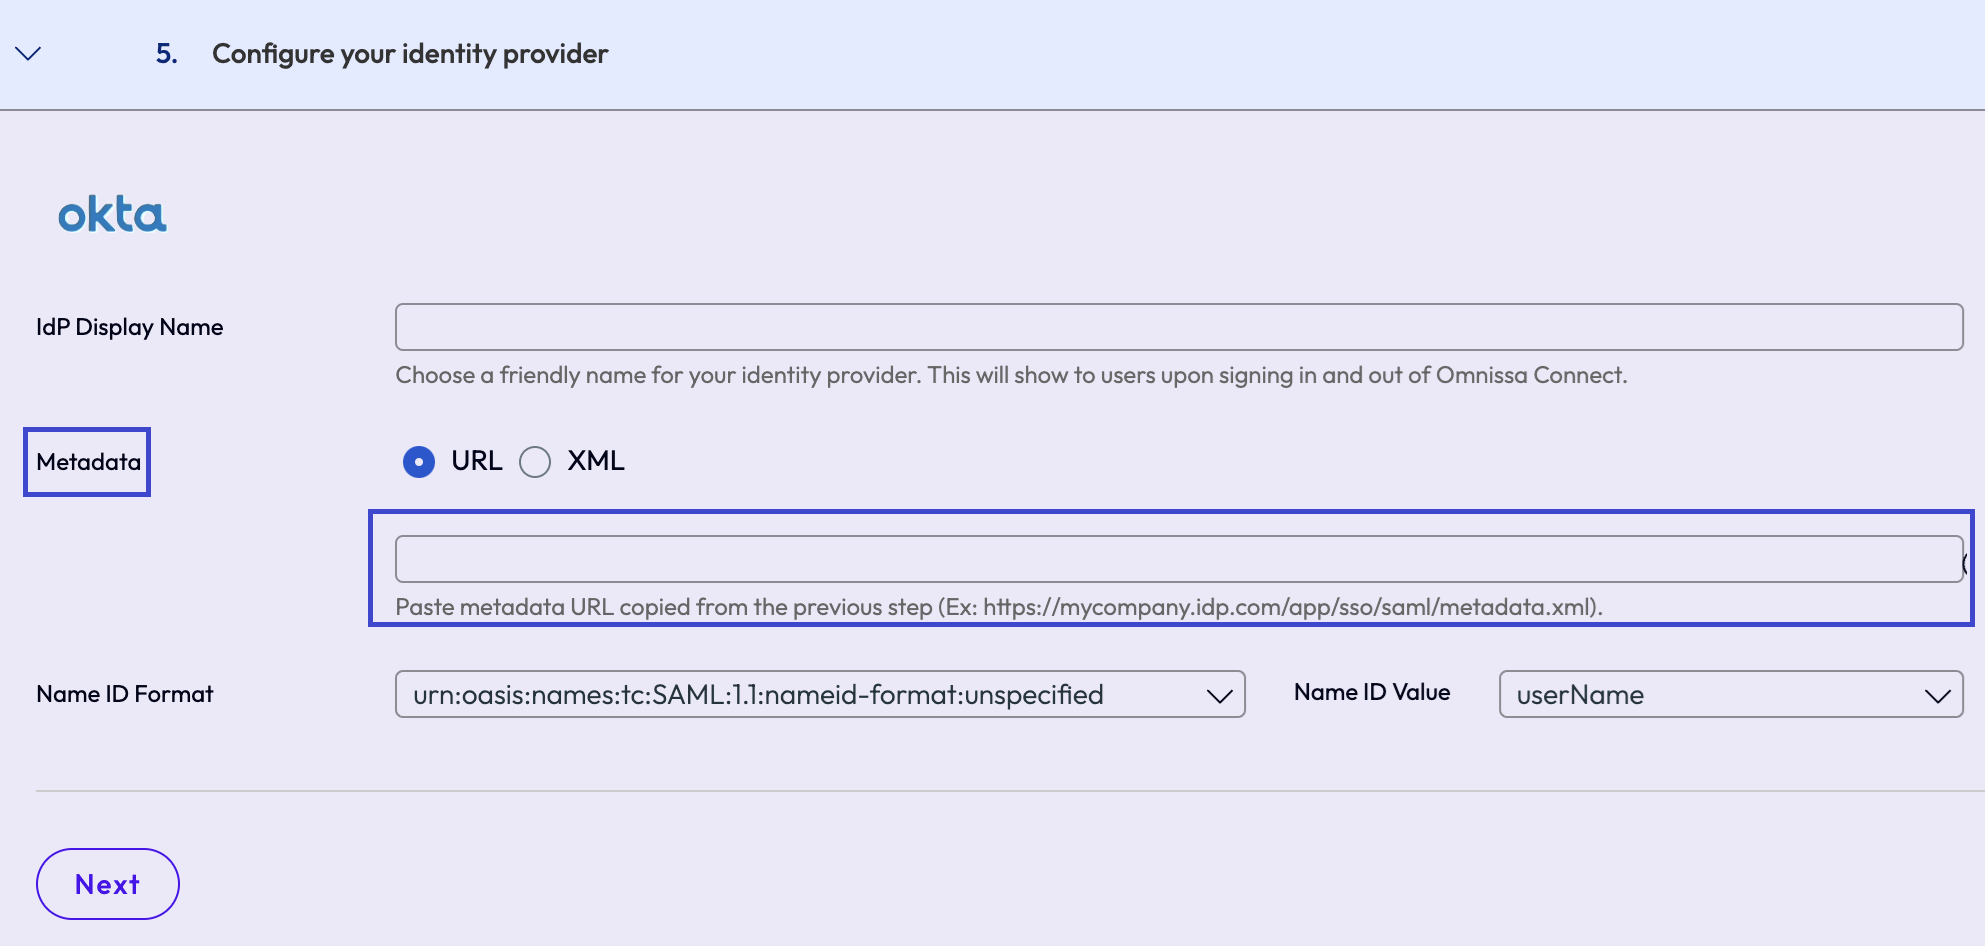
- Select the Name ID Format. The Name ID Format is the value in the SAML response to identify the authenticated user.
- Select the Name ID Value.
- In Omnissa Connect, in the Set user identification preference step, select how users of your enterprise are going to identify themselves when accessing Omnissa Connect from the Omnissa Connect discovery page.
- User identification is different from how the user authenticates against your enterprise identity provider.
- Follow the examples shown on the screen to choose the correct one.
- Consider that for all the options, the chosen value must end with
@<DomainName.com>wheredomainNameis the one you registered during the verification step.
- In Omnissa Connect, select Configure to complete the self-service federation process.
What to do next
In this step you configured Okta as the IdP, selected the SAML user and group claims, and selected the value to be used for user identification. Move on to validating and activating your setup.
Was this page helpful?