You can install Omnissa Unified Access Gateway (UAG) in your environment from Omnissa Customer Connect.
For more information about Unified Access Gateway, see the Omnissa Product Documentation portal.
Procedure
-
In vCenter, navigate to the VM folder where you want to install the Unified Access Gateway appliance, right click, and select Deploy OVF Template.
-
Using the information in the Tenant Installation Worksheet, fill out the text boxes and click Finish to deploy.
#-NIC deployment options are 1-NIC, 2-NIC, and 3-NIC
Note: You must enter passwords in the OVF deployment forms.
-
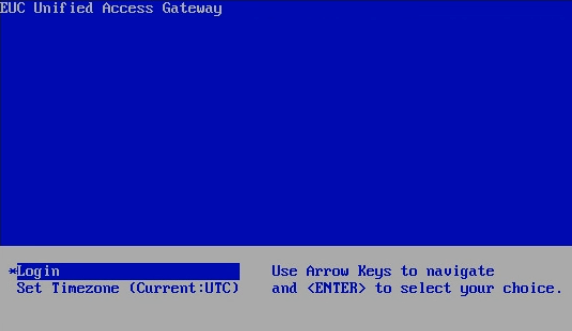
Power on the VM. This process might take over five minutes. Once the VM is fully started up, the following screen displays in the console:
-
If you are missing Unified Access Gateway configurations, run the
apsetupscript.-
Log into the Tenant appliance using one of the following methods:
- Console to the Tenant appliance and log in with user
desktone. - Start a PuTTY session to the Service Provider appliance, log in with user
desktone, and SSH to the BBLL IP of the Tenant appliance.
- Console to the Tenant appliance and log in with user
-
Navigate to the directory shown and run the
apsetupscript:sudo /usr/local/desktone/scripts/apsetup.sh -
Respond to the prompts according to the information in the Tenant Installation Worksheet. If the setup was successful, the script exits with
Response status: 200.
-
-
Update the certificates (this task can be done later).
If you are using a 3-NIC configuration, you must perform the following steps from a desktop with access to the UAG management network and the network with the share containing the SSL certificates.
-
Open a browser and log into the UAG appliance at
https://UAG-IP:9443/adminwith the user nameadmin. -
Click Select under Configure Manually.
-
Under Advanced Settings, click the gear icon next to TLS Server Certificate Settings.
-
Select the Internet Interface check box.
-
Next to Private Key, click the hyperlink to browse to the folder containing your certificates.
Note: You might have to click All Files in the file type drop-down menu in the File Open dialog box that pops up.
-
Do the same for Certificate Chain, then click the blue Save button.
The text Server Certificate Uploaded Successfully displays in green at the top right of the browser frame.
-
-
Wait for the UAG services to restart and configuration to complete. This can take 5–10 minutes.
-
Validate configuration success by checking external connectivity.
What to do next
Was this page helpful?