This section describes the process of configuring Okta as the identity provider to Workspace ONE. This configuration can be used to provide streamlined access to virtualized applications, provide Okta's extensible Multi Factor Authentication to applications in Workspace ONE, and provide a consistent and familiar login experience for users and administrators.
This configuration is done in Omnissa Access, the identity component of Workspace ONE.
Add Workspace ONE SAML App in Okta
Add and configure the Workspace ONE SAML app in the Okta Admin console.
Prerequisites
If you are using the Okta developer dashboard, switch to the Classic UI first. If you see a <> Developer prompt in the top left, click it and select Classic UI to switch to the Classic UI. Use the Classic UI for all the tasks in this document.
Procedure
-
Log in to your Okta org and navigate to the Admin user interface.
-
Navigate to Applications > Applications.
-
Click Browse App Catalog.
-
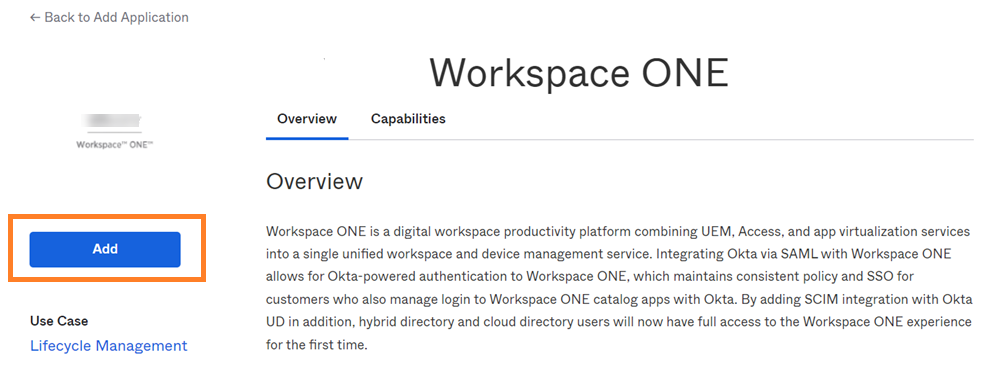
Search for Workspace ONE.
The Workspace ONE app information page displays.
-
Click Add.
-
In the Add Workspace ONE page, under General Settings, enter your Omnissa Access tenant URL in the Base URL text box.
For example: https
://example.workspaceoneaccess.com 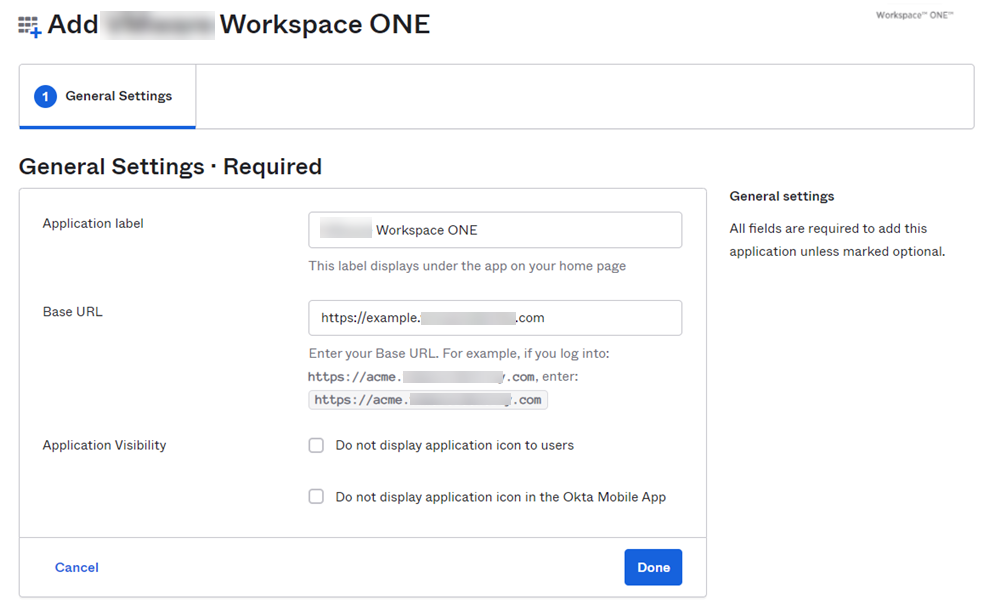
-
Click Done.
-
Select the Sign On tab.
-
In the Settings section, under SAML 2.0, right-click the Identity Provider metadata link and copy the link.
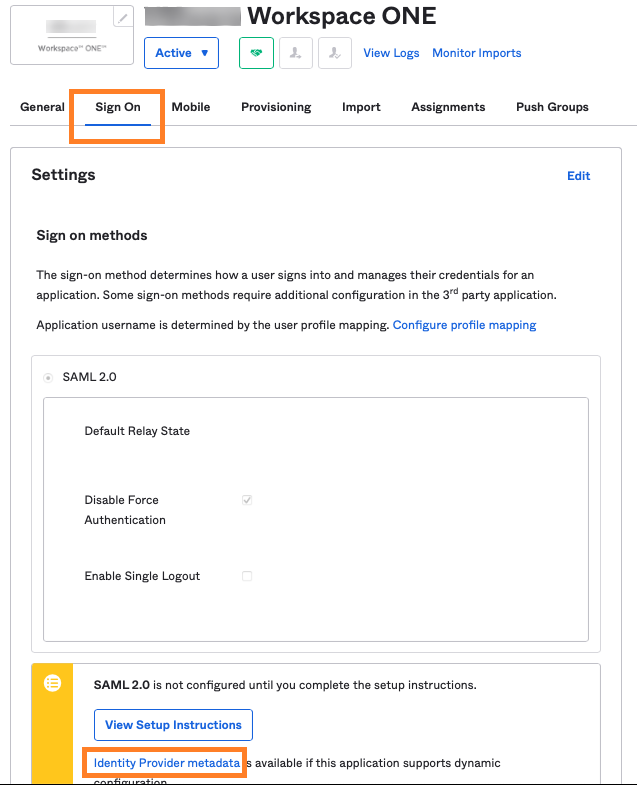
You need this information for the next task, creating an identity provider in Omnissa Access.
-
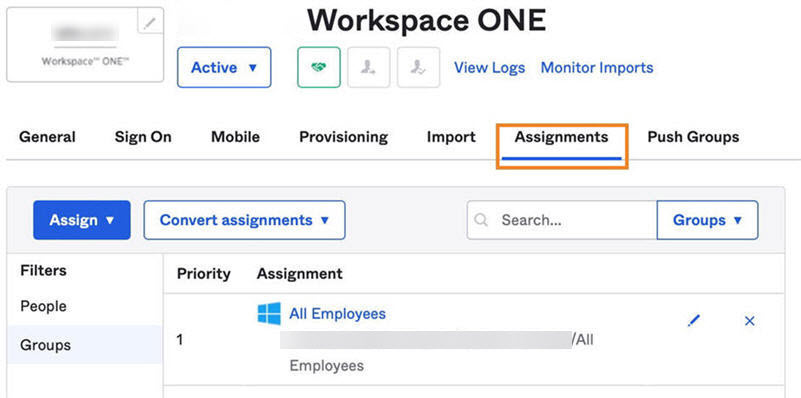
Select the Assignments tab and assign the app to the users or groups who need to access Omnissa Access.
You can assign the app to a few users at first to test the integration.
Create a New SAML Identity Provider in Omnissa Access
Create a new SAML identity provider in the Omnissa Access console for the Okta integration.
Procedure
-
Log in to the Omnissa Access console as the System administrator.
-
Select Integrations > Identity Providers.
-
Click Add Identity Provider and select Create SAML IDP.
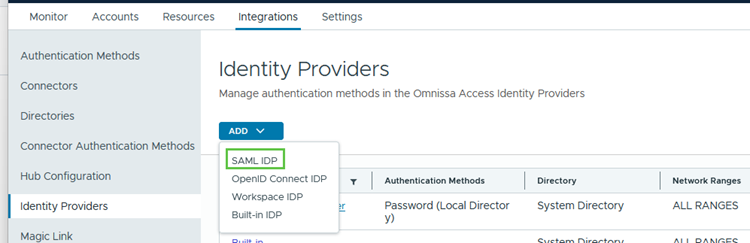
-
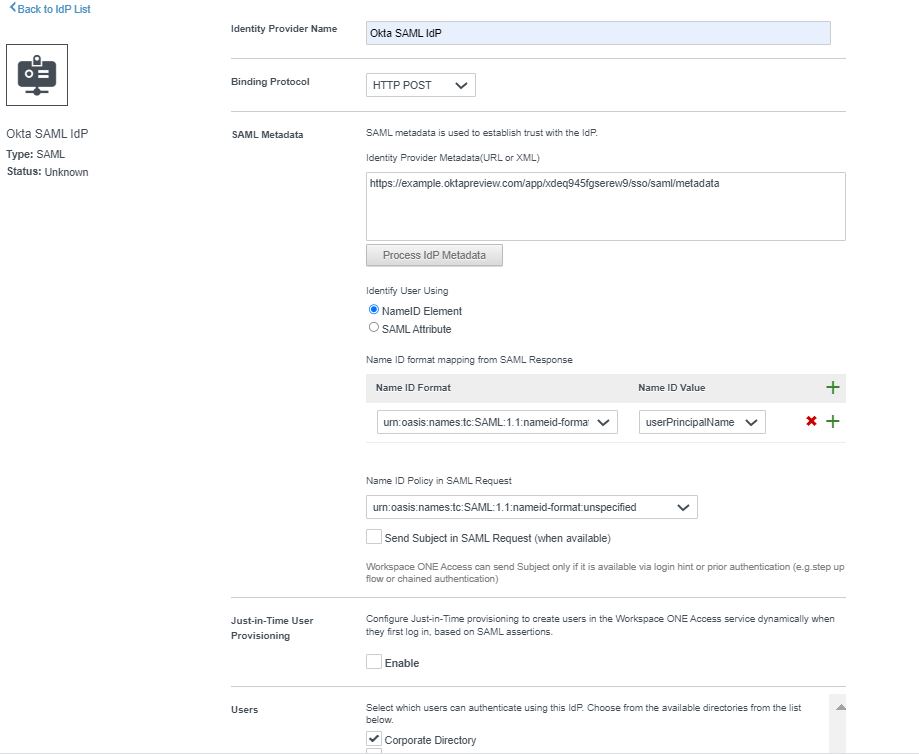
In the New Identity Provider page, enter the following information.
Option Description Identity Provider Name Enter a name for the new identity provider, such as Okta SAML IdP.Binding Protocol Select HTTP Post.
Note: This field appears after you enter the metadata URL in the SAML Metadata section and click Process IdP Metadata.SAML Metadata - In the Identity Provider Metadata text box, enter the metadata URL copied from Okta. For example:
https://yourOktaTenant/app/appId/sso/saml/metadata - Click Process IdP Metadata.
- In the Identify User Using section, select NameID Element.
- In the Name ID format mapping from SAML Response section, click the + icon, then select the following values:
Name ID Format:urn:oasis:names:tc:SAML:1.1:nameid-format:unspecified
Name ID Value:userPrincipalName
Note: Select the User Attribute that the application username value defined in Okta will match. - In the Name ID Policy in SAML Request section, select the same value that you selected for Name ID Format in the previous step:
urn:oasis:names:tc:SAML:1.1:nameid-format:unspecified - Leave the Send Subject in SAML Request (when available) check box unselected.
Users Select the directories you want to authenticate using this identity provider. Network Select the networks that can access this identity provider. Authentication Methods Enter the following:
Authentication Methods: Enter a name for the Okta authentication method, such asOkta Auth Method.
SAML Context:urn:oasis:names:tc:SAML:2.0:ac:classes:PasswordProtectedTransportFor example:
- In the Identity Provider Metadata text box, enter the metadata URL copied from Okta. For example:
-
Click Add.
Add Okta Authentication Method to Access Policies in Omnissa Access
After you set up Okta as a SAML identity provider in Omnissa Access, add the newly-created Okta authentication method to access policies in Omnissa Access. Update the default access policy, and other policies as needed.
You need to add the Okta authentication method to the default access policy so that Okta is used as the sign in provider for the Workspace ONE catalog. The default access policy governs login to the catalog, and any apps configured in Omnissa Access that do not have another policy definition already.
Procedure
-
In the Omnissa Access console, select Resources > Policies.
-
Click Edit Default Policy.
-
In the Edit Policy wizard, click Configuration.
-
Click the policy rule for Web browsers.
-
Set Okta authentication as the authentication method.
If a user's network range is: ALL RANGES
and the user is accessing content from: Web Browser
Then perform this action: Authenticate using
then the user may authenticate using: Okta Auth MethodNote: For Okta Auth Method, select the authentication method you created for the IDP in Create a New SAML Identity Provider in Omnissa Access.
-
Click Save.
-
-
Edit other policies as needed to add the Okta authentication method.
Was this page helpful?