Configuring the identity provider (IdP) in the Enterprise Federation workflow in Omnissa Connect includes working in both the provider and Omnissa Connect consoles, and this procedure outlines configuring Microsoft Entra ID in the SAML (Security Assertion Markup Language) protocol or in the OIDC (OpenID Connect) protocol with SCIM (System for Cross-domain Identity Management) provisioning.
What is the role of Omnissa Access
The Omnissa Access tenant is provisioned automatically to help with this step. Omnissa Access acts a service provider and self-service federation provides a presentation layer to help simplify connecting your identity provider with your service provider.
What is the role of Omnissa Identity Service?
Enterprise federation using SAML can use the Omnissa Identity Service for SCIM based user provisioning and management. The Omnissa Identity Service integrates Omnissa products and services with third-party cloud-based identity providers for user provisioning and identity federation. Omnissa Identity Service offers centralized user management across the Omnissa platform.
Note: You must configure a separate instance of the Omnissa Identity Service app for enterprise federation. You cannot use a previously configured Omnissa Identity Service app.
Supported authentication protocols
Enterprise federation with SCIM provisioning supports both SAML and OpenID Connect (OIDC) authentication protocols.
Microsoft documentation
- This topic outlines using Microsoft Entra ID as the identity provider, but if you want the latest Microsoft Entra ID documentation, see the Microsoft Entra ID documentation site.
- If you want to use group attributes in Microsoft Entra ID, see the topic Configure group claims for application by using Microsoft Entra ID for the current steps to configure them.
- Need help finding your Microsoft Entra tenant ID? See How to find your Microsoft Entra tenant ID.
- See the full list of attributes for use in the expression builder at Reference for writing expressions for attribute mappings in Microsoft Entra ID.
Requirements
- You must complete the Verify Domains step before you can access the Configure identity provider area of the Set up Enterprise Federation widget in Omnissa Connect.
- You must have admin permissions to integrate apps in Entra ID.
- Some fields have character restrictions, so ensure you are aligning to the parameters set by the field you are configuring. For example, you cannot use the character ampersand (&) in the Department attribute.
SAML
To configure Microsoft Entra ID in the SAML protocol for SCIM provisioning, work in both the Omnissa Connect console and in the Microsoft Entra admin center. It is best to use two browser instances to facilitate copying and pasting values between the consoles.
Note: You can use the preconfigured Omnissa Identity Service app as the baseline to simplify configuration rather than creating an app as outlined in the listed steps.
- Select your identity provider in Omnissa Connect.
- Open a browser instance and go to your Omnissa Connect console.
- Go to Set up Enterprise Federation > Configure identity provider and select Start.
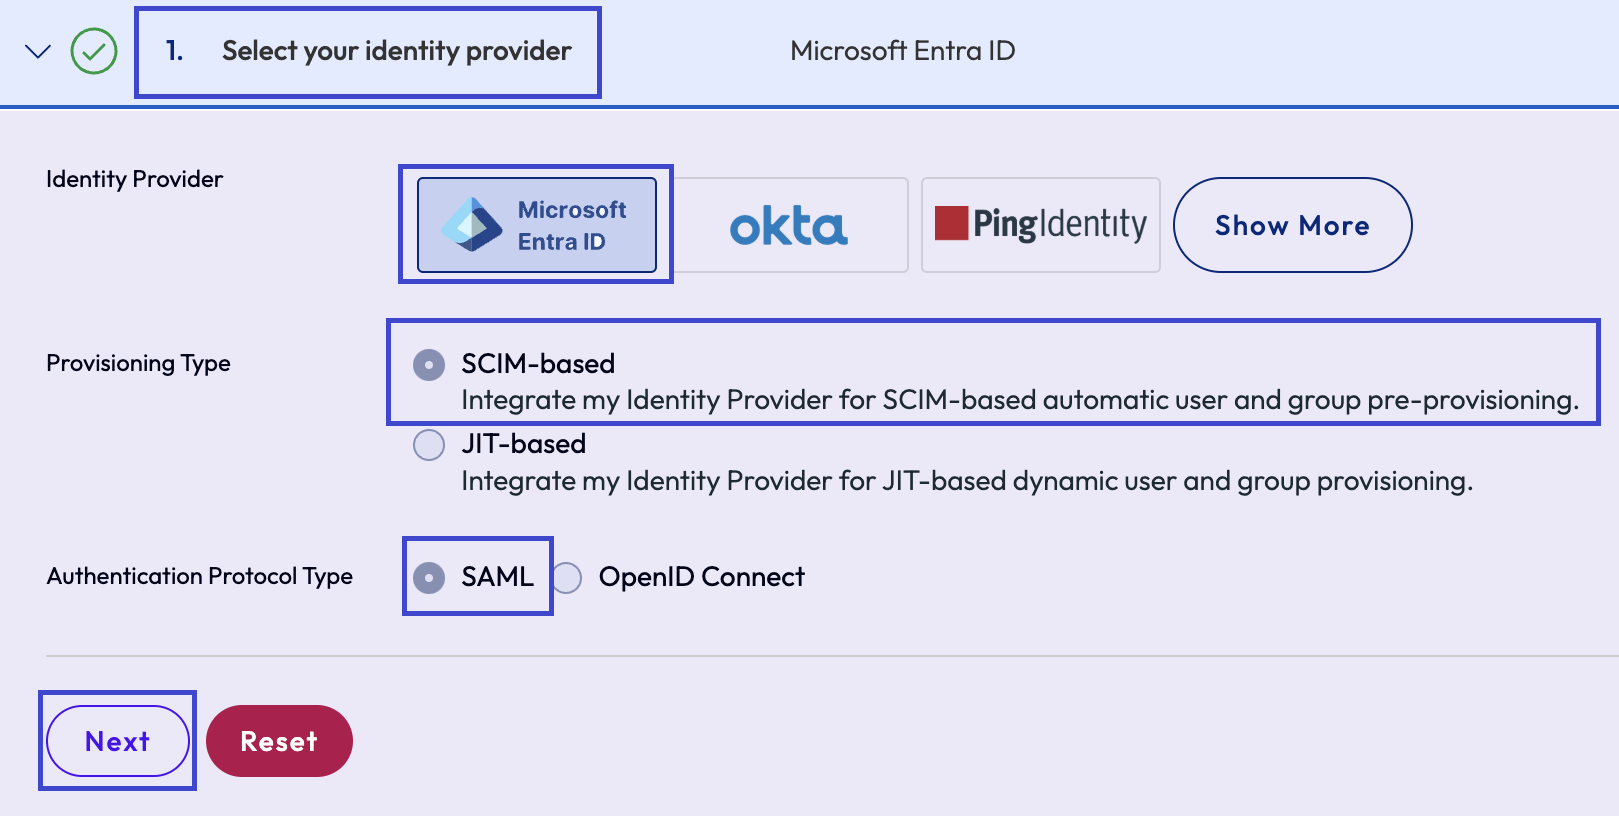
- On the Select your identity provider tab, select the listed settings and then select Next.
- Identity Provider: Microsoft Entra ID
- Provisioning Type: SCIM-based
- Authentication Protocol Type: SAML
- Keep your Omnissa Connect instance open.
- Create an Omnissa Connect app in Microsoft Entra ID.
- Open another browser instance and log in to your Microsoft Entra admin center with admin privileges.
- In Microsoft Entra ID, go to Dashboard > Enterprise applications > Manage > All applications and select to add a new application.
- On the Browse Microsoft Entra Gallery page, select to create your own application.
- Complete the following menu options in the Create your own application widget.
- What's the name of your app?: Enter any name that is easily identified.
- What are you looking to do with your application?: Select Integrate any other application you don’t find in the gallery (Non-gallery).
- Select Create.
- Still working in your Microsoft Entra ID instance, select the app you just created from the All Applications list.
- Select Assign users and groups on the Overview page.
- Follow the instructions to assign users and groups that you want to have access to Omnissa Connect through SSO.
- Set up Microsoft Entra ID for SCIM provisioning.
- In your Microsoft Entra ID instance, return to the app's Overview page after completing the addition of users and groups and select Manage > Provisioning from the left navigation.
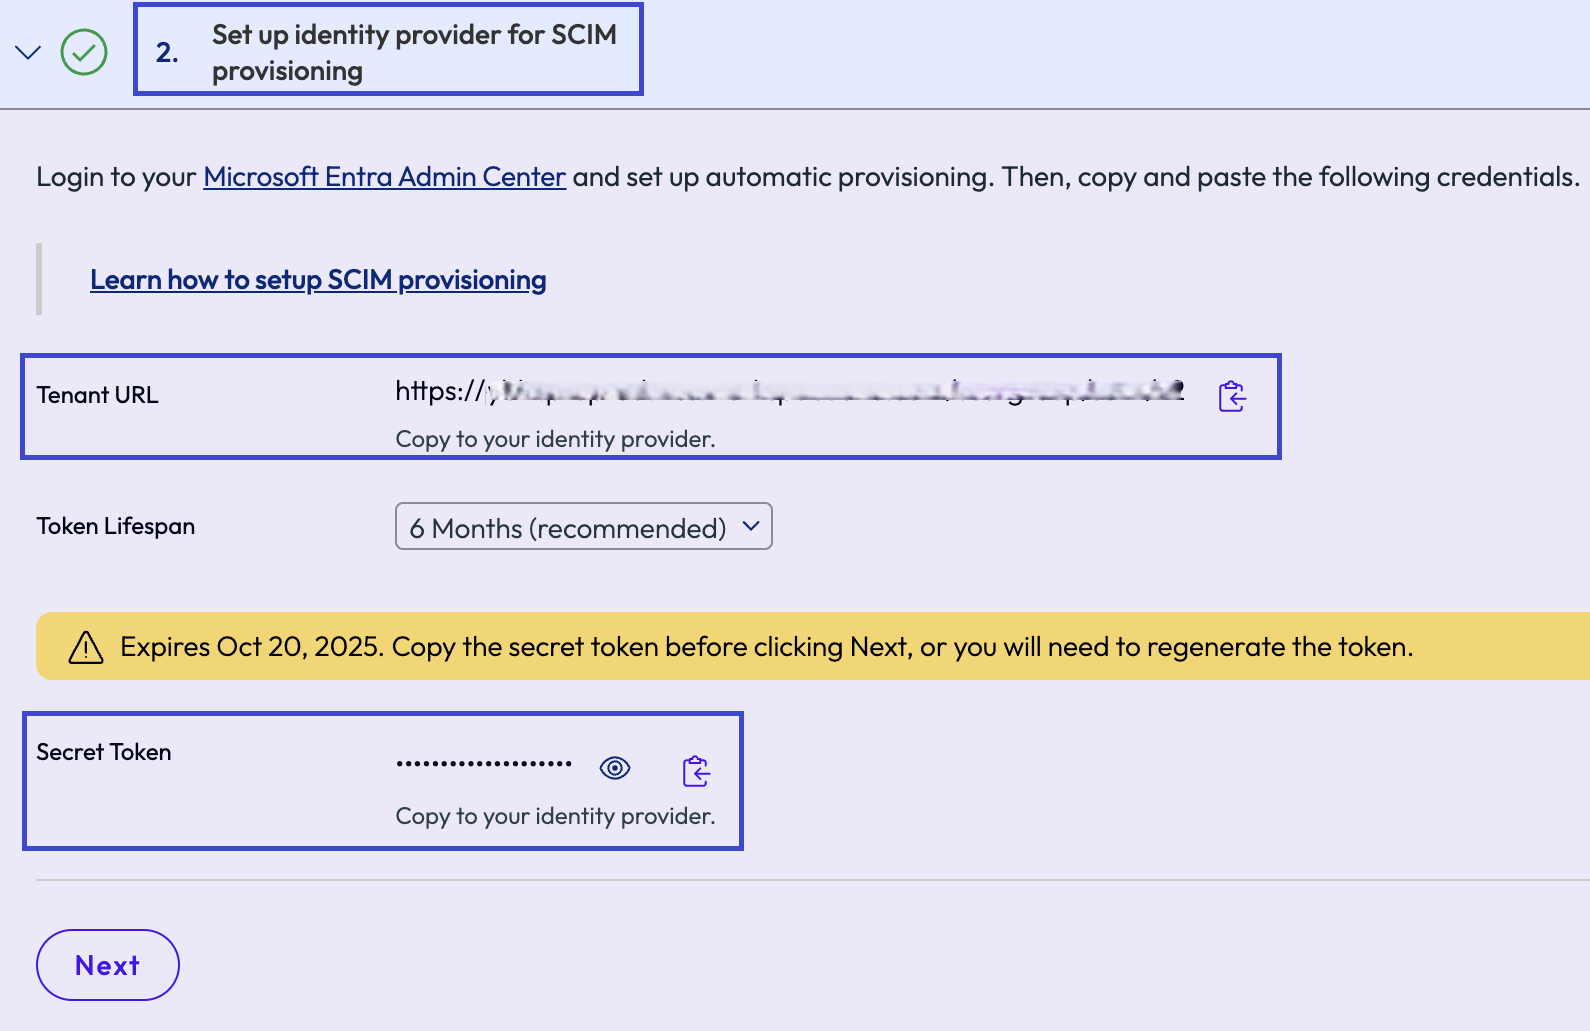
- In your Omnissa Connect browser instance, ensure you are on the Set up identity provider for SCIM provisioning tab so you can copy the Tenant URL and the Secret Token.
- On the Provisioning page in Microsoft Entra ID, complete the following menu items.
- Provisioning Mode: Select Automatic.
- Tenant URL: Copy the Tenant URL from Omnissa Connect and paste it in the text field.
- Secret Token: Copy the Secret Token from Omnissa Connect and paste it in the text field.
- Test Connect: Select to test the connection to ensure the two systems can communicate.
- After completion, return to your Omnissa Connect browser instance and select Next on the Set up identity provider for SCIM provisioning tab to move on the next step.
- Set up SAML in Microsoft Entra ID.
- On the Overview page of your app in Microsoft Entra ID, select Set up single sign on.
- Keep your Omnissa Connect browser instance open.
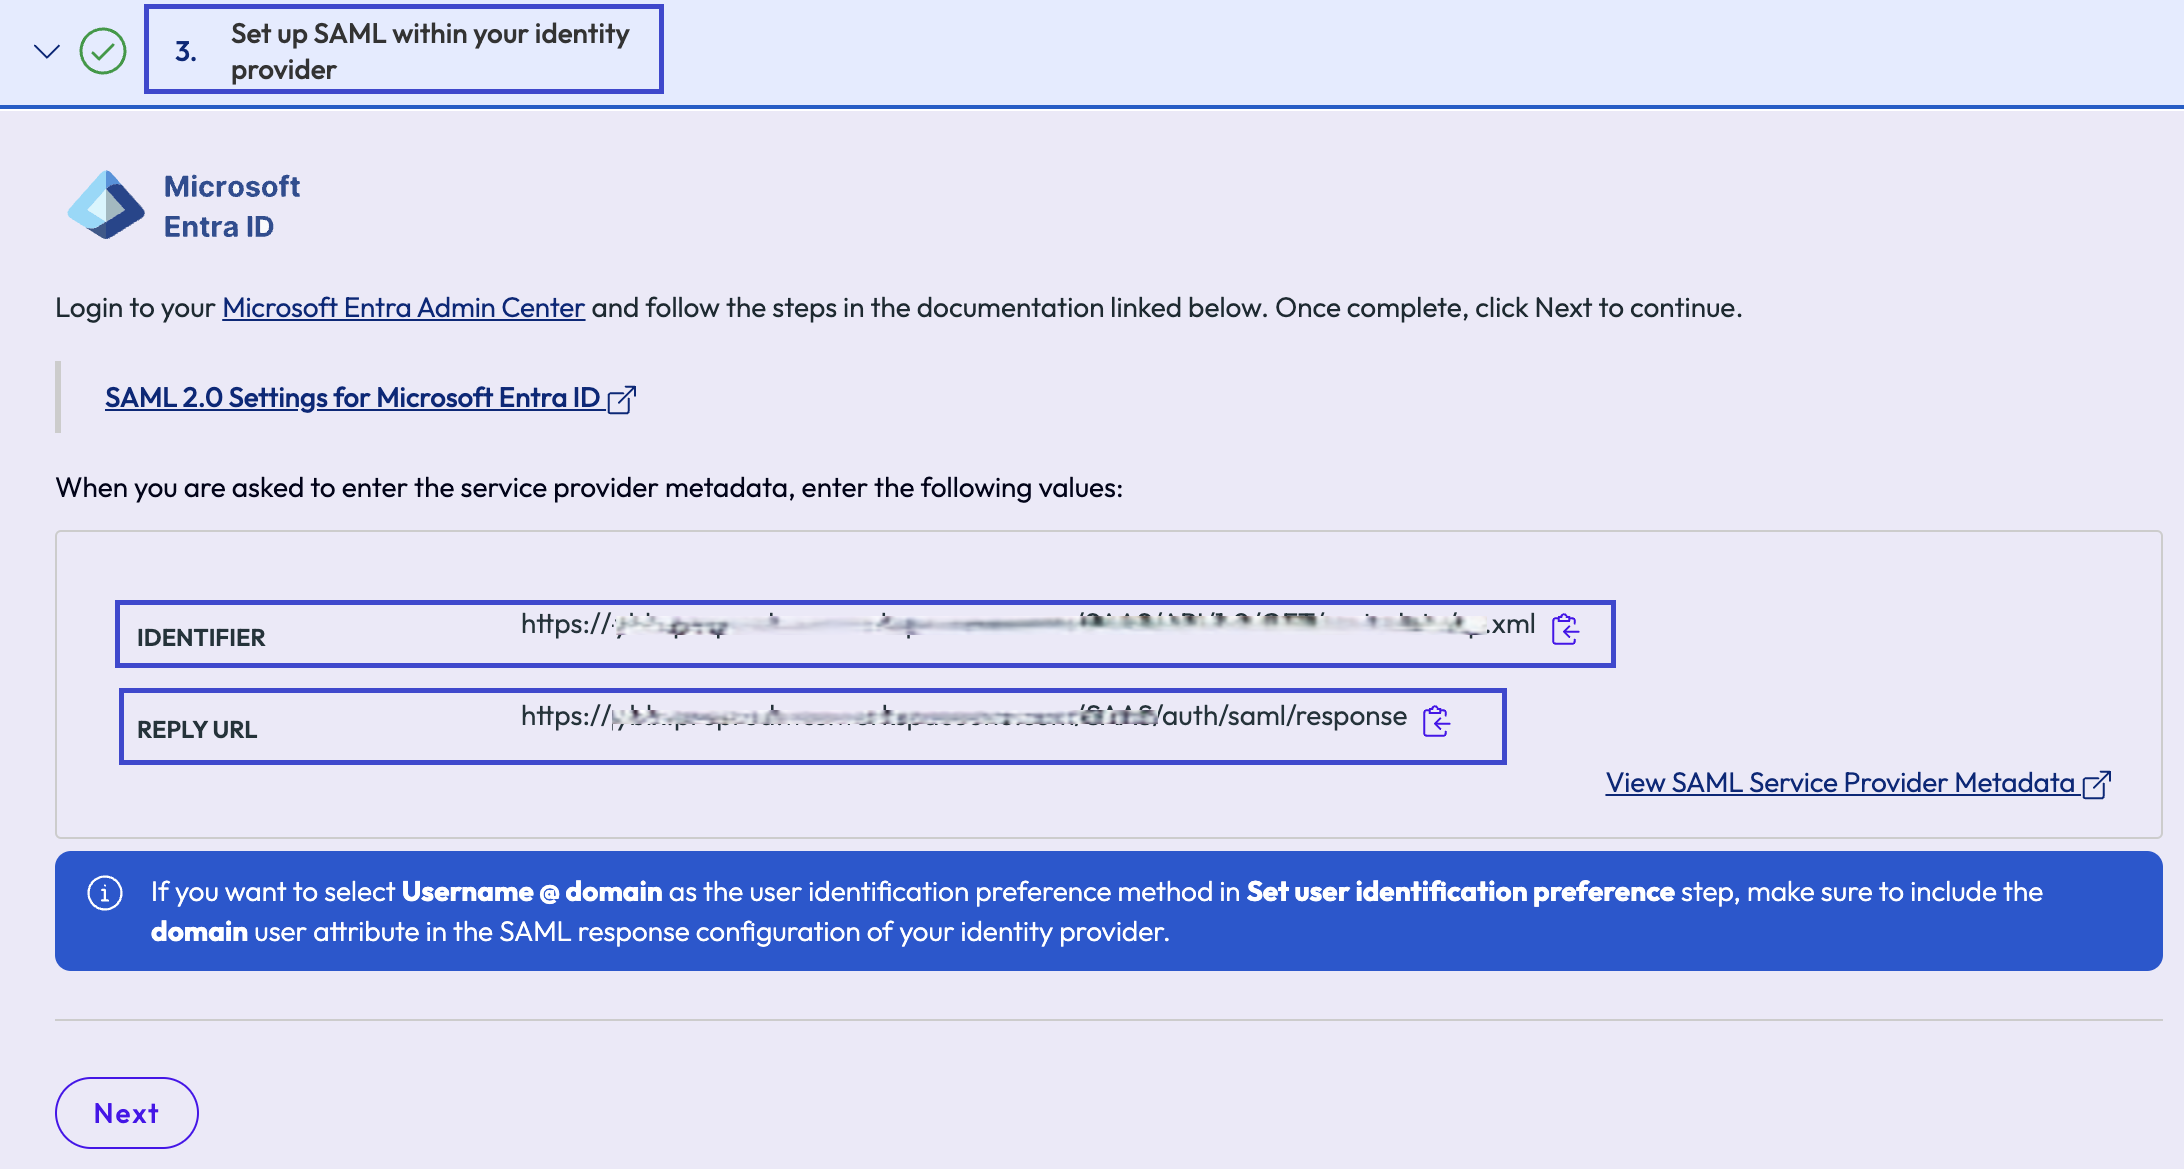
- You are going to copy the Identifier and the Reply URL from the Connect console, from the Set up SAML within your identity provider tab.
- Complete the following menu options in the Basic SAML Configuration widget.
- Identifier (Entity ID): Copy the Identifier from Omnissa Connect and paste it in the text field.
- Reply URL (Assertion Consumer Service URL): Copy the Reply URL from Omnissa Connect and paste it in the text field.
- Ignore optional steps, save your settings, and close the Basic SAML Configuration widget.
- Do not close the Microsoft Entra ID browser instance. Keep the Microsoft Entra admin center browser session open because you are going to edit attributes and claims next.
- Return to your Omnissa Connect browser instance and select Next on the Set up SAML within your identity provider tab to move on the next step.
- On the Overview page of your app in Microsoft Entra ID, select Set up single sign on.
- Set up attributes and claims in Microsoft Entra ID.
- In your app in Microsoft Entra ID, select Manage > Single sign-on from the left navigation and select to edit Attributes and Claims.
- Keep your Omnissa Connect browser instance open.
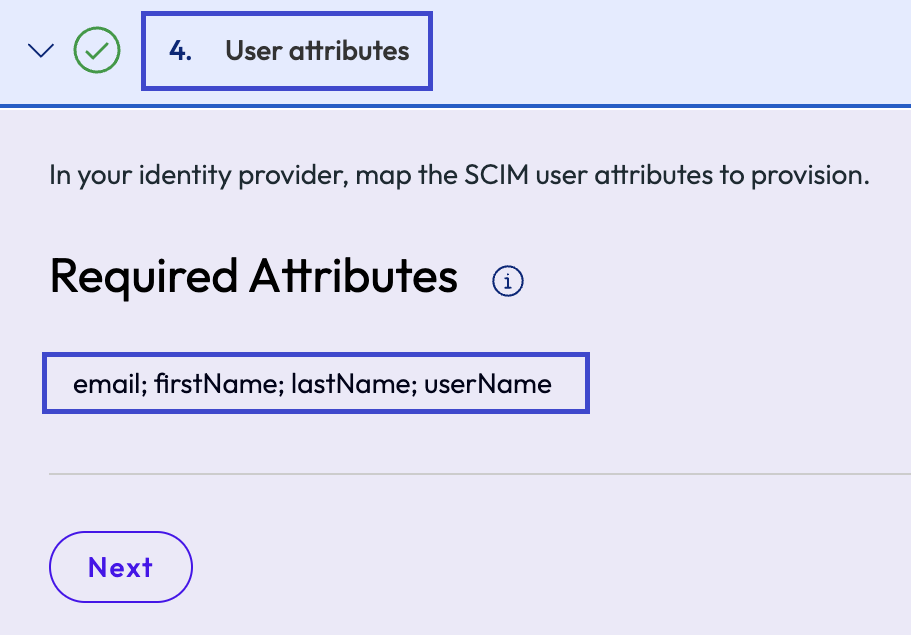
- The User attributes tab lists the user attributes you need to map in Microsoft Entra ID.
- Configure the Required claim in Microsoft Entra ID.
- For the Unique User Identifier (Name ID), the value
user.userprincipalnameworks as long as you selected UPN (user principal name) in Omnissa Connect. - If you select email in Omnissa Connect, you must change the value of the Unique User Identifier to
user.mail.
- For the Unique User Identifier (Name ID), the value
- Configure the Additional claims in Microsoft Entra ID.
- Remove Attribute Namespace values that were assigned by Microsoft Entra ID.
- Add or edit the pre-populated additional claims so that the system recognizes them.
- These strings are case sensitive.
- Name:
email, Source Attribute:user.mail - Name:
firstName, Source Attribute:user.givenname - Name:
lastName, Source Attribute:user.surname - Name:
userName, Source Attribute:user.userprincipalname - Name:
userPrincipalName, Source Attribute:user.userprincipalname
- Name:
- Optionally, you can add the name
domainand map it to the applicable domain. - In Omnissa Connect, on the User attributes tab, select Next to move to the Configure your identity provider step.
- In your app in Microsoft Entra ID, select Manage > Single sign-on from the left navigation and select to edit Attributes and Claims.
- Configure the identity provider in Omnissa Connect.
- In Omnissa Connect, on the Configure your identity provider tab, enter a name in the IdP Display Name text field.
- Keep your Microsoft Entra ID browser instance open.
- In the app, on the Single sign-on page, in the SAML Certificate section, copy the App Federation Metadata Url.
- Paste the App Federation Metadata Url from Microsoft Entra ID into the Metadata text field in Omnissa Connect.
- In Omnissa Connect, select URL as the Metadata type.
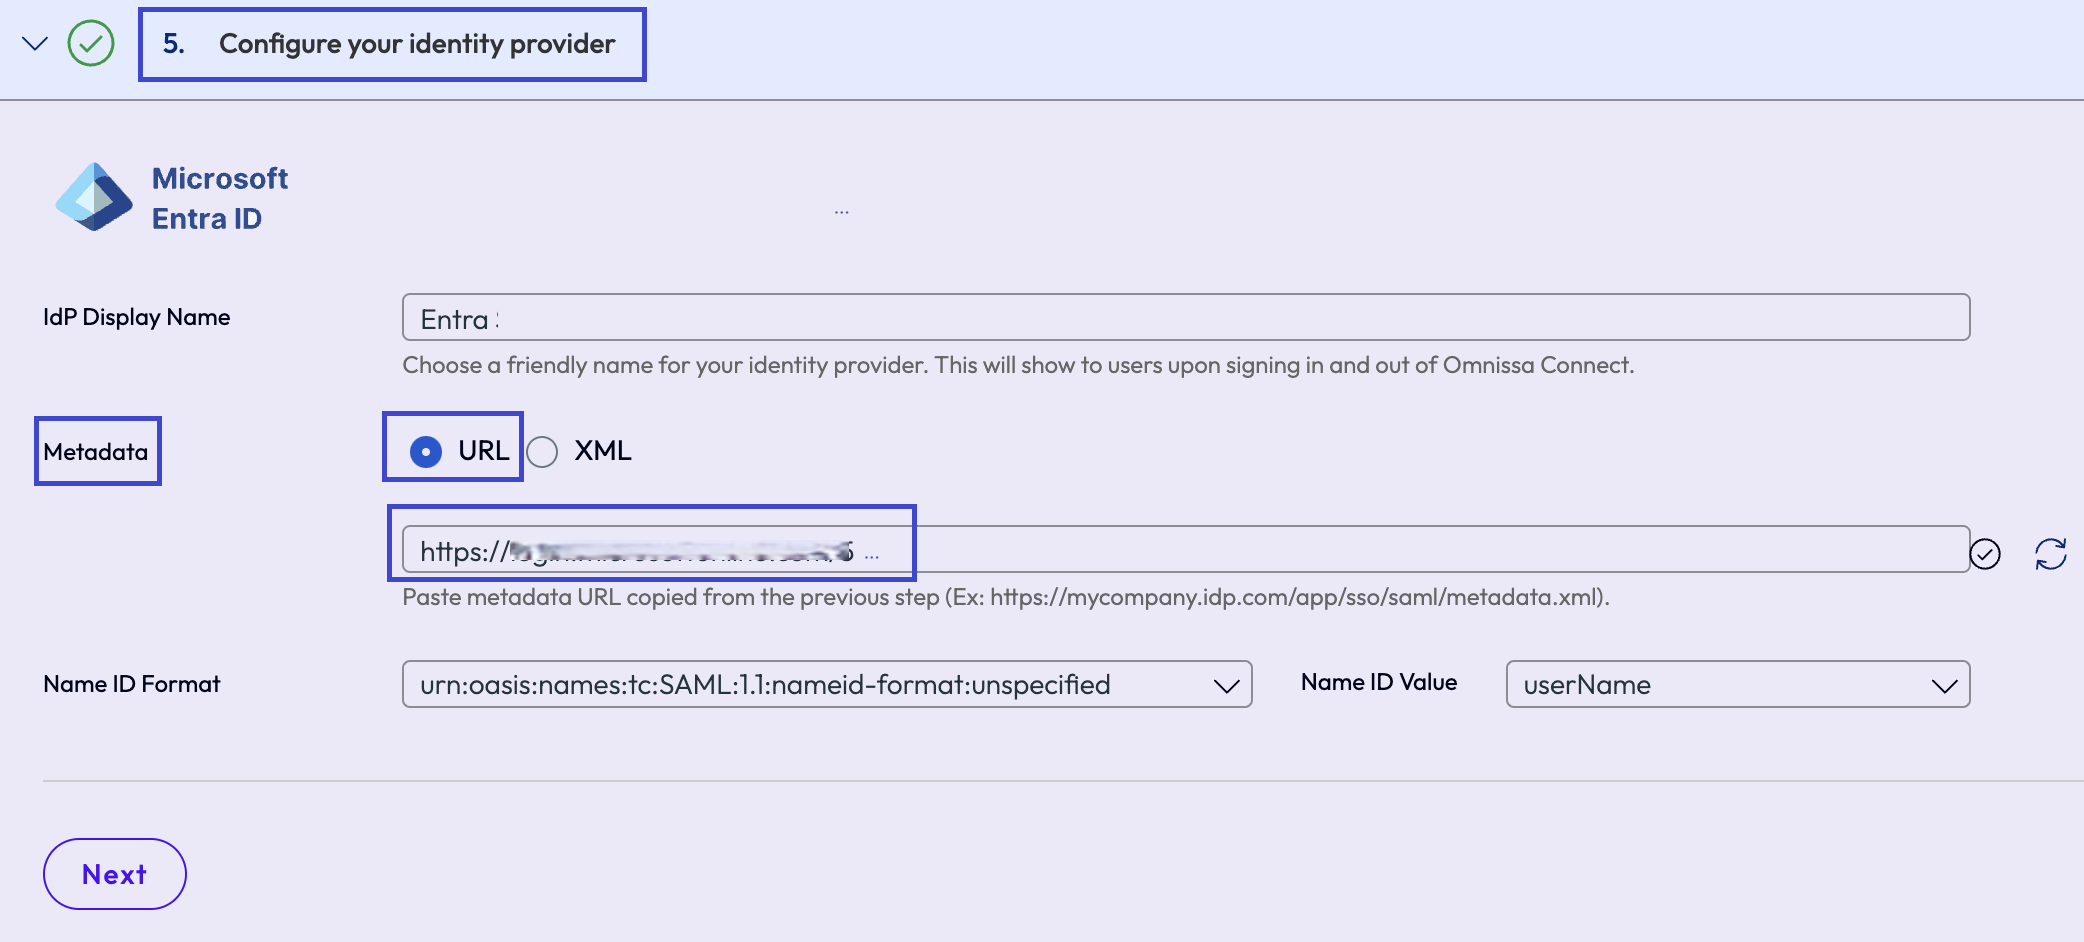
- Validation of the metadata starts automatically.
- When validation finishes, a green check box icon indicates that the file was read and parsed successfully.
- If the validation returns an error, check that the URL you entered is correct.
- Select Next in Omnissa Connect to move to the next tab, Set user identification preference.
- In Omnissa Connect, on the Configure your identity provider tab, enter a name in the IdP Display Name text field.
- Configure the user identification preference in Omnissa Connect.
- On the Set user identification preference tab, select how users of your enterprise are going to identify themselves when accessing Omnissa Connect from the Omnissa Connect discovery page.
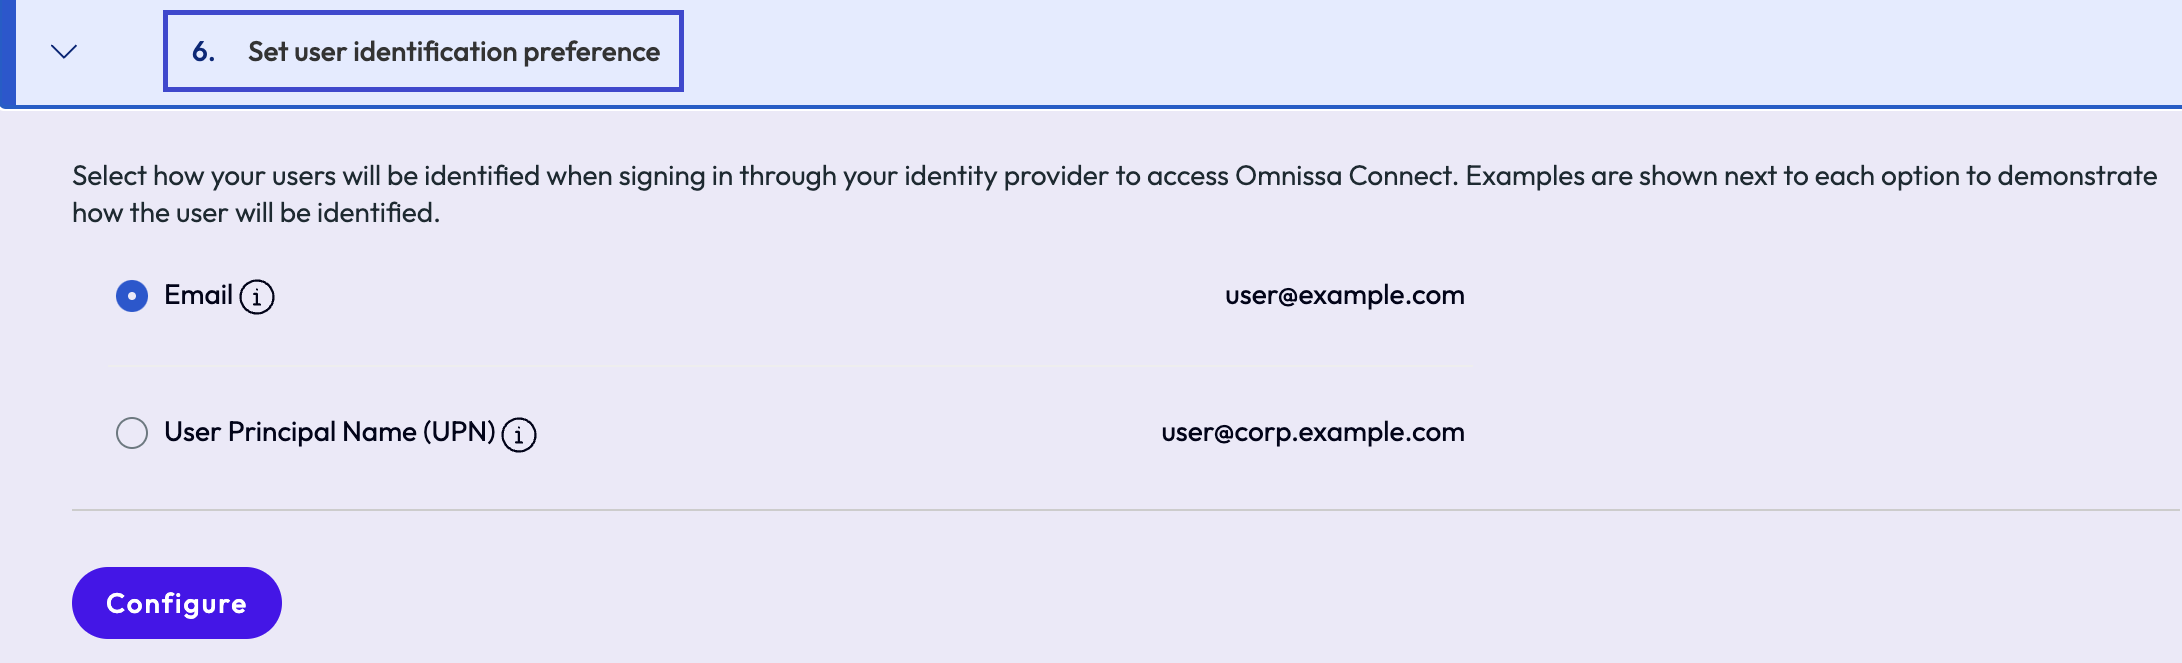
- User identification is different from how the user authenticates against your enterprise identity provider.
- Follow the examples shown on the screen to choose the correct one.
- Consider that for all the options, the chosen value must end with @DomainName.com where domainName is the one you registered during the verification step.
- Select Configure to complete the process.
- On the Set user identification preference tab, select how users of your enterprise are going to identify themselves when accessing Omnissa Connect from the Omnissa Connect discovery page.
- Check and activate provisioning for the app in Microsoft Entra ID.
- Return to your Microsoft Entra ID browser instance and navigate to your enterprise integration.
- Find and select your app in the Enterprise applications > All applications list.
- In the left navigation, select Manage > Provisioning.
- On the Overview screen, select to Start Provisioning from the top menu options.
OIDC
To configure Microsoft Entra ID in the OpenID Connect (OIDC) protocol for SCIM provisioning, work in both the Omnissa Connect console and in the Microsoft Entra admin center. It is best to use two browser instances to facilitate copying and pasting values between the consoles.
- Select your identity provider in Omnissa Connect.
- Open a browser instance and go to your Omnissa Connect console.
- Go to Set up Enterprise Federation > Configure identity provider and select Start.
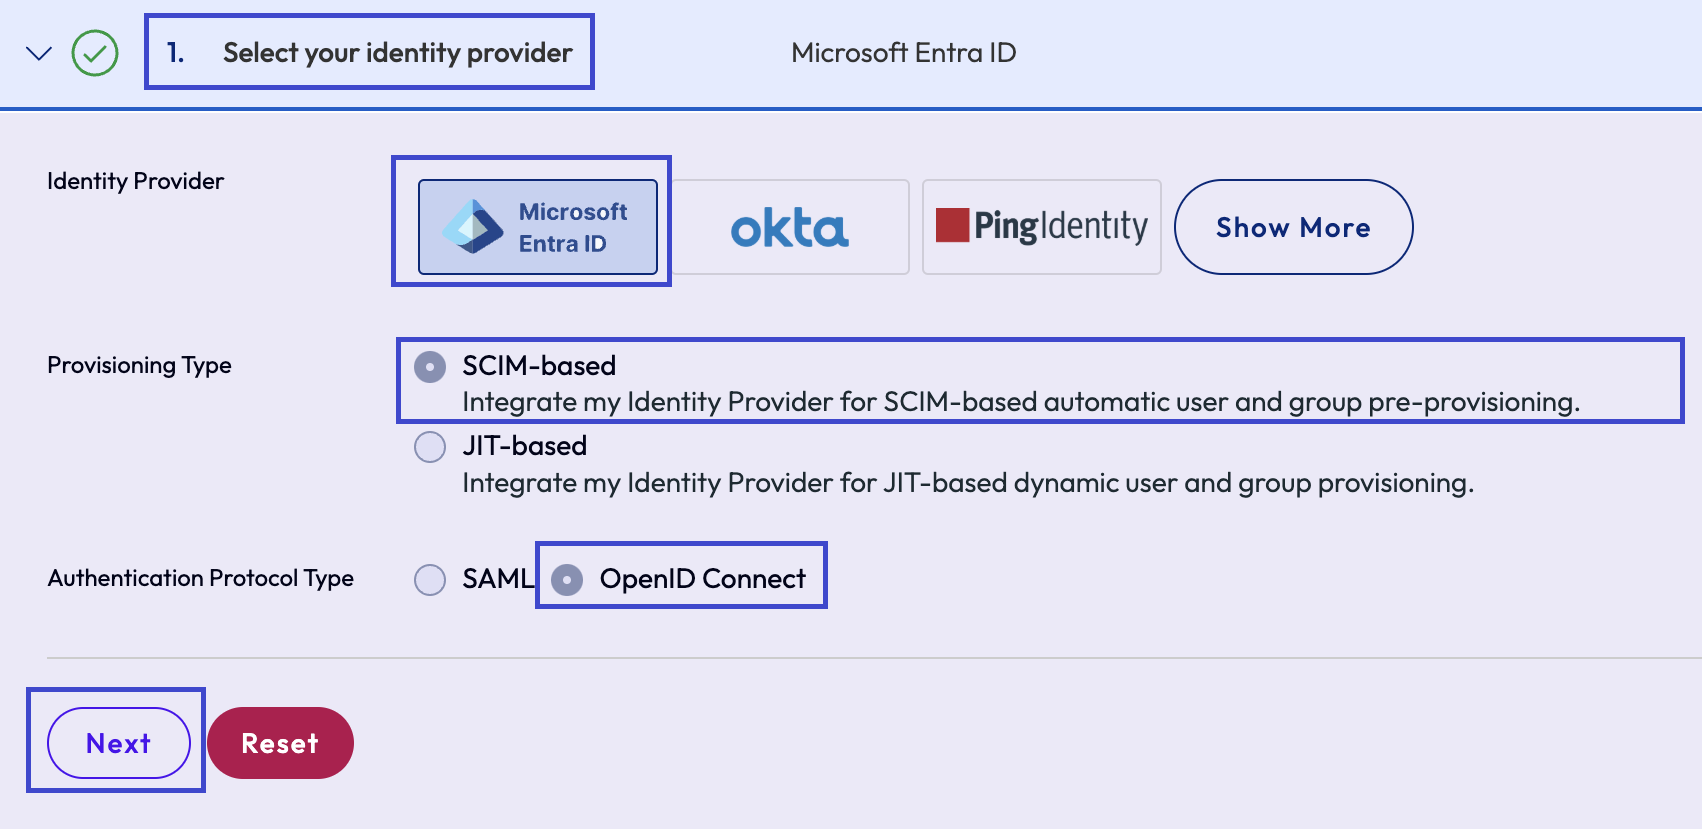
- In the Select your identity provider tab, select the listed settings and then select Next.
- Identity Provider: Microsoft Entra ID
- Provisioning Type: SCIM-based
- Authentication Protocol Type: OpenID Connect
- Keep your Omnissa Connect browser instance open.
- Add an Omnissa Connect app to Microsoft Entra ID.
- Open another browser instance and log in to your Microsoft Entra admin center with admin privileges.
- In Microsoft Entra ID, go to Dashboard > Enterprise applications > Manage > All applications and select to add a new application.
- On the Browse Microsoft Entra Gallery page, select to create your own application.
- Complete the following menu options in the Create your own application widget.
- What's the name of your app?: Enter any name that is easily identified.
- What are you looking to do with your application?: Select Integrate any other application you don’t find in the gallery (Non-gallery).
- Select Create.
- Assign users and groups in Microsoft Entra ID.
- Select the app you just created from the All Applications list and then select Assign users and groups on the Overview page.
- Follow the instructions to assign users and groups that you want to have access to Omnissa Connect through SSO.
- Set up Microsoft Entra ID for SCIM provisioning.
- In your Microsoft Entra ID instance, return to the app's Overview page after completing the addition of users and groups and select Manage > Provisioning from the left navigation.
- In your Omnissa Connect browser instance, ensure you are on the Set up identity provider for SCIM provisioning tab so you can copy the Tenant URL and the Secret Token.
- On the Provisioning page in Microsoft Entra ID, complete the following menu items.
- Provisioning Mode: Automatic
- Tenant URL: Copy the Tenant URL from Omnissa Connect and paste it in the text field.
- Secret Token: Copy the Secret Token from Omnissa Connect step and paste it in the text field.
- Test Connect: Select to test the connection to ensure the two systems can communicate.
- After completion, return to your Omnissa Connect browser instance and select Next on the Set up identity provider for SCIM provisioning tab to move on the next step.
- Set up Microsoft Entra ID with a redirect URI for OIDC.
- In Microsoft Entra ID, navigate to Enterprise applications and select the link for application registrations.
- Keep your Omnissa Connect browser instance open.
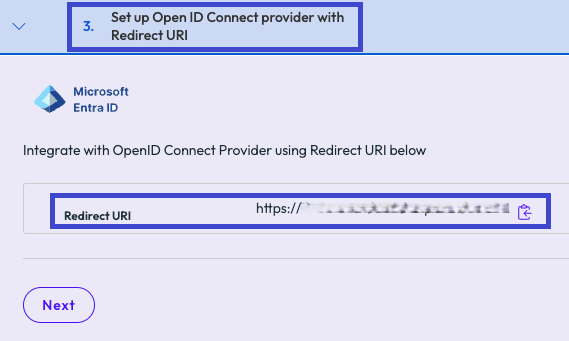
- Ensure you are on the Set up Open ID Connect provider with Redirect URI tab so you can copy the Redirect URI from the Connect console.
- Back on the Microsoft Entra ID instance, select New Registration.
- In the Register an application widget, complete the listed settings.
- Name: Enter a name to help identify the app.
- Supported account types: Select Accounts in this organizational directory only (Single tenant).
- Redirect URI: Select Web and paste the Redirect URI from Omnissa Connect into the text field.
- Register the app. The system displays the message Successfully created application name.
- In Microsoft Entra ID, navigate to Enterprise applications and select the link for application registrations.
- Set up attributes and claims in Microsoft Entra ID.
- In Microsoft Entra ID, in the Overview of the app you just registered, select Go to Enterprise applications.
- Select Manage > Single sign-on from the left navigation and select to edit Attributes and Claims.
- Keep your Omnissa Connect browser instance open.
- The User attributes tab lists the user attributes you need to map in Microsoft Entra ID.
- Configure the Required claim in Microsoft Entra ID.
- For the Unique User Identifier (Name ID), the value
user.userprincipalnameworks as long as you selected UPN (user principal name) in Omnissa Connect. - If you select email in Omnissa Connect, you must change the value of the Unique User Identifier to
user.mail.
- For the Unique User Identifier (Name ID), the value
- Configure Additional claims in Microsoft Entra ID.
- Remove Attribute Namespace values that were assigned by Microsoft Entra ID.
- Add or edit the pre-populated additional claims so that the system recognizes them.
- These strings are case sensitive.
- Name:
email, Source Attribute:user.mail - Name:
firstName, Source Attribute:user.givenname - Name:
lastName, Source Attribute:user.surname - Name:
userName, Source Attribute:user.userprincipalname - Name:
userPrincipalName, Source Attribute:user.userprincipalname
- Name:
- Optionally, you can add the name
domainand map it to the applicable domain. - In Omnissa Connect, on the User attributes step, select Next to move to the Configure your identity provider step.
- Configure the identity provider in Omnissa Connect.
- In Omnissa Connect, configure the Configure your identity provider tab.
- Keep your Microsoft Entra ID browser instance open.
- In the registered app, go to the Overview and select Endpoints.
- Copy the OpenID Connect metadata document URL from Microsoft Entra ID.
- Keep your Microsoft Entra ID browser instance open.
- Paste the OpenID Connect metadata document endpoint URL into the Configure URL text field in Omnissa Connect.
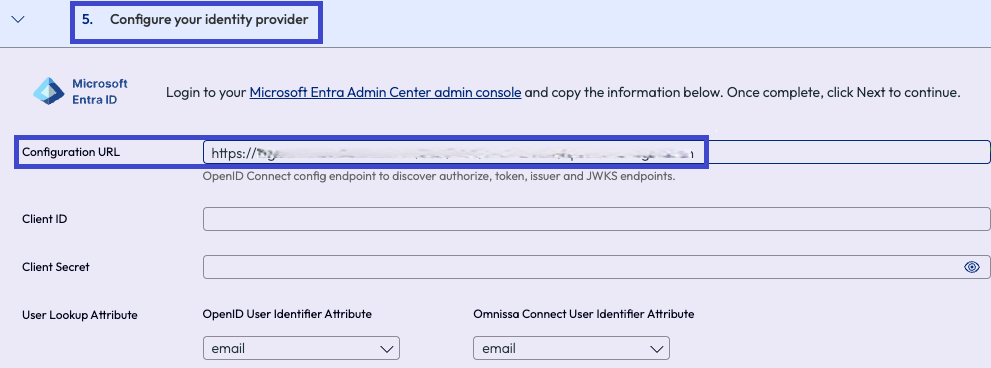
- Note that we still need a Client ID and a Client Secret.
- Let's get these from Microsoft Entra ID.
- In the registered app in Microsoft Entra ID, in the left navigation, select Manage > Certificate & secrets.
- Select the Add a certificate or secret link.
- Select New client secret.
- Select Add to generate the secret on the Client secrets tab.
- Copy the Value for pasting in Omnissa Connect in the Client Secret text field.
- Copy the Secret ID for pasting in Omnissa Connect in the Client ID text field.
- If you navigate away from this page without copying the strings, you must generate a new secret.
- On the Configure your identity provider tab in Omnissa Connect, paste the listed values.
- Paste the Value from Microsoft Entra ID to the Client Secret text field in Omnissa Connect.
- Paste the Secret ID from Microsoft Entra ID to the Client ID text field in Omnissa Connect.
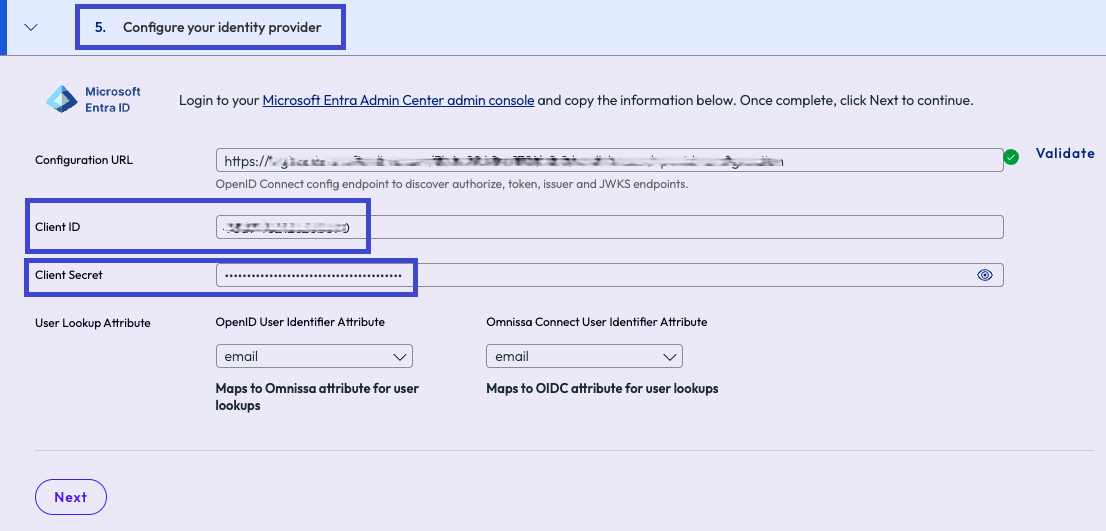
- Configure the User Lookup Attribute menu item by specifying the Omnissa Connect attribute to map to the OpenID Connect attribute.
- Select Next to move to the next step in Omnissa Connect.
- In Omnissa Connect, configure the Configure your identity provider tab.
- Configure the user identification preference in Omnissa Connect.
- On the Set user identification preference tab, select how users of your enterprise are going to identify themselves when accessing Omnissa Connect from the Omnissa Connect discovery page.
- User identification is different from how the user authenticates against your enterprise identity provider.
- Follow the examples shown on the screen to choose the correct one.
- Consider that for all the options, the chosen value must end with @DomainName.com where domainName is the one you registered during the verification step.
- Select Configure to complete the process.
- On the Set user identification preference tab, select how users of your enterprise are going to identify themselves when accessing Omnissa Connect from the Omnissa Connect discovery page.
- Update the app manifest file in Entra ID.
To prevent an authentication error message, you must update the manifest file for your app.- Return to your Microsoft Entra ID browser instance, go to Identity > Applications > App registrations.
- Select the app you created.
- Select Manifest in the left navigation panel.
- Locate the
acceptMappedClaimsproperty. - Update the value to true:
"acceptMappedClaims": true,. - Save your settings.
- Check and activate provisioning for the app in Microsoft Entra ID.
- In your Microsoft Entra ID browser instance and navigate to your enterprise integration.
- Find and select your app in the Enterprise applications > All applications list.
- In the left navigation, select Manage > Provisioning.
- On the Overview screen, select to Start Provisioning from the top menu options.
What to do next
In this step you configured Microsoft Entra ID as the IdP, selected the SCIM based user provisioning, set up SAML or OIDC authentication, and selected the value for user identification. Move on to validating and activating your setup.
Was this page helpful?