Limited Availability
Horizon 8 offers Nutanix integration with limited availability. For more details on the functionality available in this limited availability release, see Horizon 8 Support for Nutanix AHV Limited Availability.
If you are a current Omnissa customer and you would like to request access to this feature, contact your sales representative or partner. If you are not a current Omnissa customer and you would like to request access to this feature, contact getHorizon8NutanixLA@omnissa.com.Procedure
-
Go to Inventory > Desktops > Add.
-
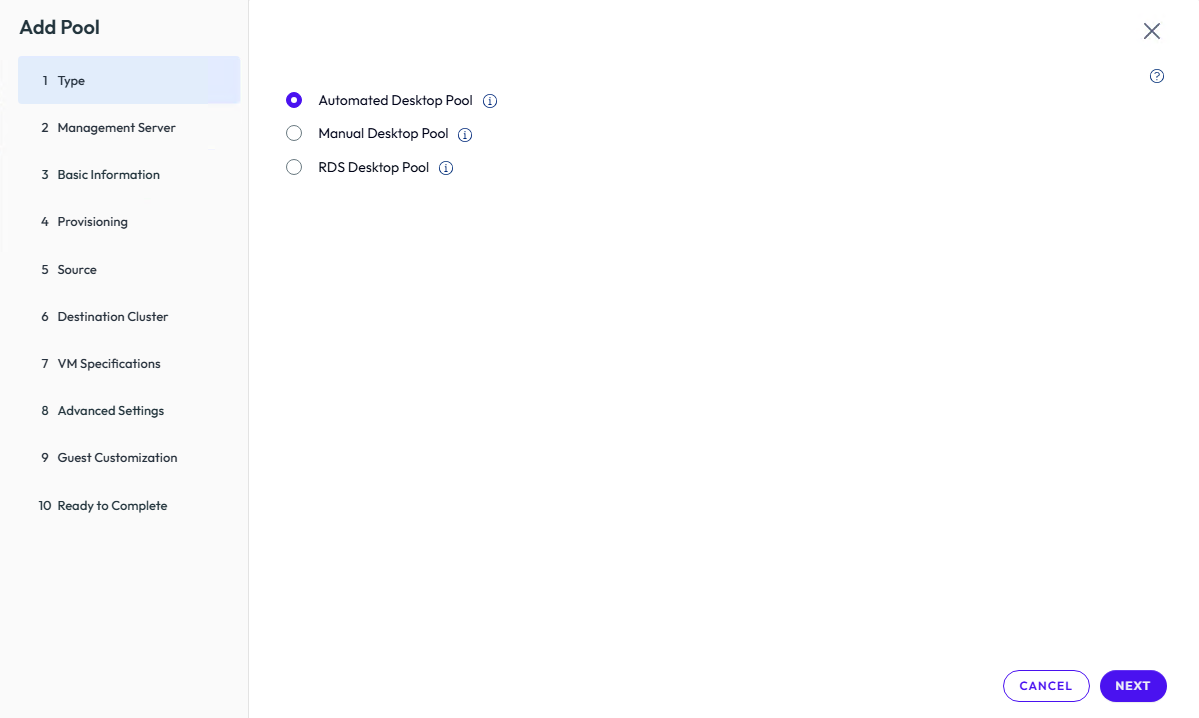
In Type, complete the following:
-
Select Automated Desktop Pool.
-
Click Next.
-
-
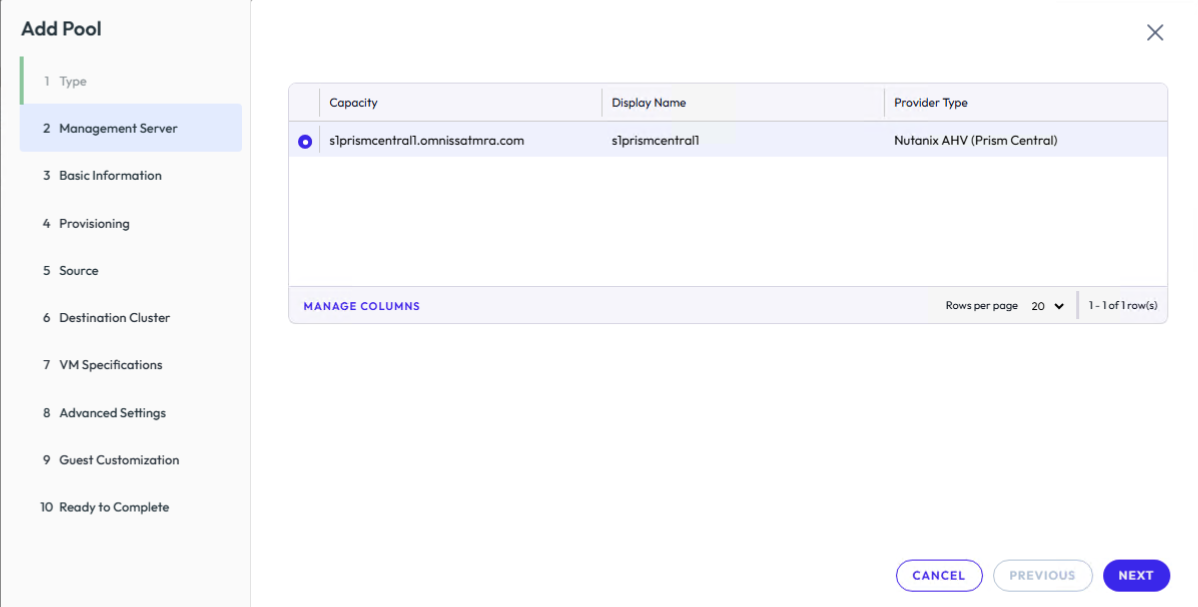
In Server Management, under Select Capacity, choose your Prism Central instance.
-
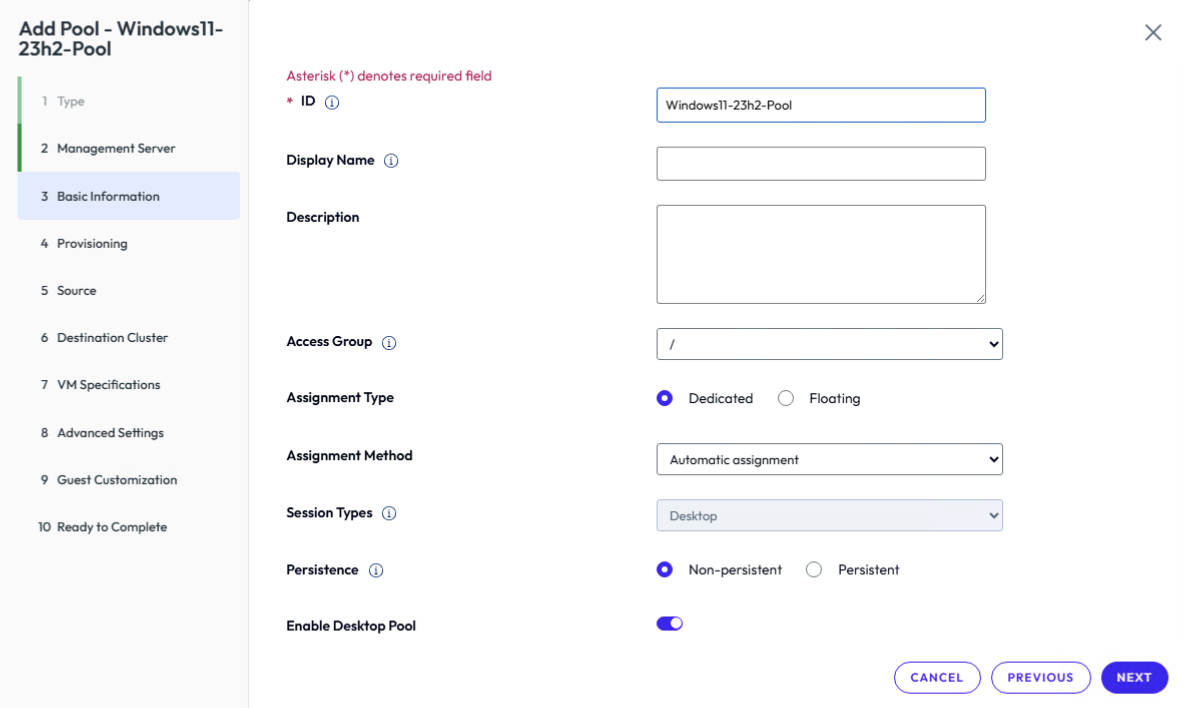
In Basic Information, complete the following:
-
ID - Enter the Pool ID.
-
Display Name - Enter the Pool Display Name.
-
Description - Enter a description.
-
Access Group - Select the Access Group.
-
Assignment Type - Select Dedicated or Floating.
-
Assignment Method - Select an assignment method.
-
Session Types - Desktop is selected.
-
Persistence - Select Persistent or Non-Persistent.
-
Enable Desktop Pool - Select to enable or disable.
-
Click Next.
-
-
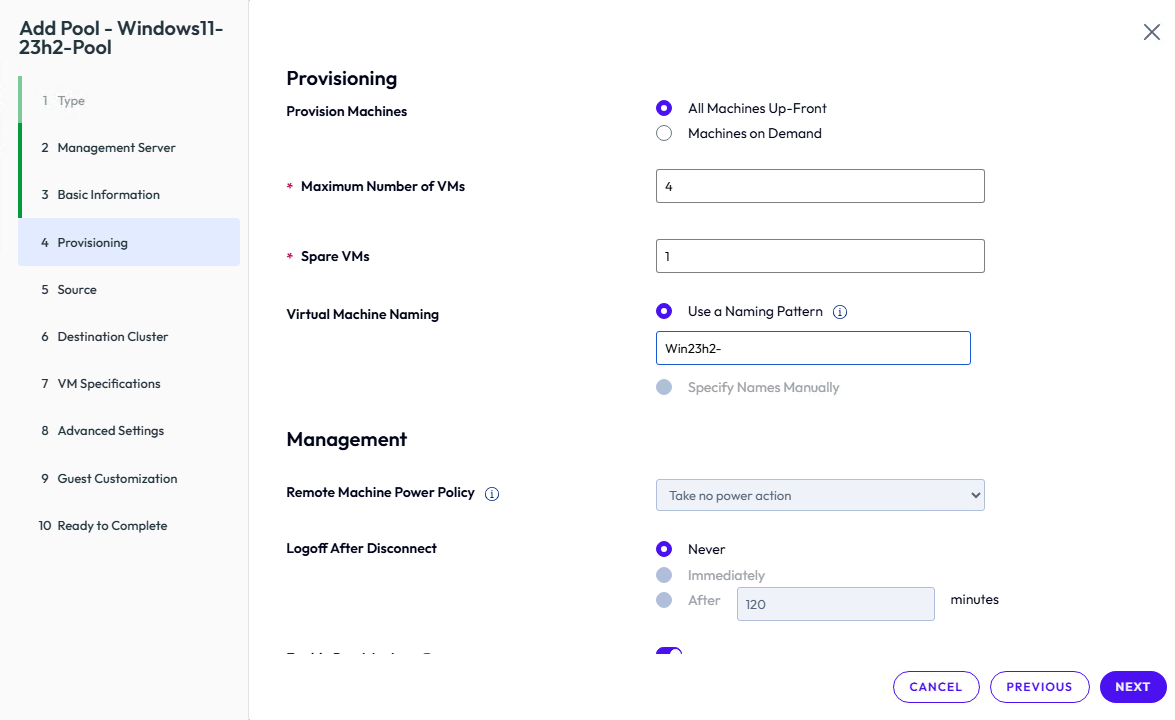
In Provisioning Settings, configure the following:
-
Provision Machines - Select All Machines Up-Front or Machines on Demand.
-
Maximum Number of VMs - Enter the max VMs.
-
Spare VMs - Enter the spare count.
-
Virtual Machine Naming - Enter the naming pattern.
-
Remote Machine Power Policy - Take no power action is selected.
-
Logoff After Disconnect - Select Never, Immediately, or After an entered amount of minutes.
-
Enable Provisioning - Select to enable or disable.
-
Stop Provisioning on Error - Select to enable or disable.
-
Click Next.
-
-
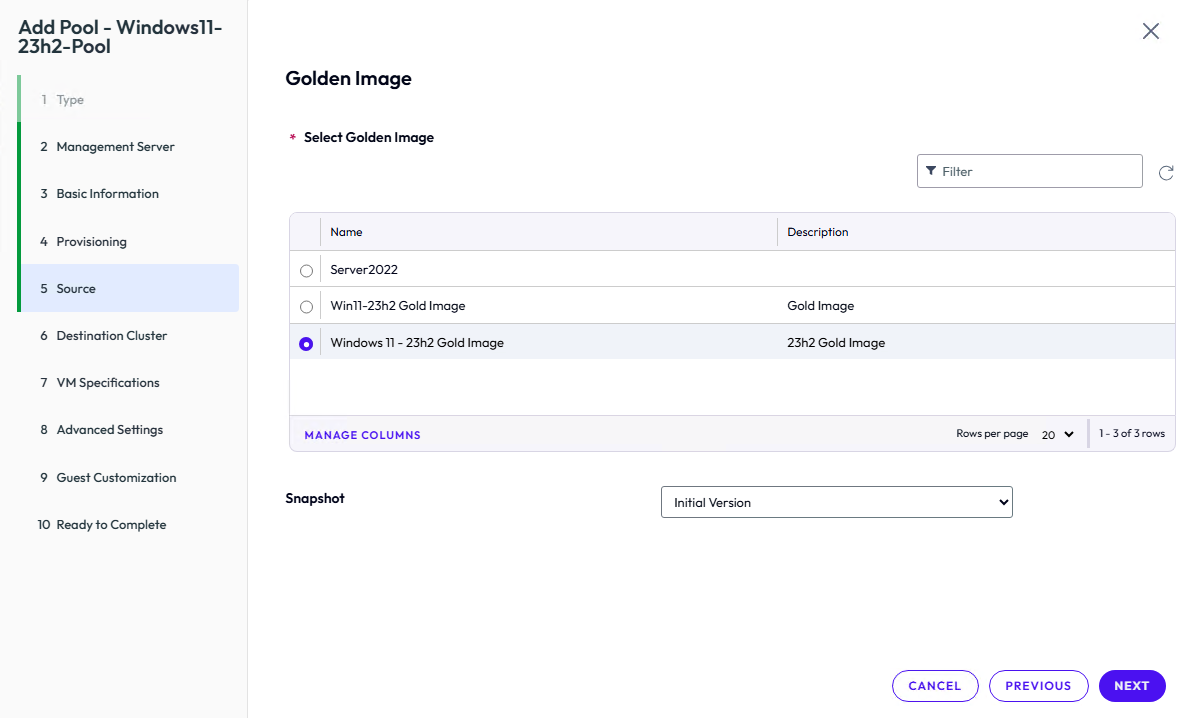
In Source, complete the following:
-
Select your Golden Image VM Template (created earlier).
-
Click Next.
-
-
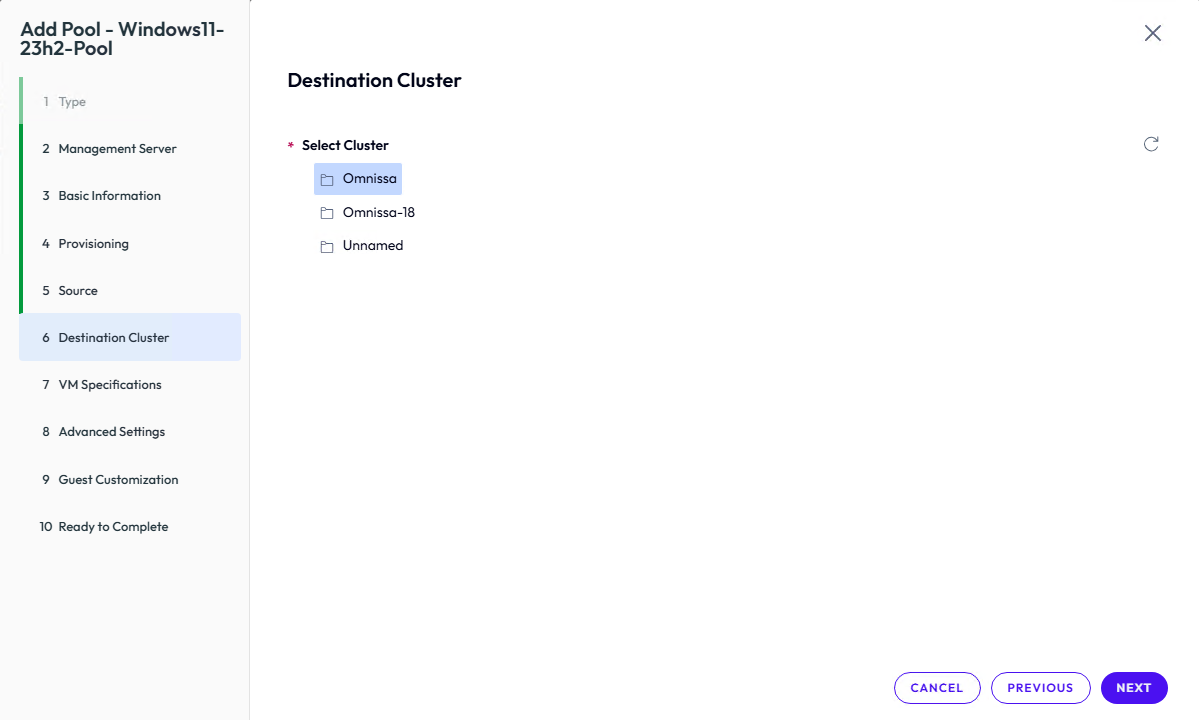
In Destination, complete the following:
-
Select your Cluster.
-
Click Next.
-
-
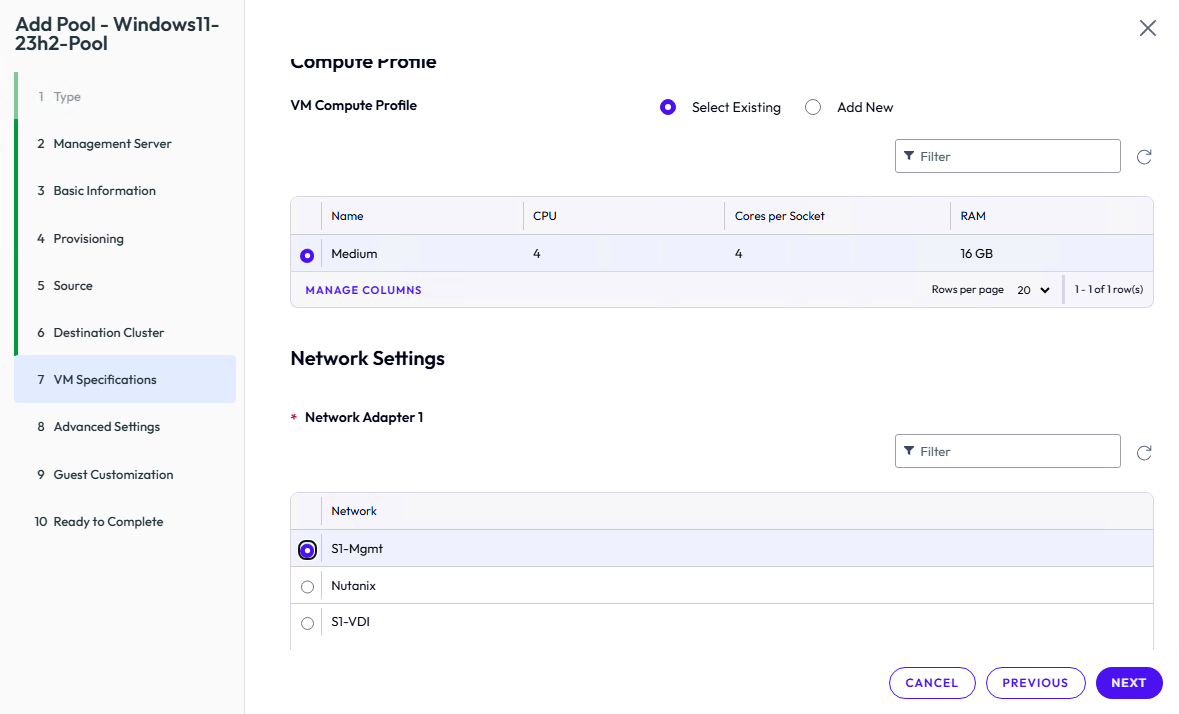
In VM Specifications, complete the following:
-
Choose an existing Compute Profile or click Add New.
-
Select the Network Adapter Subnet for the VMs.
-
Click Next.
-
-
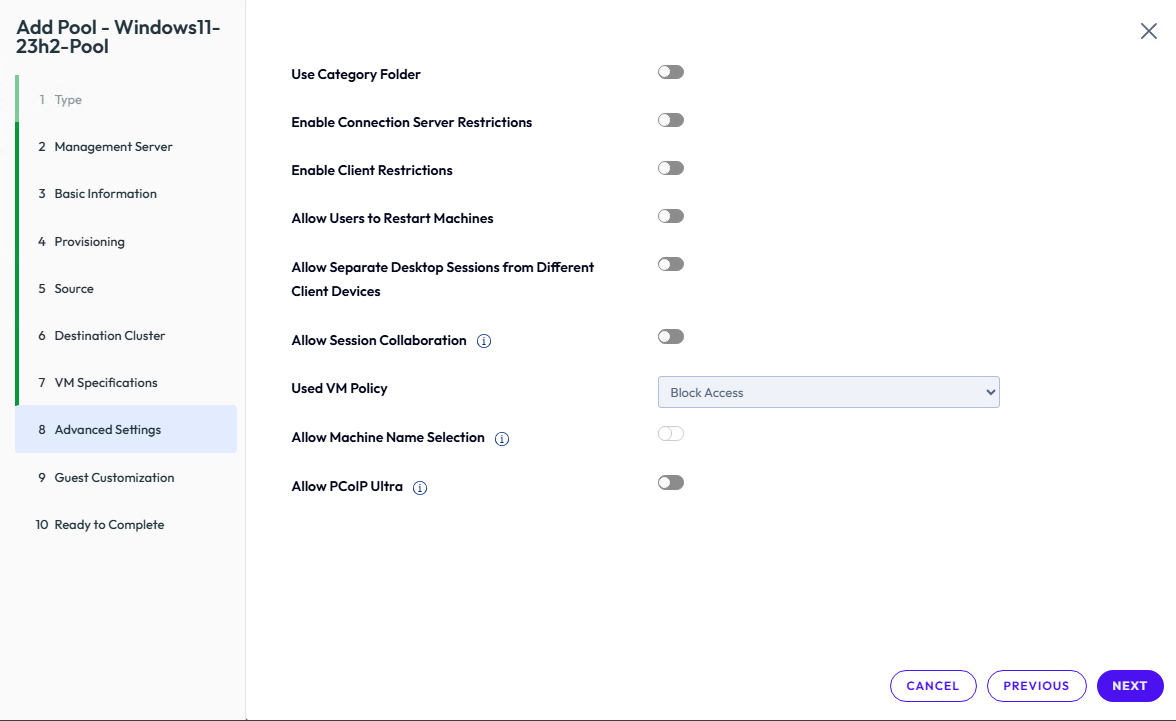
In Advanced Settings, click Next (use defaults unless custom options are needed).
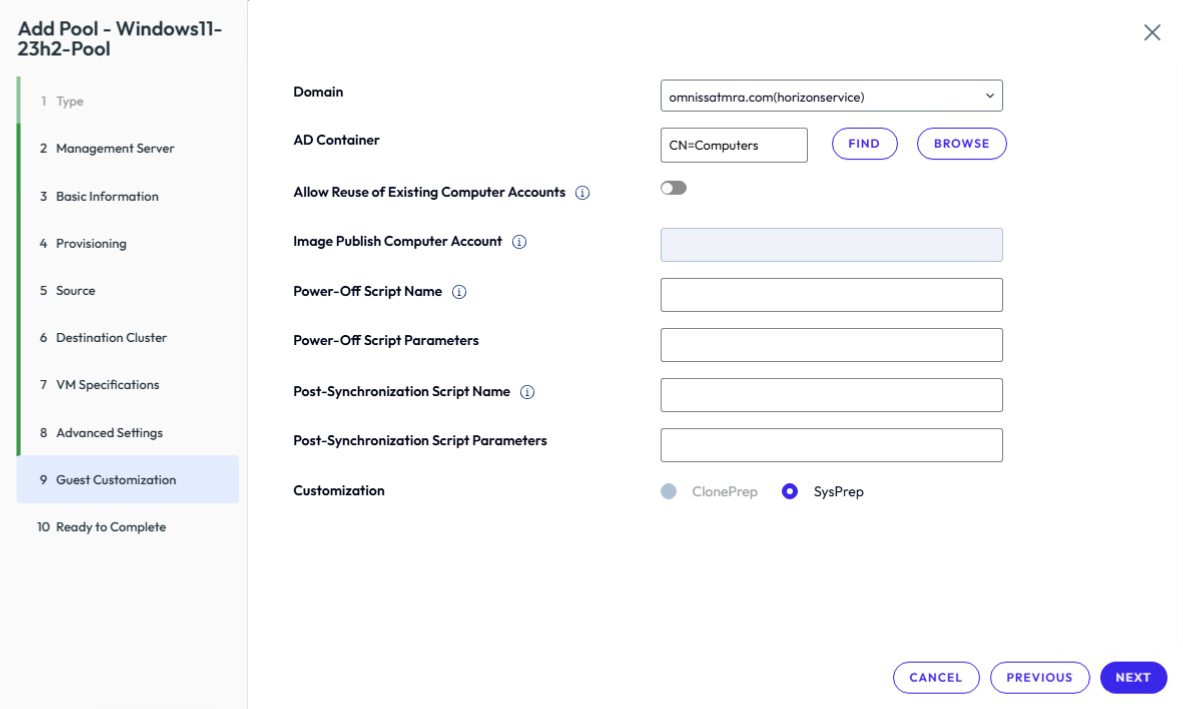
- In Guest Customization, click Next (ensure correct Sysprep or Custom Spec is used).
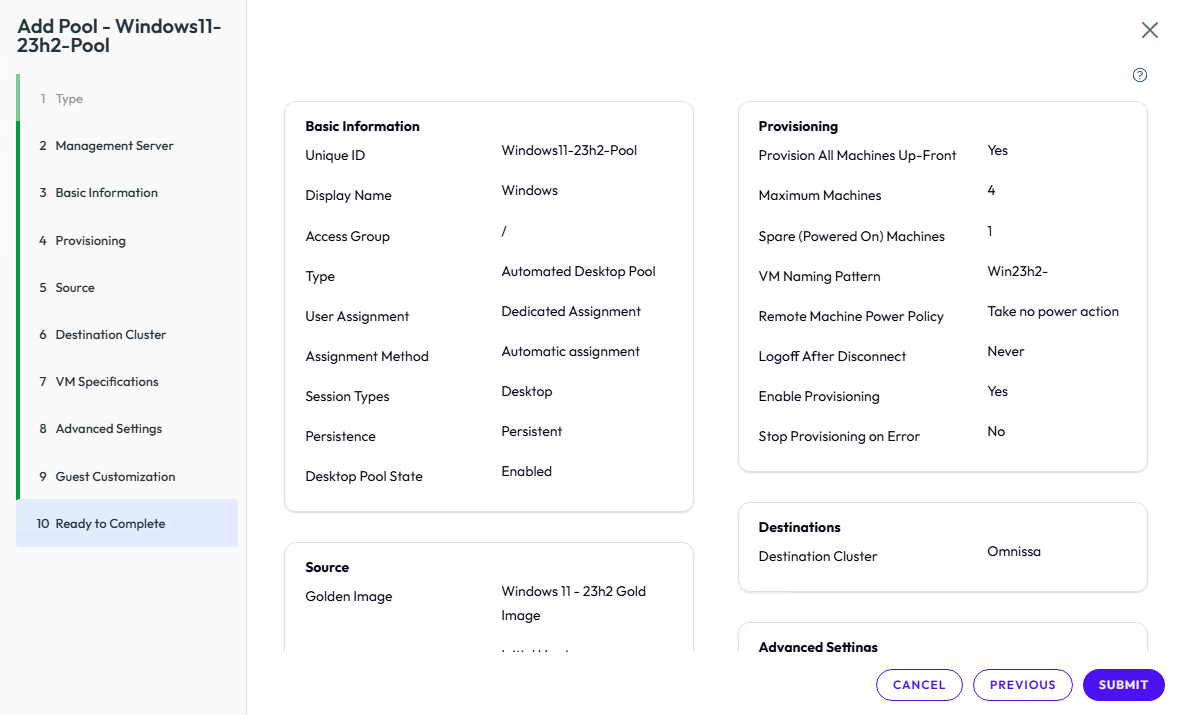
- In Ready to Complete, review all settings for accuracy and click Submit.
- In Deployment, the pool deployment will now begin. This process may take several minutes depending on the number of VMs.

Was this page helpful?