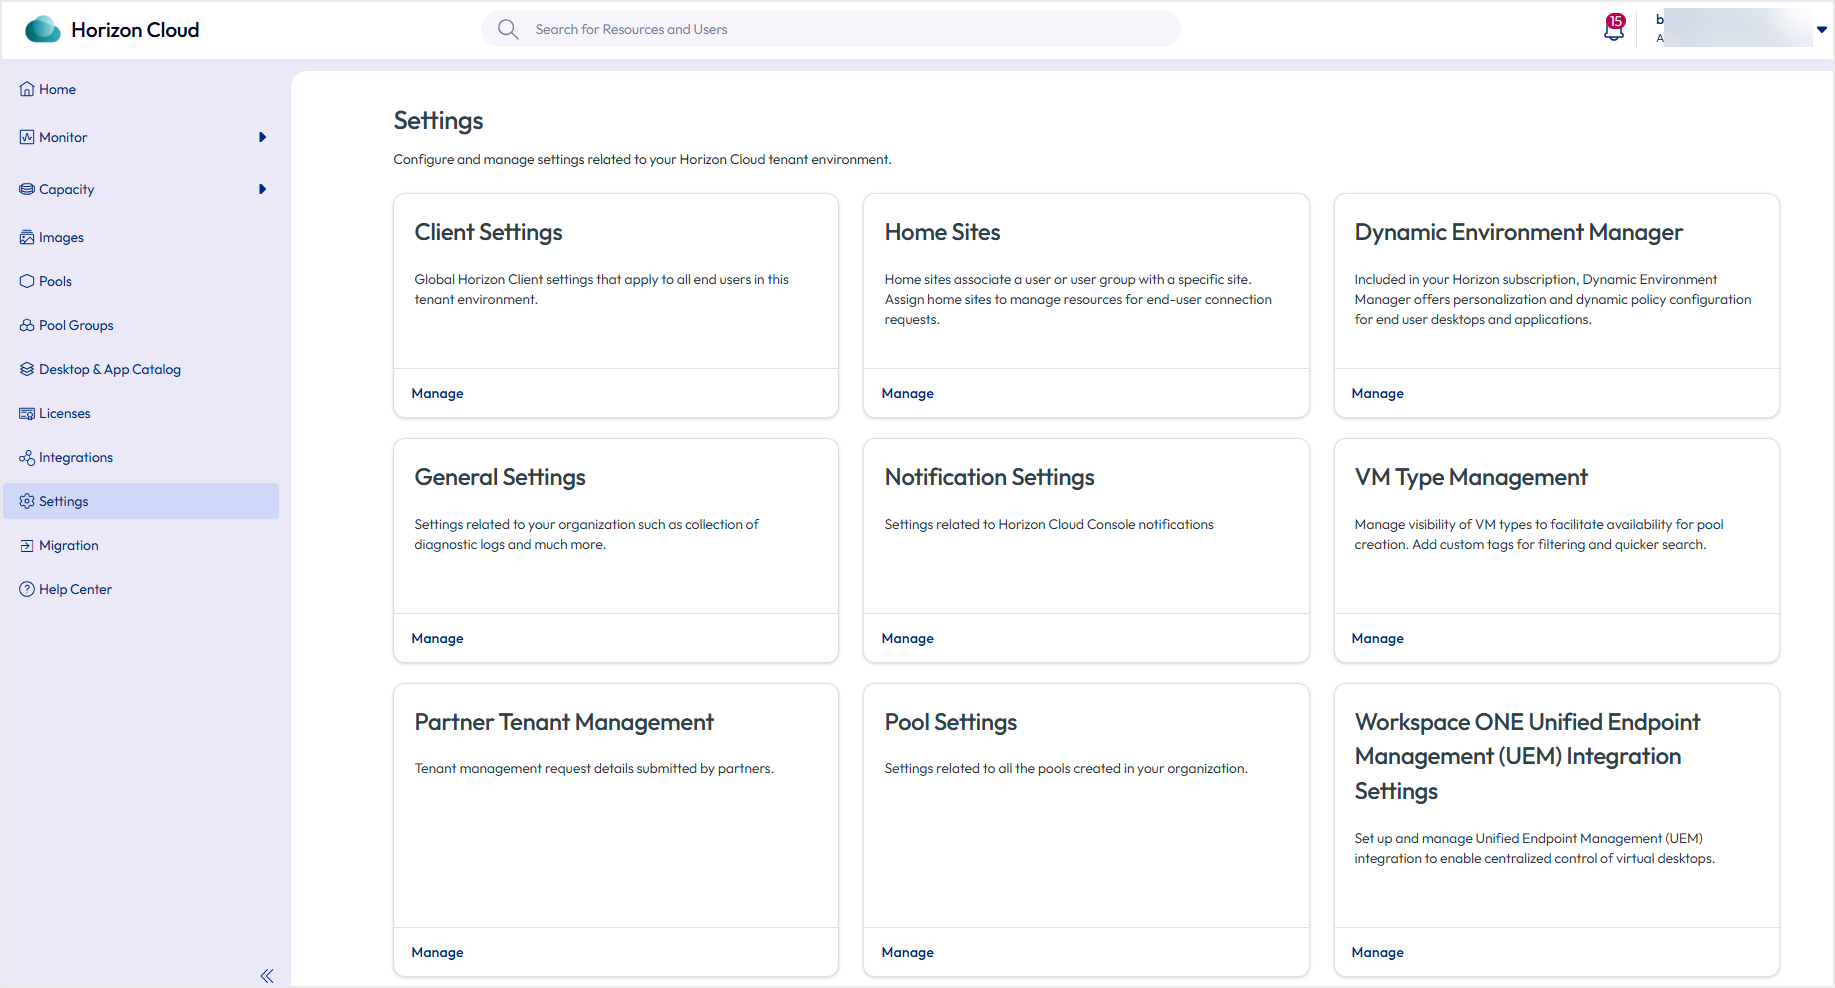
You can configure global Horizon Client settings that apply to all end users in your Horizon Cloud tenant environment. To do so, click Settings from the Horizon Universal Console and then click Manage in the Client Settings section.
Configure Pre-Login Message in Horizon Cloud
You can customize a message that end users see before they log in to Horizon Client.
-
Click Settings in the navigation bar.
-
Click Manage on the Client Settings tile.
-
On the Client Settings page, click the Custom Messages tab and click Edit.
-
Toggle the switch to include the pre-login message.
-
Enter the pre-login message. You can toggle back the switch back to deactivate the message.
Configure Custom Client Access URLs in the Horizon Universal Console
You can customize the URL that your end users access to connect to your desktops and applications.
Prerequisites
Determine the URL or subdomain to use. The following details apply to the URL or subdomain you use.
-
This URL or subdomain must be unique across the Horizon Client service. You receive an error if the URL or subdomain is being used by another tenant. If you believe that a URL or subdomain you own is in use by another tenant not owned by your organization, file a support request to notify us.
-
The subdomain of the custom URLs must be at least 1 character and at most 63 characters in length.
-
Custom URLs must only contain letters, numbers, and dashes (-).
-
Some strings are disallowed or reserved by the system. This category of string includes:
- Generic words such as book
- Well-known company-owned terms like Gmail
- Specific restricted strings such as protocol.coding
- Open-source terms like php and sql
- Pattern-based variants using those strings such as mail0, mail1, mail2, and so on.
-
URLs or subdomains found to be owned by another organization or to violate copyrights or trademarks that you do not own are removed.
Procedure
-
Log in to Horizon Cloud.
-
From the Horizon Universal Console, click Settings in the left-pane navigation panel.
-
Click Manage on the Client Settings tile.
-
On the Client Settings page, click the Branding tab.
-
To provide a Custom Client Access Subdomain, perform the following steps.
-
In the Custom Client Access Subdomain section, provide a subdomain to customize the client access URL that end-users will use to connect to your desktops and applications.
-
Click Edit to Enable custom client access subdomain by selecting the toggle.
The Enable custom client access subdomain field is deactivated and the option available is No as a default. Only after you click Edit, the toggle is activated and you can select it.
-
Add a Custom client access subdomain.
Configuring and editing the custom client subdomain requires several minutes to take effect, typically 30 minutes but sometimes longer. Consider performing this operation during non-business hours to prevent unexpected downtime.
-
-
To provide a Custom Client Access URL, perform the following steps.
-
In the Custom Client Access URL section, provide a fully-qualified domain name to customize the URL that end users will use to connect to your desktops and applications.
Note: You must set up an alias association by creating a CNAME record on your DNS server that maps your FQDN to the provided endpoint. For more details, refer to the Configuring a CNAME Record for Custom Client Access URL Endpoint section below.
-
Click Configure to configure the URL.
-
Provide the Custom client access URL.
-
Click Browse to browse and upload a Certificate that is valid for the custom client access URL entered previously in
PFXformat.Note: The certificate must meet the Microsoft Certificate requirements listed here. The certificate must only contain Server Authentication EKU and must not include Client Authentication EKU.
-
Add a Password for the certificate. Click Save.
Configuring and editing the custom client subdomain might take up to 10 minutes to take effect.
-
Configuring a CNAME Record for Custom Client Access URL Endpoint
You must configure a CNAME record in DNS so that your custom client access URL (FQDN) resolves to the provided Horizon endpoint. The exact steps depend on your DNS provider.
Procedure
-
Log in to your DNS management tool.
This can be:
-
Cloud DNS (Azure DNS, AWS Route 53, Google cloud DNS)
-
Domain Registrar DNS (GoDaddy, Namecheap)
-
On-prem DNS (Windows DNS Server, BIND)
-
-
Create a CNAME record for your endpoint access URL.
Follow the steps as per your DNS provider tool for CNAME record creation for your FQDN to the provided endpoint.
Fields for CNAME creation as reference (field names might vary for DNS providers):
-
Source / Name / Alias
-
Type
-
Destination / Alias / Value / Target
For example:
If you have configured the client access URL as below:
-
Custom Client Access URL:
vid.contoso.comThe provided Omnissa endpoint will look like:
****.azurefd.net.Here is the CNAME record for this example:
-
Record Type: CNAME
-
Name / Alias:
vdi(depending on what you chose for client access URL) -
Target / Value:
****.azurefd.net.(Horizon provided endpoint) -
TTL: Keep defaults or set appropriately as per your DNS provider.
Note: Field names might vary. Please check the DNS provider documentation.
-
-
-
Save and Apply Changes.
DNS propagation may take a few minutes to hours.
-
Verify.
Use the following commands to confirm that the CNAME points to the target FQDN:
-
nslookup vdi.contoso.com -
dig vdi.constoso.com
After DNS propagation completes, the user should be able to access desktops and applications using the custom client access URL.
-
Configure Network Ranges to Identify Internal Users
You can define the ranges of your internal network by specifying the egress NAT public IP addresses on the firewall or router in the office or data center from which your Horizon Clients are connecting. Defining your internal network in this way enables the broker to apply network-specific policies such as allowing direct connections to desktops from Horizon Client, bypassing the Unified Access Gateway.
To define your internal network for the broker, use the Network Ranges tab on the Client Settings page and specify all of the ranges of egress NAT addresses that correspond to your internal end-user traffic.
The broker recognizes Horizon Clients connecting from the specified ranges of egress NAT addresses on your office or data center router or firewall as originating from your internal network. Users connecting from public IP addresses within these ranges are considered internal users. Users connecting from public IP addresses outside these ranges are considered external users.
Note: If your network configuration changes and any of the specified address ranges are removed from use, you must manually delete the unused ranges from the Network Ranges list. The broker does not detect whether an address range is in use and does not automatically remove any ranges from the list.
Prerequisites
Identify the egress Network Address Translation (NAT) addresses on your office or data center router or firewall that correspond to your internal end-user traffic.
Procedure
-
Click Settings in the navigation bar.
-
Click Manage on the Client Settings tile.
-
On the Client Settings page, click the Network Ranges tab.
The Network Ranges page displays a list of public IP address ranges corresponding to your internal end-user traffic.
-
To add an egress NAT address range to the list, click Add.
-
Select a range type, enter an address or range for that type, and click Save.
CIDR Select CIDR and enter a range between the allowable ranges of /1 and /32, such as 192.168.70.10/32. Single IP Select Single IP and enter an IP address, such as 192.168.70.10. IP Range Select IP Range and enter an IP addres range, such as 192.168.70.10-192.168.72.32. -
Continue to add more egress NAT address ranges to the list until you have defined the full extent of your internal network traffic.
After you perform this task, you can use the controls in the Network Ranges tab to Delete a range in the list. However, before you delete a range from the list, consider the following points:
- When you delete an egress NAT address range, the broker considers that range to be part of the external network.
- If you delete all the ranges from the list, the broker treats all users as external users. Therefore, policies applied to internal users will no longer take effect.
Configure Global Client Restrictions in Horizon Cloud
You can configure client restrictions, which specify that only certain Horizon Client versions can launch virtual desktops, published desktops, and published applications from your Horizon Cloud tenant.
The client restrictions feature is supported for Horizon clients that support Horizon Cloud. This includes Horizon Windows Client versions 2111 and later, Horizon Mac Client 2203 and later, Horizon Linux Client 2206 and later, Horizon Android Client 2303 and later, Horizon iOS Client 2303 and later, and Horizon Client for Chrome 2306 and later.
Procedure
-
Select Settings > Client Settings.
-
In the Client Settings page, click the Client Restrictions tab.
This tab displays all the client restriction settings that are currently in effect when users attempt to connect to desktops and applications through the Universal Broker service.
-
To modify client restriction settings, click Configure. Then configure the settings as described in the following table.
The editing window provides controls for activating and configuring client restrictions.
-
Use the toggles to turn on and off restrictions for Horizon Client on specific platforms. For client platforms that have restrictions turned on, configure settings as described in the following table.
Note: Use the following guidelines when configuring settings:
-
When specifying the client version, you must enter the version in the format x.x.x which corresponds to the internal version number. To find the internal version number for Horizon Client, select the command from the client menu that shows the application information for that Horizon Client.
-
The client versions that you specify for Warn users connecting from client versions must be different from the client versions that you specify for Block connections from client versions. You can configure a given client version to either show a warning message or be blocked from connecting to sessions. You cannot configure the same client version to do both.
Client Platform Description Windows For the Block connections from client versions setting, select one of these options: - Earlier than: Specify a client version to block all clients earlier than that version.
- Equal to: Enter specific versions (separated by commas) that block users when they connect with those client versions.
Linux For the Block connections from client versions setting, select one of these options: - Earlier than: Specify a client version to block all clients earlier than that version.
- Equal to: Enter specific versions (separated by commas) that block users when they connect with those client versions.
Mac For the Block connections from client versions setting, select one of these options: - Earlier than: Specify a client version to block all clients earlier than that version.
- Equal to: Enter specific versions (separated by commas) that block users when they connect with those client versions.
iOS For the Block connections from client versions setting, select one of these options: - Earlier than: Specify a client version to block all clients earlier than that version.
- Equal to: Enter specific versions (separated by commas) that block users when they connect with those client versions.
Android For the Block connections from client versions setting, select one of these options: - Earlier than: Specify a client version to block all clients earlier than that version.
- Equal to: Enter specific versions (separated by commas) that block users when they connect with those client versions.
Chrome For the Block connections from client versions setting, select one of these options: - Earlier than: Specify a client version to block all clients earlier than that version.
- Equal to: Enter specific versions (separated by commas) that block users when they connect with those client versions.
Block additional clients When you select this option, all client types other than the non-restricted Horizon Client platforms are blocked from launching any desktops or published applications. Blocked message Enter the message to display to users that try to connect using a blocked Horizon Client version. Character length limit for the message is 1024. Warning message Enter the warning message to display to users that connect using the specified Horizon Client version. Character length limit for the message is 1024. For example, you can use this warning message to inform users that the specified Horizon Client version will be restricted in the near future and to recommend upgrading to a later client version. -
-
Click Save to save your changes.
Was this page helpful?