This method uses a customized Amazon EC2 instance to create an Amazon Machine Image (AMI), which is then imported into Horizon Cloud for use with Amazon WorkSpaces Core. You can use this method when you need greater control over the operating system configuration and installed applications before the image is managed by Horizon Cloud.
This method relies on standard AWS services such as Amazon EC2, Amazon S3, and EC2 Image Builder, and allows you to prepare and validate the image in your AWS account before importing it into Horizon Cloud.
Begin You Begin
Before starting this method, complete all required image preparation tasks described in Common Preparation Steps for Image Import.
Workflow Overview
Using the AWS EC2 custom instance import method involves the following workflow:
- 1 - Import a Windows operating systems ISO into AWS and create a custom AMI
- 2 - Launch an EC2 instance from a custom AMI
- 3 - RDP to the EC2 Instance and Customize the Image
- 4 - Import the finalized EC2 instance into Horizon Cloud
1 - Import a Windows Operating System ISO into AWS and Create a Custom AMI
This section describes how to import a Windows operating system ISO (International Organization for Standardization disk image) into AWS using EC2 Image Builder and create a base Amazon Machine Image (AMI). The resulting AMI is later used to launch an EC2 instance for customization before importing it into Horizon Cloud.
Procedure
Use the following steps to import a Windows ISO and create a custom AMI by using EC2 Image Builder:
-
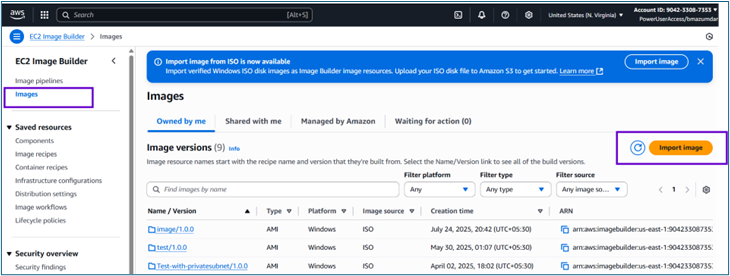
From the AWS Management Console, go to EC2 Image Builder.
-
In the navigation pane, choose Images.
-
To open the import dialog, choose Import image.
-
In the General section, provide the following information:
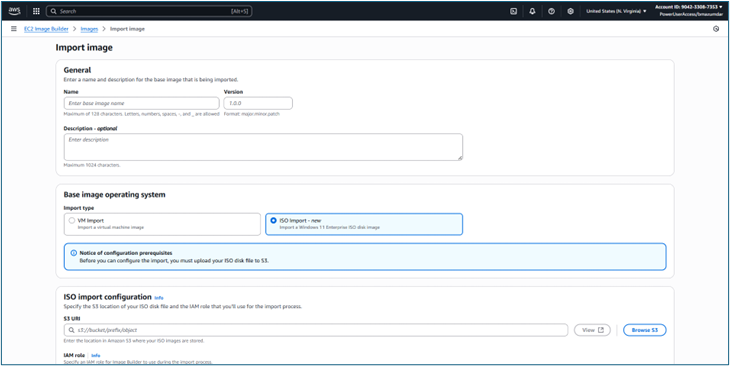
- Name – Enter a unique name for the image.
- Version – Specify a version number for the based image using the format
major.minor.patch.
-
For Import type, select ISO import.
-
In the ISO import configuration section, provide the following details:
- S3 URI – Specify the Amazon S3 location where the Windows ISO file is stored. To browse for the file, choose Browse S3.
- IAM role – Select an IAM role to associate with the import configuration. If required, choose Create new role and use the default Image Builder service-linked role.
-
(Optional) Add tags to the Image Builder image resource. These tags apply only to the Image Builder image and are not applied to the resulting AMI.
-
For ISO infrastructure configuration, choose one of the following options:
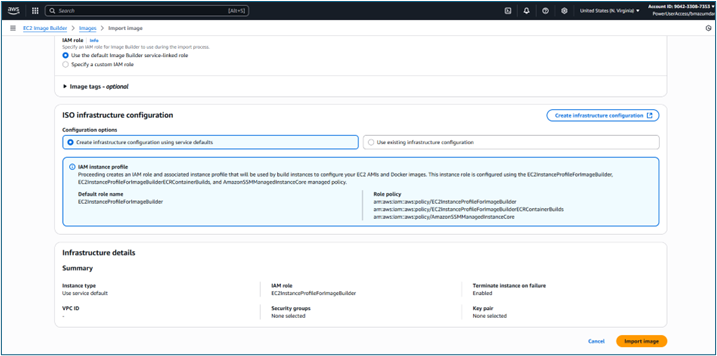
- Use the default infrastructure configuration created by Image Builder.
- Select an existing infrastructure configuration.
- Choose Create infrastructure configuration to create a new one in a separate tab and then return to select it.
For more information, see the AWS documentation on managing Image Builder infrastructure configurations.
-
Choose Import image to start the ISO import process.
-
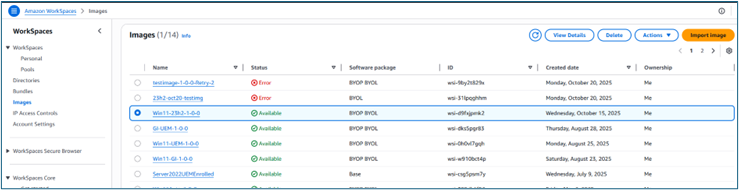
Monitor the import status in EC2 Image Builder until the image creation completes successfully.
Create an EC2 Instance from the AMI
After the import process completes successfully, you can launch an EC2 instance using the resulting Amazon Machine Image (AMI) or copy the AMI to another AWS Region.
For more information, see the following documentation in the Amazon EC2 User Guide:
- Create an EC2 instance from an imported image
- Launch an instance using the launch instance wizard in the console
- Copy an Amazon EC2 AMI
2 - Launch an EC2 Instance from a Custom AMI
This section describes how to launch an Amazon EC2 instance using a custom Amazon Machine Image (AMI). The instance created from this AMI can then be customized and prepared for import into Horizon Cloud.
For additional details, see the AWS documentation: How do I launch an EC2 instance from a custom AMI?.
Procedure
To launch an EC2 instance from your custom AMI, complete the following steps:
-
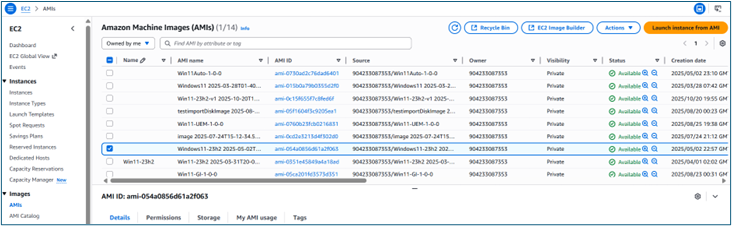
Open the Amazon EC2 console.
-
Select the target custom AMI and click Launch instance from AMI.
-
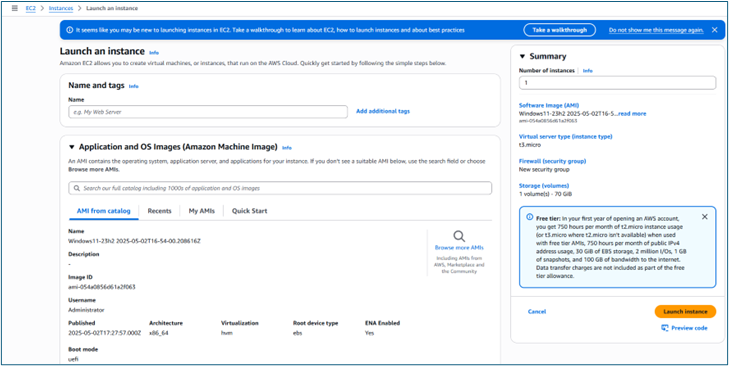
Under Name, enter a unique name for your instance.
-
Under Instance type, choose an instance type.
-
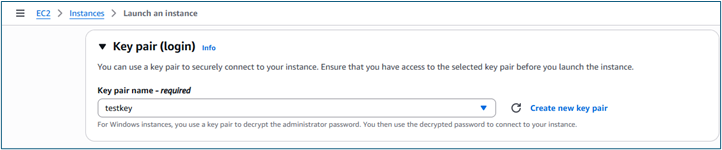
Under Key pair (login), select an existing key pair, or create a new one.
-
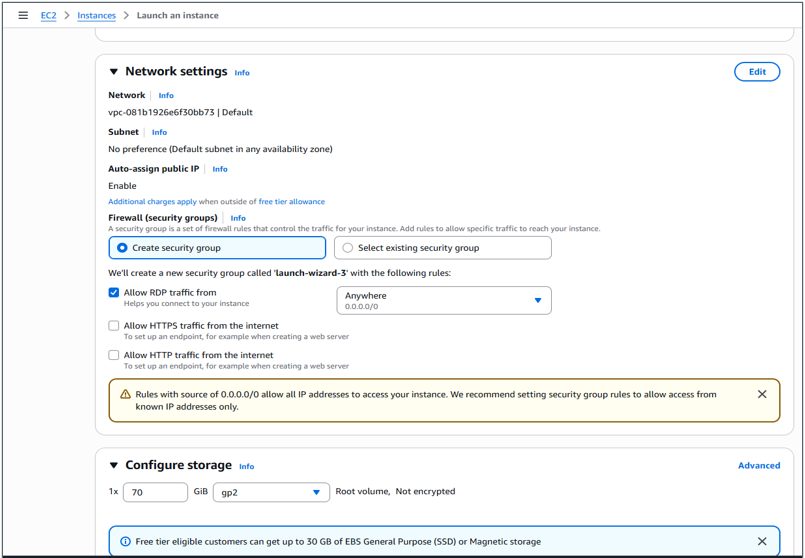
(Optional) Under Network settings, click Edit, and then select your VPC, subnet, and security group. Alternatively, you can Create a new security group.
-
Under Configure storage, configure the required GiB and root volume size.
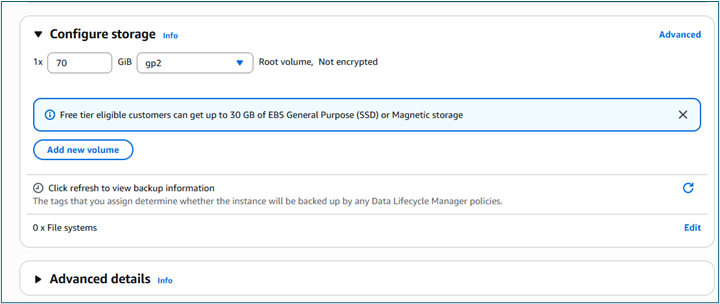
-
(Optional) Under Advanced details, configure options such as attaching an IAM instance profile.
-
Under Summary, click Launch instance.
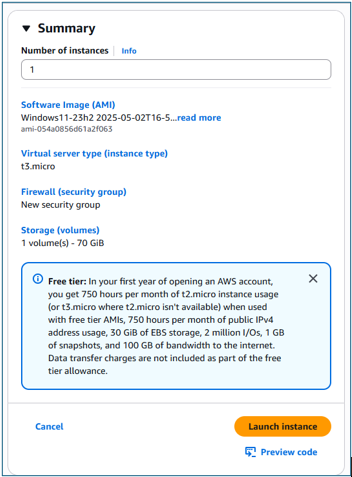
To verify the instance status, select Instances in the navigation pane, or select the Instance ID.
3 - RDP to the EC2 Instance and Customize the Image
After launching the EC2 instance from the custom AMI, connect to the instance using Remote Desktop Protocol (RDP) to perform any required customization. This typically includes installing applications and validating the image before it is imported into Horizon Cloud.
For more information about connecting to a Windows instance, see the AWS documentation: Connect to your Windows instance using RDP.
Procedure
To connect to the EC2 instance and prepare the image, complete the following steps:
-
Connect to the EC2 instance using RDP.
-
Install the required applications on the instance.
-
Download and run the Amazon WorkSpaces BYOL checker tool (AWS Image Checker).
- Navigate to the Amazon WorkSpaces BYOL tools documentation and download the BYOL checker tool.
- Save the tool in a location on the instance that will be included in the final image.
-
Configure agent pairing for Horizon Cloud. For detailed steps, see Copy an Agent Pairing for Image Preparation.
-
During the image import process from an Amazon EC2 custom instance, the Horizon Agent is installed automatically as part of the image import workflow.
-
When importing an image from an Amazon Workspaces Core custom image, the Horizon Agent must be installed manually.
For more information, see the Omnissa documentation: Managing Images for Amazon WorkSpaces Core Provider Deployments.
4 - Import an Amazon EC2 Custom Instance into Horizon Cloud
After customizing the EC2 instance, import it into Horizon Cloud so it can be managed and published for use with Amazon WorkSpaces Core. This process uses the Amazon EC2 Custom instance as the image source in the Horizon Cloud console.
Procedure
To import the EC2 custom instance, complete the following steps:
-
Access the Horizon Cloud console.
-
Navigate to Images.
-
Enter the required General Information for the image.
-
In the Image Source section, select Amazon EC2 Custom Instance.
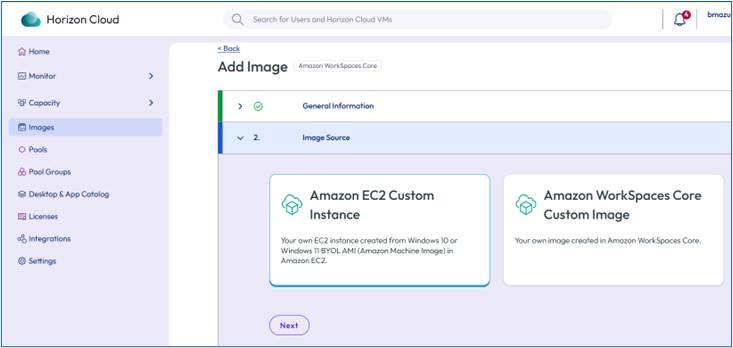
-
Click Next and complete the remaining steps in the image import workflow.
For detailed steps and configuration options, see the Omnissa documentation: Add and Publish an Image with Amazon WorkSpaces Core and then navigate to the section Adding an image from an Amazon EC2 Custom Instance.
Was this page helpful?