Using the Add Application workflow in the Horizon Universal Console, you can add an application to your organization's inventory. You can either add a package immediately when creating an application or you can use the Add Package workflow and add a package to the existing application later.
Considerations
-
If you want to add a package to an existing application, it is not necessary to create the application again.
-
After using the Add Application workflow for the first time, the same user must not attempt to use that option a second time for the same image until they have completed the steps to capture an application package in the capture desktop VM. If they try to use the option again for the same image before finishing the steps to capture an application package, a message displays stating that a request to create a package is already initiated. A different user in the same tenant, however, can initiate creating a package for that image whether or not the first user has finished.
Note: When selecting different images, either on the same Horizon Edge or another Horizon Edge, the same user can run multiple captures simultaneously. They cannot run multiple captures simultaneously for the same image.
-
The first time you click the Add Application option to initiate the capture process, the system can take up to 10 minutes before the capture desktop VM is ready and the status changes to
Desktop ready for application capture. For this first time, this 20-minutes time is because the system is creating a desktop assignment and two desktop VMs to support the capturing process. After you have completed capturing your first application package, and then want to initiate a new capturing process, the time between when you click the Add Application option and the status changes toDesktop ready for application captureis shorter, around 10 minutes. The times after the first time are shorter because the system does not have to create the capture desktop assignment like it did for the first time. For the second time, the system deletes the previously used capture desktop VM and uses a new one.
Each package has a delivery option. Using this option, you can configure the package delivery mode as Classic or On-demand. With classic delivery, any assigned application is delivered to an end user immediately at computer startup or user login. With on-demand delivery, a shortcut appears, but the application is not delivered until the user opens the shortcut. For more information, see Understanding Package Delivery Modes of an App Volumes Application Package Using Horizon Cloud.
Prerequisites
Confirm that your environment meets all the prerequisites listed in Overview and Prerequisites For Using App Volumes Applications in Horizon Cloud.
Important: The Add workflow is only available for images with single-user, client, or VDI types of Microsoft Windows operating systems, and not for multi-session types of operating systems. Before you perform the steps in the task that follows, you must have an available image with the App Volumes agent installed. When adding and publishing the image, ensure that you have turned on the App Volumes toggle button. By default, this toggle is turned off. This toggle button is listed in the Agent section when publishing an image.
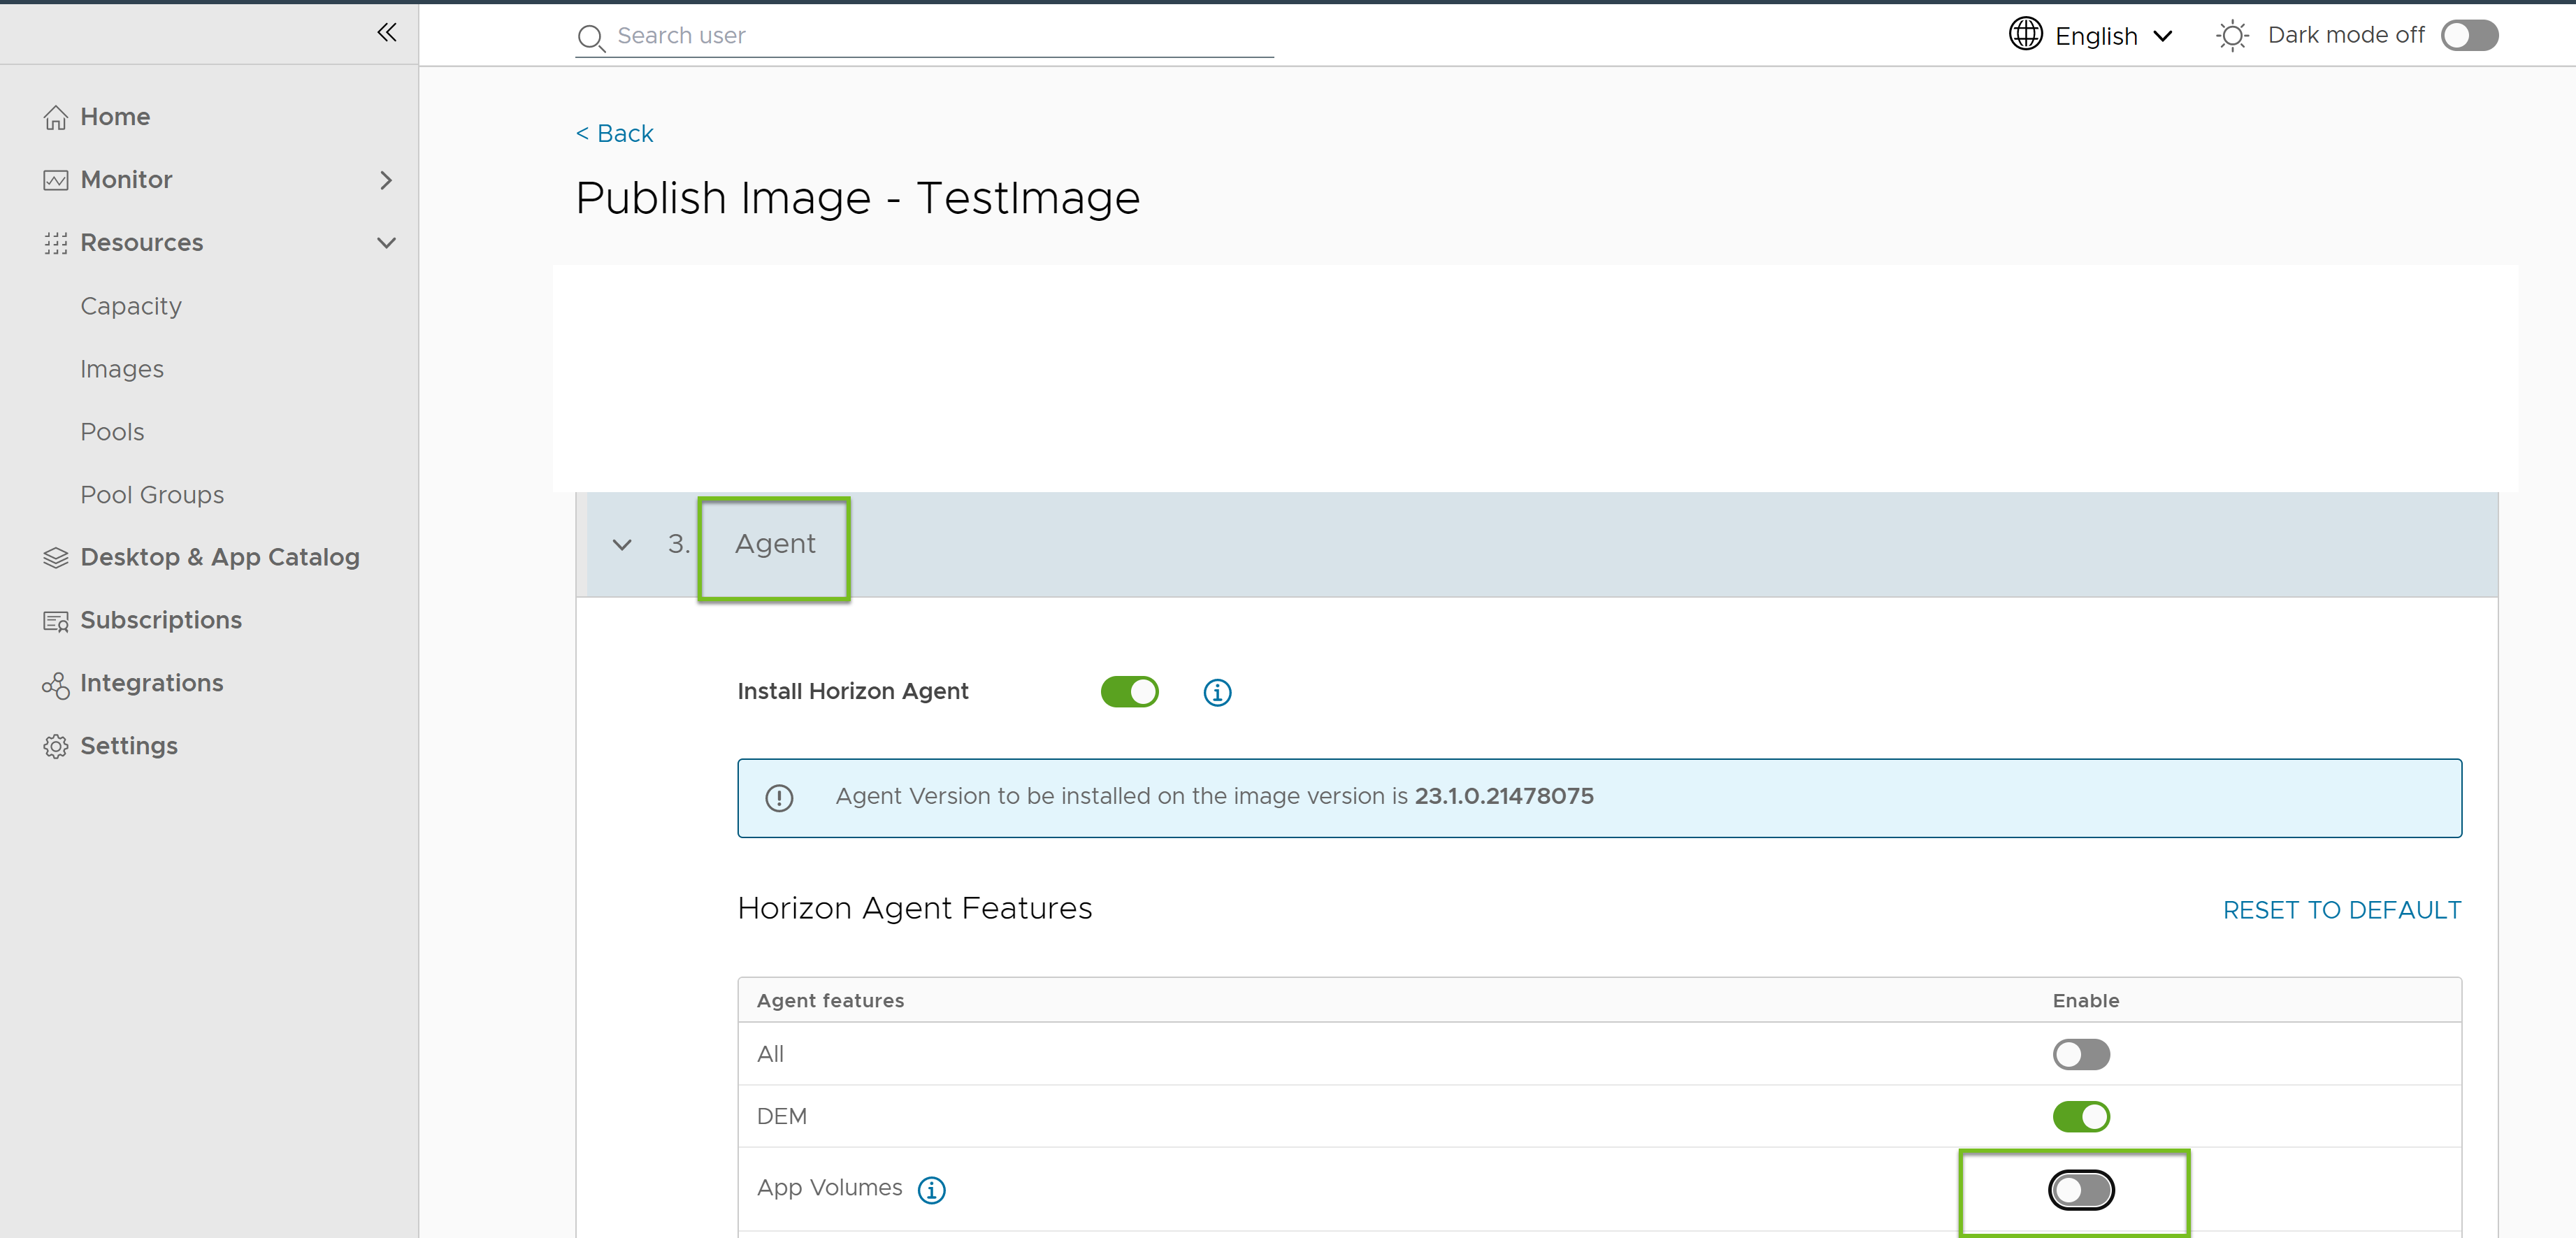
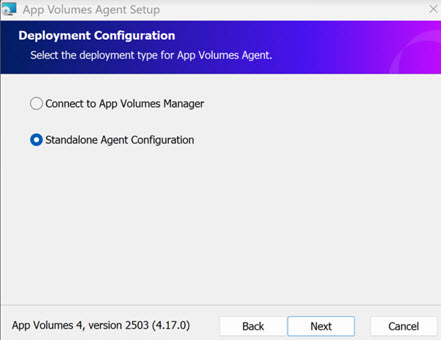
Important: For Amazon WorkSpaces Core, if you are not planning to create the desktop pool with Always On power management mode, keep the App Volumes toggle off and install the App Volumes agent manually. While installing the agent manually, select the Standalone Agent Configuration option. For information about the the Always On power management mode, see the VM details section of Create a pool.
To add an image and publish an image, see the Managing Horizon Images Using the Horizon Control Plane.
Procedure
-
In the Horizon Universal Console, navigate to Desktop and App Catalog > App Volumes.
-
Click Add > Application.
-
On the Add Application page, add Application Name and Description.
-
Add the Owner Details by selecting the owner from the available domains from the Active Directory
-
Select the toggle to Add Package.
Note: You can add the package now or later. To add the package later, use the Add Package workflow. Windows core features such as WSL (Windows Subsystem for Linux) cannot be captured as an App Volumes package.
-
Add Package Name and Description.
-
Select the Horizon Edge where the application will be packaged.
-
Select the Provider in which the packaging VM is created to capture the package.
-
Select the Image used by the VM to capture the package.
Ensure that the image has the App Volumes agent installed.
-
Select the Image version used by the VM to capture the package.
-
If you want to route outbound requests to the Internet through a proxy server, activate the Use outbound proxy toggle and provide the values for Proxy host and Proxy port.
-
Optional: If you have already configured outbound proxy settings (proxy host and proxy port) for the Horizon Edge selected in this workflow, then turn on the Copy Horizon Edge proxy toggle to use the same configuration here. As a result, Horizon Edge proxy settings are automatically carried over to these fields: Proxy host and Proxy port.
-
Select the Desktop Model used to create the VM for packaging.
-
Select the Machine Identity.
You can either use the Azure Active Directory or a configured Active Directory domain registered with your environment. If you choose the configured Active Directory domain, ensure that the domain is reachable from the selected Horizon Edge.
Note: For Azure Active Directory, all Windows 11 and Windows 10 devices are supported, except Home editions Windows Server 2019 and newer Virtual Machines running in Microsoft Azure (Server core is not supported).
-
If you have selected an Amazon Workspaces Core provider type in one of the previous steps, select a Directory ID for this package from the drop-down box.
The Directory ID indicates a directory created in the Amazon Web Services (AWS) console. Create a Pool.
-
Select the Packager or the user that is allocated the VM for capturing the application.
The domain of the user must be same as the selected Active Directory domain.
-
Select between Classic and On-demand delivery.
By default, the package delivery is Classic. If you configure the package as On-demand, package attachment occurs only when the end user launches the application.
Note: For packages created using versions of Horizon Agent Installer 23.1.0.21387799 and earlier which do not have on-demand support, an administrator can still change from On-demand to Classic and Classic to On-demand. However, App Volumes agent cannot virtualize the existing package as per the on-demand behavior.
-
In the Networks section, depending on whether the Horizon Edge selected in an earlier step is Microsoft Azure or Amazon Workspaces Core, do the following:
Options Procedure Microsoft Azure To select the virtual network and tenant subnet for this package, click the drop-down boxes for Virtual Network and VM Subnet respectively and choose the desired values.
When a system pool is created during application capture, the selected tenant subnet is considered instead of all the subnets associated with the provider which was selected earlier in this procedure.Amazon Workspaces Core For the specified Virtual Private Cloud ID (VPC), select Availability Zone 1 and Availability Zone 2 and the respective Subnet from each of these Availability Zones.
Note: If the Directory ID selected in an earlier step is registered, then changing the Availability Zones and Subnets is prevented. The values for these fields are automatically added. This behavior is the same as when creating a pool. See Create a Pool. -
Click Save.
Results
-
As soon as the package is added, status of the package is
Desktop provisioning is in progress. -
After desktop provisioning is done and the packager is assigned a VM, status of the package is
Ready for capture.
What to do next
After creating an application, you can perform either of the following tasks:
-
If you want to add another package to this application or decided to create a package at a later point in time, follow the steps mentioned in Add a New App Package to an Existing App Volumes Application Using Horizon Cloud.
-
If you have already created a package and want to capture the application package, follow the steps mentioned in Capture an App Volumes Application Package Using Horizon Cloud.
Was this page helpful?