Prerequisites
You can customize default agent features any time after connecting to your Windows 365 account and before entitling users and onboarding Microsoft Azure VMs. You can also edit agent settings for specific provisioning policies after onboarding existing VMs or creating new VMs.
However, to simplify the onboarding experience, be sure to perform this step before you map your Windows 365 pools to provisioning policies and subsequently entitle users and onboard VMs.
For related information about the sequence of steps for getting started with integrated Windows 365 in Horizon Cloud, see Configuring Windows 365 Integration.
Procedure
When you initially connect to Windows 365, an agent features customization page is made available after your Windows 365 permissions are validated. The page allows you to specify the default agent settings to use when onboarding existing Azure VMs and provisioning new VMs into your integrated Windows 365 environment. The default provisioning policy is applied to Windows 365 VMs during onboarding. After the VMs have been onboarded, you can change these settings for one or more provisioning policies. You can also change these settings for the default provisioning policy that applies to VMs as they are onboarded.
-
From the Horizon Universal Console, click Integrations > Windows 365 and then click Default Agent Features on the Windows 365 page.
-
If prompted, authenticate to Microsoft using your Windows 365 credentials.
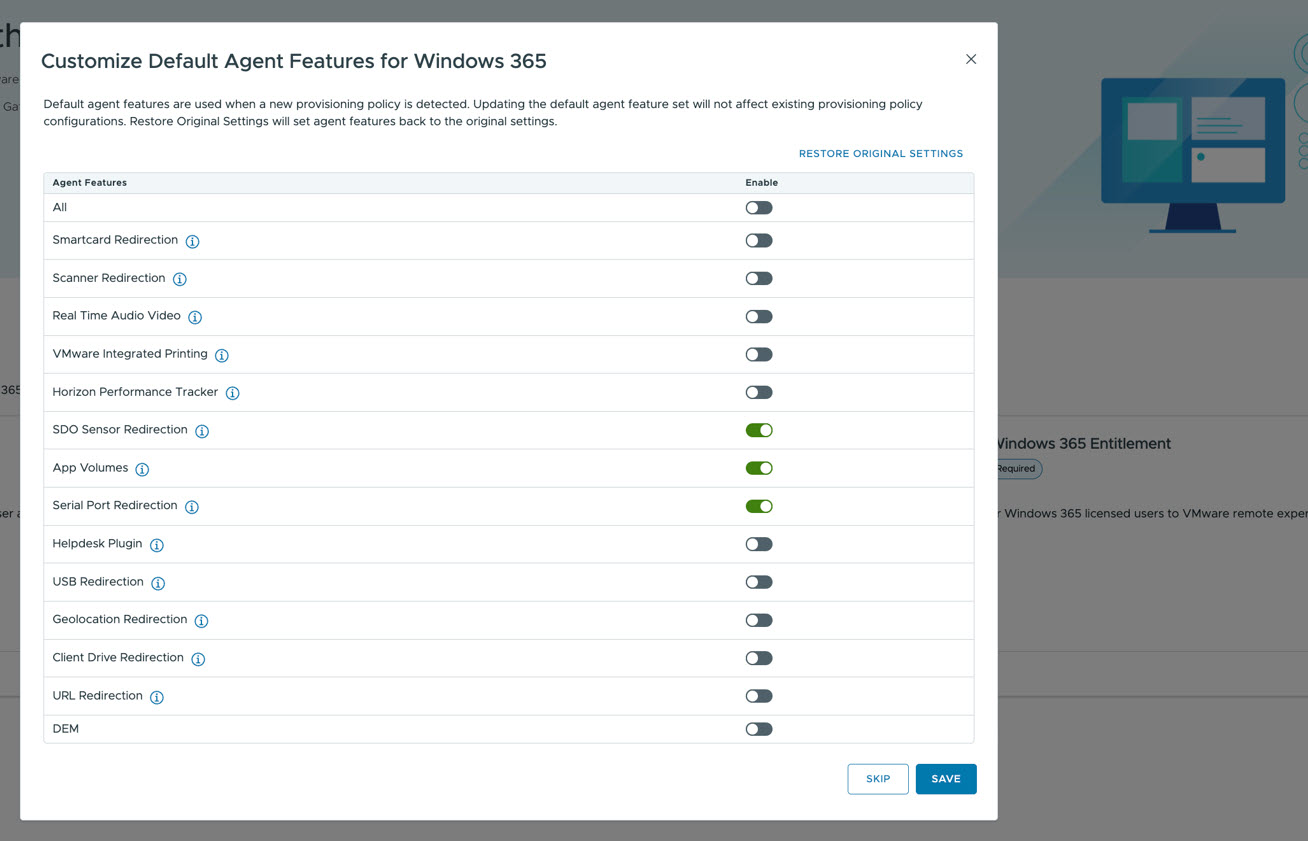
If so prompted, the system attempts to validate your access credentials. The validation process may take up to 30 seconds. Once validated, the Customize Default Agent Features for Windows 365 page appears.
-
From the Customize Default Agent Features for Windows 365 page, specify the default agent features that you want configured for new VM provisioning policies and then click Save.
These settings are applied to new VMs as you deploy them into your integrated Windows 365 environment and existing VMs that are onboarded to Horizon Cloud from Windows 365. You can click Restore Original Settings to set the agent feature toggles to their original Omnissa settings. Alternatively, you can choose to specify the agent defaults later by clicking Skip.
-
Click Save or Skip.
To edit the agent feature settings later for onboarded VMs, see Edit agent feature settings for existing provisioning policies for integrated Windows 365.
-
Depending on when you perform this step in the integration process, you may need to re-enter the integration workflow sequence. To reorient yourself and be sure to not miss a step, see the workflow at Configuring Windows 365 Integration.
Was this page helpful?