Prerequisites
- Workspace ONE UEM version 23.02 or later to configure Critical and Non-Critical Actions.
- Workspace ONE UEM version 23.08 or later to configure Quick Actions.
Administrators assigned with the Hub Services Super Admin role can configure Actions in the device self-service page.
Procedure
-
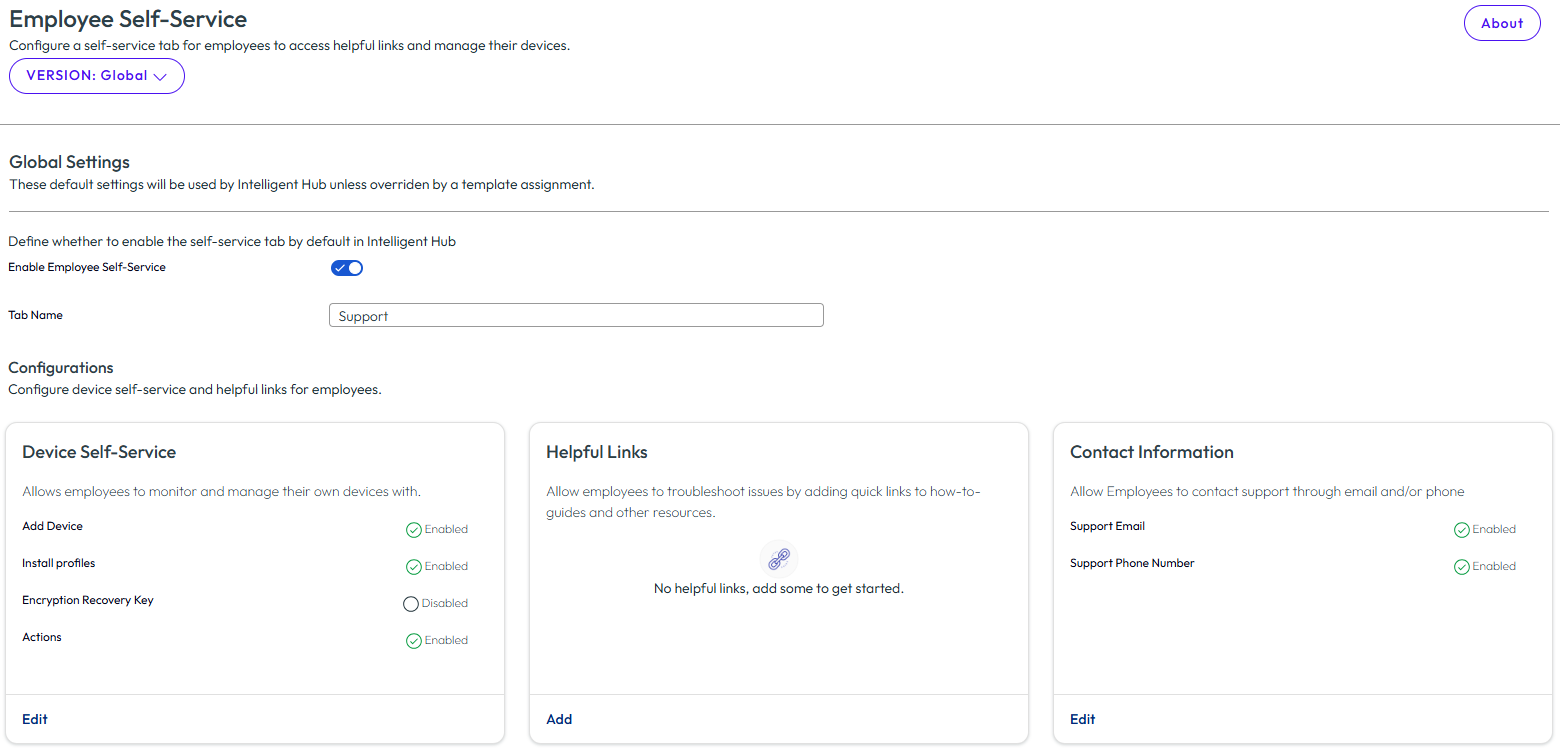
Navigate to the Hub Services console Home page and click Employee Self-Service.
-
Either select GLOBAL to edit the global settings or create or edit a customized template.
-
(Optional) Change the support tab name that displays in Workspace ONE Intelligent Hub.
-
In the Device Self-Service pane, click Edit to enable the self-service features.
Option Description Add Device Enable Add Device to let users register a new device through email, SMS, or a QR code. Users can see the status of their devices, and they can click Sync Device to sync their profiles to the device. Install Profiles Enable Install Profiles so that users can view their profile and install optional profiles or reinstall automatic profiles. This also lets users see their installed work apps and devices. Encryption Recovery Key When Encryption Recovery Key is enabled, users can retrieve their desktop encryption recovery keys for their enrolled and encrypted macOS and Windows devices from the Workspace ONE Intelligent Hub Support tab, instead of submitting a support ticket requesting a recovery key. -
In the Actions section, click Add Action. A list of available non-critical, critical, and quick actions are listed. Enable the check boxes to select actions. The check boxes for non-critical actions are enabled by default. Quick actions and Critical actions, such as Delete Device, Device Wipe, and Enterprise Wipe, are disabled by default.
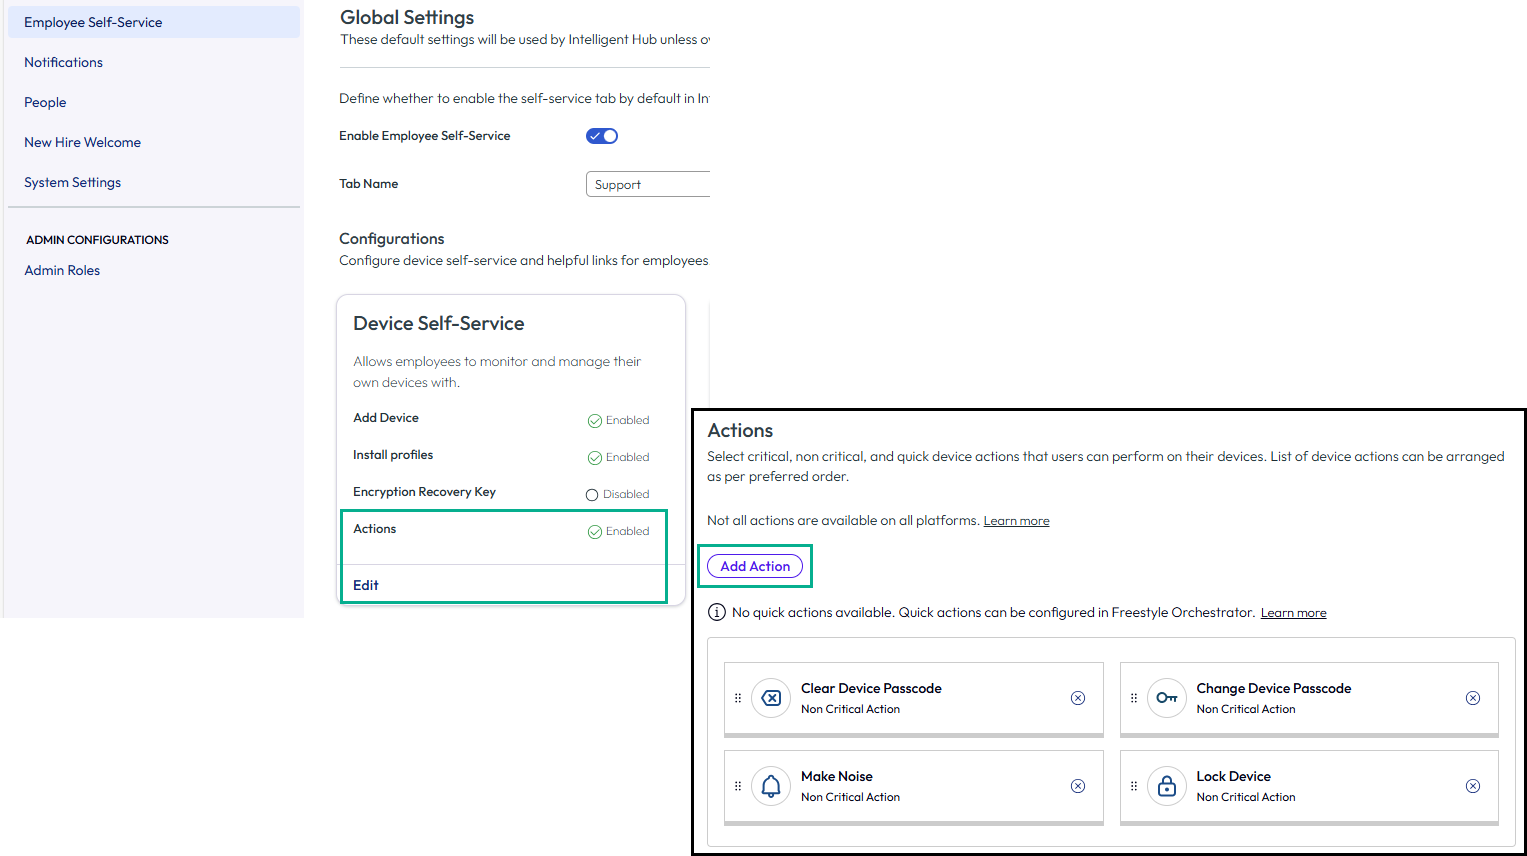
The actions cards are added to the Actions section, where you can rearrange them to organize the action list.
Notes:
-
Users accessing the Workspace ONE Intelligent Hub Support tab from a web browser can view and execute actions for any of their enrolled devices. This includes quick actions, except for macOS devices, which do not display quick actions in the Support tab. On the Workspace ONE Intelligent Hub app for Windows, and on iOS and Android, quick actions are only displayed for the device the user is currently logged into.
-
If you did not create Freestyle Orchestrator Workflows in the Workspace ONE UEM console, you do not see a Quick Action tab listed in the Hub Services console.
For more information about the actions that you can make available to users, see Self-Service Portal Into Workspace ONE UEM.
-
-
Click DONE
-
-
In the Helpful Links section, click Edit to allow employees to easily access troubleshooting and other self-service resources.
-
Click ADD SECTION to add link names and URLs. You can add up to 20 helpful links.
-
Click DONE
-
-
In the Contact Information section, click Edit to configure support contact information to allow your employees to contact internal help resources.
Choose to enable support by email and support by phone. Each contact method is assigned a default value by Omnissa as part of the onboarding process. On this page, you can add a new phone number and email address to serve as the support contact for the Version selected.
-
On the Employee Self-Service page, click SAVE.
Note: The Support tab also allows users to upload S/MIME certificates to sign and encrypt their corporate email. This capability does not require configuration in Hub Services. For more information, see Users Upload S/MIME Certificates from the Workspace ONE Intelligent Hub Portal Support Tab.
Was this page helpful?