Data Explorer allows you to quickly and easily explore your data within Omnissa Intelligence. Use this feature if you're not familiar with the Intelligence data structure, don't know where to begin, or are just looking for quick answers to commonly asked queries. The Data Explorer provides support for all data sources and fields.
Navigation
Find the Data Explorer in Intelligence at Workspace > Data Explorer.
How do you use the Data Explorer?
The Data Explorer uses data from pre-defined and custom report templates in your Intelligence environment to display results. You can also manually create queries and add aggregations to your pre-defined templates and queries. Use the Data Explorer results to create reports, widgets, or workflows, or you can use the Data Explorer's data dictionary.
- Search for pre-defined and custom report templates available in your Intelligence environment.
- In Intelligence, go to Workspace > Data Explorer.
- In the search field, enter a word and select a query from the list.
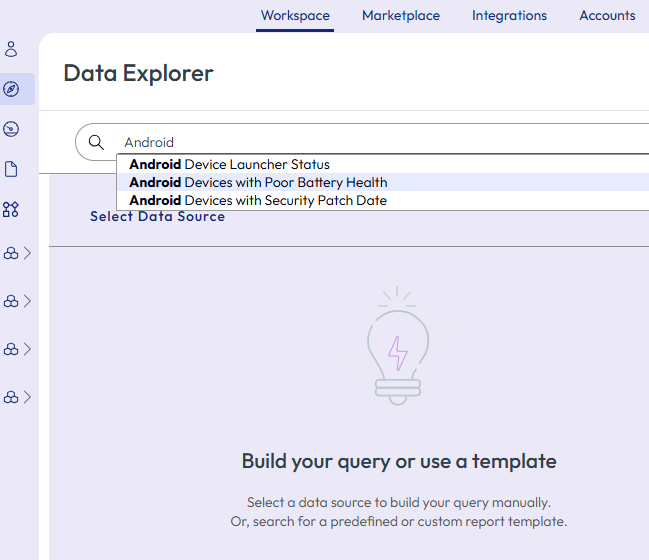
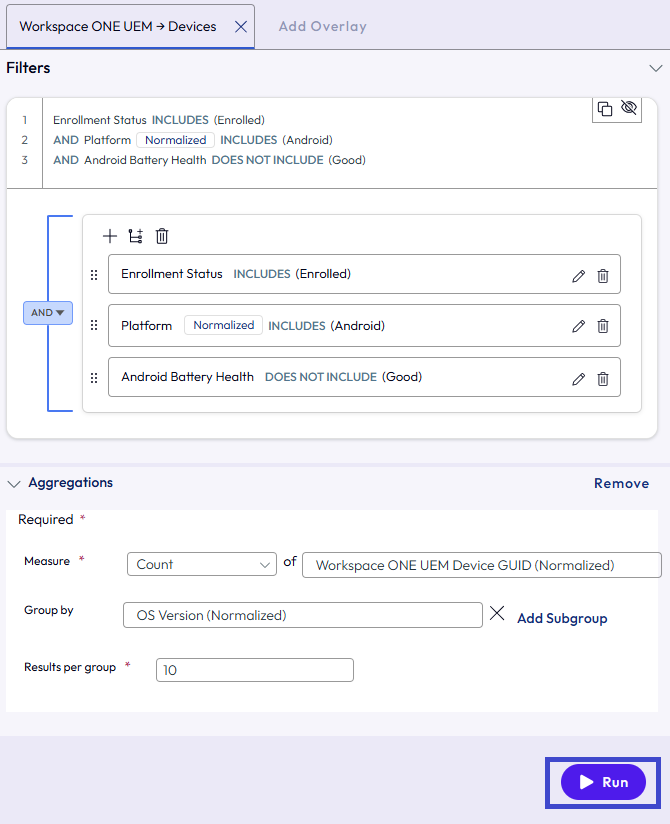
- Populate the query builder.
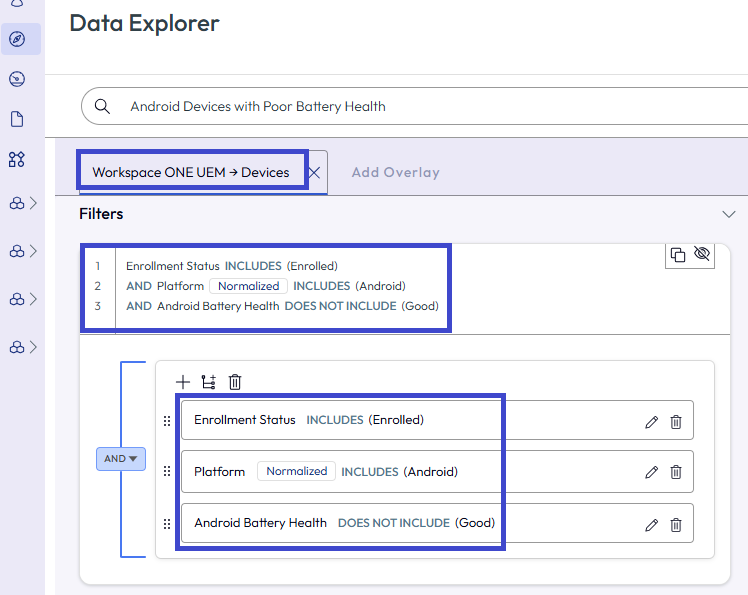
- After you select a query, the query builder populates with applicable filters.
- View the data source and the applicable entity of the data source.
- View the corresponding filters for the data source and entity.
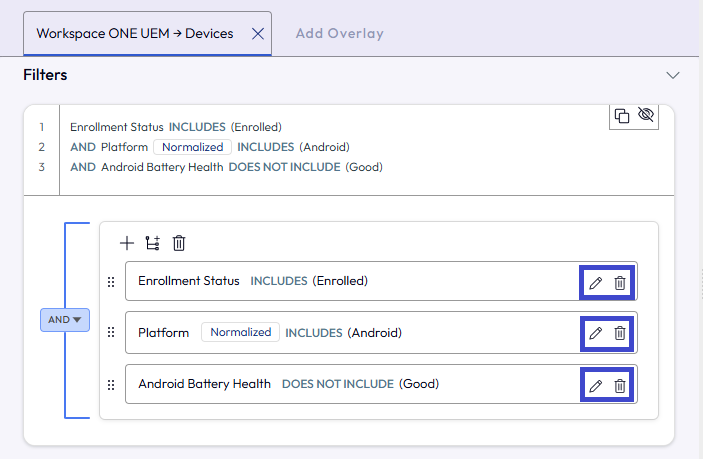
- Edit queries when the populated data does not fit your needs.
- Use the Change Data Source option to select a different data source.
- Use the edit icon or the delete icon to change or remove a filter.
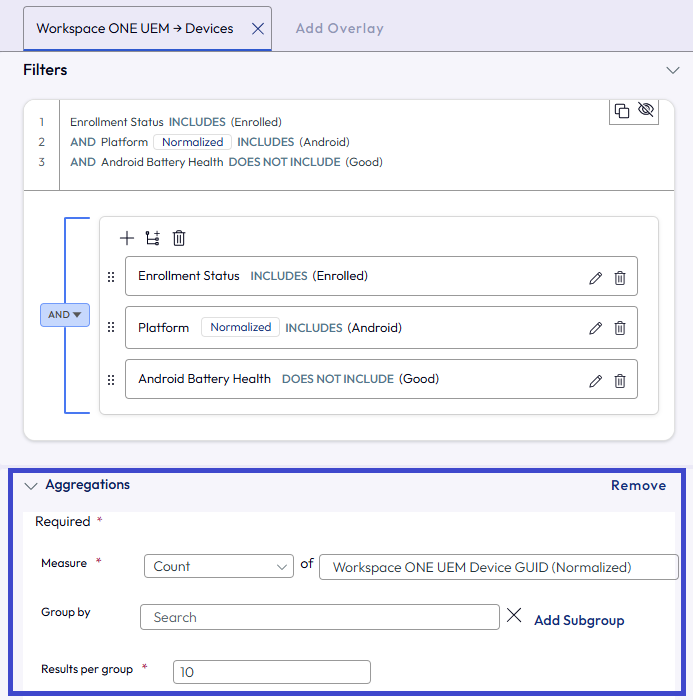
- Add aggregations to your queries if you want to see visualizations and aggregated records for results.
- Select + Add Aggregation.
- Add the Measure values and select the Group by values.
- You can also use the Remove button to delete aggregations you no longer want.
- Review and run the query builder if you made changes. If you made no modifications to the query from the template selection, the system automatically loads the result.
- Review the query builder entries.
- Select Run to get results for the query if you made modifications.
- View the results on the right side of the Data Explorer.
- If your query has aggregations you see a visualization and aggregated data along with the raw data records on the Results tab.
- If you did not add aggregations, you see only the raw data records on the Results tab.
- Work with the results using the Visualization area and the Aggregated Data, Results and Data Dictionary tabs.
- Visualization: You see your widgets and charts here.
- The default chart type is Donut, but you can switch between Horizontal, Vertical, Metric, Table, or Tree Map.
- Save your widget for future reference by adding it to an existing dashboard or creating a new dashboard using the Create Widget button.
- Results: This is the default tab and it shows you a preview of your raw data records.
- Directly download the preview (current 100 records) by selecting Export Display.
- If you want to export more data, you can easily create a report from this page with the Create Report button. The system pre-fills fields for you, so you just need to name your report. The system adds the saved report to your reports list in the Reports area.
- Use the Create Workflow button to add an automation that includes your query results.
- Aggregated Data: This is the default tab for aggregated queries.
- View your aggregated table of records here.
- You can directly download all aggregated records by selecting Export Data.
- Data Dictionary: This tab provides information on all attributes related to the query data source and entity.
- Use the information to find out what you can select when you manually edit a query or when you add measures for visualization.
- The dictionary's list of data changes according to the selected entity and data source.
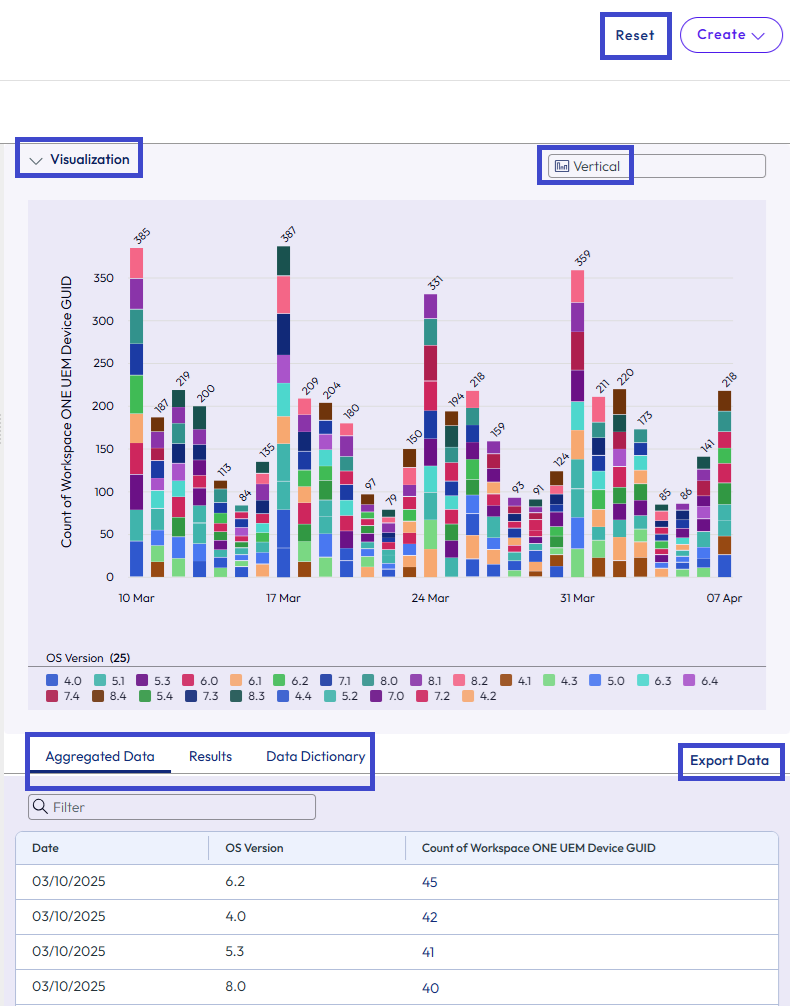
- Visualization: You see your widgets and charts here.
- Use Reset to clear your queries and start over.
Use the Data Explorer to audit events
Use the Data Explorer to help you audit and troubleshoot issues your Intelligence admins might have. Export the list to work with the first 100 events, create a widget from the information and add it to a dashboard, or create a report to aid in your analysis and research.
- Go to the Data Explorer.
- Select the Intelligence > Audit Events data source.
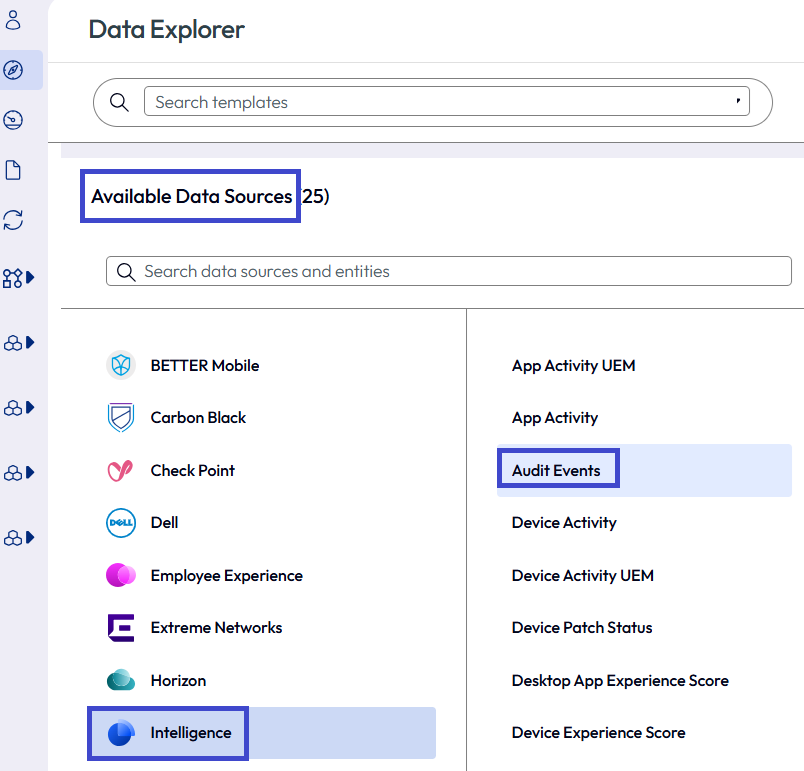
- For the Filters section, you can select numerous attributes to find events. We've listed some suggestions.
- Do you know the names of the admins having issues? Select the Actor Display Name > Includes and select a single admin or multiple admins.
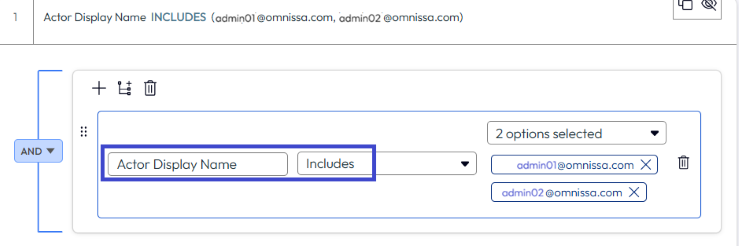
- Want to view a list for a specific event? Select the Audit Event Type > Includes > Authenticate to view a list of authentication events.
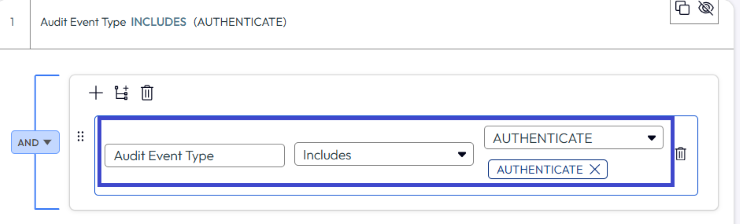
- Do you know the names of the admins having issues? Select the Actor Display Name > Includes and select a single admin or multiple admins.
- Use the Results tab to work with the data. Export the list, create a widget and add it to a dashboard, or create a report.
Omni-Powered Data Explorer
We built the Omni-Powered Data Explorer on the Omni framework so that admins can ask data questions in natural language while also providing full query details for deeper exploration and refinement.
Activating the Omni-powered option
See the Getting Started with Omni topic for details on activation and roles.
If you have a Premium Omnissa Intelligence subscription, you can activate this feature by adding or editing an admin in Omnissa Connect and selecting the Data Analysis role.
After you assign the admin the role, the Omni-Powered menu drop down displays in Data Explorer.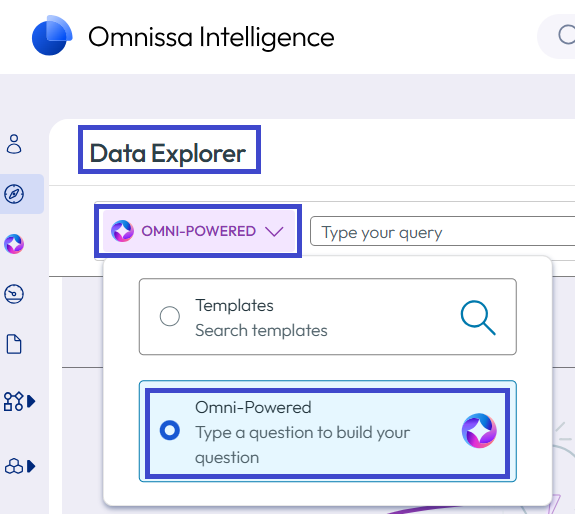
Supported integrations
Omni-Powered Data Explorer supports the listed integrations and more are planned in the future.
- Omnissa Horizon
- Omnissa Workspace ONE Experience Management
- Omnissa Workspace ONE UEM Modern
- We support most tables
- Omnissa Workspace ONE UEM Legacy
- Supported tables: airwatch_application, airwatch_device, airwatch_product, airwatch_profile, airwatch_user, and airwatch_windowspatch
How does it work?
The Data Analysis tool in Omni-Powered Data Explorer directly answers data questions in natural language using the search text box. The tool provides a streamlined, single‑query search experience. Each query is independent, helping retrieve targeted results.
Here are some example questions for entry in the search text box.
- Give me the count of all enrolled devices by platform.
- List all devices with a poor experience score in the last 7 days.
- What is the breakdown of VMs by pool id and power status?
The system automatically generates query details and results in answer to questions.
You can modify the generated query as needed and you can run the modified query to get the updated results.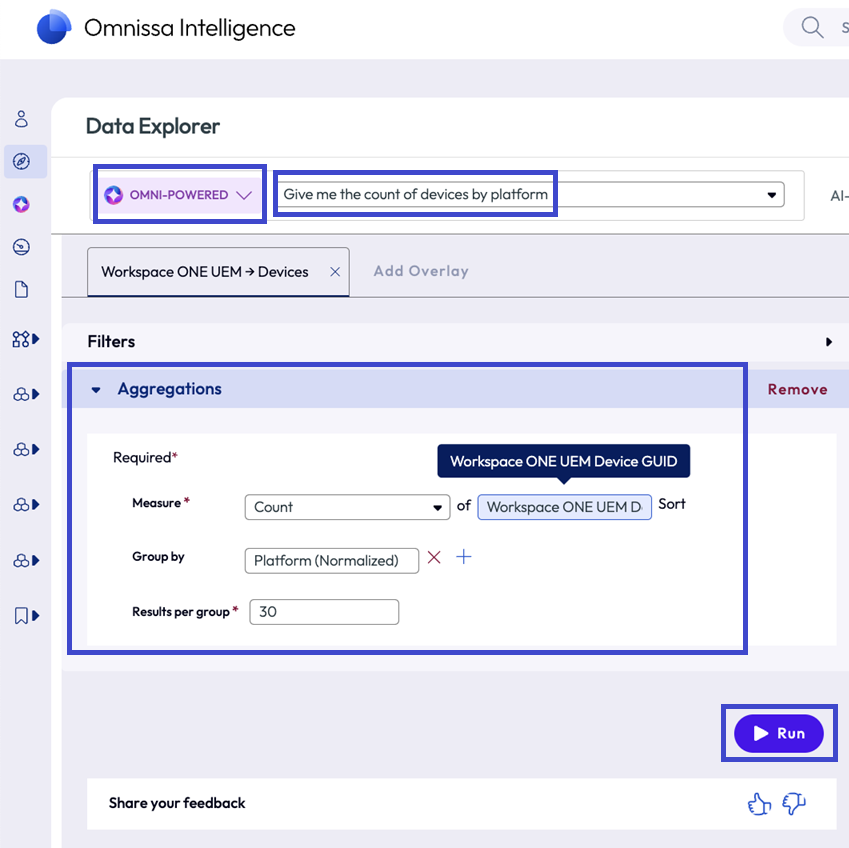
Results
Results depend on the type of questions.
- Report/list questions: Omni-Powered Data Explorer displays raw data details.
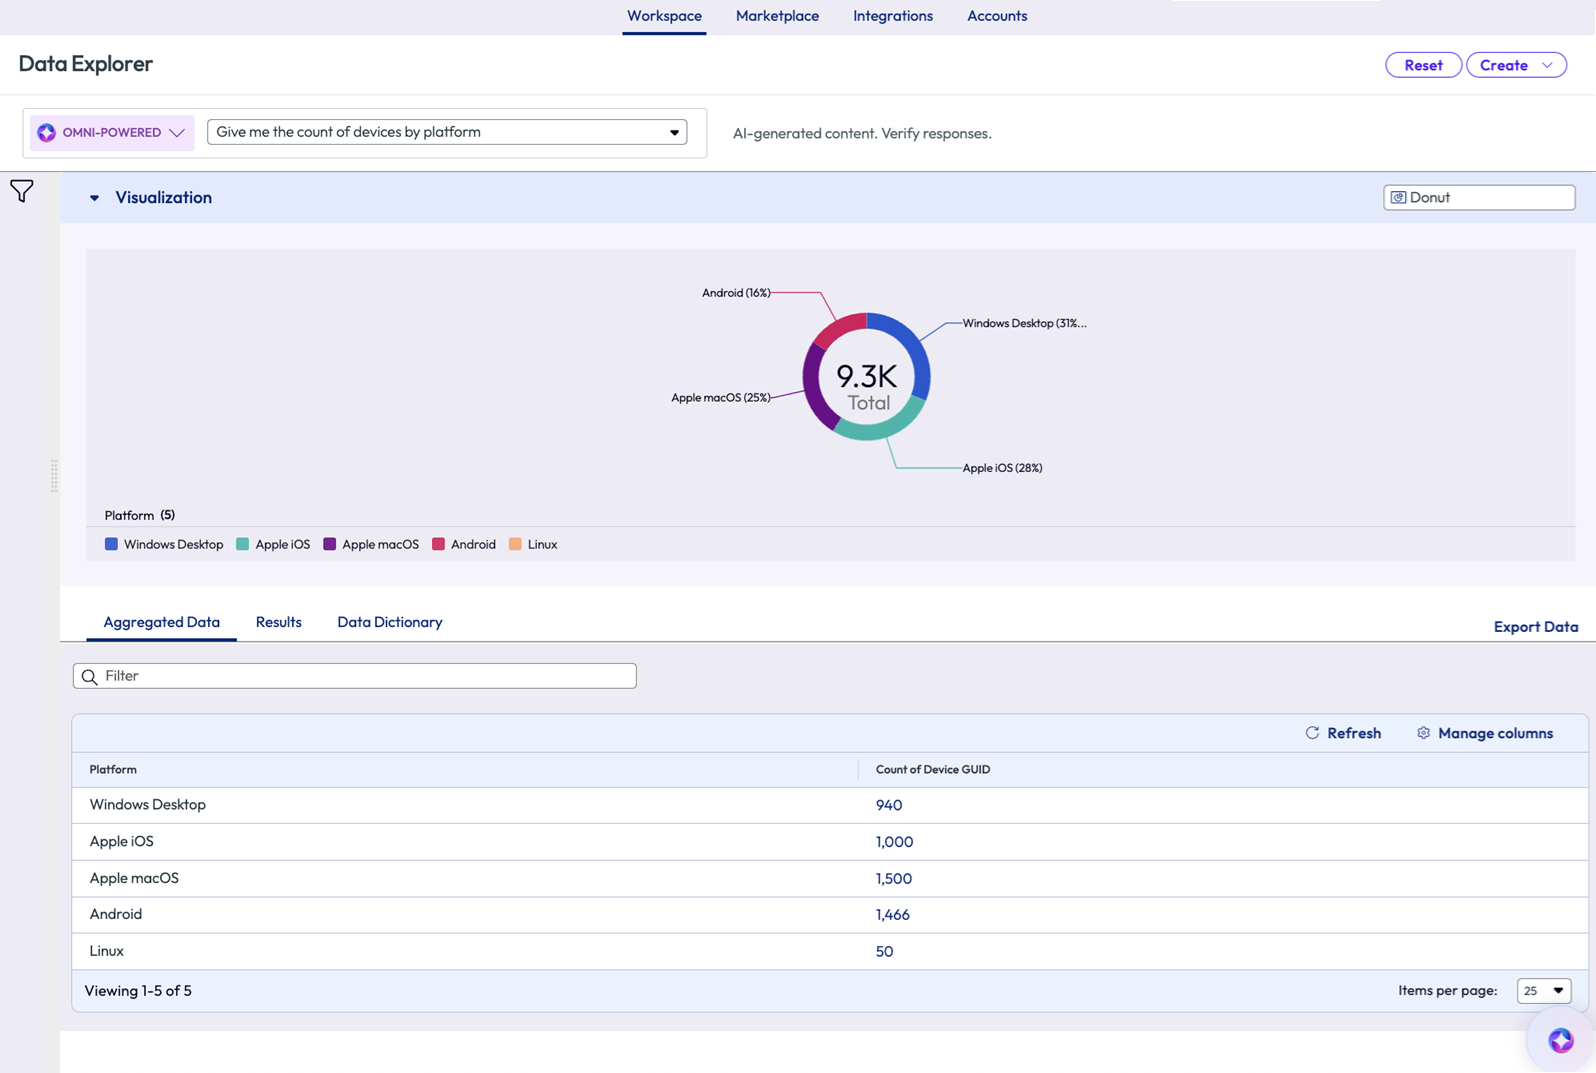
- Aggregated questions: Omni-Powered Data Explorer displays visualizations and the associated raw and aggregated data tables.
- You can edit chart type visuals as needed.
- You can save your work as a report or a widget.
Was this page helpful?